Summer’s here, and it’s time to fire up the grill. Whether you’re a seasoned grill master or just starting out, adjusting the airflow on your gas grill is essential for achieving that perfect cook. Sure, you might think that temperature dials alone are enough to control the heat level of your grill, but airflow plays a crucial role in the cooking process too.
But don’t worry if you’re new to this – adjusting the airflow on a gas grill is not rocket science. It’s all about finding that sweet spot where your food cooks evenly without drying out or burning. In this blog post, we’ll take you through everything from dampers and burner tubes to venturi tubes and more. Trust us; by the end of this article, you’ll be grilling like a pro.
So why does proper airflow matter? Well, it affects how much oxygen reaches the burners, which directly impacts how hot your grill gets. If there’s too little air getting in, your food will cook slowly and unevenly. On the other hand, too much air can lead to flare-ups and burnt food.
That’s why it’s important to get familiar with all the components of your gas grill so you can adjust them accordingly. We’ll walk you through each component step-by-step so that you can achieve that perfect balance of heat and airflow.
So, grab those tongs and let’s get started. By following our tips on how to adjust airflow on a gas grill, you’ll have burgers sizzling perfectly in no time.
Contents
Understanding the Basics of Airflow
Grilling is an art, and one of the most crucial aspects of it is understanding the basics of airflow. Airflow regulates the temperature and ensures even cooking of the food. Whether you’re a seasoned grill master or a beginner, understanding how to adjust airflow on a gas grill is essential for achieving delicious, perfectly cooked food every time.
Firstly, we need to understand the two types of airflow in a gas grill: primary and secondary. Primary airflow refers to the air entering the grill from the bottom vents, controlling the flame’s intensity by supplying oxygen to the burners. Secondary airflow, on the other hand, enters the grill through top vents and regulates the temperature inside.
To adjust primary airflow, open or close the bottom vents. If you want a hotter fire, open them wider to increase oxygen supply to the burners, thus increasing heat output. Conversely, if you want a cooler fire, close them partially to restrict airflow, reducing heat output.
To adjust secondary airflow, open or close the top vents. If you want to cool down your grill, open them wider to allow more hot air to escape. On the other hand, if you want to increase temperature, close them partially to trap more hot air inside.
It’s important to remember that adjusting airflow takes time. After making any changes, wait for a few minutes for the temperature to stabilize before checking it again. You can also adjust airflow by controlling each burner’s heat output using their control knobs.
Adjusting Airflow with the Vents
Grilling is more than a simple task; it’s an art. Achieving the perfect temperature and cooking your food to perfection requires a basic understanding of airflow, which can be controlled by adjusting the vents on your gas grill. As an expert in this field, I’m here to guide you through the process of adjusting airflow with the vents to ensure that you get fantastic cooking results every time.
Let’s start by understanding how the vents work. The vents are primary airflow regulators and are typically located on the lid or near the bottom of the grill. They control the amount of oxygen that enters the grill and how much smoke and heat exits. By opening or closing them, you can regulate the temperature and control the cooking process.
To increase the temperature of your gas grill, open the vents fully to allow more oxygen to enter and increase the heat. If you want to decrease the temperature, close the vents partially to limit the oxygen supply and reduce the heat. It’s as simple as that.
However, there’s more to it than just temperature control. Adjusting the vents also affects how much smoke flavor your food will have. If you want a smokier flavor, close the vents partially to trap more smoke inside. On the other hand, if you prefer less smoke flavor, open the vents more to let more smoke out.
In summary, mastering airflow with vents is crucial for achieving perfect grilling results every time. Remember to adjust your vents according to your desired temperature and smoke level. Here are some key takeaways that can help you:
Adjusting Airflow with the Burners
In our previous section, we talked about how to adjust the primary regulators or vents on your gas grill to control airflow. Now, let’s delve into another aspect of adjusting airflow: using the burners.
The burners are responsible for heating up your grill and controlling the temperature. This makes adjusting airflow with burners a crucial part of grilling. By using these simple steps, you can control your grill’s temperature and prevent flare-ups while achieving perfect grilling results every time.
To start adjusting airflow with the burners, turn off all the burners except one. Leave that one burner on high heat for about 10 minutes, allowing it to heat up. Then, adjust the temperature knob to a lower heat setting and observe how the flame changes. If the flame becomes smaller, it means that there is less oxygen reaching the burner, and the airflow has been reduced. On the other hand, turning up the heat setting on the temperature knob will allow more oxygen to reach the burner, increasing the airflow and making the flame bigger. It’s essential to keep an eye on the flame size while adjusting the airflow with the burners to avoid flare-ups.
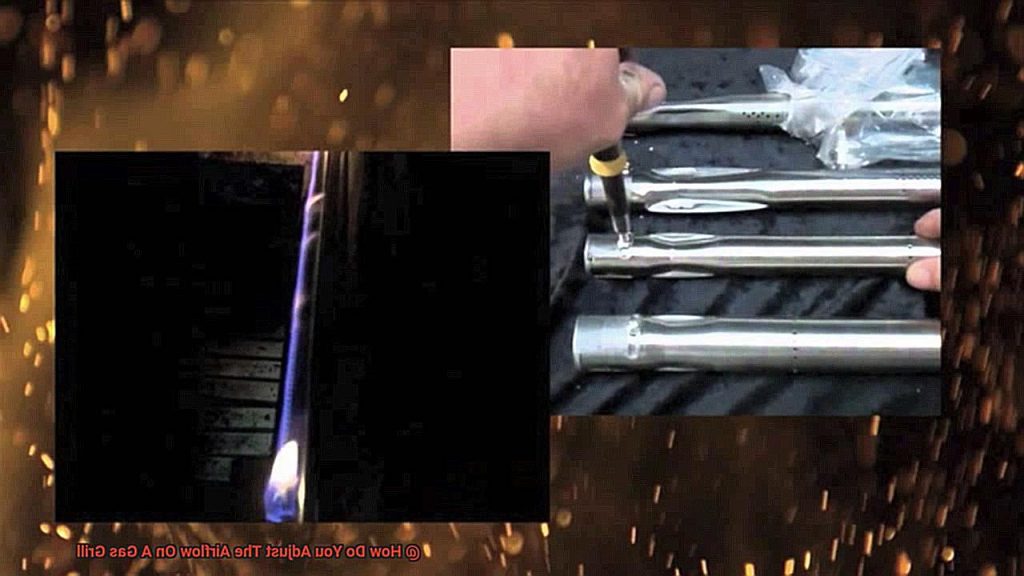
But wait, there’s more. Another way to adjust airflow with burners is by using a venturi tube. This small metal tube connects each burner to the control knob and can help you control how much air enters the burner and how much heat it produces.
Adjusting your venturi tube is easy. Start by turning off all burners and removing the cooking grates. Then locate the venturi tubes and use a screwdriver to adjust their openings. For more airflow, open up the venturi tubes by turning them counterclockwise. To reduce airflow, close them by turning them clockwise.
In summary, here are some key takeaways to remember when adjusting airflow with burners:
- Adjusting airflow with burners is crucial to getting the perfect cooking temperature and preventing flare-ups.
- To adjust the airflow with the burners, turn off all burners except one, leave it on high heat for 10 minutes, and then adjust the temperature knob to a lower heat setting.
- Use a venturi tube to control how much air enters the burner and how much heat it produces.
- Open up the venturi tubes by turning them counterclockwise for more airflow and close them by turning them clockwise to reduce airflow.
Finding the Right Balance for Different Types of Food and Cooking Methods
Grilling on a gas grill can be a bit challenging, especially when trying to find the perfect balance of heat and airflow for different types of food and cooking methods. However, with a little experimentation, adjusting the airflow can be easy. Here are five sub-sections that will guide you through finding the right balance of heat and airflow for your next grilling adventure.
Adjusting the Vents and Burners:
The vents and burners are essential for regulating airflow and heat output on a gas grill. For high heat and quick cooking like burgers or steaks, opening the vents at the bottom and partially closing the vents on top will provide more airflow to keep flames hot and prevent flare-ups. For lower heat and longer cooking times like chicken or vegetables, partially closing both vents will reduce the amount of oxygen feeding the flames, creating a more controlled environment.
By turning up or down each burner, you can adjust the amount of heat being generated and control airflow accordingly. Turning up all burners will increase heat output and provide more airflow, while turning them down will decrease heat and reduce airflow.
Different Types of Food:
Different types of food require different levels of airflow. For example, thick cuts of meat like steak should be cooked with lower heat and less airflow to ensure even cooking without burning on the outside. Vegetables or fish may require higher heat and more airflow to create a charred exterior and smoky flavor.
Cooking Methods:
Different cooking methods also require different levels of airflow. For indirect grilling (where food is not placed directly over the flame), adjust the airflow to create an even distribution of heat throughout the grill. For direct grilling (where food is placed directly over the flame), adjust the airflow to control flare-ups and prevent burning.
Experimentation:
Finding the right balance of heat and airflow on a gas grill requires some experimentation. Start by using the recommended settings for your grill and make adjustments based on the type of food being cooked and the desired cooking method. Monitor temperatures with a thermometer and adjust vents and burners as needed to achieve your desired results.
Keep the Lid Open:
When grilling on a gas grill, keeping the lid open can help increase airflow and keep the heat high. This is especially important when cooking foods that require high heat and quick cooking, like burgers or steaks. However, for foods that require lower heat and longer cooking times, like chicken or vegetables, it’s best to keep the lid closed to maintain a more controlled environment.
Tips for Getting Maximum Heat Output from Your Gas Grill
Proper airflow is the key to achieving this goal, and it’s essential to know how to adjust the vents on your grill. In this article, we’ll explore five tips for adjusting the airflow on your gas grill to get the most heat out of it.
Clean Your Grill
The first step in getting maximum heat output from your gas grill is to clean it thoroughly. Any debris or ashes that accumulate can block the airflow and affect the temperature, causing uneven heating. By cleaning your grill regularly, you can ensure that it is always operating at its best.
Adjust the Vents
Most gas grills come with adjustable vents that allow you to control the airflow. The vent on the bottom controls the amount of oxygen that enters your grill, while the vent on top controls the amount of smoke and heat that escapes. To maximize heat output, open both vents fully and let the oxygen flow.
Preheat Your Grill
Preheating your grill is crucial for getting maximum heat output. Turn on all burners to high and close the lid for at least 10-15 minutes before placing your food on the grill. This will allow the grill grates to reach their maximum temperature, giving you a good sear on your food.
Monitor the Temperature
Use a thermometer to monitor the temperature of your grill. If you notice that it’s not reaching your desired temperature, you may need to adjust the airflow to increase heat output.
Adjust Burner Settings
If you’re still not getting enough heat from your grill, try adjusting the burner settings by turning up the heat on one or more burners while leaving others at a lower setting. This will create different heating zones on your grill, allowing you to cook different foods at different temperatures.
Common Mistakes to Avoid When Adjusting Airflow on a Gas Grill
Grilling is a beloved pastime, but it takes more than just throwing some meat on the grill to achieve that mouthwatering flavor. Proper airflow on your gas grill is key to a successful cookout. However, many grilling enthusiasts make common mistakes when adjusting the airflow, resulting in overcooked, undercooked, or burnt food.
Here are the top five mistakes to avoid when adjusting airflow on a gas grill:
Leaving the Vents Closed or Partially Closed
It may seem like a good idea to keep the lid closed and the vents shut while cooking, but this will restrict airflow, leading to uneven heat distribution and charred food. Keep your vents open to regulate temperature and ensure even cooking.
Opening All the Vents During Cooking
On the other end of the spectrum, opening all the vents during cooking can lead to hot spots and flare-ups, making your food dry and overcooked. Only adjust the vents as needed to maintain a consistent temperature.
Adjusting Airflow Too Frequently
Grillmasters love to check on their food, but every time you open the lid, you let out heat and smoke, disrupting the cooking process. Keep the lid closed as much as possible and only adjust the vents when necessary.
Not Knowing How to Properly Adjust Vents Based on Food Type
Different types of food require different cooking temperatures and times. Learn how to adjust your vents based on what you’re cooking for perfect results every time.
Not Cleaning Vents Regularly
Grease and debris can build up inside the vents, obstructing airflow and causing safety hazards. Clean them after each use to ensure proper ventilation and prevent dangerous flare-ups.
Benefits of Properly Adjusting Airflow on a Gas Grill
Look no further than the simple yet crucial step of adjusting the airflow on your gas grill. This small detail can make a significant difference in the quality of your grilled dishes.
One of the primary benefits of adjusting the airflow is temperature control. By regulating the amount of oxygen that enters the grill, you can control the heat and prevent your food from burning or cooking inconsistently. This is particularly crucial for meats that require specific temperatures to cook thoroughly and retain their natural juices. With proper airflow, you can achieve optimal cooking temperatures for each type of food.
But it’s not just about temperature – adjusting airflow also enhances the flavor of your food. When air circulates correctly around your food, it creates that mouth-watering smoky flavor that we all love in grilled meats. However, if there’s not enough airflow, your food may end up tasting too charred or burnt. Properly regulating airflow ensures that you achieve that perfect smoky flavor every time.
Another benefit of adjusting airflow is fuel efficiency. Too much oxygen flowing into the grill can cause your fuel to burn faster than necessary, leading to waste and higher fuel costs. By regulating the airflow, you can reduce waste and save money on fuel costs in the long run.
Finally, adjusting airflow can also extend the life of your grill. Allowing too much oxygen to flow into your grill can cause unnecessary wear and tear on your equipment, leading to costly repairs or replacements. By properly regulating the airflow, you can prevent damage and ensure that your grill lasts as long as possible.
Troubleshooting Problems with Airflow on Your Gas Grill
Grilling is a beloved pastime that brings people together over delicious food and good conversation. However, perfect grilling results can be elusive if your gas grill is not functioning properly, especially when there are problems with airflow. Proper airflow is critical to evenly cooking your food, and when things go wrong, it can be frustrating. But don’t worry, troubleshooting problems with airflow on your gas grill is not as daunting as it may seem. In this article, we’ll explore some common issues that can arise and how to fix them.
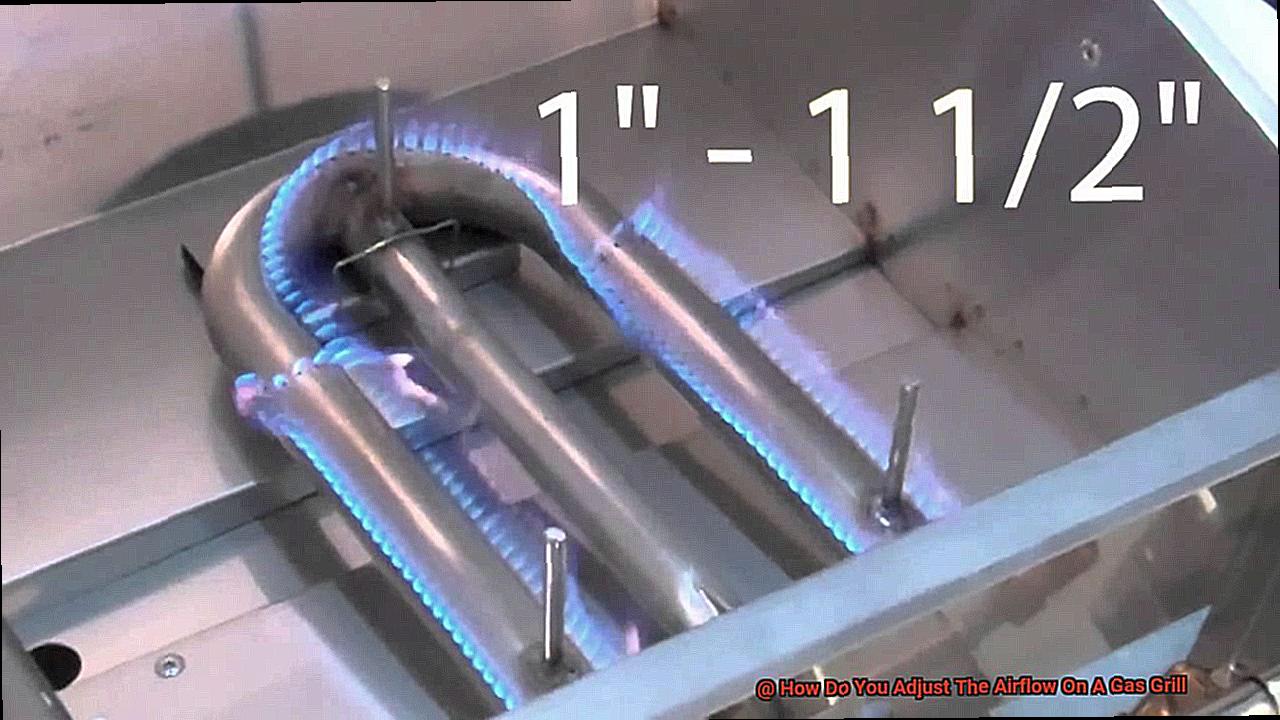
One of the most common problems that affect airflow is a clogged burner tube. A clogged burner tube can cause low flames and uneven heat distribution, leading to dry and overcooked food. To fix this issue, you need to turn off your grill and disconnect the propane tank. After that, remove the burner tubes and clean them thoroughly with a wire brush or a pipe cleaner. This simple step will ensure that your grill is working correctly and cooking your food to perfection.
Another problem that can cause issues with airflow is a malfunctioning regulator. The regulator controls the flow of gas from the propane tank to the burners, so if it’s not working correctly, you could end up with low or uneven heat. If you suspect that your regulator is faulty, turn off your grill and disconnect the propane tank.
Inspect the regulator for damage or wear and tear. If you notice any issues, replace the regulator with a new one to ensure that your grill is receiving a consistent flow of gas.
Finally, a blocked venturi tube can also cause problems with airflow on your gas grill. The venturi tube connects the burner to the control valve and mixes fuel with air to create a flame. If it becomes clogged with debris such as spider webs or rust, it can cause low flames and uneven heat distribution.
To fix this problem, turn off your grill and disconnect the propane tank. Remove the venturi tubes and clean them thoroughly with a wire brush or a pipe cleaner. This simple step will ensure that your grill is receiving the right balance of fuel and air, resulting in perfectly cooked food.
Conclusion
In conclusion, adjusting the airflow on a gas grill is an essential skill for any grilling enthusiast.
By regulating the amount of oxygen that enters the grill, you can control the temperature and ensure your food cooks evenly. Remember to start with a clean grill and open all vents before lighting it up.
Don’t be afraid to experiment with different settings until you find what works best for you and your grill.