Are you a grill master, but still struggling to get that perfect smoky flavor in your meat? Maybe it’s time to take a closer look at your chimney cap. This small yet crucial component plays a significant role in regulating the smoke and heat inside your pellet grill. If you’re not adjusting it correctly, you could be missing out on evenly cooked meat and the ultimate wood-fired taste.
Don’t worry if you’re unsure how to adjust the chimney cap on your pellet grill. It might seem intimidating at first, but once you get the hang of it, it’s a breeze. By manipulating a small metal lever, you can open or close the chimney cap and control the airflow and temperature inside your grill. With just a few tweaks here and there, you’ll be able to achieve the perfect flavor and tenderness in your meat.
In this blog post, we’ll walk you through every step of adjusting the chimney cap on your pellet grill. We’ll also explain how it works so that even newbies can understand. Whether you’re an experienced griller or just starting out, this guide will help ensure that every time you light up your pellet grill, you’ll get mouth-watering results with that authentic wood-fired flavor.
So let’s fire up those grills and get ready for some serious grilling magic.
Contents
How to Locate the Chimney Cap on Your Pellet Grill
Locating the chimney cap on your pellet grill is an essential step to achieving the perfect grilling experience. The chimney cap regulates the airflow inside your grill, which affects the temperature and smoke production. In this article, we’ll guide you through the process of locating the chimney cap and understanding its purpose.
Step 1: Look at the Top of Your Pellet Grill
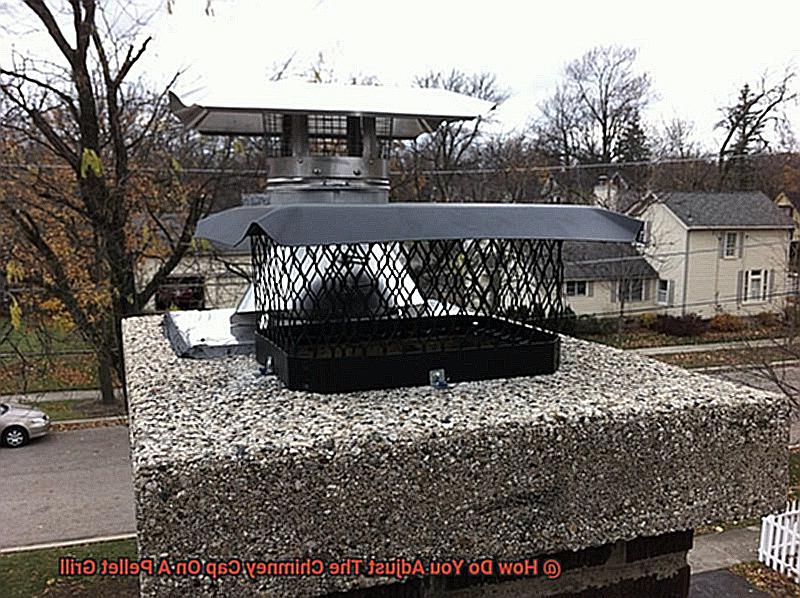
The first step in finding the chimney cap is to look at the top of your pellet grill. Most pellet grills have a hood or lid that covers the cooking area, and the chimney cap is usually located on top of this hood or lid.
Step 2: Search for a Small Metal Cap
Once you’ve identified the location of the hood or lid, search for a small metal cap on top of the grill. This cap covers the vent or flue that releases smoke and heat from the grill into the atmosphere. The position of the chimney cap may vary depending on your pellet grill’s make and model.
Step 3: Familiarize Yourself with Your Pellet Grill
It’s important to familiarize yourself with your particular model of pellet grill and how the chimney cap works. This will help you adjust it as needed to achieve the desired temperature and smoke level for your cooking. Consult your grill’s user manual or contact the manufacturer for assistance if you’re having trouble locating or understanding how to adjust the chimney cap.
Understanding How to Adjust the Chimney Cap
Adjusting the chimney cap is not an exact science, and every pellet grill model operates differently. To increase the temperature inside your pellet grill, open the chimney cap vents by rotating it to the left. This allows more oxygen to flow into the firebox, resulting in a hotter fire and higher cooking temperature.
Conversely, if you want to decrease the temperature inside your pellet grill or add more smoky flavor to your food, close the chimney cap vents by rotating it to the right. This reduces airflow into the firebox, resulting in a cooler fire and less intense heat.
How to Increase Temperature Inside Your Pellet Grill
Look no further than adjusting the chimney cap. This small but mighty component can significantly impact the airflow and temperature within your grill. Let’s dive into how to adjust the chimney cap to increase the temperature inside your pellet grill.
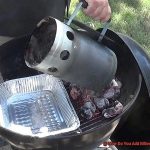
Step 1: Ensure Your Pellets are Dry and Clean
Before making any adjustments to the chimney cap, double-check that your pellets are dry and free from debris. Wet or dirty pellets can hinder your grill’s ability to heat up, making it harder to achieve the desired temperature.
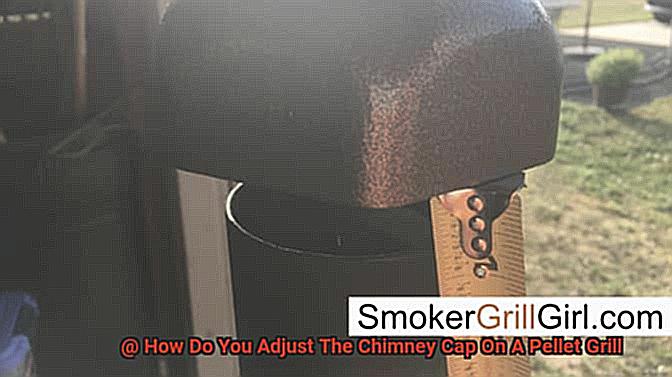
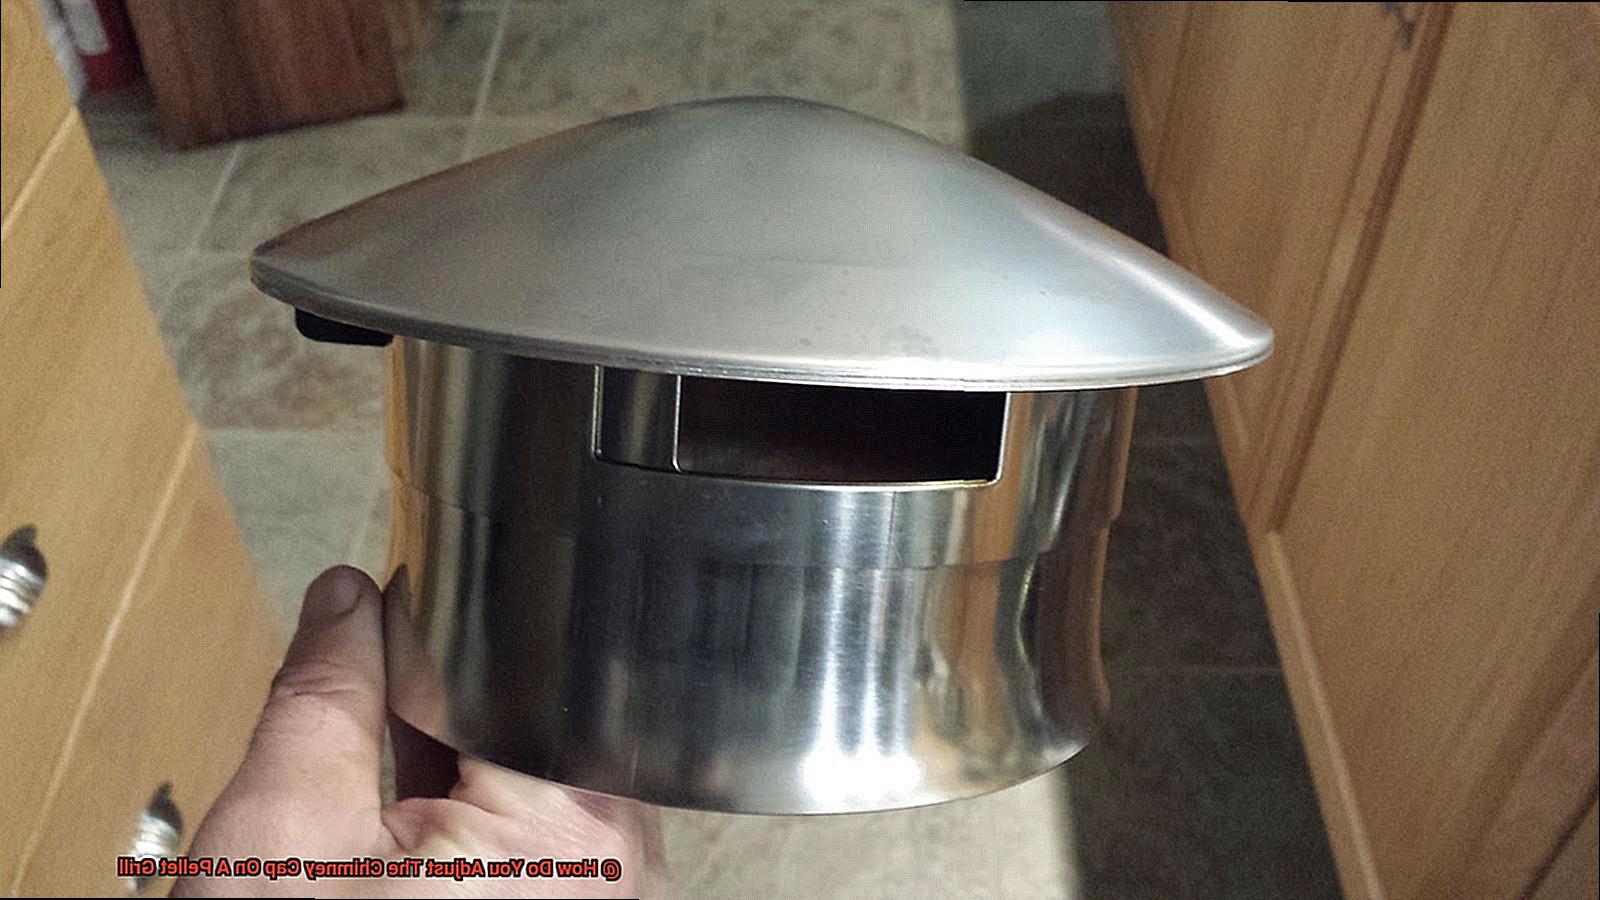
Step 2: Locate the Chimney Cap
The chimney cap is situated on top of your pellet grill’s chimney. It may be a small metal cap or a lever, depending on your grill’s model.
Step 3: Adjust the Chimney Cap
To increase temperature inside your pellet grill, rotate the chimney cap counterclockwise to open the vents. This will allow more oxygen into the firebox, resulting in a higher combustion rate and hotter fire.
Step 4: Wait for Temperature Stabilization
It’s essential to make small adjustments to the chimney cap and wait a few minutes between each one. This allows time for the temperature inside your grill to stabilize and ensures that you don’t overshoot your desired temperature.
Step 5: Experiment with Other Methods
While adjusting the chimney cap can help increase temperature, it’s not the only factor at play. Experiment with other methods such as increasing fan speed or adjusting temperature settings on your control panel to find what works best for your specific grill and cooking needs.
How to Decrease Temperature Inside Your Pellet Grill
Controlling the temperature inside your pellet grill is crucial to achieving perfectly cooked meats and vegetables. Whether you’re a seasoned griller or a newbie, knowing how to adjust the chimney cap on your pellet grill can make all the difference in the world. Here are five sub-sections to guide you through the process of adjusting the chimney cap to decrease the temperature inside your pellet grill.
Find the Chimney Cap
First things first, locate the chimney cap on your pellet grill. It’s typically a small metal cap with a handle or lever that sits at the top of the grill’s chimney.
Identify the Adjustment Mechanism
Once you’ve found the chimney cap, determine how to adjust it. Depending on your pellet grill model, it may be a lever or a rotating disk that opens or closes the vents.
Partially Close the Chimney Cap
To decrease the temperature inside your pellet grill, partially close the chimney cap by rotating it to the right. This will limit the amount of oxygen that enters the grill and reduce heat output.
However, be careful not to close it completely as this can lead to a buildup of smoke and carbon monoxide inside your grill, which can be dangerous.
Experiment with Vent Positions
Adjusting the chimney cap is not an exact science, and every pellet grill model operates differently. You may need to experiment with different vent positions to find what works best for your particular grill and cooking preferences.
Factors such as wind and outside temperature can also affect the temperature inside your pellet grill, so be prepared to make adjustments as needed.
Consult Your Grill’s User Manual
It’s always a good idea to consult your grill’s user manual for specific instructions on adjusting the chimney cap. This will give you a better understanding of how your particular grill works and ensure that you are making adjustments safely.
In addition to adjusting the chimney cap, there are other methods you can use to decrease the temperature inside your pellet grill, such as reducing the amount of pellets in the hopper or opening the lid slightly to let out some heat.
Experimenting with Different Vent Positions for Perfect Cooking Results
Calling all grill masters. Are you tired of subpar cooking results on your pellet grill? Fear not, because we have the solution to help you achieve perfectly cooked meats and veggies every time – experimenting with different vent positions.
The position of the chimney cap is a crucial factor that affects your cooking results. It regulates the airflow inside your grill, which in turn affects temperature and smoke production. Therefore, adjusting it can make all the difference.
To help you understand how adjusting your chimney cap and other vents can help you achieve perfect cooking results, here are some sub-topics:
Finding the Perfect Balance Between Heat and Smoke
Your goal is to find the perfect balance between heat and smoke. You can achieve this by adjusting the chimney cap. Start by opening it fully and observe the temperature inside your grill. If it’s too high, partially close the chimney cap until you achieve your desired temperature. This step alone can do wonders for your cooking.
Controlling Airflow Further
You can control airflow even further by adjusting other vents on your pellet grill. The intake vent at the bottom of your grill should be adjusted according to how much heat you want to produce. Open it up all the way for higher temperatures and partially close it off for lower temperatures. These adjustments can help you fine-tune your cooking.
Different Types of Meat Require Different Cooking Temperatures and Smoke Levels
Different types of meat require different cooking temperatures and smoke levels. For example, smoking a brisket requires a low temperature and high smoke levels for a longer period than grilling chicken. Understanding these differences will help you achieve perfect cooking results for each type of meat.
Understanding the Basics of Airflow Control in Pellet Grills
As an expert in understanding the basics of airflow control in pellet grills, I am here to share with you the secret to adjusting the chimney cap for optimal temperature and smoke production.
Pellet grills use convection cooking, circulating hot air around the food to cook it evenly. But airflow control is crucial in pellet grills because it determines the temperature inside the grill. By adjusting the airflow, you can control the temperature and smoke production of your grill.
Let’s dive into how adjusting the chimney cap affects temperature and smoke production. The chimney cap, located on top of the grill, controls the flow of air through it. By opening it, air flows more freely through the grill, increasing its temperature. Conversely, closing it reduces airflow and drops the temperature.
But wait. That’s not all. The chimney cap also affects smoke production. When open, more air flows through the grill, producing more smoke. Conversely, closing it reduces airflow and results in less smoke production.
So how do you adjust the chimney cap for optimal temperature and smoke production? Pellet grills usually come with a built-in chimney cap that can be adjusted manually. Some models have a digital control panel for precise adjustments of chimney cap and airflow. It’s crucial to follow manufacturer instructions when adjusting the chimney cap to avoid damaging your grill or causing a fire hazard.
In summary, understanding how to adjust the chimney cap on your pellet grill is essential in achieving perfectly cooked dishes with just-right amounts of heat and smoke. Experiment with different vent positions like a conductor fine-tuning an orchestra to create a beautiful symphony. Happy grilling. Here are some tips for you:
Adjusting the Chimney Cap According to User Manual Instructions
In this post, we’ll dive into the details of adjusting the chimney cap according to user manual instructions to ensure that you’re cooking like a pro.
To get started, grab your user manual and familiarize yourself with its instructions. The manual provides specific details on how to adjust and maintain the chimney cap, making it crucial not to skip this step. Once you’ve reviewed the manual, let’s get started.
The first step is to check if the chimney cap is open or closed. If it’s closed, rotate it counterclockwise to open it up. This allows smoke and heat to escape from the grill, creating a steady flow of air.
Now comes the fun part – adjusting the chimney cap based on temperature. The chimney cap controls the flow of air through the grill, which affects temperature and smoke production. If you want a lower temperature, partially close the chimney cap by rotating it clockwise, reducing the amount of heat and smoke that escape from the grill. For a higher temperature, open the chimney cap more by rotating it counterclockwise.
However, sudden adjustments can cause fluctuations in temperature and affect the cooking process. Gradual changes are key here. Make small adjustments and wait a few minutes before making additional changes.
In addition to adjusting based on temperature, wind conditions may also require you to make adjustments. A strong wind blowing towards the grill may cause excessive heat loss, so partially closing the chimney cap can prevent this.
To sum it up, adjusting the chimney cap according to user manual instructions is crucial for achieving perfectly cooked food on your pellet grill. Take your time, make gradual adjustments based on temperature and wind conditions, and you’ll be cooking like a pro in no time. Remember, the chimney cap is the conductor that fine-tunes the orchestra of your grill, so make sure you’re in control. Here are some quick tips to help you adjust the chimney cap:
Troubleshooting Common Problems with Adjusting the Chimney Cap
Adjusting the chimney cap on your pellet grill is a crucial component to achieving the perfect temperature and flavor for your grilled meals. However, common problems like a stuck, wobbly, or poorly drawing chimney cap can be frustrating. Fear not, we have some troubleshooting tips to help you out.
Let’s start with the issue of a chimney cap that won’t budge. This can be caused by a buildup of grease or debris, making it difficult to turn. The solution? Thoroughly clean the chimney cap and surrounding area before attempting to adjust it. A little elbow grease can go a long way in ensuring smooth operation.
If you notice that your chimney cap is loose or wobbly, it’s time to tighten those screws and bolts. The cause could be wear and tear over time or improper installation. Double-check that the chimney cap is properly seated in its place and tightened securely. This simple fix can make all the difference in maintaining optimal cooking conditions.
Another issue that can affect your cooking is a poorly drawing chimney cap. If you’re experiencing uneven cooking or a lack of flavor, it could be due to a clogged chimney or a low-quality chimney cap. To troubleshoot this issue, ensure that your chimney is clear of any debris and consider upgrading to a higher-quality chimney cap if needed. This investment will pay off in delicious, evenly cooked meals.
Tips for Achieving Optimal Heat and Smoke Levels
Achieving perfect heat and smoke levels on a pellet grill is all about mastering the art of adjusting the chimney cap. This small but mighty component controls the airflow through the grill, which in turn affects both the temperature and smoke production. Here are some top tips for getting it just right.
First and foremost, ensure that your grill is clean before you start. A dirty chimney cap can impact the airflow and temperature, leading to uneven cooking or poor smoke production. A quick scrub down before you fire up your grill can make all the difference.
As you begin to heat up your grill, remember that the chimney cap should be fully open. This allows maximum airflow and helps the pellets ignite properly. Once you’ve reached your desired cooking temperature, you can start to adjust the cap to achieve your desired heat and smoke levels.
One essential tip is to start with the chimney cap partially closed. This restricts some of the airflow and increases smoke production, but be careful not to close it too much, or you risk lowering the temperature too much as well. Finding the right balance is key.
Additionally, it’s important to adjust the chimney cap based on what you’re cooking. If you’re smoking a brisket for several hours, keep the chimney cap partially closed for a longer period of time to maintain consistent smoke production. Conversely, if you’re grilling burgers quickly, you may not need as much smoke and can keep the chimney cap more open.
Last but not least, don’t forget to check and clean your chimney cap regularly to ensure it’s functioning correctly. Grease or debris buildup can restrict airflow and affect temperature and smoke production. Simply removing any buildup with a brush or scraper can make a significant difference in your grilling experience.
Conclusion
In summary, mastering the art of adjusting the chimney cap on your pellet grill is the key to unlocking a world of perfectly cooked meals with just the right amount of heat and smoke. By controlling the airflow within your grill, you can effortlessly fine-tune the temperature and smoke production to suit your cooking needs.
Whether you’re planning on smoking a brisket for hours or quickly grilling up some burgers, adjusting the chimney cap can make all the difference in achieving that mouth-watering flavor. However, it’s crucial to familiarize yourself with how it works before making any adjustments.
Consulting your user manual for specific instructions on how to adjust and maintain your chimney cap is highly recommended. This will help you avoid damaging your grill or causing a fire hazard.
Remember to make gradual adjustments based on temperature and wind conditions, experiment with different vent positions, and check and clean your chimney cap regularly to ensure optimal functioning. With these tips in mind, you’ll be well on your way to becoming a grilling master in no time.