Imagine this: a sunny day, mouthwatering scents wafting through the air, and the sound of sizzling meat hitting your plate. Grilling is an art we all love, but what if we told you there’s a way to take it up a notch? Get ready to dive into the captivating world of adding billows to your Weber kettle grill.
Say goodbye to struggling with temperature control or fretting over flare-ups that could ruin your culinary masterpiece. With billows, you’ll transform your Weber kettle into a grilling machine that promises precise temperature regulation and effortless smoking.
Main points:
What exactly are billows?
Billows are ingenious temperature control devices made specifically for Weber kettle grills. They’re a game-changer for grill enthusiasts like us, making it easy to control airflow and ensuring perfectly cooked food every single time.
The perks of using billows:
- Masterful temperature control: No more guesswork – billows automate the process, maintaining your desired temperature for hours on end.
- Extended cooking sessions: Ideal for low and slow cooking, billows guarantee a steady flow of air without interruptions. The result? Succulent meats that practically fall off the bone.
- Effortless smoking: Unlock new dimensions of flavor by effortlessly infusing smoky goodness into your cooking repertoire.
How can you add billows to your Weber kettle?
- Step 1: Select the right billows system that suits your needs and matches your Weber kettle grill model.
- Step 2: Mount the billows onto the bottom vent of your kettle grill.
- Step 3: Connect the billows to a power source and adjust the desired temperature using the control unit.
- Step 4: Sit back, relax, and let the magic happen as you enjoy an unparalleled grilling experience.
Adding billows to your Weber kettle is a game-changing move that will catapult your grilling skills to new heights. With precise temperature control and effortless smoking capabilities, you’ll unlock a world of culinary possibilities right in your own backyard. Get ready to impress family and friends with your mouthwatering creations as you become the ultimate grill master. Stay tuned for more tips and tricks to perfect your grilling game.
Contents
What is Billows?
Grilling is an art that demands precision and mastery. To achieve culinary perfection, maintaining the ideal temperature is paramount. If you’re seeking to elevate your grilling skills, look no further than Billows for Weber kettle grills. In this article, we will delve into the wonders of Billows – what it is, how it works, and why it’s an essential accessory for every grilling enthusiast.
What is Billows?
Billows is a game-changer – a revolutionary temperature control system designed exclusively for Weber kettle grills. Comprising a fan, a temperature probe, and a controller, Billows works in harmony to regulate and maintain the desired cooking temperature. With its unrivaled airflow management, Billows ensures consistent heat distribution for consistently mouthwatering results.
How does it work?
Installing Billows is a breeze. Follow these simple steps to unlock its full potential:
- Remove the cooking grate from your Weber kettle.
- Locate the vent at the bottom of the kettle – this is where Billows will be attached.
- Securely fasten the Billows unit to the vent, creating an airtight seal.
- Connect Billows to a power source – plug in the power cord or utilize a fully charged power bank.
- Set your desired temperature on the intuitive controller interface.
Once connected and powered on, Billows takes charge, meticulously monitoring and regulating the temperature inside your Weber kettle. The fan blows air into the grill while the temperature probe continuously measures the internal heat. The controller automatically adjusts fan speed according to your specified temperature, ensuring a consistently controlled cooking environment.
Key Advantages and Features:
- Consistent Temperature Control: Bid farewell to temperature fluctuations and unevenly cooked food. With Billows’ precise regulation, you can achieve flawless results every time.
- Weather Resistance: No matter the external conditions, Billows remains unfazed. Wind, rain, or snow, it maintains a steadfast temperature, creating a stable cooking environment. Grill with confidence, knowing your food will be cooked to perfection regardless of the weather.
- Compatibility with Various Fuel Sources: Whether you’re a fan of charcoal briquettes or hardwood lump charcoal, Billows seamlessly adapts to your preferred fuel source. Unlock a world of flavors and experiment with diverse cooking styles.
Necessary Materials for Installation
Ready to elevate your grilling experience with the revolutionary Billows system? Before you embark on the installation process, it’s essential to gather all the materials necessary for a successful integration. In this guide, we’ll unveil the key items you need to ensure a seamless and efficient installation of the Billows system into your beloved Weber kettle. Let’s dive in.
Weber Kettle Grill:
The first item on our checklist is, undoubtedly, a Weber kettle grill. Since the Billows system is tailor-made for use with Weber kettles, having a compatible grill is paramount. Before installation, ensure that your grill is spotlessly clean and in optimal working condition.
Billows System:
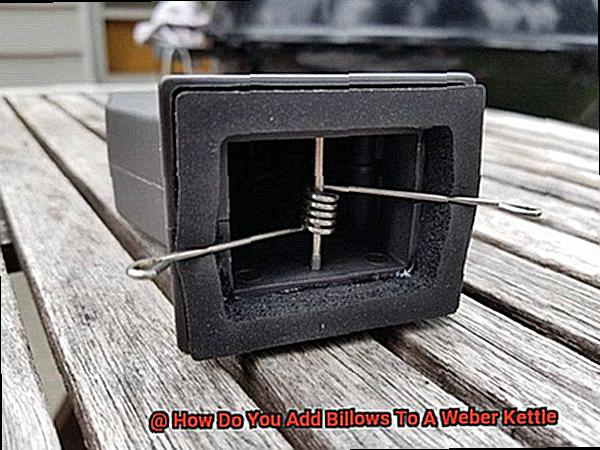
Next up is the star of the show – the Billows system itself. This comprehensive system comprises the fan unit, temperature probe, and control unit. With its ability to automatically adjust airflow and maintain precise temperatures, the Billows system guarantees perfectly cooked meals every time. Make certain that you have the complete Billows system as specified by the manufacturer.
Power Source:
Given that the Billows system requires power to operate efficiently, you’ll need a nearby power source. Most Billows systems come with a power adapter that can be conveniently plugged into any standard electrical outlet. If you plan on using the system outdoors where electricity access may be limited, consider utilizing an extension cord or a portable power source.
Mounting Bracket:
To securely attach the Billows fan unit to your Weber kettle, a robust mounting bracket is indispensable. This bracket is usually included in the Billows system package and is meticulously designed to perfectly fit Weber kettle grills of all shapes and sizes. Follow the manufacturer’s instructions meticulously to ensure a flawless installation of the mounting bracket.
Screws and Tools:
Depending on your specific Weber kettle model and the Billows system variant, you may require additional screws or fasteners to firmly secure the mounting bracket. Refer to the installation manual provided with your Billows system to ascertain if any supplementary tools or hardware are necessary. Having a basic toolkit on hand will prove invaluable should any adjustments be needed during the installation process.
Step-by-Step Guide to Installing Billows on a Weber Kettle
Are you ready to take your grilling game to new heights? Say hello to the game-changing Billows system. Not only will it revolutionize your grilling experience, but it’ll also help you achieve mouth-watering results every time. Get ready to dive into the step-by-step process of installing Billows on your trusty Weber kettle.
But first, let’s talk safety. It’s crucial to ensure your grill is fully cooled before attempting to install the Billows. We want to avoid any accidental burns or mishaps while we’re elevating our grilling skills.
- Step 1: Remove the cooking grates and charcoal grate from your Weber kettle. By doing this, you’ll have better access to the bottom vent area where all the magic happens. Use any specific techniques or tools recommended for your Weber kettle model to make this process a breeze.
- Step 2: Now it’s time to attach the Billows adapter plate to the bottom vent of your Weber kettle. This little plate is what ensures a proper seal and allows the Billows system to regulate temperature like a pro. Position it correctly and secure it tightly, leaving no room for air to escape. Remember, a snug fit is key.
- Step 3: Some Billows models might require a few modifications or adjustments to fit just right. Don’t worry if this applies to yours. Simply follow the instructions provided with your specific model and make any necessary tweaks to ensure a secure fit.
- Step 4: Once the adapter plate is securely attached, it’s time for the star of the show – the Billows fan unit. This is where the magic happens. Carefully place the fan unit on top of the adapter plate, ensuring proper alignment, and make sure it’s tightly connected.
- Step 5: Let’s power up this baby. If you’ve opted for a battery-powered Billows unit, insert and secure the batteries according to the instructions. If you’ve chosen a plug-in unit, connect it to a nearby power outlet or extension cord. Double-check all connections to ensure everything is secure and aligned.
- Step 6: Safety check complete? Connections secure? Fantastic. It’s time to put your installation skills to the test. Turn on the Billows system and make sure it’s functioning as expected. Keep a close eye on the temperature control throughout testing to ensure optimal performance. We’re almost there.
Removing the Cooking Grate from the Weber Kettle
Prepare to embark on a journey of grilling excellence as we unveil the secrets to removing the cooking grate from your Weber kettle. This essential process is the gateway to limitless possibilities, allowing you to make modifications, add accessories, or simply give your grill a thorough clean. So, let’s dive into this mesmerizing task and unlock the full potential of your Weber kettle.
Step 1: The Serenade of Safety
Before we begin this enchanting adventure, it is vital to prioritize safety. Allow your Weber kettle to cool down completely, ensuring a risk-free experience. Patience is key, my friends.
Step 2: The Dance of Tabs
Behold the tabs that hold the cooking grate captive. With finesse and grace, gently lift these tabs upwards or outwards, depending on your Weber kettle model. No brute force needed here – a delicate touch will set your cooking grate free.
Step 3: Unveiling Secret Locks
Prepare to uncover hidden treasures within your Weber kettle. Some models possess secret features like locking pins or clips that keep the cooking grate secure. Follow the manufacturer’s instructions and liberate these captivating mechanisms to free your grate from its stronghold.
Step 4: Handle with Tender Love
As you triumphantly remove the cooking grate from its confinement, treat it with tender love and care. Beware of any sharp edges and be mindful of hot surfaces – we wouldn’t want any unexpected grilling mishaps. Safety reigns supreme.
Locating the Vent on the Bottom of the Kettle
Welcome back, grill enthusiasts. In our previous adventure, we dived into the captivating world of removing the cooking grate from a Weber kettle. Today, we embark on a new quest as we explore the mesmerizing art of locating the vent on the bottom of this iconic grilling masterpiece. So, grab your tongs and join me as we uncover the secrets of airflow control and temperature regulation.
The Vent: A Crucial Element for Billows:
The vent on the bottom of a Weber kettle is not just a random hole; it’s an essential component for adding those delicious billows that infuse your culinary creations with irresistible flavors. This vent allows you to control the airflow, which in turn regulates the temperature inside the kettle during your grilling adventures.
Flipping and Flirting with the Kettle:
To locate this elusive vent, we must first flip our beloved kettle upside down. Behold. The bottom reveals a circular opening adorned with a metal disk. This disk is none other than our treasured vent. With a gentle touch and a flick of your wrist, you can easily adjust it to increase or decrease airflow. It’s like dancing with fire, but with more flavor.
Center Stage: The Perfect Location for Even Heat:
Picture your kettle’s bottom as a grand stage, and right at the center lies our talented vent. This strategic placement ensures even heat distribution while you work your grilling magic. By skillfully adjusting the vent, you gain control over the amount of oxygen reaching your charcoal or wood, ultimately dictating the intensity of your fiery performance.
The Hinge Mechanism: Opening Doors to Flavor:
Ah, behold the hinge mechanism. This ingenious design allows the vent to gracefully open and close, giving you the power to dictate the dance of flavors. When adding billows to your Weber kettle, it’s crucial to ensure the vent is fully open, embracing the embrace of proper airflow and combustion. Don’t be afraid to let those flavors soar.
Multiple Vents: A Symphony of Airflow:
In some cases, your Weber kettle may boast multiple vents on its bottom. Imagine it as a symphony of airflow possibilities. To unlock the full potential of your grilling masterpiece, open all vents, letting the breeze of flavor sweep across your culinary canvas. But remember, closely monitor the temperature and make adjustments as needed. It’s a delicate balancing act.
Attaching the Billows Unit onto the Vent of the Weber Kettle
Today, we delve into the captivating realm of attaching the Billows unit onto the vent of your cherished Weber kettle grill. As an expert in the craft of grilling, I am here to walk you through this pivotal process, ensuring your culinary adventures ascend to new heights. Grab your aprons, for we are about to embark on a remarkable quest.
Setting the Stage for Success:
Prepare yourself for a flawless installation by meticulously cleaning the vent on your Weber kettle grill. Rid it of any debris or obstructions that could impede optimal airflow and disrupt the performance of our temperature control device.
Removing the Top Vent:
Unlocking grilling perfection commences with removing the top vent from our Weber kettle grill. A simple counterclockwise twist liberates it, marking a monumental moment in our pursuit of culinary excellence.
Aligning and Securing with Precision:
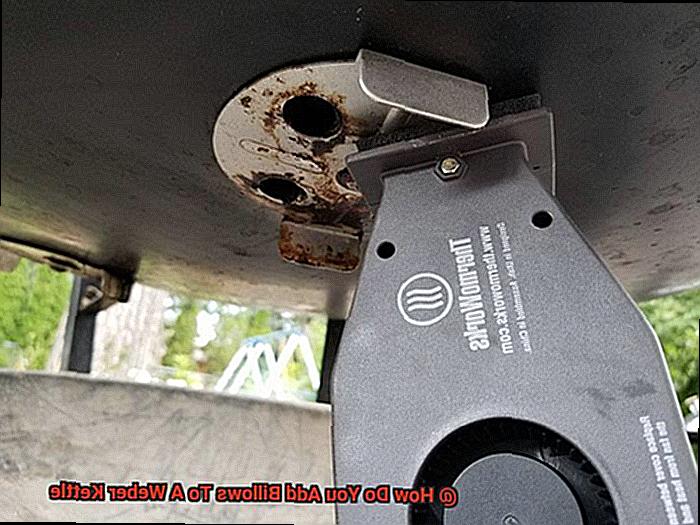
With the top vent out of the way, carefully position the Billows unit over the vent opening. Ensure that every hole in the unit aligns flawlessly with its grill counterparts. Employing the provided screws or clips, firmly fasten the Billows unit onto the vent, leaving no room for movement or unwanted leaks.
Reuniting Flavor and Control:
The time has come to reunite our top vent with its long-lost companion, the Billows unit. Gracefully place the top vent back onto your grill, ensuring an exquisite fit snugly encompassing the Billows unit. Witness this harmonious dance between flavor and control.
Powering Up for Precision:
Power up your grilling prowess by connecting your Billows unit to a suitable power source. Whether it be plugging into an electrical outlet or utilizing batteries, consult the manufacturer’s instructions to ensure a seamless power connection.
Fine-Tuning the Symphony of Flavor:
Now that everything is in its rightful place, immerse yourself in the world of settings and programming. Unleash the full potential of your Billows unit by following the manufacturer’s instructions. Adjust temperature settings, fan speed, and other parameters to orchestrate a symphony of flavor tailored to your desires. This is where true grilling mastery awaits.
Connecting to a Power Source
In our previous section, we explored the wonders of attaching the Billows unit to your Weber kettle grill, taking your grilling adventures to new heights. Now, let’s dive into the essential steps for safely connecting the Billows to a power source. After all, a connected Billows means precise temperature control and mouthwatering flavors in every bite. So, let’s get plugged in and fire up those grills.
Step 1: Choose a Safe and Suitable Power Source
First things first – find a power source that can handle the Billows’ energy needs. Make sure it’s safe and capable of handling the required voltage. Safety should always come first when dealing with electricity.
Step 2: Extend Your Reach for Outdoor Grilling
If you prefer grilling in the great outdoors, you may need an extension cord to connect your Billows to a power source. Ensure it’s suitable for outdoor use and long enough to reach comfortably from your grill area to the power supply. Stay grounded and keep things safe.
Step 3: Secure Connection is Key
Now it’s time to connect your Billows. Use the provided power cord and plug it securely into an electrical outlet. Check for any loose connections or exposed wires to ensure a solid and safe connection. Safety always sizzles.
Step 4: Check for Additional Accessories
Some Billows models may require extra accessories or adapters to connect properly with a power source. Don’t worry – it’s all part of the grilling journey. Consult the manufacturer’s instructions and guidelines to determine if any additional components are needed. A little preparation goes a long way.
Step 5: Test Before You Grill
Before unleashing your culinary creativity, take a moment to test the Billows after connecting it to a power source. Switch it on and listen for the satisfying hum of its operation. Be alert for any unusual sounds or vibrations that could indicate a faulty connection or malfunction. Safety and satisfaction go hand in hand.
Setting Desired Temperature on Billows Device
Prepare to elevate your grilling prowess with the Billows device, a game-changer in temperature control. Bid farewell to temperature fluctuations and welcome perfectly grilled delights. In this comprehensive guide, we’ll unravel the art of setting the desired temperature on your Billows device, taking you on a culinary adventure that will tantalize your taste buds.
Step 1: Prepare for Grilling Greatness
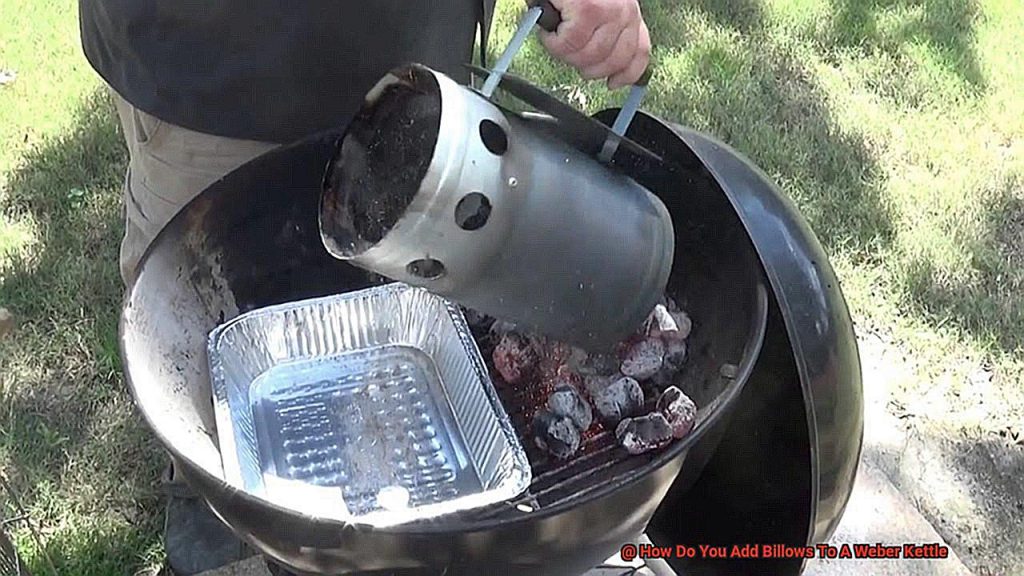
Before embarking on temperature control wizardry, ensure your grill is primed to deliver mouthwatering flavors. Scrub those grill grates until they gleam, providing a pristine surface for your culinary creations. Arrange charcoal or wood chips in their designated area and ignite them using a trusty chimney starter or your preferred method. With your grill brimming with potential, it’s time to unveil the magic of the Billows device.
Step 2: Embrace the Power of the Billows
Effortlessly attach the Billows device to your Weber kettle grill, slipping it onto one of the lower vents. A snug fit is crucial to thwart any sneaky air leakage. Once securely in place, you’re ready to seize control of your grilling destiny.
Step 3: Connect and Conquer
To set your desired temperature, connect the Billows device to a digital controller or smartphone app purpose-built for this task. These ingenious tools often come with temperature probes that can be inserted into your meat or placed nearby, monitoring its internal temperature. It’s like having a personal grilling assistant at your beck and call.
Step 4: The Art of Temperature Selection
Now comes the thrilling part – selecting your desired temperature. Different foods necessitate varying cooking temperatures for optimum deliciousness. For low and slow wonders like ribs or brisket, aim for around 225°F (107°C), nurturing succulence through patience. Craving a sizzling sear on steaks or burgers? Crank up the heat to approximately 375°F (190°C). The Billows device will work its enchantment, deftly adjusting the fan speed to maintain your chosen temperature.
Step 5: Keep an Eye on Things
While the Billows device excels at maintaining consistent temperatures, it’s wise to periodically glance at your grill. A quick survey allows you to make any necessary adjustments, ensuring a flawless grilling experience. Remember, perfection demands attention to detail.
Conclusion
Adding Billows to a Weber kettle is a simple and effective way to enhance your grilling experience. By attaching this innovative device to your kettle, you can achieve precise temperature control and maintain consistent heat throughout the cooking process.
With its sleek design and easy installation, the Billows seamlessly integrates with your Weber kettle, providing a seamless grilling experience. No more worrying about fluctuating temperatures or uneven cooking results – the Billows takes care of it all.
To add Billows to your Weber kettle, start by removing the top vent from the lid. Then, insert the Billows adapter into the vent opening and secure it tightly. Next, connect the power cord to an electrical outlet and ensure that it is properly plugged in.
Once everything is set up, download the accompanying app on your smartphone or tablet. This app allows you to monitor and control the temperature of your grill remotely. With just a few taps on your screen, you can adjust the airflow and set your desired cooking temperature.
The Billows uses advanced technology to regulate airflow and maintain a steady temperature inside your Weber kettle. It features an integrated fan that blows air into the grill, increasing or decreasing heat as needed. This ensures that your food cooks evenly and comes out perfectly every time.
Whether you’re smoking ribs low and slow or searing steaks at high heat, adding Billows to your Weber kettle will revolutionize your grilling game. Say goodbye to guesswork and hello to precision cooking with this must-have accessory.
In conclusion, adding Billows to a Weber kettle is a game-changer for any grilling enthusiast. With its easy installation, remote temperature control, and precise airflow regulation, this device elevates your grilling experience to new heights. So why wait?