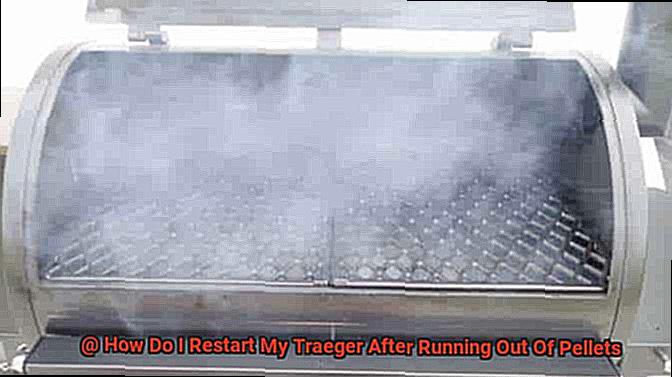
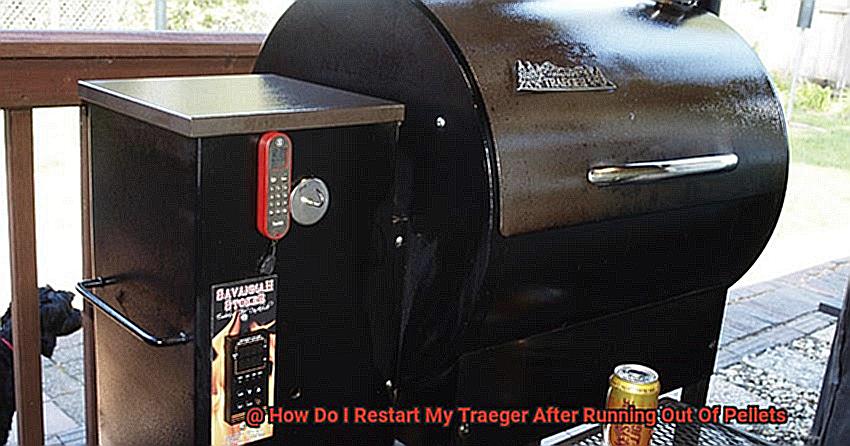
Are you a proud owner of a Traeger grill who has ever been caught off guard by an empty pellet hopper mid-cook? Don’t worry, it happens to the best of us. But the good news is that restarting your Traeger after running out of pellets isn’t rocket science.
Traeger grills rely on wood pellets as their fuel source, which are evenly distributed through the auger to create heat and smoke. When you run out of pellets, the grill will automatically shut down to prevent damage. However, getting your grill up and running again is a quick and easy process that only takes a few minutes.
In this blog post, we’ll walk you through each step of restarting your Traeger grill after running out of pellets. From clearing the auger to adding fresh pellets, we’ve got all the information you need to get back to grilling in no time.
But before we dive into the nitty-gritty details, let’s take a moment to talk about why it’s crucial to know how to restart your Traeger grill after running out of pellets. After all, nobody wants their BBQ party or family dinner ruined due to a simple mistake like this.
So whether you’re an experienced pitmaster or just starting out with your Traeger grill, keep reading and learn how to restart your grill after running out of pellets like a pro.
Contents
Safety First: Turning Off and Unplugging the Grill
Restarting your Traeger grill after running out of pellets is easy, but before jumping right into refilling the hopper with new pellets, prioritizing safety is key.
First and foremost, ensure that the grill has completely cooled down before attempting to refill it with pellets. This will prevent potential accidents or burns while handling the grill. Once the grill has cooled, locate the power switch and turn it off. Next, unplug the grill from the outlet to ensure that no electricity is running through the unit.
To prevent any potential accidents or damage to your Traeger grill, it’s also essential to check that all parts of the grill are securely fastened and in their proper place before restarting. This includes the grease tray, drip bucket and other removable parts that may have been removed during cleaning or maintenance.
After ensuring safety, it’s time to clean the grates and drip tray to prevent any leftover ash or grease from affecting the quality of your next cook. You can do this using a grill brush or scraper, depending on the type of debris present. Once cleaned, add new wood pellets to the hopper. Make sure to choose the right type of wood pellets for your recipe to achieve your desired flavor profile. Once you have added enough pellets, replace the hopper cover and reattach the grates and drip tray.
Now that you’ve successfully restarted your Traeger grill, preheat it for about 10-15 minutes before placing any food on it. This ensures that your grill is at the optimal temperature for cooking. Once preheated, you can start grilling your favorite meats, vegetables, or whatever recipe you have in mind.
Cleaning the Grates and Drip Tray
Imagine the sizzle of your favorite steak on the grill, the aroma wafting through the air. But after cooking up a storm, it’s time to clean up and get ready for your next culinary masterpiece. One crucial aspect of maintaining your Traeger grill is cleaning the grates and drip tray. Follow these simple steps to ensure that your grill is always in top condition.
Safety first: make sure your grill has cooled down completely before starting any cleaning. Once you’re ready, preheat your Traeger to around 350°F to loosen any debris on the grates.
With your trusty wire brush in hand, start scrubbing those grates clean. Be sure to remove any leftover food or debris that may have accumulated. After scrubbing, give the grates a thorough wipe down with a damp cloth or paper towel.
Don’t forget about the unsung hero of your Traeger – the drip tray. It catches all the excess grease and drippings from your food while it cooks, ensuring that your meals are cooked to perfection. Remove the tray from your Traeger and dispose of any excess grease or drippings that may have accumulated.
Next, wash the drip tray with soap and water, taking care to scrub away any stubborn spots with a brush or sponge. Rinse with water and dry it off with a clean towel.
Adding New Wood Pellets to the Hopper
Adding new pellets is a breeze if you follow these simple steps.
First things first, ensure that you have enough pellets to fill the hopper. Depending on the size of your Traeger, the hopper can hold up to 20 pounds of pellets, so double-check your inventory before starting.
Once you have enough pellets, it’s time to prepare the hopper for the new ones. Open the lid and remove any remaining pellets using a vacuum or scoop. It’s crucial to avoid mixing old and new pellets as this can cause operational issues down the line.
With the hopper emptied, pour in the new pellets until it’s about three-quarters full. Resist the temptation to overfill it as that can lead to jams and other problems. Once filled, close the lid and turn on the Traeger.
Be patient and give it a few minutes to heat up before resuming cooking. During this time, the new pellets will be fed into the firepot and ignite, creating heat and smoke for your food. It’s always a good idea to keep an eye on the temperature gauge to ensure it’s at your desired level before beginning to cook again.
It’s essential to note that only Traeger-approved wood pellets should be used in your grill. Using other types of wood or fuel can damage your grill and void its warranty. Stick with Traeger-approved pellets for optimal performance and peace of mind.
Reattaching the Grates and Drip Tray
If you’ve run out of pellets on your Traeger grill, don’t worry. Reattaching the grates and drip tray is a simple process that anyone can do. Let’s get started.
First things first, safety is key. Make sure your grill has cooled down before attempting to reattach anything. We don’t want any accidental burns or singed eyebrows.
Next, let’s tackle the drip tray. Remove the tray and dispose of any ash or debris that may have accumulated in it. Then, give it a quick clean to make sure it’s free of any unwanted residue. Place the tray back into the grill and ensure that it fits snugly into place. Don’t forget to slide in the grease bucket into its holder under the grill.
Now, onto the grates. Take them out and give them a quick clean to remove any leftover debris or ash. Starting from the front of the grill, position the grates back into place, ensuring they fit snugly before closing the lid.
Before restarting your Traeger grill, it’s important to refill the hopper with fresh pellets and turn on the grill following the manufacturer’s instructions. This will ensure that your grill runs smoothly without any hitches.
Restarting Your Traeger Grill
Don’t let this ruin your BBQ plans. Restarting your Traeger grill is a simple process that can be done in just a few quick steps. As an expert on this topic, I’m here to guide you through the process and ensure that your grilling experience stays on track.
Step 1: Confirm Your Pellet Supply
Before beginning the restart process, it’s important to check if you have enough pellets to complete your cook. If not, add more pellets to the hopper and make sure you have enough to last for the duration of your cook. This will save you from having to repeat the entire process midway through your cook.
Step 2: Turn Off and Unplug Your Grill
To start the restart process, turn off your Traeger grill and unplug it from the power source. This will help ensure that the grill is completely turned off and ready for cleaning.
Step 3: Clean Out the Hopper
Remove any remaining pellets from the hopper and clean out any ash or debris that may have accumulated inside. This step ensures that your Traeger grill is ready for the next cook and prevents any potential clogs or malfunctions.
Step 4: Add High-Quality Pellets
After cleaning out the hopper, it’s time to add fresh pellets. Use any type of pellet that suits your taste preferences, but it’s recommended that you use high-quality pellets for optimal results. Good quality pellets burn more efficiently, ensuring even cooking and better flavor.
Step 5: Restart Your Grill
Finally, plug in your Traeger grill and turn it on. Set the temperature to your desired cooking temperature and allow the grill to heat up for a few minutes before placing your food on it. This helps ensure that the temperature is steady and consistent when cooking.
Preheating the Grill Before Cooking
Then, pay attention, because today we’re talking about the crucial step of preheating your Traeger grill before cooking.
- First off, let’s be clear: skipping the preheating process is not an option. If you want perfectly cooked food with that signature smoky flavor, you need to start by preheating your grill. So, what’s the best way to do it? Here are some top tips:
- Refill the hopper: Before you start preheating, make sure you have enough pellets in the hopper to last through the cook. Running out of pellets mid-cook is a recipe for disaster, so don’t take any chances.
- Set the temperature: This might seem like a no-brainer, but it’s worth emphasizing. Make sure you set your grill to the desired temperature before preheating. Adjusting the temperature afterward wastes time and can throw off your cooking.
- Be patient: Unlike gas or charcoal grills, Traeger grills take longer to preheat because they rely on wood pellets for fuel. Give yourself at least 15-20 minutes of preheating time before starting to cook.
- Keep the lid closed: It’s essential to retain heat during the preheating process, so keep that lid closed. This ensures that the temperature remains consistent throughout your grill.
- Monitor the temperature: Whether you’re using a meat thermometer or a built-in thermometer on your Traeger grill, keep an eye on the temperature and make adjustments as necessary.
Once your Traeger grill has reached your desired temperature, it’s time to start cooking. But don’t forget to keep an eye on your food and adjust the temperature as needed for even cooking.
Tips for Choosing the Right Type of Wood Pellets
When it comes to grilling, selecting the right type of wood pellets is crucial. Not only can the type of wood pellets you use greatly impact the flavor of your food, but it can also affect the efficiency of your grill. Here are five factors to consider when choosing the right type of wood pellets for your Traeger grill:
Compatibility with Your Grill
The first thing to consider when selecting wood pellets is whether they are compatible with your Traeger grill. While Traeger brand pellets are recommended, other brands can also be used. However, be sure to check that the pellets you choose are appropriate for your grill model.
Flavor Profile
Different types of wood pellets produce different flavors in your food. For example, hickory and mesquite pellets will produce a strong and smoky flavor, while fruitwood pellets like apple or cherry will produce a milder and sweeter flavor. Consider what type of food you’ll be grilling and choose a flavor that complements it.
Quality
The quality of the wood pellets you use can drastically impact the taste and efficiency of your grill. High-quality pellets are made from 100% hardwood with no fillers or additives and will burn more efficiently. Low-quality pellets may produce less flavor and burn less efficiently, costing you more in the long run.
Moisture Content
Moisture content is another factor to consider when choosing wood pellets. Pellets with a moisture content between 5-10% are ideal for optimal burning. If the pellets have too much moisture, they may not burn well, while those with too little moisture may burn too quickly.
Price
While it may be tempting to opt for cheaper wood pellets, investing in high-quality ones is worth it in the long run. Low-quality pellets may require more frequent refills and produce less flavor, ultimately costing you more money. Consider the long-term benefits of investing in high-quality pellets.
Conclusion
In summary, experiencing a pellet shortage mid-cook on your Traeger grill can be disheartening, but fear not. Restarting your grill is a simple and speedy process that anyone can manage. Safety should always come first, so make sure to switch off and unplug your grill before cleaning the grates and drip tray.
Adding new pellets to the hopper is an effortless task if you follow some straightforward guidelines. Check the compatibility of your grill, select the ideal flavor profile, opt for high-quality pellets with optimal moisture content, and consider long-term benefits over price.
Preheating your Traeger grill before cooking is fundamental to achieving mouth-watering food with that signature smoky taste. Refilling the hopper, setting the temperature, exercising patience, keeping the lid closed, and monitoring the temperature are all top tips to bear in mind.
Maintaining your Traeger grill by cleaning out the hopper, adding high-quality pellets, securely reattaching grates and drip trays is crucial for optimal performance and peace of mind.