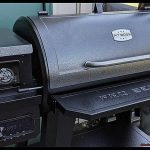
Do you love firing up your gas grill for some mouth-watering outdoor cooking, but recently discovered that mice have infiltrated your grilling haven? Maybe you noticed strange squeaks or chewed-up accessories around your grill. It’s not just the damage they can cause; mice leave behind droppings, urine, and even dead carcasses that can create unsanitary cooking conditions and pose health risks.
But don’t panic. We’ve got your back. In this post, we’ll guide you through the steps of cleaning your gas grill after a mouse invasion. From basic cleanup to deeper sanitization techniques, we’ll show you how to use natural ingredients and household cleaning products to get your grill back in tip-top shape for your next cookout. Plus, we’ll share tips on preventing future rodent visits.
Don’t let pesky mice ruin your grilling season. Follow our expert advice to clean and sanitize your gas grill like a pro.
Contents
Disconnecting Propane Tank and Removing Grates and Burners
Mice are not just adorable little creatures that scurry around in the fields, they can be a real nuisance when they invade your gas grill. Their droppings, urine, and other debris can contaminate the grill and make it unsafe for cooking. So, cleaning your gas grill after mice have visited is crucial to ensure it is safe to use and free of any potential health hazards. In this article, we will discuss the process of disconnecting a propane tank and removing grates and burners from a gas grill after mice have been present.
Before starting the cleaning process, it’s important to have all the necessary tools and equipment on hand. You’ll need gloves, a grill brush, warm soapy water, and a sponge or cloth. Once you’re prepared, turn off the gas valve on the propane tank and unscrew the connection between the tank and the regulator on the grill. Carefully remove the propane tank from the grill and set it aside in a safe location.
With the propane tank removed, you can focus on removing the grates and burners from the grill. Start by taking off the grates and setting them aside. Then, remove the burners by unscrewing them from their brackets or supports. Use gloves to prevent exposure to bacteria or harmful substances.
Now that you’ve removed the grates and burners, it’s time to clean them thoroughly with warm soapy water and a grill brush. Be sure to scrub away any residue or debris left behind by mice. Pay special attention to areas where they may have nested or left droppings. Rinse everything thoroughly with clean water and dry it off with a cloth or paper towel.
In addition to cleaning the grates and burners, don’t forget about the interior of the grill itself. Use a grill brush to scrub away any debris or residue that may have accumulated inside, paying special attention to areas where mice may have nested or left droppings. Rinse everything thoroughly with clean water and dry it off with a cloth or paper towel.
Finally, inspect the propane tank for any signs of damage or contamination. If you notice any issues, it’s best to replace the tank to ensure your grill is safe for use.
To summarize, here’s a checklist for disconnecting propane tank and removing grates and burners from a gas grill after mice have been present:
Scrubbing Grates and Burners with a Wire Brush
Fear not, we have the solution. In this post, we’ll provide you with expert tips on scrubbing grates and burners with a wire brush after mice have been in your gas grill.
First things first, safety is paramount. Before cleaning your grill, make sure to disconnect the propane tank and thoroughly inspect it for any damage or contamination. Once you’ve done that, it’s time to roll up your sleeves and get started.
Step 1: Preheat Your Grill
To loosen any leftover food or debris on the grates and burners, preheat your grill on high for 15-20 minutes. Remember to turn off the burners and let the grill cool down for a few minutes before starting to clean.
Step 2: Scrubbing with a Wire Brush
Grab a wire brush and start scraping the grates and burners in a back-and-forth motion until all debris is removed. Pay extra attention to areas where mice may have left droppings or urine, such as corners or crevices. If needed, use a scraper tool to help remove any stubborn debris.
Step 3: Wipe Down with Damp Cloth or Paper Towel
Once the scrubbing is complete, use a damp cloth or paper towel to wipe down the grates and burners and remove any loose debris. For any remaining residue, consider using a grill cleaner or degreaser.
Step 4: Take Extra Precautions
If mice have been nesting inside your grill, take extra precautions when cleaning. Wear gloves and a mask to protect yourself from potential health hazards. Dispose of any nesting material or droppings in sealed plastic bags.
Rinsing Grates and Burners Thoroughly
There’s nothing quite like a summer BBQ, but discovering that mice have been nesting in your gas grill can quickly put a damper on things. Don’t worry though, with a bit of elbow grease and the right approach, you can have your grill looking and smelling as good as new. One of the most important steps in cleaning your grill after a mouse infestation is to rinse the grates and burners thoroughly. Here’s how to do it effectively:
Step 1: Begin with a Soak
Start by removing the grates and burners from your grill and placing them in a large bucket or sink filled with hot soapy water. Let them soak for at least 30 minutes to loosen any grime or buildup that has accumulated.
Step 2: Scrub Away Debris
After soaking, use a stiff-bristled brush to scrub away any remaining debris. Pay close attention to all the nooks and crannies to ensure a thorough cleaning. You’ll want to get rid of any droppings or debris left behind by the mice.
Step 3: Rinse Thoroughly
Rinse the grates and burners thoroughly with clean water to remove any soap residue. Make sure you rinse everything thoroughly to prevent any unwanted flavors from lingering in your food.
Step 4: Deal with Stubborn Stains
If there are any stubborn stains or buildup on the grates and burners, you may need to use a specific grill cleaner designed for these surfaces. Follow the instructions carefully and rinse everything thoroughly afterwards.
Step 5: Inspect for Signs of Nesting
Don’t forget to check the underside of the grates and burners for any signs of nesting or droppings. Use a flashlight to inspect these areas and remove any debris with a scraper or brush.
Cleaning the Interior of the Grill
It’s time for a summer BBQ, but before you cook up a storm, it’s important to ensure your gas grill is free of any unwanted guests like mice. These pesky critters can leave behind droppings, urine, and other debris that can contaminate your grill and impact the taste and safety of your food. So, let’s dive into the steps to clean the interior of your grill.
Step 1: Remove any removable parts
Start by removing grates or burners from the grill. Use a stiff-bristled brush to scrub away visible debris on these parts, then soak them in hot soapy water for at least 30 minutes before rinsing thoroughly and drying. This will help remove surface-level contamination left behind by mice.
Step 2: Clean the interior of the grill
Now it’s time to tackle the interior of the grill. Use a grill brush or scraper to remove debris, paying special attention to corners and crevices where mice may have nested. If there are any difficult-to-reach areas, consider using a small vacuum or compressed air to blow out any debris.
Step 3: Sanitize the interior of the grill
After removing as much debris as possible, sanitize the interior of the grill. Mix a solution of one part white vinegar to two parts water and generously apply it to all surfaces with a spray bottle. Let this solution sit for at least 10-15 minutes before wiping it away with a clean cloth. This will kill any bacteria or other contaminants left behind by mice.
Step 4: Air dry and reassemble
Once you’ve completed all previous steps, allow your grill to air dry completely before reassembling it and using it again. Additionally, store your grill in a location that is less likely to attract mice in the future, such as a sealed shed or garage.
Inspecting the Propane Tank for Damage or Contamination
As you gear up for a summer of sizzling steaks and juicy burgers, let’s talk about a potential buzzkill: mice. These uninvited guests can contaminate your grill with their droppings and even chew through the exterior of your propane tank, jeopardizing both your health and safety. Fear not, though – inspecting the propane tank for damage or contamination is a quick and easy task that will give you peace of mind before firing up the grill.
To begin, it’s essential to turn off the gas supply valve and disconnect the propane tank from the grill. Take a close look at the tank’s exterior, searching for any visible damage such as scratches, dents, rust, or gnaw marks. If you spot any of these signs, be sure to replace the tank immediately to avoid gas leaks.
Next, it’s time to inspect the propane tank’s valve for contamination. Use a dry cloth to wipe away any debris, dirt, or moisture that may have accumulated on it. Additionally, make sure that the rubber gasket is in good condition and free from cracks or tears.
If you suspect that mice have contaminated your propane tank with their droppings or urine, don’t take any chances. Have it inspected by a professional who can check for harmful bacteria or viruses that could pose a health risk. Better safe than sorry.
Wearing Gloves During Cleaning Process
Summer is the perfect time for grilling and enjoying the great outdoors. However, it’s important to keep your grill clean and free from any potential health hazards. If you suspect that mice have been lurking around your gas grill, it’s essential to take extra precautions when cleaning it. One of the most important steps in this process is wearing gloves.
But why is it so crucial to wear gloves when cleaning a gas grill after mice have been present? Mice can carry a variety of diseases and bacteria, which can be harmful if they come into contact with your skin. To protect yourself, it’s vital to choose gloves that are both durable and resistant to chemicals. Rubber gloves or heavy-duty cleaning gloves are typically the best options for this task.
Before putting on your gloves, make sure that your hands are clean and dry to eliminate any potential contamination. During the cleaning process, it’s important to wear your gloves at all times. This includes removing any debris or mouse droppings from the grill grates, cleaning the burners and other internal components, and wiping down the exterior of the grill.
To avoid further contamination, dispose of any debris or contaminated materials in a sealed trash bag. After completing the cleaning process, remove your gloves carefully and dispose of them properly. Wash your hands thoroughly with soap and warm water for at least 20 seconds before handling any food or other items.
If you’re wondering what type of gloves to choose for cleaning your gas grill after mice have been present, rubber gloves or heavy-duty cleaning gloves are your best bet. These types of gloves are not only durable but also resistant to chemicals. Additionally, they provide ample protection for your hands while you clean your grill.
Pay Attention to Areas Where Mice May Have Left Droppings or Urine
It’s time to fire up the grill for some delicious outdoor cooking. But before you start cooking your favorite meals, pay attention to areas where mice may have left droppings or urine. These pesky critters are known carriers of harmful bacteria like salmonella and hantavirus, which can cause serious health problems in humans. So, it’s crucial to take precautions by wearing gloves and a face mask when cleaning these areas to avoid any potential health risks.
Here are some tips on how to clean your gas grill after mice:
Inspect the Grill Grates, Warming Racks, and Flavorizer Bars
Mice love to scavenge for food in warm and sheltered areas, making gas grills the ideal environment for them. Check these areas for any signs of mouse droppings or urine. If you notice any debris, use a stiff-bristled brush to scrub away the mess.
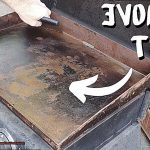
Thoroughly Clean the Grates
Remove the grates and clean them thoroughly with warm soapy water and a grill brush. Rinse them thoroughly with clean water before putting them back in place. If the grates are heavily soiled, soak them in a tub of warm soapy water for a few hours before scrubbing them.
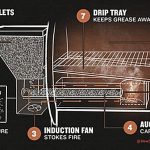
Clean Other Parts of the Grill
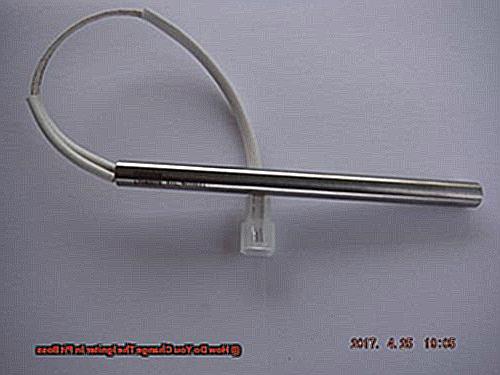
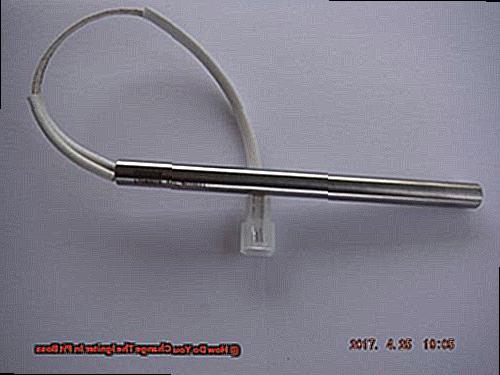
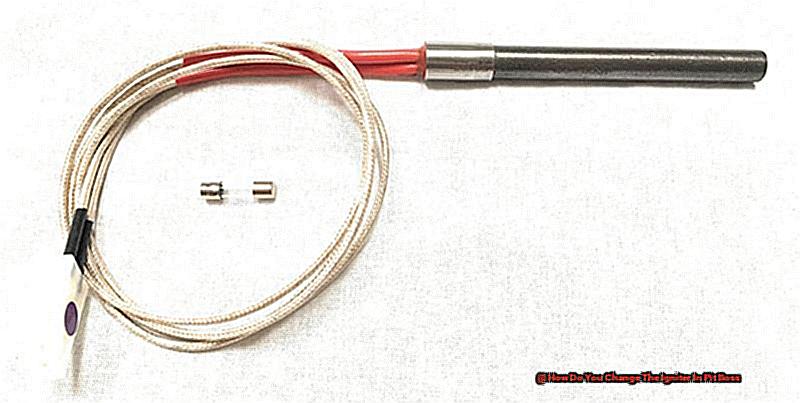
Don’t forget to clean other parts of the grill, including the burners, igniter, and grease tray. Use a grill brush or scraper to remove any debris or grease buildup from these areas. For hard-to-reach spots, you may need to use a toothbrush or cotton swab.
Clean the Exterior of the Grill
Finally, wipe down the hood and side tables with warm soapy water and a soft cloth. If your grill has a stainless steel finish, use a stainless steel cleaner to restore its shine.
Allow Grill to Dry Completely Before Reassembling Parts
Grill masters, listen up. You know the importance of keeping your grill in tip-top shape, but have you ever considered the critical role of allowing it to dry completely before reassembling its parts? After all, you don’t want all that hard work you just put into cleaning and disinfecting to go to waste.
Why is it so crucial to let your grill dry completely? Moisture or dampness left inside the grill can be a recipe for disaster, leading to rust and further damage. To avoid this, experts recommend letting your grill sit for at least 24 hours in a warm and dry place before reassembling.
But let’s be real, sometimes you just can’t wait that long. In that case, use a clean cloth to wipe down any excess water or moisture from the grill parts before leaving them out to air dry. Just make sure not to rush the process and ensure that everything is fully dry.
Here’s a pro tip: don’t forget about electronic components or wiring if your grill has them. Be sure they are completely dry before reconnecting them to prevent electrical shorts and potential danger.
Conclusion
In conclusion, a mouse invasion in your gas grill can be more than just a hassle. It can lead to unsanitary cooking conditions and health risks due to droppings and urine left behind. But fret not. With the right tools and approach, you can clean your gas grill after a mouse infestation and prevent future rodent visits.
First things first, disconnect the propane tank and remove the grates and burners. Give them a thorough scrub with warm soapy water, paying extra attention to areas where mice may have nested or left droppings. Rinse everything off with clean water, then dry it all with a cloth or paper towel.
But don’t stop there. The interior of the grill itself also needs a good cleaning. Use a grill brush to scrub away any debris or residue that may have accumulated inside, making sure to get into every nook and cranny where mice could have scurried around. Rinse everything off again with clean water and dry it all once more.
Before using the propane tank again, inspect it carefully for any signs of damage or contamination caused by our tiny uninvited guests. And make sure you’re wearing gloves during the cleaning process to protect yourself from potential health hazards.
Last but not least, let your grill dry completely before putting it back together to avoid any further damage caused by moisture or dampness.