Water quality is a crucial aspect of our daily lives. It’s not just about the visual appeal, but also the chemical and microbiological factors that determine its safety for human consumption. A probe is a tool used to analyze water quality by detecting various parameters such as temperature, pH, and dissolved oxygen levels. However, for a probe to be accurate, it needs to be calibrated.
Calibration might sound like a daunting task, but it’s actually quite simple. It involves adjusting the measuring instrument to provide results that are as accurate as possible. Calibration ensures that the readings from your probe are reliable and precise. In this blog post, we’ll explore why calibration is important and how to calibrate a pH probe step-by-step.
Don’t worry if you’re not a technical expert – anyone can learn how to calibrate a probe with some basic knowledge. We’ll also provide tips for maintaining your probe’s accuracy and extending its lifespan.
So, if you’re interested in diving into the fascinating world of water quality analysis and learning how to calibrate your own probe, keep reading.
Contents
What is Probe Calibration?
Probe calibration is an essential process in various industries, as it ensures accurate and reliable measurements through the comparison of a probe’s readings to a known standard or reference instrument. Calibration involves several key steps, including cleaning the probe, preparing a specific calibration solution, and taking readings while making adjustments to the instrument’s calibration settings as necessary.
Regular probe calibration is crucial because environmental factors such as temperature, humidity, and mechanical stress can cause a probe’s accuracy to drift over time. Calibration corrects this drift and ensures that the readings obtained from the probe are within acceptable limits. In addition, many regulatory bodies require probes to be calibrated periodically to comply with industry standards.
To perform accurate calibration, the reference instrument must be calibrated and traceable to a national or international standard. During calibration, technicians compare the probe’s readings to those of the reference instrument and make adjustments to bring them into agreement. The process may involve placing the probe in a calibration solution and allowing it to stabilize before taking readings.
Organizations must document their calibration processes in a calibration log or record-keeping system to keep track of when probes were last calibrated and any adjustments made during the process. By following specific procedures and keeping accurate records, organizations can ensure compliance with industry standards and improve the quality of their products or services.
Why Is Probe Calibration Important?
Calibration is the process of comparing a device or instrument against a known reference standard to determine its accuracy and adjust it if necessary. In other words, calibration ensures that the instrument provides accurate and reliable measurements.
Probes are used in various industries for measuring critical parameters such as temperature, pressure, humidity, and flow rate. These measurements can have a significant impact on product quality, safety, and efficiency. For example, inaccurate temperature readings in a food processing plant can lead to spoilage or contamination of food products, posing a risk to public health. Similarly, inaccurate pressure readings in a chemical plant can result in explosions or leaks that can harm workers and the environment.
Therefore, probe calibration is particularly important because it helps to detect and correct any inaccuracies that could compromise product quality and safety. Calibration can help identify factors such as environmental conditions, wear and tear, and usage that may affect the accuracy of the instrument. By adjusting the instrument to ensure its accuracy, calibration helps to ensure that the measurements taken are reliable.
Moreover, regulatory bodies require industries to calibrate their instruments regularly to comply with standards and regulations. For instance, the ISO 17025 standard requires laboratories to calibrate their instruments regularly and maintain proper records of calibration. Compliance with these regulations is crucial for organizations to maintain accreditation and avoid legal issues.
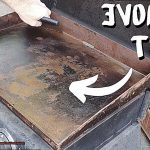
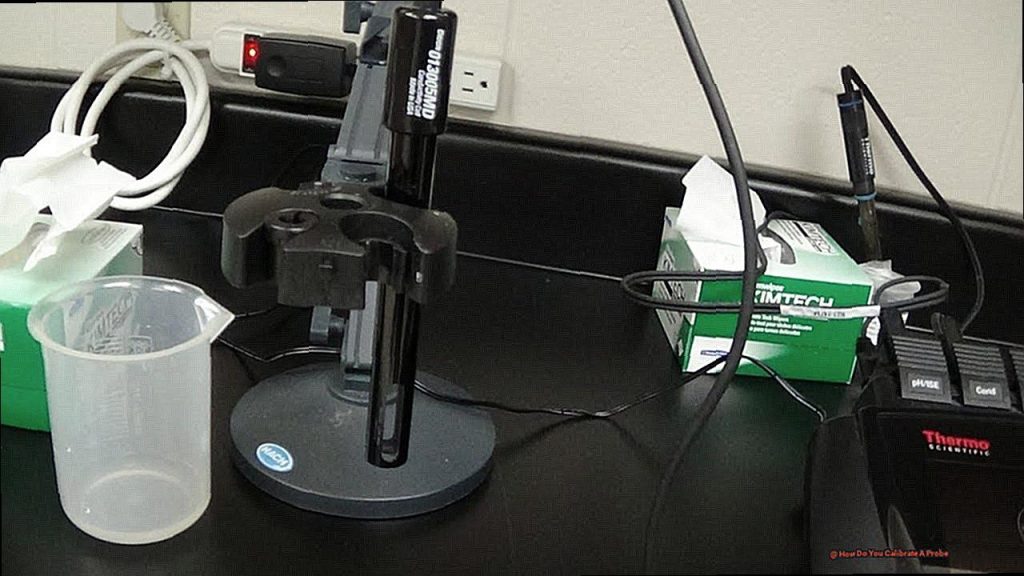
Cleaning the Probe
Whether you work in food production, chemical processing, or any other industry that relies on accurate measurements, you know that probes are essential tools. But before you can even start calibrating your probe, you need to make sure it’s clean and free from any debris or residue.
Cleaning the probe is a simple yet crucial step that ensures accurate readings and reliable results. In this guide, I will take you through the process of cleaning a probe before calibrating it.
To begin with, remove any excess debris or residue from the surface of the probe using a soft cloth or brush. This step is crucial to ensure that the cleaning process is effective. Once you’ve removed any debris, it’s time to wash the probe.
Wash the probe thoroughly with mild detergent and warm water, avoiding harsh chemicals or abrasive materials that can scratch or damage its surface. Use a soft cloth or sponge to gently wash the probe and ensure that every area is clean.
After washing, rinse the probe with clean water and dry it completely with a soft cloth. To avoid leaving any fibers on the surface of the probe, use a lint-free cloth. Once dry, inspect the probe for any signs of damage or wear and tear.
If you notice any damage such as cracks or chips, it may be necessary to replace the probe before calibrating it. Damaged probes can affect their accuracy and lead to incorrect readings.
To recap, here’s a quick checklist for cleaning your probe:
- Remove excess debris or residue from the surface
- Wash thoroughly with mild detergent and warm water
- Rinse with clean water and dry completely with a lint-free cloth
- Inspect for damage or wear and tear
By following these steps regularly, you can ensure that your probe remains accurate and reliable, which is vital in any industry.
Preparing the Calibration Solution
Calibrating a probe is a vital part of obtaining accurate and reliable measurements. But did you know that the key to success lies in the preparation of the calibration solution? In this article, we’ll delve into the crucial steps to prepare a calibration solution accurately, ensuring optimal results from your probe.
The first step is to check the manufacturer’s instructions for the required concentration and volume of the calibration solution. This information is critical, and it’s essential to follow it precisely to meet the necessary standards.
After gathering the necessary information, measure out the correct amount of distilled water into a clean container. Using distilled water is vital as it prevents any interference with the chemical makeup of the calibration solution.
Next up, add the required amount of calibration chemical to the distilled water and mix thoroughly until it dissolves completely. Paying close attention to instructions is crucial as it guarantees the correct concentration is achieved.
Once you’ve prepared your calibration solution, don’t forget to label it correctly with important details such as date, concentration, and other relevant information. Ensure you store the labeled container in a cool and dark place away from direct sunlight to avoid contamination or degradation.
Before using your calibration solution, check its pH level using a pH meter or strips. The pH level should fall within a specific range specified in the manufacturer’s instructions. If it’s outside this range, make necessary adjustments accordingly.
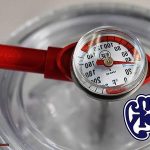
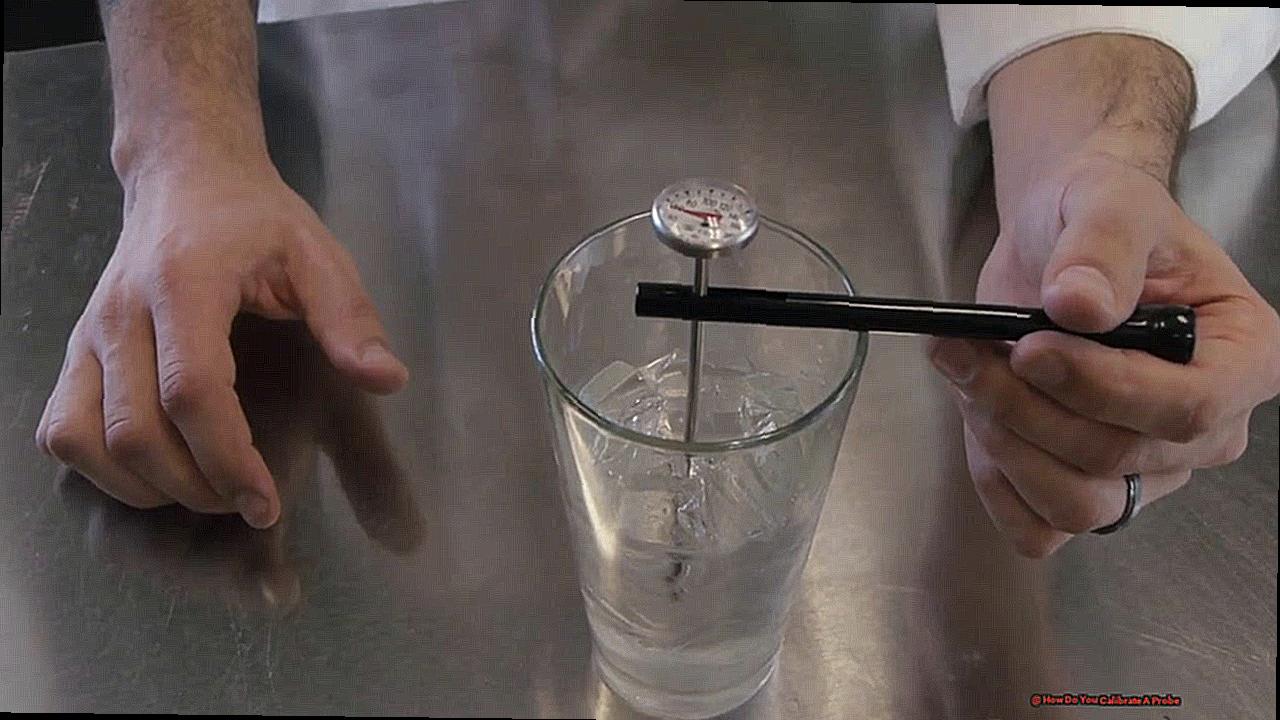
Placing the Probe in the Calibration Solution
If you’re an avid probe user, you know that placing your probe in the calibration solution is a crucial step in the calibration process. But do you know how to do it right? Let’s dive into the details.
First and foremost, before placing the probe in the solution, ensure that the solution is at the correct temperature and concentration. Don’t rush into this step, as the temperature and concentration can impact the accuracy of your calibration. Follow the manufacturer’s instructions carefully to get it right.
With your solution ready, it’s time to place your probe in it. But don’t just dunk it in there recklessly. Place it gently and wait for it to stabilize. The time for stabilization varies depending on the type of probe and solution being used, but typically, it takes around 30 seconds. And while waiting, be sure not to disturb or move your probe.
Once stabilized, adjust your instrument’s reading to match the value displayed by the calibration solution. This adjustment can be done manually or automatically depending on your instrument. Whatever method is used, make sure to follow manufacturer instructions.
With calibration complete, remove the probe from the solution and rinse it with clean water to remove any residue. And don’t forget – let your probe dry completely before using it again.
Taking Readings and Making Adjustments
Proper calibration is crucial to ensure that your food is cooked to perfection every time.
Let’s start with the first step – connecting the probe to the measuring device. This is a critical step that requires attention to detail. Make sure both the probe and measuring device are calibrated correctly to avoid any inaccuracies in your readings.
Once connected, take an initial reading and record it as a baseline for future comparisons. Then take subsequent readings and compare them to the initial reading. If there is a significant difference, it’s time to make adjustments.
Making adjustments can be a bit daunting, but don’t worry. Follow the manufacturer’s instructions carefully, and you’ll be able to make any necessary changes to either the probe or measuring device. After making adjustments, re-take readings and compare them until they are within an acceptable range.
Remember to keep a record of any changes made during calibration. This will come in handy for future reference and ensure that you’re keeping track of any adjustments made and final readings obtained.
Taking readings and making adjustments may seem like a tedious process, but it’s worth it for perfectly cooked food. So take your time, follow the steps carefully, and enjoy delicious meals every time you fire up your grill.
Documenting Your Results
As a grill master, you know that precision and attention to detail are key to achieving mouthwatering meals every time you fire up your grill. But did you know that documenting your results during the calibration process is just as crucial as calibrating your probe?
Documenting your results is a critical step in the process of calibrating a probe. It involves recording all the readings and measurements taken during the calibration process and analyzing them to ensure that the probe is functioning correctly. By keeping accurate records of all readings and measurements taken during the calibration process, you can ensure that your probe is functioning correctly and identify any potential issues before they become more significant problems.
One way to document your results is to use a calibration logbook. This logbook should include details such as the date and time of the calibration, the equipment used, the standard used for comparison, and the results obtained. Calibration logbooks are handy because they allow you to note any adjustments made during the calibration process and the reasons for making them.
Another method of documenting your results is by using computer software. There are many software tools available that can help you record and analyze your calibration data. These tools can be customized to meet your specific needs, and they often include features such as automated calculations, graphing capabilities, and data trending.
Regardless of the method used, it is essential to keep accurate records of your calibration results. This documentation can be used to demonstrate compliance with industry standards or regulatory requirements, and it can also provide valuable information for troubleshooting or identifying potential issues with the probe.
Tips for Accurate Probe Calibration
Accurate probe calibration is crucial for obtaining precise measurements in any industry that uses probes. This can include engineering, manufacturing, or scientific research. Calibration guarantees that the readings obtained from a probe are consistent and reliable over time, which is essential for making informed decisions and maintaining quality control.
To ensure accurate probe calibration, it’s important to follow proper techniques. Here are five tips for accurate probe calibration:
Use a known reference point
Using a known reference point, such as a standard sample with a known value or a calibration standard, is the first step in calibrating a probe. By doing so, you can verify the accuracy of your probe and adjust it accordingly.
Check for drift
Probes can drift from their original calibration settings over time. Regularly checking for drift and making adjustments as needed is important to ensure accuracy.
Follow the manufacturer’s instructions
To guarantee accuracy, it’s crucial to follow the manufacturer’s instructions carefully. Different probes have different calibration procedures, so make sure you have everything you need before starting the process.
Record your results
Keeping track of your calibration results over time is essential for identifying any issues affecting your probe’s accuracy and making adjustments as needed.
Use proper technique
Proper technique includes cleaning the probe, using the correct settings on your equipment, and avoiding unnecessary movements or vibrations that could affect the measurement.
Conclusion
In conclusion, calibration is an essential process that guarantees accurate and reliable measurements from probes used in various industries. To achieve proper calibration, you need to follow a series of steps that include cleaning the probe, preparing a specific calibration solution, placing the probe in the solution, taking readings and making adjustments, and documenting the results. Regular calibration ensures consistent readings over time, which is crucial for informed decision-making and maintaining quality control.
Calibration also helps detect any inaccuracies that could compromise product quality and safety. Therefore, it’s vital to use proper techniques such as using a known reference point, checking for drift, following the manufacturer’s instructions carefully, recording results accurately, and using proper technique.
By keeping accurate records of all readings and measurements taken during the calibration process, organizations can ensure compliance with industry standards while improving their products’ or services’ quality. Although calibration may seem daunting at first glance, anyone can learn how to calibrate a probe accurately with basic knowledge.