Do you find yourself frustrated by unevenly cooked meats and temperature fluctuations when using your Traeger grill? Fear not, because calibrating your pellet sensor might just be the solution you need.
Your Traeger’s pellet sensor is a critical component in maintaining consistent cooking temperatures for your mouth-watering barbecue. However, it’s not uncommon for it to become uncalibrated over time, resulting in inaccurate temperature readings and poorly cooked meats.
In this blog post, we’ll guide you through the step-by-step process of calibrating your pellet sensor on a Traeger grill. We’ll start by emphasizing the importance of calibrating your pellet sensor and why it needs to be recalibrated periodically. Then, we’ll provide a list of materials required to complete the calibration process.
But that’s just the beginning. We’ll also delve into the nitty-gritty of the calibration process itself. You can rest assured that we’ve got you covered with tips and tricks to ensure that your pellet sensor is calibrated precisely.
By following our expert advice, you’ll have all the knowledge and expertise needed to calibrate your pellet sensor like a pro. With a calibrated sensor, you can trust that every cut of meat will be grilled to perfection every single time. Don’t let an uncalibrated pellet sensor ruin your next barbecue – follow our guide and get back to grilling like a pro.
Contents
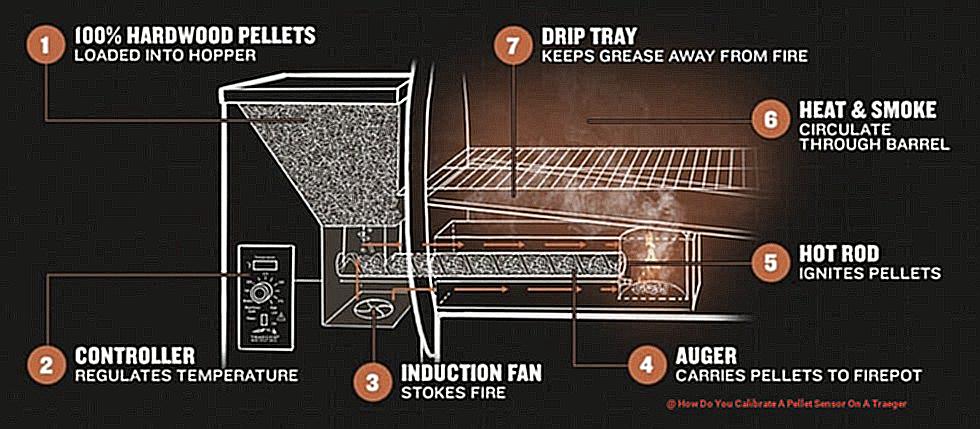
What is a Pellet Sensor?
One of the key components that sets these grills apart from traditional charcoal or gas grills is the pellet sensor.
So, what exactly is a pellet sensor? In short, it’s a device that measures the level of wood pellets in the hopper and communicates with the grill’s controller to regulate temperature. This is important because maintaining a steady stream of pellets is crucial for consistent heat levels.
The pellet sensor itself typically consists of a metal rod that extends into the hopper and detects the level of pellets. As pellets are consumed during cooking, the rod becomes exposed, sending a signal to the controller that more pellets are needed.
Different manufacturers and models may use different types or designs of pellet sensors, such as optical or mechanical sensors, or weight-based systems. However, regardless of the design, a properly calibrated pellet sensor is critical for optimal performance.
Calibrating your pellet sensor is relatively simple and can be done in just a few steps. Begin by turning off and unplugging your grill. Locate the pellet sensor, which is usually located on the side of the hopper, and adjust its position by loosening the screw that holds it in place and moving it up or down until it’s approximately 1/8 inch away from the pellets. Tighten the screw to secure the sensor in place.
Next, reset the controller by pressing and holding the “P-Setting” button until it displays “rSt” before releasing the button. This will reset the controller to its default settings and allow it to recalibrate based on the new position of the pellet sensor.
Once you’ve completed these steps, plug in your Traeger grill and turn it on. Test cook to ensure that your temperature control system is functioning correctly by monitoring the temperature inside your grill.
Why Calibrate a Pellet Sensor on a Traeger?
One of the most crucial components of achieving consistent and accurate results is the calibration of your pellet sensor. Let me explain why this step is so important.
The pellet sensor plays a vital role in regulating the temperature by monitoring the level of wood pellets in the hopper. If this sensor is not calibrated correctly, it can lead to uneven heating and potentially even a fire. This is the last thing you want to deal with when you’re trying to enjoy a relaxing cookout.
Calibrating your pellet sensor, therefore, is an essential step in ensuring that your Traeger grill is functioning correctly. The process involves adjusting the settings on the controller to match the actual amount of pellets in the hopper. By doing this, you ensure that the controller knows precisely how much fuel is available and can adjust the temperature accordingly.
While Traeger grills come pre-calibrated from the factory, it’s important to note that various factors such as temperature changes, humidity, and pellet type can all impact the accuracy of the sensor over time. Therefore, it’s recommended to periodically check and adjust the calibration as needed.
In summary, calibrating your pellet sensor on a Traeger grill is crucial for achieving consistent and accurate results while cooking. Here are some benefits of calibrating your pellet sensor:
- Avoid potential issues such as uneven heating and fires.
- Ensure that your Traeger grill is functioning correctly.
- Enjoy perfectly grilled meals every time.
Tools Needed for Calibration
If you’re looking to calibrate your pellet sensor, you’ll need the right tools for the job. Calibrating your grill is crucial to ensure that it delivers consistent, high-quality results every time you cook. Here are the essential tools you’ll need:
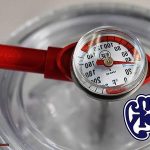
First things first, you’ll need a digital thermometer. This tool will accurately measure the temperature inside your grill and help you make adjustments as needed. No more guessing temperatures and ending up with unevenly cooked food.
Next, safety should always come first. It’s important to have a sturdy pair of gloves to protect your hands when working with hot surfaces and equipment.
You’ll also want to have a set of pliers or tweezers on hand for fine-tuned adjustments to your grill’s settings. A small screwdriver may also come in handy for accessing specific components.
Lastly, don’t overlook the importance of setting up a clean and well-lit workspace. A cluttered and poorly lit area will only slow you down and increase the risk of mistakes. Make sure you have plenty of room to work and that your workspace is free of distractions.
By having these tools at your disposal and setting up a safe and efficient workspace, you’ll be better equipped to successfully calibrate your pellet sensor on a Traeger grill. Achieving perfect harmony between the temperature and wood pellets will be a breeze, and you’ll be wowing your guests with perfectly grilled meals in no time.
Step-by-Step Process of Calibrating the Pellet Sensor
Calibrating your pellet sensor is essential for achieving consistent and delicious results, and we’re here to guide you through the step-by-step process. So, let’s get started.
First and foremost, safety should always be your top priority. Before beginning the calibration process, make sure to turn off your grill and unplug it from the power source.
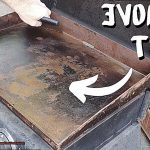
Step 1: Empty the Hopper
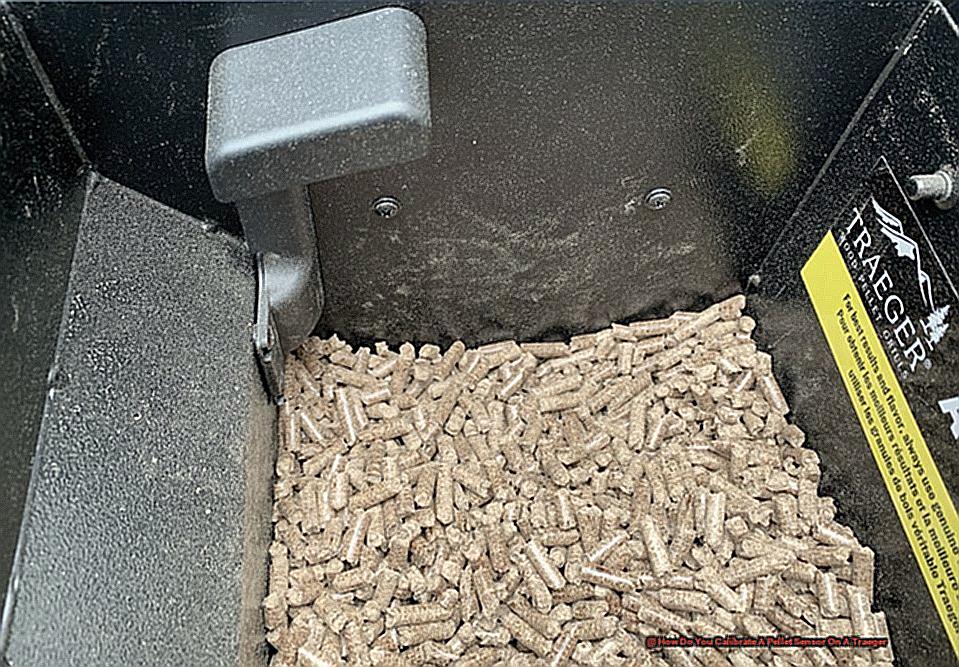
Remove the hopper cover and ensure there are no pellets in the hopper. If there are, remove them and set them aside. It’s crucial to have an empty hopper before proceeding to the next step.
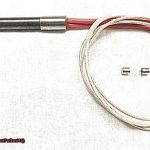
Step 2: Remove the Sensor
Gently remove the wire from the pellet sensor and set it aside. Use a small Phillips head screwdriver to remove the four screws that hold the sensor in place. Carefully remove the sensor from its housing and inspect it for any damage or wear.
Step 3: Calibrate the Sensor
To calibrate the pellet sensor, you’ll need a small weight that weighs approximately 1 oz (28 grams). Place the weight on top of the sensor and reattach the wire. Plug in your Traeger grill and allow it to warm up for at least ten minutes before proceeding.
Once your grill has warmed up, navigate to the “Pellet Sensor Calibration” option on your control panel. This option may be located under “Settings” or “Maintenance,” depending on your model of Traeger grill. Follow the on-screen instructions to complete the calibration process.
During the calibration process, your grill will measure how much weight is on the sensor and adjust the feed rate accordingly. Once the calibration is complete, remove the weight from the sensor and replace it with pellets. Your Traeger grill should now be calibrated and ready to use.
Congratulations. You’ve successfully calibrated your pellet sensor like a pro. Having a well-calibrated pellet sensor is essential for maintaining a steady temperature and producing evenly cooked meat. So, get ready to impress your guests with perfectly grilled meals every time.
Adjusting the Position of the Pellet Sensor
The solution might be as simple as adjusting the position of your pellet sensor. This tiny component plays a crucial role in monitoring the amount of pellets in the hopper, ensuring that your grill has enough fuel to function properly. If the sensor isn’t calibrated correctly, it can throw off the entire cooking process.
Luckily, adjusting the position of the pellet sensor is an easy DIY task. Here’s what you need to do:
- Locate the sensor inside the hopper. It’s typically near the bottom and has a wire and connector.
- Loosen the two screws that secure the sensor in place.
- Slide the sensor up or down until it’s about 1/4 inch above the pellets.
- Tighten the screws back in place once you’ve adjusted the position of the sensor.
There are a few things to keep in mind before you start grilling away. If you’ve just filled your hopper with pellets, give it a few minutes for the sensor to accurately reflect the new level of pellets. And if you frequently switch between different types of pellets, adjust the position of your sensor accordingly to account for variations in shape and size.
Resetting the Controller
No worries, resetting the controller might just be the solution you need. In this article, we’ll explore the process of resetting the controller on your Traeger grill, its effects, and some valuable tips to keep in mind.
Firstly, let’s ensure safety. Turn off the grill and unplug it from the power source before proceeding. Afterward, locate the controller and press and hold the power button for 10 seconds. This simple step will reset the controller and clear any previous settings that may have been affecting the pellet sensor’s accuracy.
Bear in mind that resetting the controller will delete any previous temperature settings. So, before hitting that reset button, take note of your preferred temperature settings to avoid any inconvenience later on. Also, if you’ve customized your grill’s settings, like changing display language or setting a timer, they will be deleted during the reset process as well. Don’t forget to take note of these settings too.
Now that you’ve successfully reset your controller, plug in your Traeger grill and turn it on. The controller will start up as if it were brand new. You can now begin calibrating the pellet sensor and adjusting its position to about 1/4 inch above the pellets. Give it a few minutes to accurately reflect the new level of pellets if you’ve just filled the hopper or adjust it accordingly if you switch between different types of pellets.
Resetting the controller is an essential step in calibrating the pellet sensor on your Traeger grill. By doing so, you ensure that your grill functions correctly and precisely detects the amount of pellets in the hopper. Happy grilling.
Testing the Temperature Control System
The key to achieving mouthwatering meals every time is a well-calibrated temperature control system. But how can you be sure that your Traeger grill’s temperature control system is up to par? In this article, we’ll walk you through the process of testing each component to ensure optimal performance.
Let’s start by breaking down the temperature control system into its three essential components: the temperature probe, controller, and fan. Each of these parts plays a critical role in regulating the temperature in your grill.
First up, the temperature probe. Take it out of the grill and insert it into a cup of boiling water. The probe should read 212°F (100°C) at sea level. If it doesn’t, you may need to adjust its calibration or replace it entirely.
Next, let’s check the controller. Turn on your grill and set it to a specific temperature. Watch the controller closely to ensure that it’s maintaining the desired temperature. If not, you may need to adjust its calibration to bring everything back on track.
Finally, let’s move on to the fan. The fan regulates the oxygen levels in your grill, which affects the temperature. Listen for any unusual noises while your grill is running and make sure the fan is running smoothly without any rattling.
By testing each component of your Traeger grill’s temperature control system, you can achieve consistent results every time you fire up your grill. Say goodbye to overcooked or undercooked meats and hello to perfect grilling every time.
Troubleshooting Tips for Accurate Temperature Readings
Grilling on a Traeger is all about achieving perfectly cooked meals, and accurate temperature readings are essential to making that happen. However, if your pellet sensor is not calibrated correctly, you may end up with undercooked or overcooked food. Here are some troubleshooting tips for ensuring that your Traeger grill is giving you accurate temperature readings every time.
Properly Install the Pellet Sensor and Check Pellets
Make sure that the pellet sensor is properly installed and connected to the grill’s control panel. If it’s loose or not properly attached, it may not be able to accurately measure the temperature of the grill. Additionally, check that the pellets in the hopper are dry and free from any debris or dust. Wet or dirty pellets can cause the pellet sensor to malfunction, leading to inaccurate temperature readings.
Calibrate the Pellet Sensor
If the above steps do not solve the issue, it may be necessary to calibrate the pellet sensor. To do this, start by preheating your grill to 350 degrees Fahrenheit. Once heated, insert a meat probe into the center of the grill grates and wait for it to stabilize at the preheated temperature. Next, insert a second meat probe into the center of the grill grates and set it to read ambient temperature. Wait for this probe to also stabilize at 350 degrees Fahrenheit. Compare the readings of both probes. If they are the same, your pellet sensor is calibrated correctly. If they differ by more than 10 degrees Fahrenheit, adjust the calibration of your pellet sensor.
Check Temperature Probe Placement
Make sure that the temperature probe is placed in the center of the grill grate, away from any hot spots or direct heat sources. If it’s too close to a hot spot, it will give inaccurate readings.
Clean the Temperature Probe and Check Connection
Over time, the temperature probe can become dirty, which can affect its accuracy. Use a soft cloth and some rubbing alcohol to wipe it down gently. Additionally, check the connection between the temperature probe and the controller. Make sure that the connection is secure. If it becomes loose, it can cause inaccurate readings.
Check for Obstructions and Pellet Quality
Sometimes debris or food particles can get stuck in the fan or auger, which can affect airflow and temperature control. Check for any obstructions and clean them out if necessary. Lastly, check the pellets.
If you’re using old or low-quality pellets, they may not burn evenly, which can affect temperature control. Make sure you’re using high-quality pellets that are dry and stored properly.
Conclusion
In the world of grilling, precision is key. And when it comes to Traeger grills, calibrating your pellet sensor is a crucial step in achieving that perfect cook every time. A well-calibrated pellet sensor ensures that the temperature remains consistent and accurate, preventing any mishaps such as uneven heating or fires.
Fortunately, calibrating your pellet sensor is a relatively simple process that can be done in just a few steps. First, ensure you have all the necessary tools for calibration – including gloves, pliers or tweezers, a digital thermometer and a small screwdriver. Then adjust the position of the pellet sensor to around 1/4 inch above the pellets and reset the controller by holding down the power button for 10 seconds.
But calibrating your pellet sensor isn’t the only step you need to take to ensure optimal performance from your Traeger grill’s temperature control system. Regular testing of each component is also essential. Troubleshooting tips include checking pellets for debris or dust, properly installing the pellet sensor, placing the temperature probe away from hot spots or direct heat sources and cleaning it regularly with rubbing alcohol.
By following these expert tips and performing regular checks on your Traeger grill’s temperature control system, you can enjoy perfectly grilled meals every time without any frustration or disappointment.