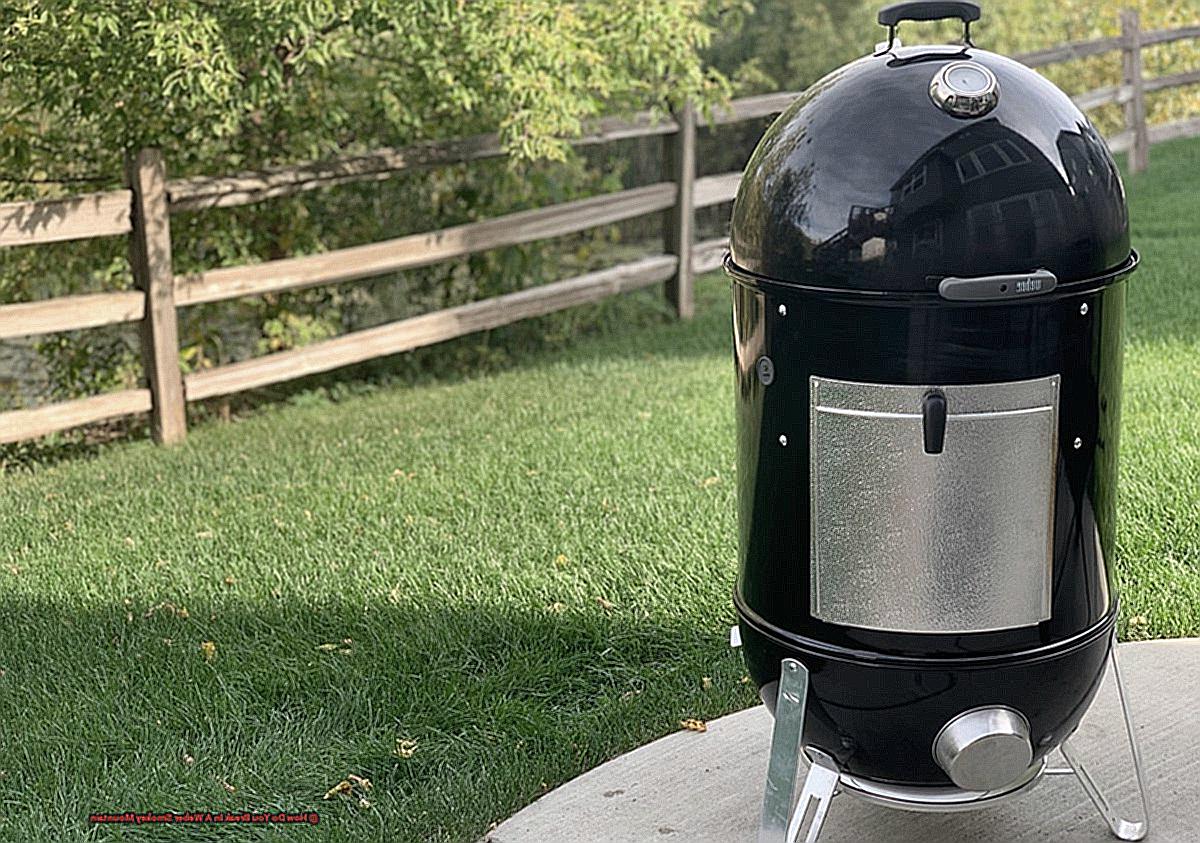
Get ready to dive into the world of the Weber Smokey Mountain. This iconic smoker is renowned for producing mouthwatering, melt-in-your-mouth meats.
But before you achieve BBQ greatness, breaking in your Weber Smokey Mountain is a must. Often overlooked, this step ensures optimal performance and flavor.
Get ready to unlock a world of smoky, savory goodness that will leave your taste buds begging for more.
Contents
Thoroughly Cleaning the Smoker
Achieving mouthwatering, flavorful smoked meats requires a clean and well-maintained smoker. Thoroughly cleaning and seasoning your Weber Smokey Mountain smoker is the secret to creating a safe cooking environment and a non-stick surface for better results. In this guide, we’ll walk you through the steps involved in ensuring your smoker is thoroughly cleaned before its first use.
Step 1: Remove and Clean the Components
Begin by taking apart your smoker and removing all the components, such as the grates, water pan, and charcoal grate. Give them a thorough wash with warm soapy water to eliminate any dirt or debris. Rinse them meticulously to remove any lingering soap residue.
Step 2: Scrub the Interior of the Smoker
Now it’s time to tackle the buildup or residue on the walls, lid, and bottom of the smoker. Use a brush or scrubber along with a mixture of warm water and mild dish soap to scrub gently but firmly. Ensure all surfaces are thoroughly cleaned.
Step 3: Rinse Thoroughly
After scrubbing, rinse the interior of the smoker thoroughly to remove any soap residue. Either use a hose or fill the smoker with clean water, pouring it out several times until the water runs clear.
Step 4: Season Your Smoker
To protect against rusting and create a non-stick surface, it’s essential to season your smoker before its first use. Apply a light coat of cooking oil, like vegetable or canola oil, to all interior surfaces using a brush or paper towel. Be sure to cover every area, including the walls, lid, and bottom.
Step 5: Preheat and Smoke
Next, preheat your smoker to approximately 275°F (135°C) for about an hour. During this time, you may notice smoke and an odor, which is normal and helps remove any lingering manufacturing smells. The oil will bond with the metal, forming a non-stick surface.
Step 6: Cool Down and Start Cooking
Once the seasoning process is complete, allow your smoker to cool down completely. It is now ready for its first use. Remember to follow the manufacturer’s instructions regarding cooking temperature and smoking time.
Maintaining Your Smoker:
After each use, it’s crucial to perform regular cleaning and maintenance to keep your Weber Smokey Mountain in optimal condition. This includes removing ashes and debris, cleaning the grates, and wiping down the interior surfaces. By consistently following these steps, you’ll ensure that your smoker continues to deliver exceptional results for years to come.
Seasoning the Smoker with Cooking Oil
Then it’s time to unlock the full potential of your Weber Smokey Mountain smoker by seasoning it with cooking oil. Seasoning your smoker is a crucial step in preparing it for use, as it creates a protective shield on the interior surfaces, shielding against rust and ensuring exceptional performance.
But don’t worry, the process is as easy as 1-2-Let’s dive into the steps:
- Prep the Smoker: Start by giving your smoker a thorough wipe-down with a clean cloth or paper towel, removing any lingering dust or debris. Ensure that every nook and cranny is dry before proceeding to the next step.
- Select the Right Oil: Opt for a cooking oil with a high smoke point, like vegetable oil, canola oil, or peanut oil. These oils can handle scorching temperatures without burning or imparting any unwanted flavors, making them perfect for seasoning your smoker.
- Apply the Oil: Pour a small amount of oil onto a fresh cloth or paper towel. Begin rubbing the oil onto all the interior surfaces of your smoker—the cooking grates, water pan, and charcoal grate. Make sure to coat each area evenly, but avoid going overboard as excessive oil can lead to excess smoke during the seasoning process.
Now that we’ve covered the basics, let’s move on to some additional tips and tricks for achieving optimal results.
- Ignite the Fire: Light up a small fire using either charcoal briquettes or wood chunks. Allow the fire to blaze for approximately 2-3 hours, maintaining a steady temperature around 225-250°F (107-121°C). This will effectively bond the oil to the metal, establishing that coveted protective layer.
- Embrace Ventilation: Don’t forget to keep your vents partially open throughout the seasoning process to facilitate proper airflow. This prevents any moisture or condensation from accumulating inside the smoker, safeguarding its longevity and performance.
- Cool Down and Clean Up: Once the designated time has elapsed, extinguish the fire and let your smoker cool down completely. Once cooled, grab a clean cloth or paper towel and wipe away any lingering oil residue.
- Repeat for Maximum Impact: For optimal results, it’s advisable to repeat the seasoning process at least one more time before using your Weber Smokey Mountain for cooking. This ensures that the protective layer is fully formed and primed to endure high heat and prolonged usage.
Keep in mind that seasoning your smoker is not a one-and-done affair. Over time, that protective layer may fade and require replenishment. Make it a habit to season your smoker periodically, especially if it has been stored for an extended period or exposed to harsh weather conditions.
Firing Up the Smoker to Season
Before you dive into a world of mouthwatering smoked dishes, there’s an important step you must take – seasoning your smoker. Don’t worry, it’s not as complicated as it sounds, and I’m here to guide you through the process.
First things first, grab some charcoal briquettes. They’re like the reliable sidekick to your smoker. Fill up the charcoal chamber and arrange them in a pyramid shape, allowing room for that all-important airflow. Now, it’s time to add some flavor to the mix – wood chunks or chips. Hickory, mesquite, apple, or cherry wood are popular choices, depending on your desired flavor profile.
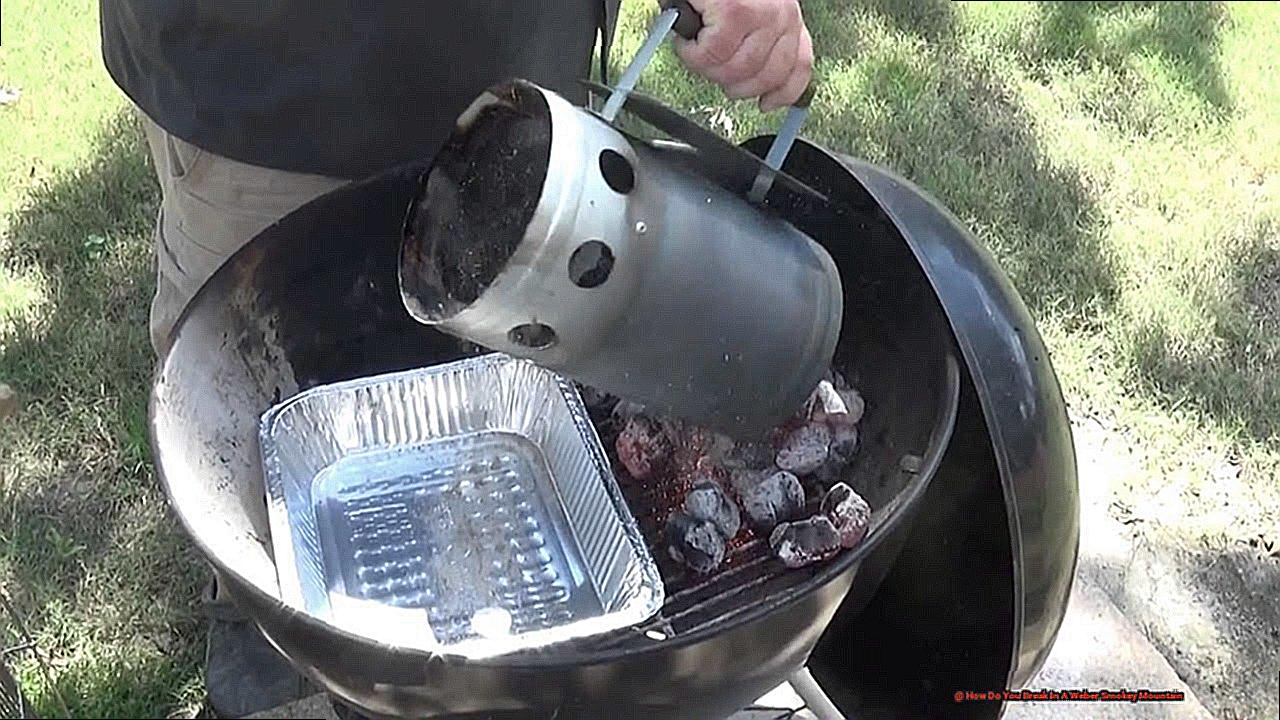
Before you light the charcoal, make sure all vents are wide open. This ensures proper airflow and temperature regulation inside the smoker. Now, ignite the charcoal using a chimney starter or lighter cubes. Wait patiently until those coals are covered in a beautiful layer of gray ash. Ah, the sweet smell of readiness.
Next comes the delicate part – transferring those hot coals to the charcoal chamber. Tongs or a heat-resistant glove will be your best friends here. Be gentle and don’t spill any hot coals or ashes. Safety first.
Close the lid of your Weber Smokey Mountain and adjust the vents for a consistent temperature. We recommend keeping it around 225°F (107°C) during seasoning. Let your smoker run at this temperature for about 2-3 hours. This allows any manufacturing residues, oils, or other substances to burn off, ensuring a clean and flavorful cooking environment.
As your smoker does its magic, you may notice wisps of smoke escaping from various points. Don’t panic – this is all part of the seasoning process. It’s like your smoker’s way of stretching its legs and getting ready for the delicious journey ahead.
After a few hours, it’s time to unveil your seasoned masterpiece. Carefully open the lid and take a look at those interior surfaces. They should appear slightly darkened and have a glossy sheen. This means your smoker has been properly seasoned and is ready to unleash its full potential.
Remember, seasoning your Weber Smokey Mountain is a one-time process. You don’t need to repeat it every time you fire up your smoker. However, regular cleaning and maintenance are key to ensuring optimal performance and longevity.
Maintaining Consistent Temperature During Seasoning
Achieving the perfect seasoning for your Weber Smokey Mountain grill requires maintaining a consistent temperature throughout the process. This ensures even heat distribution and prevents any hot spots that could affect the performance of your smoker. Let’s delve into the details of how to maintain this crucial consistency.
The first step is to understand the importance of air intake and exhaust control. These vents act as the lungs of your smoker, regulating the airflow and subsequently the temperature inside. During seasoning, it’s best to keep these vents partially open to ensure a steady supply of oxygen for a consistent temperature.
When it comes to fuel, charcoal briquettes are your best bet. They provide a more controlled and stable heat source compared to lump charcoal, which tends to burn hotter and faster. Using charcoal briquettes helps maintain a consistent temperature throughout the seasoning process.
Monitoring the temperature inside your smoker is essential for making any necessary adjustments. Invest in a reliable thermometer and keep an eye on the temperature throughout seasoning. Avoid constantly opening the lid, as this can result in heat loss and disrupt the cooking environment you’re trying to create.
In terms of placement, find a spot for your seasoned smoker away from strong winds or extreme weather conditions. Direct sunlight or drafts can affect temperature control, so choose a cozy spot that minimizes exposure to these elements.
Now, here’s a secret weapon – water pans. These pans play a crucial role in regulating temperature during seasoning. Placing a filled water pan between the charcoal and cooking grate acts as a heat sink, stabilizing and distributing heat evenly throughout your smoker. Additionally, the water creates a moist cooking environment that enhances the seasoning process.
Adding Wood Chunks or Chips for Smoke Flavor
Prepare to embark on a thrilling journey of flavor as we explore the art of adding wood chunks or chips for that irresistible smoky taste on your beloved Weber Smokey Mountain. Get ready to tantalize your taste buds and impress your friends and family with mouthwatering dishes infused with the rich essence of smoke.
Unleashing Nature’s Best: Wood Chunks vs. Wood Chips
When it comes to choosing the perfect wood for smoking, you have two enticing options: wood chunks and wood chips. Picture this: wood chunks are rugged, slow-burning warriors that release their smoky goodness gradually, ensuring a consistent flavor throughout those long smoking sessions. On the other hand, wood chips are the quick-burst artists, igniting rapidly to provide an intense infusion of smoke flavor ideal for shorter grilling endeavors.
Soaked to Perfection: The Art of Preparing Wood
Before you add those luscious wood chunks or chips to your Weber Smokey Mountain, there’s a crucial step that should not be overlooked – soaking them in water for at least 30 minutes. This simple act prevents the wood from burning too swiftly, guaranteeing a steady release of soul-stirring smoke without prematurely transforming into lifeless ash. By indulging in this essential prelude, you’ll achieve the elusive balance between sublime smokiness and culinary perfection.
Placement and Distribution: Crafting a Symphony of Smoke
With your soaked wood at the ready, it’s time to orchestrate a symphony of flavors within your smoker. Carefully spread out the wood chunks or chips on top of the charcoal, ensuring an even distribution that will envelop your food in a cocoon of captivating smoke. Take heed, though, for too much wood can overpower the delicate harmony of flavors. Begin with a modest amount and let your tastebuds guide you as you fine-tune the intensity of the smoke.
A Dance of Flavors: Embrace the Wood Variety
As you explore the realm of wood chunks and chips, don’t be afraid to embrace the allure of variety. Each type of wood boasts its own unique character and flavor profile. Allow hickory’s robust elegance to elevate your beef to new heights, while mesquite’s audacious spirit infuses a tantalizing zeal into your grilling endeavors. For poultry and pork, let applewood or cherry wood weave their fruity symphony through each succulent bite. The possibilities are endless, limited only by your culinary imagination.
The Watchful Eye: Maintaining Optimal Smoke Levels
Throughout your grilling odyssey, keep a watchful eye on the ethereal presence of smoke. Should you notice its wisps thinning out, fear not. Simply introduce more soaked wood chunks or chips to replenish the captivating dance of flavors within your Weber Smokey Mountain. Remember, it is in this delicate balance that true artistry lies.
Monitoring Temperature Throughout the Process
Today, we embark on a journey into the world of temperature control throughout the process of breaking in a Weber Smokey Mountain. As grill masters, we know that achieving that mouth-watering smoky flavor in our grilled dishes is an art, and temperature monitoring is the brushstroke that brings it all together. So, let’s don our aprons and explore why monitoring temperature is crucial for grilling success on your Weber Smokey Mountain.
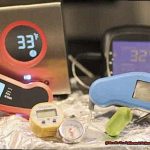
The Role of Thermometers:
Thermometers are the secret weapon in the arsenal of any grilling aficionado. Equipping yourself with a reliable probe thermometer, digital thermometer, or wireless thermometer allows you to accurately measure the internal temperature of your smoker. Consistency is key here – trust your thermometer.
Placement Matters:
To get an accurate reading of the cooking temperature, place the thermometer probe about 2 inches above the cooking grate. This ensures that you’re measuring the ambient temperature inside the smoker rather than just focusing on the meat. By doing so, you’ll be able to make necessary adjustments to maintain a consistent heat level throughout.
Taming Temperature Fluctuations:
As you break in your Weber Smokey Mountain, expect some initial temperature fluctuations as it adapts to its new environment. Regularly monitoring and making adjustments are essential to keep the temperature steady. The vents on your smoker are your best friends here – they allow you to control airflow and regulate heat effectively.
Understanding Ideal Temperature Ranges:
Different meats require different smoking temperatures for optimal results. For example, low and slow cooking at around 225°F (107°C) is ideal for succulent pork ribs, while higher temperatures around 275°F (135°C) may work better for poultry. Knowing these ideal ranges will help you achieve tender and flavorful results every time.
Duration of the Seasoning Process
The duration of the seasoning process is a crucial step in breaking in your Weber Smokey Mountain smoker and ensuring optimal performance. While personal preference and the specific model of your smoker can influence the duration, it is generally recommended to season the smoker for at least 2-3 hours. Trust me, it’s worth the time investment.
To begin the seasoning process, start by giving your smoker a thorough cleaning. Remove any stickers or protective coatings, and wash the grates and water pan with warm soapy water. This ensures that any manufacturing residues are removed and you’re starting with a clean slate.
Once your smoker is clean, it’s time to coat the interior surfaces with a thin layer of cooking oil or spray. This not only prevents rust but also promotes better heat distribution. Don’t forget to coat the grates and water pan as well.
Now, it’s time to fire up your smoker and preheat it to a temperature of around 225°F (107°C). Maintain this temperature throughout the seasoning process by using charcoal briquettes or wood chunks as fuel.
As you begin the seasoning process, keep an eye on the smoke. Initially, you may see some white smoke as any remaining manufacturing residues burn off. However, once the smoke turns blue or almost invisible, it’s a sign that the seasoning process is complete.
To enhance the seasoning process and add flavorful smoke, consider adding wood chunks or chips on top of the charcoal while you’re seasoning your smoker. This will infuse your future grilling sessions with that extra smoky touch.
After the initial seasoning, it’s a good idea to repeat the process at least once before using your Weber Smokey Mountain smoker for cooking. This ensures that the non-stick surface is well-established and any remaining residues are eliminated.
Remember, the seasoning process is just the beginning of your journey with your Weber Smokey Mountain smoker. As you continue to use and maintain it, you’ll develop your own techniques and preferences for achieving the perfect smoky flavors.
Cool Down and Brush off Loose Debris After Seasoning
Now that you’ve enhanced the flavor and prepared your grill for countless delicious meals, it’s important to follow the next step: cooling down and brushing off any loose debris that may have accumulated during the process. This not only ensures a clean and well-maintained grill but also guarantees that your future cooking sessions are free from unwanted flavors or flare-ups. So, grab your soft-bristle brush or grill brush and let’s dive into this essential post-seasoning task.
Allow the Grill to Cool Down Naturally:
After hours of smoking and seasoning, your grill will be hot to the touch. It’s crucial to let it cool down naturally rather than attempting to speed up the process with water or other cooling methods. Rushing this step can potentially damage the grill, so exercise patience and give it the time it requires to reach a safe temperature.
Brush off Loose Debris:
While waiting for your grill to cool down, take advantage of this time to brush off any loose debris that may have accumulated during the seasoning process. Using a soft-bristle brush or a grill brush, gently remove any particles from the grates and interior surfaces of the grill. Be thorough in your approach, ensuring that all loose debris is completely eliminated.
Keep Your Grill Clean:
Brushing off loose debris after seasoning is an integral part of maintaining a clean and functional grill. Not only does it improve the overall aesthetics of your smoker, but it also helps prevent potential flare-ups during future cooking sessions. By keeping your grill clean, you can ensure that each dish you prepare on it is free from unwanted flavors or contaminants.
Ready for the Next Adventure:
Once your Weber Smokey Mountain has cooled down completely and all loose debris has been brushed off, it’s now ready for its next grilling adventure. Whether you’re planning to smoke some mouthwatering ribs, roast a succulent whole chicken, or even try your hand at homemade pizza, rest assured that your freshly seasoned and cleaned grill is primed and ready to bring out the best flavors in your food.
Conclusion
Breaking in a Weber Smokey Mountain is an essential step to ensure optimal performance and delicious results. To achieve this, start by assembling the smoker according to the manufacturer’s instructions. Then, coat the interior surfaces with cooking oil or spray to create a protective layer. Next, light a small fire using charcoal and let it burn for about two hours at a moderate temperature. This process helps season the smoker and remove any manufacturing residues. During this time, you might notice some smoke or odor, but don’t worry – it’s all part of the breaking-in process.
Once the initial burn is complete, it’s time to prepare your first cook. Choose a simple recipe that doesn’t require too much attention so you can focus on getting familiar with your new Weber Smokey Mountain. Maintain a consistent temperature throughout the cook by adjusting the vents accordingly. This will help further season the smoker and enhance its flavor-infusing abilities.
As you continue using your Weber Smokey Mountain, you’ll notice improvements in its performance and taste over time. Each cook adds another layer of seasoning to the smoker, enhancing its ability to produce mouthwatering barbecue delights.
Remember, breaking in a Weber Smokey Mountain is not just about following steps; it’s about embarking on a journey towards becoming a master of smoked cuisine. So embrace the process, experiment with different recipes, and savor every moment as you unlock the full potential of your trusty Weber Smokey Mountain.
In conclusion, breaking in a Weber Smokey Mountain involves assembling it properly, coating it with oil or spray for protection, conducting an initial burn to season and remove residues, and then starting your first cook while maintaining consistent temperatures. With each use, your Weber Smokey Mountain will become better seasoned and deliver even more flavorful results.