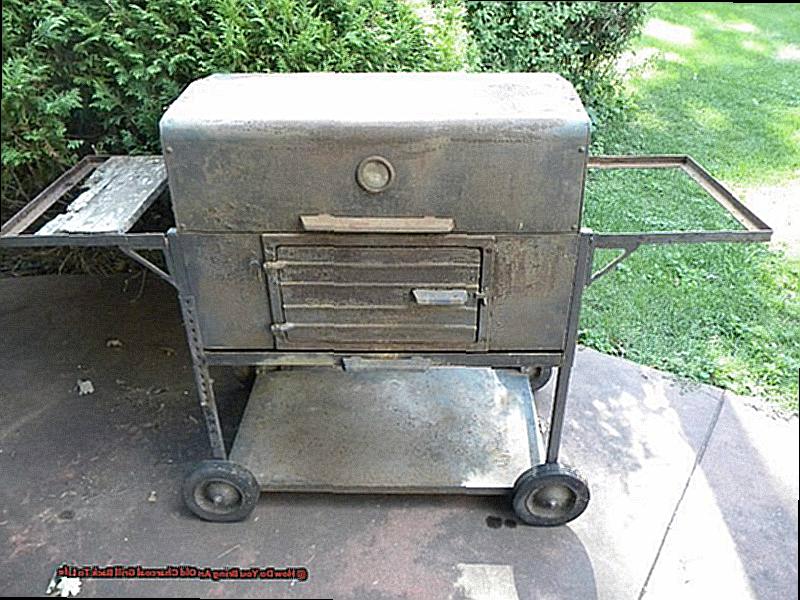
Is your old charcoal grill looking like a rusted relic in your backyard? Are you feeling envious of your neighbor’s shiny new grill? Before you splurge on an expensive upgrade, consider reviving your old grill.
Reviving an old charcoal grill may seem daunting, but with some elbow grease and expertise, it can look and function like new. Not only is it budget-friendly, but it’s also eco-friendly by reducing waste.
In this blog post, we’ll guide you through the step-by-step process of bringing your old charcoal grill back to life. From inspecting and cleaning the grill to replacing damaged parts, we’ll cover everything necessary to get it in tip-top shape. We’ll also share insider tips and tricks to keep your grill in prime condition for years to come.
So, if you’re ready to breathe new life into that old grill gathering dust in the corner, let’s get started.
Contents
Cleaning the Grill
Not only does this ensure that your food tastes great, but it also guarantees safe grilling. Here are some steps to follow:
Step 1: Clear the Debris
Removing all the ashes and debris from the grill is the first step. Use a scraper or wire brush to scrape off any built-up ash and debris from the bottom of the grill. This will help you see what needs to be cleaned next.
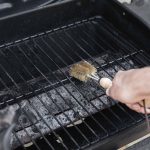
Step 2: Scrub the Grates
Next, take out the grates and soak them in hot soapy water. A grill brush will help scrub away any grease and grime from the grates. Rinse them thoroughly with water and dry them completely before placing them back in the grill.
Step 3: Get a Specialized Grill Cleaner
For stubborn grease and grime, use a specialized grill cleaner that is safe for your type of grill. Follow the manufacturer’s instructions carefully, let it sit for a few minutes, and then scrub it off with a wire brush or scraper. Rinse everything thoroughly with water and dry it completely before putting it all back together.
Step 4: Clean the Inside
Don’t forget to clean the inside walls of the grill too. Wipe them down with a damp cloth or sponge and warm soapy water. A non-abrasive cleaner suitable for your type of grill can handle persistent stains or buildup. Avoid harsh chemicals or abrasive materials that can damage your grill’s surface.
Step 5: Tackle the Outside
Lastly, clean the outside of your grill using warm soapy water. A cloth or sponge will work just fine for basic dirt and stains. However, for tougher stains or dirt, specialized outdoor grill cleaner is recommended.
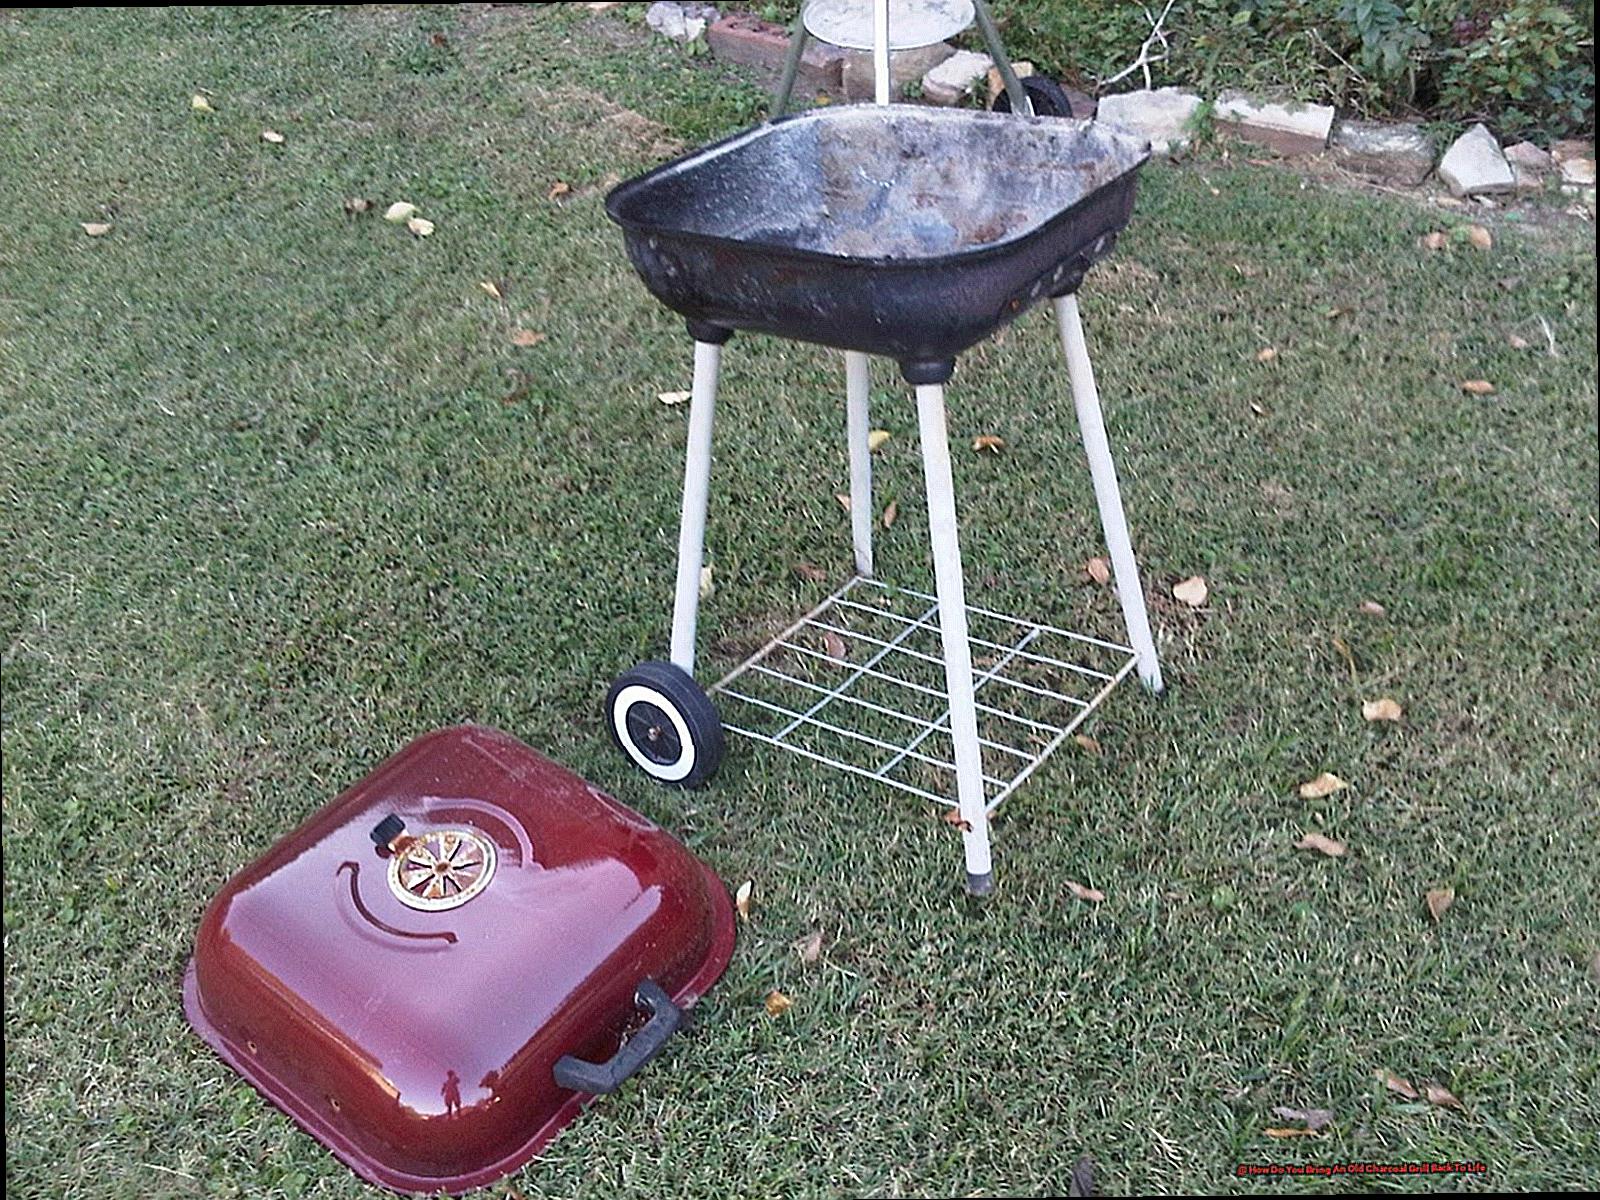
Inspecting the Grill for Damage
Before you start scrubbing and cleaning, it’s crucial to inspect the grill for any damage that may have occurred over time. As an expert in inspecting grills for damage, I’m here to guide you through the process.
First things first, examine the exterior of the grill for any rust or cracks in the metal. Rust can be removed with a wire brush or sandpaper, but if it’s too corroded, it may need a replacement. Cracks in the metal are not only unsightly but can lead to dangerous situations like heat loss. Therefore, they must be addressed immediately.
Moving on to the interior, check for signs of damage or wear and tear. Look out for rust, holes in the grates, and any loose or broken parts. Rust can be removed using a wire brush, but if it has eaten through the metal, it may require a replacement. If there are holes in the grates, they can be patched up using aluminum foil or replaced entirely. Loose or broken parts should be tightened or replaced before using the grill.
Don’t forget to inspect the ash catcher and ash pan for any damage or holes. The ash catcher should fit snugly into place to prevent ash from falling out of the grill. The ash pan should also fit securely to avoid any hot ash from spilling.
To ensure even cooking, check all of the grill’s vents and dampers to ensure they’re working correctly. These vents control airflow, which affects the temperature of the grill.
In summary, here is a checklist of what to look out for when inspecting your old charcoal grill:
- Exterior: Rust, cracks
- Interior: Rust, holes in grates, loose or broken parts
- Ash catcher and ash pan: Damage or holes
- Vents and dampers: Working correctly
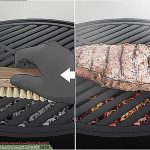
Re-Seasoning the Grates
Luckily, re-seasoning the grates of your old charcoal grill is the solution you need to elevate your grilling game and make your food taste better than ever before.
The process of re-seasoning involves removing any rust or debris and applying a layer of oil to create a non-stick surface. Here’s how you can do it:
Step 1: Inspect
Before you begin, take a close look at your grill for any signs of damage or wear and tear. Address any issues before re-seasoning the grates to ensure they last longer.
Step 2: Scrub
Remove the grates from the grill and scrub them with a wire brush to remove any rust or debris. If they are especially dirty, soak them in a solution of equal parts vinegar and water for an hour before scrubbing.
Step 3: Dry
Make sure to rinse the grates with water and dry them thoroughly. It’s important to ensure they are completely dry before moving on to the next step.
Step 4: Oil Up
Apply a thin layer of oil to the grates using a paper towel or brush. Any type of oil will do, except for olive oil as it has a low smoke point.
Step 5: Heat Things Up
Heat the grill to high heat for about 20 minutes to allow the oil to bond with the grates. This will create a non-stick surface that will make cooking easier and prevent food from sticking.
Step 6: Maintenance is Key
After seasoning the grates, it’s important to maintain them regularly by cleaning them after each use and re-applying oil as needed. This ensures that your grill grates can last for years and provide delicious meals for many summers to come.
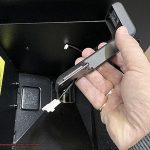
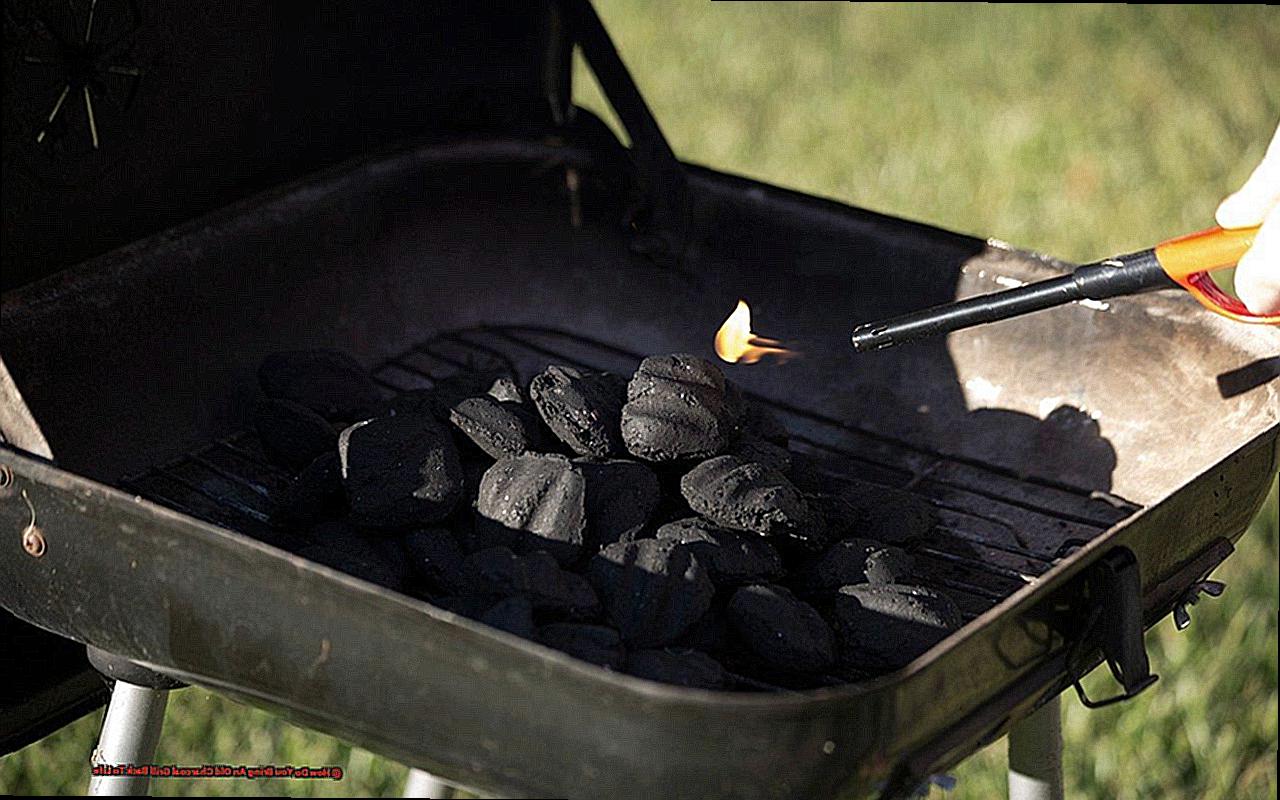
Lighting Up the Grill
Before you do, let’s review the steps and safety precautions to ensure a successful grilling experience.
To start, safety should always be your top priority. Before igniting the grill, inspect it thoroughly to ensure it’s in good condition and free from any debris or damage that could pose a potential hazard. Once you’ve confirmed it’s safe to use, it’s time to gather your supplies.
You’ll need charcoal, lighter fluid or a chimney starter, a long-handled lighter or matches, grilling gloves, and a wire brush to clean the grate before and after cooking. Now that you have everything you need, let’s light that fire.
There are two options for lighting the charcoal: lighter fluid or a chimney starter. If you choose lighter fluid, carefully squirt a small amount onto the charcoal and let it soak in for a few minutes before lighting with a long-handled lighter or matches. Be sure to stand back and avoid getting too close to the flames.
Alternatively, a chimney starter is an excellent option. Fill it with charcoal and light a piece of newspaper underneath. The heat will ignite the charcoal, which will start burning and creating heat. Once the coals are hot and glowing, carefully pour them into the grill.
Now that your grill is lit and ready to go, keep an eye on the temperature and adjust the vents as needed to maintain an even cooking temperature. Remember never to leave a lit grill unattended.
Preheating the Grill
Before you start sizzling those steaks, take a moment to properly preheat your grill. Preheating is a crucial step in the grilling process that helps ensure your food cooks evenly and prevents any residual food, grease, or rust from sticking to the grill grates.
Here are the steps to preheat your old charcoal grill:
- Step 1: Open all the vents and remove the cooking grates. This allows for maximum airflow and makes it easier to spread the charcoal throughout the grill.
- Step 2: Pour a generous amount of charcoal into the bottom of the grill and arrange it in a pyramid or mound shape. This will help the charcoal light evenly and quickly.
- Step 3: Use a chimney starter or lighter fluid to light the charcoal and let it burn until it has turned grey and ash-covered. This typically takes about 20 minutes.
- Step 4: Once the charcoal is ready, use tongs to spread it evenly across the bottom of the grill. Make sure there are no hotspots or areas with too much charcoal.
- Step 5: Replace the cooking grates and close the lid. Allow the grill to preheat for at least 10-15 minutes or until it reaches your desired temperature. This gives the grates time to heat up and ensures that they are at the right temperature for cooking.
It’s important to note that preheating times may vary depending on the size and condition of your old charcoal grill. If you’re unsure about how long to preheat your grill, use an instant-read thermometer to check the temperature inside. A temperature of 400-450°F is ideal for most grilling recipes.
Placing Food on the Grates
If you’re wondering how to place food on the grates of an old charcoal grill, fear not. With a few simple tips and techniques, you’ll be grilling like a pro in no time.
First things first: clean and oil those grates. Use a wire brush or grill stone to scrub away any rust or debris, then apply oil using a paper towel or brush. This will prevent food from sticking and ensure easy removal once it’s cooked.
Next, consider the placement of your food to ensure even cooking. Smaller items like veggies and shrimp should be spread out across the grill, while larger items like steaks and chicken breasts should be placed in the center. Remember to leave some space between each item for proper airflow.
As you cook, keep a close eye on the temperature. Use a grill thermometer or simply pay attention to timing to make sure your food is cooking evenly. And don’t forget to flip regularly to ensure both sides are cooked to perfection.
Finally, make sure you have the right tools for the job. A pair of tongs is essential for flipping and moving food around, while a spatula will come in handy for removing food from the grates.
Tips for Proper Maintenance of Charcoal Grills
Proper maintenance can go a long way in prolonging the life of your grill and ensuring that it works efficiently every time. Here are some tips to help you maintain your charcoal grill:
Clean the Ashes
Ash buildup can cause airflow problems and make it difficult for the charcoal to burn properly. After every use, make sure to clean the ashes from the grill. Use a scoop or ash pan to remove any ash and dispose of it safely. This will not only improve the performance of your grill but also prevent any safety hazards.
Scrub the Grates
The grates on your charcoal grill are where all the magic happens. They are responsible for creating those beautiful grill marks and imparting delicious smoky flavors to your food. However, they can also be a breeding ground for bacteria and other harmful substances if not cleaned properly. Use a wire brush to scrub the grates after every use and make sure to get into all the nooks and crannies. This will not only remove leftover food particles but also prevent rust from forming.
Check the Vents
The vents on your grill allow for proper airflow and temperature control. Make sure to check and clean them regularly. Clogged vents can cause temperature control issues and affect the flavor of your food. Use a small brush or toothbrush to clean the vents and ensure that they are working properly.
Store Properly
Storing your charcoal grill properly is crucial to its longevity. When not in use, store your grill in a dry place away from moisture or rain. Cover it with a waterproof cover to protect it from the elements. This will prevent rust and prolong the life of your grill.
Replace Old Parts
Some parts of your grill, such as the grates or ash pan, may wear out over time and need to be replaced. Make sure to purchase replacement parts from a reputable supplier and follow the manufacturer’s instructions for installation. This will help ensure that your grill works properly and lasts longer.
Common Mistakes to Avoid when Using a Charcoal Grill
You’ve got your trusty charcoal grill ready to go, but before you start cooking up a storm, make sure you’re not making any of these common mistakes. These mistakes can lead to subpar results and even dangerous situations.
First off, cleaning your grill is crucial. Don’t skip this step. Remove any debris or ashes left over from previous grilling sessions. This will ensure that heat is distributed evenly and prevent potential flare-ups or fires.
When lighting your grill, don’t just douse it with lighter fluid. This can leave a nasty chemical taste on your food and result in unevenly lit coals. Instead, use a chimney starter to light your charcoal evenly without any additional chemicals.
Overcrowding the grill is another mistake to avoid. Sure, it’s tempting to cook everything at once, but this can cause the temperature to drop and result in undercooked or overcooked food. Cook in batches or invest in a larger grill if you need to feed a crowd.
After using your grill, don’t neglect it. Properly cleaning and storing it will help extend its lifespan and prevent rusting or other damage from occurring. A little bit of maintenance goes a long way in bringing an old charcoal grill back to life.
Conclusion
In conclusion, bringing an old charcoal grill back to life is a cost-effective and eco-friendly way to enjoy delicious grilled food. With a bit of know-how and some elbow grease, you can restore your grill to its former glory and get it cooking like new again.
The first step is a thorough cleaning, followed by a close inspection for any damage or wear and tear. It’s also essential to re-season the grates to ensure even cooking and prevent food from sticking.
To keep your newly revived grill in top condition, regular maintenance is key. This includes cleaning out the ashes, scrubbing the grates, checking the vents, storing it properly, and replacing any worn parts as needed.
When using a charcoal grill, there are common mistakes to avoid such as improper cleaning, using too much lighter fluid, overcrowding the grill, and neglecting post-use maintenance.
By following these steps and avoiding mistakes, you’ll be able to savor perfectly grilled meals all summer long on your revitalized old charcoal grill.