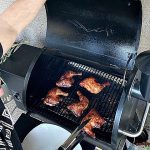
Whether you’re a BBQ fanatic or just someone who can’t resist the tantalizing aroma of smoky goodness, learning how to arrange meat in a smoker is an essential skill. Don’t worry, it’s not rocket science – but it does require some know-how to ensure your meat comes out tender and bursting with flavor.
In this article, we’re going to dive deep into the art of arranging meat in a smoker. We’ll cover everything from layering different cuts like a pro to optimizing airflow for that perfect smoke ring.
Let’s get smoking.
Contents
Utilizing a Meat Thermometer for Accurate Temperature Monitoring
When it comes to smoking meat, achieving the perfect level of doneness is essential. Nobody wants to bite into a piece of undercooked or overcooked meat that ruins the entire grilling experience. That’s where a meat thermometer comes in. This simple yet powerful tool is your secret weapon for accurate temperature monitoring in a smoker.
Why is using a meat thermometer so important? Let’s dive into the reasons:
Ensuring Food Safety:
The most critical reason to use a meat thermometer is to ensure that your meat reaches a safe internal temperature. Bacteria and pathogens can lurk within raw meat, and cooking it to the proper temperature kills these harmful microorganisms. For example, poultry should be cooked to an internal temperature of 165°F (74°C) to eliminate any potential risks.
Doneness Levels:
Different types of meat have different recommended internal temperatures for reaching various levels of doneness. Whether you prefer your steak rare, medium-rare, or well-done, using a meat thermometer allows you to achieve the perfect level of doneness every time. Say goodbye to the guesswork.
Types of Meat Thermometers:
There are several types of meat thermometers available on the market, including instant-read thermometers and leave-in thermometers. Instant-read thermometers provide quick and accurate readings but require periodic insertion into the meat during the cooking process. On the other hand, leave-in thermometers can be inserted at the beginning and left in throughout the cooking process, providing continuous monitoring without disturbing the smoker’s environment.
Proper Insertion Techniques:
To obtain accurate readings, it’s vital to insert the meat thermometer into the thickest part of the meat, away from any bones or fat. This ensures that you’re measuring the internal temperature accurately and not getting false readings from areas that may cook faster or slower.
Cleaning and Sanitizing:
To prevent cross-contamination, it’s essential to clean and sanitize your meat thermometer before and after each use. This simple step helps maintain food safety and ensures accurate temperature readings.
Digital Meat Thermometers:
The USDA recommends using a digital meat thermometer over dial or mercury-filled thermometers. Digital thermometers provide more precise readings, allowing you to monitor the internal temperature of your meat with confidence.
By utilizing a meat thermometer, you take control of your grilling experience. You can say goodbye to undercooked or overcooked meat and hello to perfectly cooked, flavorful delights. So, don’t forget to invest in a reliable meat thermometer and elevate your smoking game to new heights.
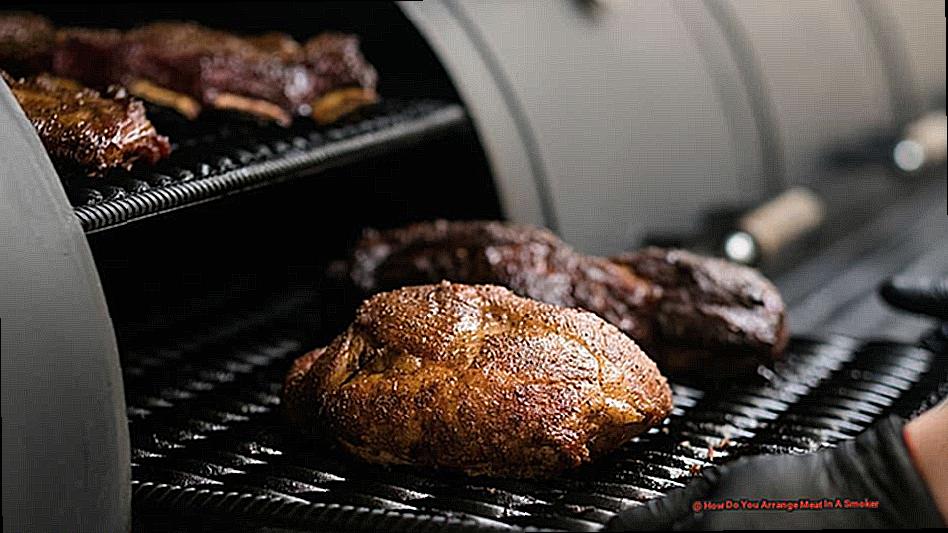
Organizing by Size and Thickness for Even Cooking
If you’re ready to take your smoking game to the next level and unlock the secrets of even cooking, then it’s time to master the art of organizing meat in your smoker. By considering the size and thickness of each piece, you can achieve mouthwatering, tender results every time. Let’s dive into the benefits of this method and discover how it can elevate your grilling experience to new heights.
Consistent Cooking Times:
Imagine sinking your teeth into a perfectly cooked steak, only to find that some pieces are overcooked while others remain raw. By organizing meat by size, you ensure a harmonious blend of flavors and textures. Grouping similar-sized cuts together allows everything to cook at the same pace, resulting in a symphony of succulence that will leave your taste buds dancing with joy.
Perfect Thickness Placement:
Thicker cuts demand more time to cook, requiring them to be positioned closer to the heat source. This strategic placement ensures they receive the intense heat necessary for a beautiful crust while retaining their tender juiciness within. Thinner cuts, like delicate fish fillets or chicken breasts, should be placed farther away to prevent drying out or overcooking, preserving their delicate flavors and textures.
Embracing Air Circulation:
Proper air circulation is the secret ingredient for even cooking in a smoker. Allowing enough space between each piece of meat ensures smoke and heat can circulate evenly throughout the cooking chamber. This attentiveness guarantees that every morsel receives its fair share of smoky love, resulting in consistent flavor and tenderness that will have your guests begging for seconds.
Denser Meats vs Delicate Meats:
Denser meats, such as beef brisket or pork shoulder, thrive when placed closer to the heat source for longer periods. The intense heat helps develop a coveted crust while maintaining succulence within. Delicate meats, like fish or chicken breasts, prefer gentler cooking, requiring placement farther away to prevent them from drying out or succumbing to overcooking too quickly. By understanding the unique needs of each type of meat, you can ensure they each reach their full flavor potential.
Say No to Flavor Cross-Contamination:
When smoking different types of meat simultaneously, it’s crucial to separate them into different sections of the smoker. This prevents any unwanted mingling of flavors and ensures that each type of meat receives its own distinct cooking conditions. With this attention to detail, you can indulge in a symphony of flavors that will tantalize your palate and leave you craving more.
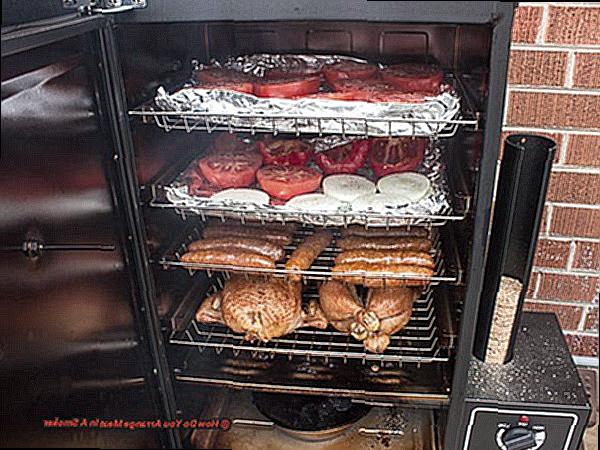
Using Racks or Hooks to Keep the Meat in Place
When it comes to smoking meat, there’s nothing worse than your perfectly marinated brisket slipping through the grates and into the fiery depths of your smoker. That’s why using racks or hooks to keep the meat in place is essential for achieving mouthwatering results. Let’s take a closer look at these two methods and see which one suits your smoking needs.
Racks are the go-to choice for many smokers, and for good reason. They often come included with the unit, providing a convenient solution for securing your meat. These racks are designed with slots or bars that allow for proper air circulation and smoke distribution. And let’s not forget about stability. Racks ensure that your meat stays put, preventing any unfortunate accidents during the cooking process. Plus, the slots or bars on the racks allow for even cooking as the smoke can penetrate from all sides.
However, when using racks, it’s important to consider the size and shape of your meat. Larger cuts may require larger racks or even multiple racks to accommodate their size. You’ll also want to leave enough space between each piece of meat to ensure proper airflow and prevent overcrowding. This will guarantee that every inch of your meat is cooked to perfection and infused with those irresistible smoky flavors.
Now let’s talk about hooks. These handy tools offer a different approach to keeping your meat in place while smoking. Hooks are particularly useful for larger cuts like whole chickens or racks of ribs. By inserting hooks through the meat, you can hang it vertically inside the smoker, creating a stunning display of succulent goodness. But hooks aren’t just for show – they have some practical advantages too.
One of the main benefits of using hooks is better smoke penetration. When your meat hangs vertically, all sides are exposed to the glorious smoke, ensuring that every bite is infused with that delectable smoky goodness. Additionally, hanging your meat helps with even cooking as heat can circulate around the entire piece, leaving no section underdone or overcooked.
However, it’s important to note that not all smokers come with hooks. If you prefer this method, you may need to purchase hooks separately. And when using hooks, be sure to properly secure and balance your meat to prevent it from swinging or touching the sides of the smoker. This can be achieved by strategically placing hooks through sturdy parts of the meat, such as bones or thicker sections.
Regardless of whether you choose racks or hooks, it’s crucial to consider the size and weight of your meat. Overloading your smoker with too much weight may affect its performance and temperature control. Always follow the manufacturer’s instructions regarding rack or hook placement in your specific smoker model. They know their equipment best and will provide guidelines for optimal meat arrangement.
Considering Fat Dripping to Prevent Flare-Ups and Excessive Smoke Production
Imagine the sizzle of your smoker, the tantalizing aroma of marinated meat, and the anticipation of a mouthwatering feast. But before you embark on your smoking adventure, let’s delve into an essential aspect that can make or break your grilling experience: fat dripping.
In this comprehensive guide, we will explore the strategies to prevent flare-ups and excessive smoke production by effectively managing fat dripping while arranging meat in a smoker.
Step 1: Trim the Fat—Aim for Perfection:
To achieve optimal results, grab a sharp knife and trim any excess fat from your meat. This not only controls fat dripping but also ensures more even cooking and enhanced smoke absorption. Strive for a thin layer of fat that adds flavor without overwhelming your taste buds.
Step 2: Drip Pans and Foil Trays—Catch That Dripping Gold:
To catch and contain dripping fat, place a drip pan or foil tray underneath your meat. These simple additions act as safety nets, ensuring no fat falls onto the heat source or coals. For an added flavor boost, fill the drip pan with water or other liquids like beer or apple juice to keep your meat moist during the smoking process.
Step 3: Harness Built-in Features—Your Smoker’s Secret Weapons:
Take advantage of your smoker’s built-in features, such as water pans or grease management systems. These ingenious additions collect drippings, preventing flare-ups and excessive smoke production. Familiarize yourself with your smoker’s specific features to maximize their effectiveness in controlling fat dripping.
Step 4: Embrace Airflow—The Breath of Flavor:
Proper airflow is paramount for regulating temperature and smoke production in your smoker. When arranging meat, create enough space between individual pieces to allow air to circulate freely. This prevents localized hot spots and guarantees even cooking throughout. Allow the aromatic smoke to dance around your meat, infusing it with delectable flavors.
Step 5: Monitor and Adjust—The Key to Flawless Results:
Vigilance is key during the smoking process. Regularly check for signs of flare-ups or excessive smoke production. If pieces are too close to each other or the heat source, reposition them strategically to prevent mishaps. By staying attentive, you can minimize fat dripping and achieve sublime results that will tantalize your taste buds.
Rotating and Rearranging the Meat for Consistent Flavor and Texture
To achieve consistent and mouth-watering results, one crucial technique is rotating and rearranging the meat in your smoker. By following these steps, you can ensure that every bite is perfectly cooked and bursting with flavors.
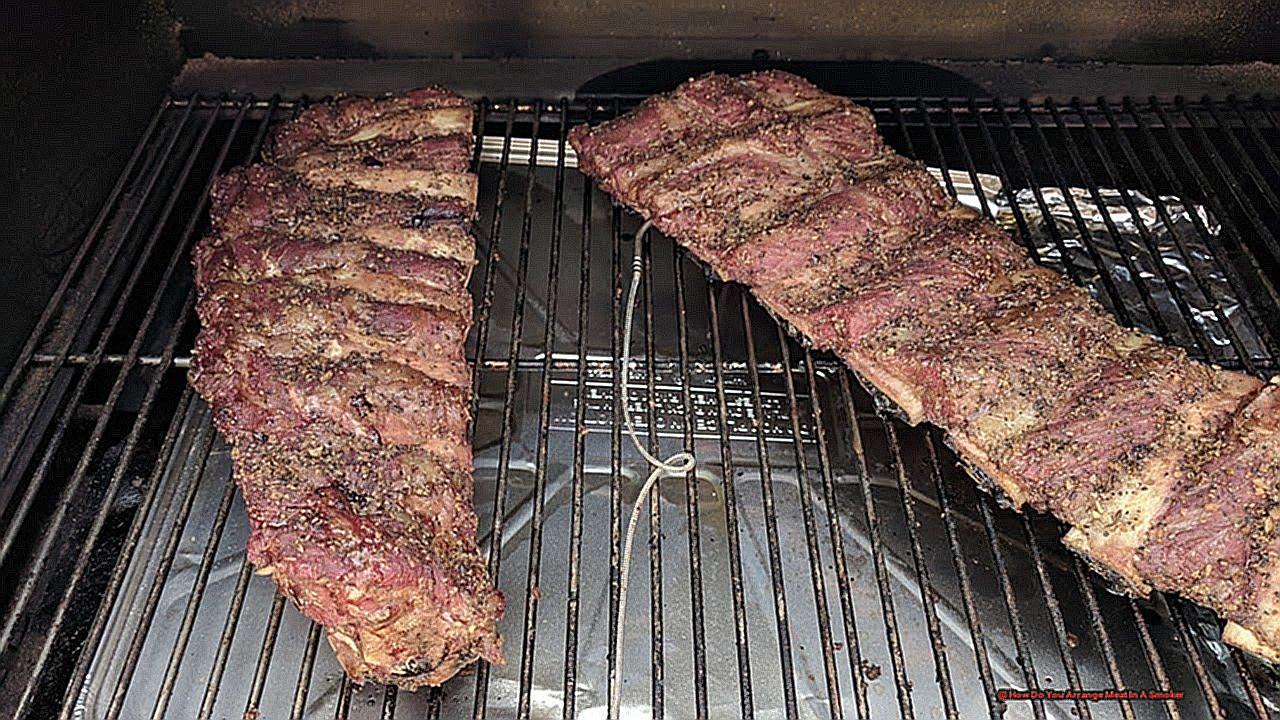
First and foremost, rotating the meat is essential for even cooking. By regularly turning the racks or flipping the cuts, you prevent any hot spots or uneven browning. This is particularly crucial when dealing with larger pieces of meat like brisket or pork shoulder.
When arranging the meat in your smoker, consider the size and thickness of the cuts. Thicker cuts should be placed closer to the heat source, while thinner cuts can be positioned further away. This ensures that all parts of the meat cook evenly, resulting in a harmonious flavor and texture.
But it’s not just about even cooking; it’s also about consistent flavor. By rotating the meat, you distribute the smoke evenly throughout the cooking process, infusing each bite with a balanced smoky goodness that will leave your taste buds dancing.
Rearranging the meat during cooking is another vital step. This prevents any parts from drying out or becoming overcooked. By swapping the position of the racks or repositioning the cuts, you ensure that all parts of your smoker are utilized equally, resulting in a well-cooked and flavorful final product.
To make this process easier and safer, I highly recommend using heat-resistant gloves or tongs when handling hot meat. Safety should always be a priority, my fellow grillers.
Now, how often should you rotate and rearrange? Well, that depends on factors such as the size and type of meat being cooked. As a general rule of thumb, experts suggest rotating the meat every hour or so during the cooking process. This helps to maintain a consistent temperature and ensures that all sides of the meat receive equal attention.
While rotating and rearranging are crucial steps in achieving consistent flavor and texture, don’t forget to monitor the internal temperature of the meat using a reliable meat thermometer. This ensures that your meat is cooked to perfection and avoids any undercooked or overcooked disasters.
Lastly, when your meat is perfectly cooked and ready to be devoured, allow it to rest for a few minutes before slicing or serving. This allows the juices to redistribute, resulting in a more flavorful and tender final product that will have your guests begging for seconds.
Separating Flavors to Prevent Cross-Contamination
Sink your teeth into a succulent, perfectly smoked piece of meat, bursting with its unique flavors. But wait, what’s that? A hint of chicken mingling with the beef? Cross-contamination strikes again. To ensure flavor integrity in your smoked meats, separate flavors and prevent unwanted mixing. Join me as we explore the benefits of flavor separation and uncover valuable tips for arranging meat in your smoker like a pro.
Separate Compartments or Racks:
Prevent cross-contamination by using separate compartments or racks for different types of meat. Allocate one rack for poultry, another for beef, and a separate one for pork. This ensures distinct flavors and allows each meat to develop its unique taste.
Consider Size and Thickness:
Achieve even cooking by considering the size and thickness of the meats. Thicker cuts may require more time to cook properly, so place them closer to the heat source. This ensures all meats are cooked evenly, avoiding undercooking or overcooking mishaps.
Drip Pans and Foil:
Juices and drippings from the meat can carry flavors from one piece to another if they come into contact. Use drip pans or foil to catch these flavorful culprits. By doing so, you can discard the juices and maintain flavor separation throughout the smoking process.
Thoroughly Clean Your Smoker:
A clean smoker is a happy smoker. After each use, clean your smoker thoroughly. Remove leftover ash, grease, or residue from previous cooking sessions. This ensures no residual flavors linger and transfer to future batches of smoked meats.
Experiment with Complementary Flavors:
While separating flavors is crucial, don’t be afraid to experiment with complementary flavors. For instance, smoking chicken with bacon on top adds a subtle smoky flavor without overpowering it. This adds depth and complexity while maintaining flavor separation.
Taking Smoking Times into Account for Optimal Results
Well, fear not. Today, we’re going to dive into the world of smoking times and how they can help you achieve optimal results when arranging meat in your smoker.
- Consider the Thickness and Weight: Different types of meat require varying amounts of time to cook and reach that perfect level of tenderness and flavor. Thicker cuts of meat will generally take longer to smoke compared to thinner cuts. So, it’s important to consider the thickness and weight of the meat when planning your smoking times.
- Consult a Smoking Chart or Recipe: To determine the ideal smoking time for a specific cut of meat, consult a reliable smoking chart or recipe. These handy resources provide approximate smoking times based on factors like the type of meat, its weight, and the cooking temperature. By following these guidelines, you can ensure that your meat is cooked to perfection.
- Monitor Internal Temperature: It’s not just about the external appearance of your meat. You also need to consider the internal temperature. Different meats have specific internal temperature targets that ensure they are not only cooked safely but also reach that desired level of doneness. Invest in a good meat thermometer to monitor the internal temperature throughout the smoking process. This will help you prevent undercooked or overcooked meat, ensuring both food safety and deliciousness.
- Know Your Smoker: The type and model of smoker you’re using can affect smoking times. Factors like ventilation systems and cooking temperature all play a role in how long it takes for your meat to smoke. So, make sure you’re familiar with your specific smoker and adjust your smoking times accordingly.
- Arrange Meat Strategically: When arranging multiple cuts of meat in your smoker, it’s crucial to consider their individual smoking times. Placing meats with similar cooking times together will ensure that everything is cooked evenly. Additionally, make sure there is enough space between each cut to allow for proper air circulation. This promotes even cooking and prevents any unwanted flavor transfer.
- Be Patient: Lastly, be patient. Rushing the smoking process can lead to subpar results. Give your meat the time it needs to develop that desired tenderness and flavor. Trust me; it’ll be well worth the wait.
Tips and Tricks for Perfectly Arranged Meats
Achieving perfectly arranged meats in your smoker is the key to even cooking and maximum flavor. In this guide, we’ll share expert tips and tricks to help you achieve mouthwatering results every time.
Choose the Right Cuts of Meat:
Select cuts with well-marbled fat for moist and flavorful results. Trim excess fat or silver skin and season with your favorite rub or marinade. Allowing the meat to sit at room temperature for 30 minutes before smoking ensures even cooking.
Create Space for Proper Airflow:
Avoid overcrowding your smoker for even cooking. Use a meat rack or grate to elevate the meat off the surface, promoting better airflow and preventing sticking.
Place Larger Cuts Closer to the Heat:
Position larger cuts closer to the heat source for thorough cooking. Smaller cuts can be placed farther away or on higher racks to prevent overcooking.
Monitor Temperature and Rotate:
Use a reliable thermometer to maintain a consistent temperature. Rotate or flip the meat halfway through smoking for even cooking on all sides and to prevent hot spots.
Baste for Extra Flavor and Moisture:
Brush a flavorful liquid onto the meat during smoking. Create a basting mixture using broth, fruit juice, beer, or a combination of your choice.
Conclusion
Arranging meat in a smoker is an art that requires precision and attention to detail. The way you position your cuts of meat can have a significant impact on the final result, ensuring that each piece is cooked to perfection. Here are some tips to help you arrange your meat in a smoker like a pro.
First, consider the size and shape of your cuts. Larger pieces of meat should be placed closer to the heat source, as they will take longer to cook. This ensures that they receive the necessary amount of heat and smoke for even cooking. Smaller cuts can be placed further away from the heat source to prevent them from drying out or becoming overcooked.
Next, think about the airflow within your smoker. Proper air circulation is crucial for maintaining consistent temperatures and smoke distribution. To achieve this, leave enough space between each piece of meat to allow for proper airflow. Avoid overcrowding the smoker, as this can lead to uneven cooking and potentially ruin your meal.
When arranging your meat, also consider any marinades or rubs that you have applied. If you have marinated your meat, make sure to pat it dry before placing it in the smoker. Excess moisture can hinder the formation of a flavorful crust on the outside of the meat.
Additionally, be mindful of the fat content in different cuts of meat. Fatty meats tend to render more fat as they cook, which can cause flare-ups and uneven cooking if positioned too close together. To avoid this, separate fattier cuts from leaner ones and place them accordingly in your smoker.
Lastly, don’t forget about basting or spritzing during the smoking process. If you plan on adding any liquids or sauces to your meat while it cooks, make sure to do so at regular intervals throughout the smoking time. This helps keep the meat moist and enhances its flavor profile.
In conclusion, arranging meat in a smoker requires careful consideration of factors such as cut size, airflow, marinades, fat content, and basting. By following these tips and techniques, you can ensure that each piece of meat is cooked to perfection and delivers mouthwatering results.