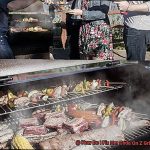
Do you ever find yourself frustrated with your Weber gas grill, wondering why your food always ends up either charred to a crisp or barely cooked?
Well, fret no more, my friend, because today is the day you become the ultimate temperature control guru. Whether you’re a grilling pro or just dipping your toes into the fiery world of outdoor cooking, mastering the art of temperature control on your Weber gas grill is the key to unlocking flavor-packed perfection.
In this blog post, we’re going to take you on a sizzling journey through all the tips and tricks that will transform you into a bona fide grill boss. From tweaking those burners like a maestro to harnessing the power of the lid and even exploring the wonders of indirect grilling, we’ve got every trick up our sleeves.
So put on that apron, grab your tongs, and let’s dive headfirst into the delicious abyss of controlled temperatures.
Contents
Understanding the Grill’s Heat Zones
Grilling is more than just cooking meat over an open flame; it’s an art that requires understanding and controlling the grill’s heat zones. By mastering this fundamental aspect of grilling, you can elevate your skills and achieve culinary perfection. In this article, we will explore the science behind heat zones, discuss techniques for temperature control, and provide practical tips to enhance your grilling experience.
The Science Behind Heat Zones
Heat zones are distinct areas on the grill’s cooking surface with varying levels of heat. Weber gas grills typically have three main heat zones: high, medium, and low. The burners’ placement creates these zones, each serving a specific purpose.
Controlling Temperature with Heat Zones
To create different heat zones on your grill, manipulate the burner controls. A two-zone setup allows for simultaneous cooking at different levels of doneness. Indirect grilling involves turning off one or more burners to create a cooler zone for slow and even cooking.
Practical Tips for Temperature Control
Familiarize yourself with your specific grill’s heat patterns through trial and error. Use a reliable grill thermometer to monitor temperature accurately in different zones. Adjust burner controls and utilize vents effectively for fine-tuned temperature control.
Enhancing Your Grilling Experience
Understanding heat zones offers versatility and precision in your grilling techniques. Achieve perfect sear marks using high heat zones. Slow-cook ribs or delicate fish with confidence using low heat zones. Experiment with different heat zones to create unique flavor profiles and culinary masterpieces.
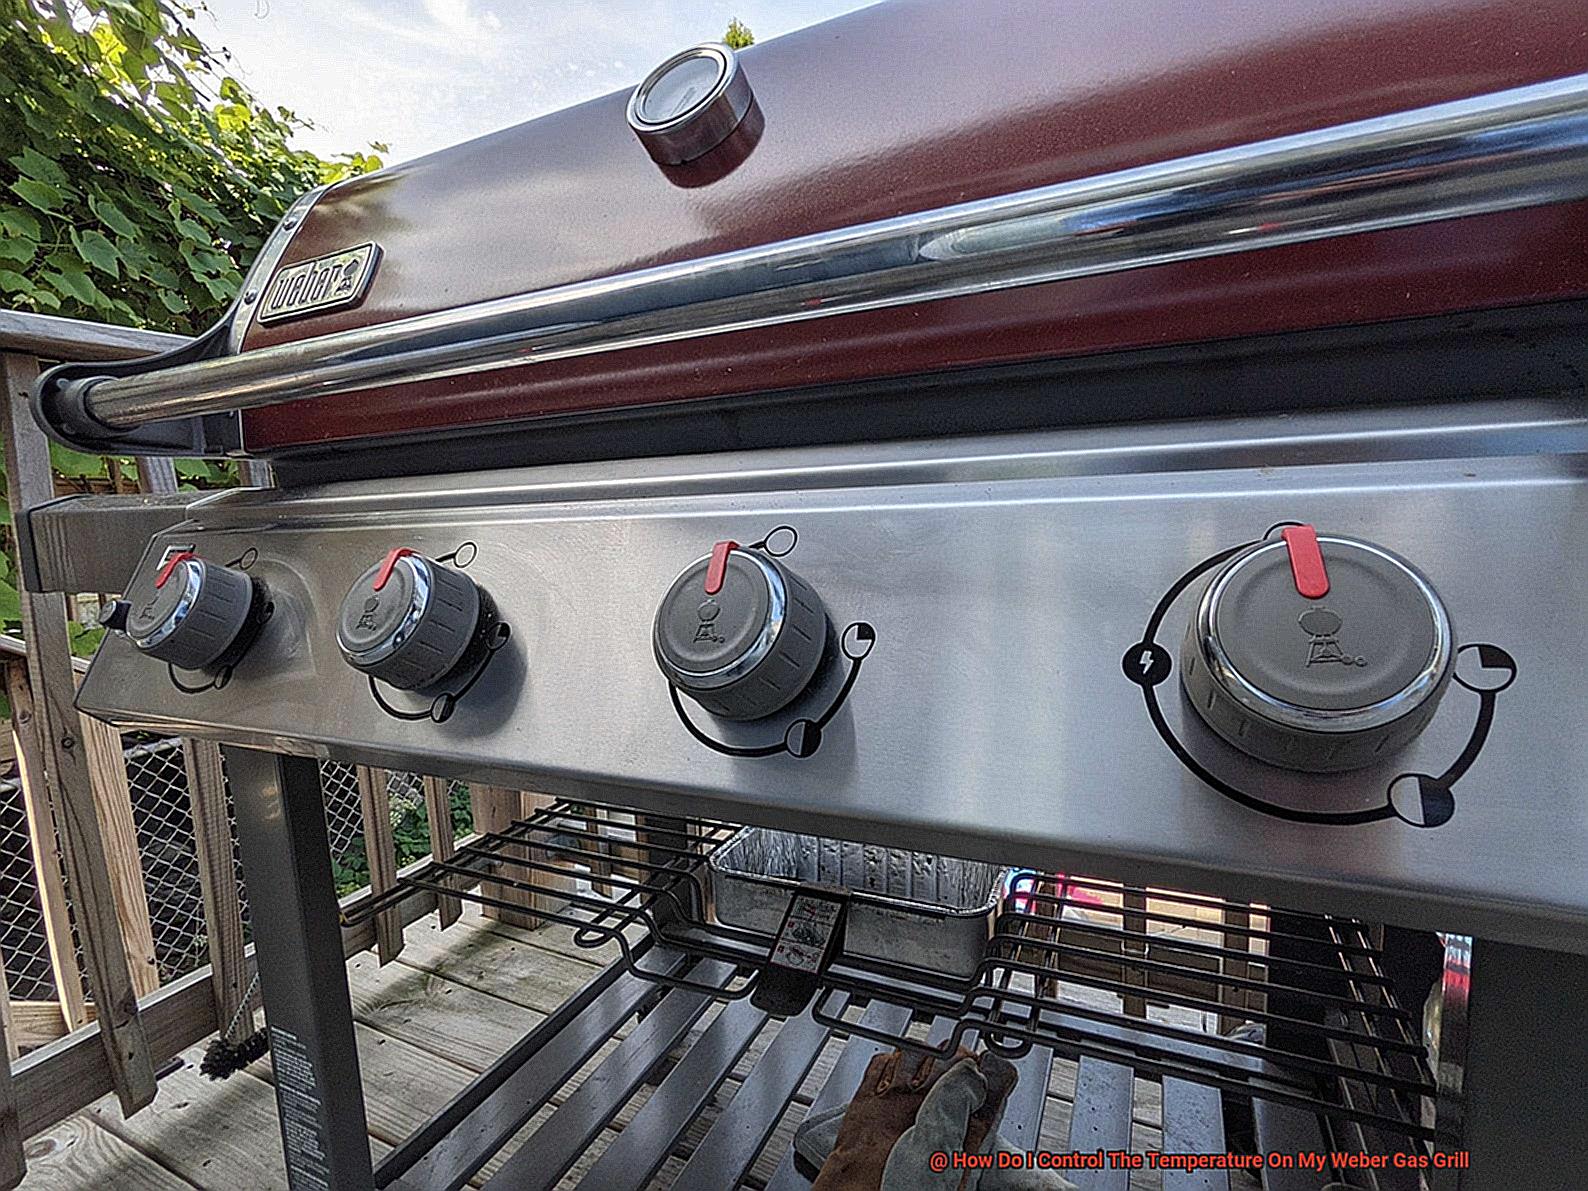
Adjusting the Burner Controls
Whether you’re a seasoned grill master or a newbie, understanding how to adjust the burner controls on your Weber gas grill is essential for achieving grilling greatness. Get ready to take your culinary skills to the next level as we dive into the art of temperature control.
The Power of Control:
Weber gas grills are designed with multiple burners, each with its own control knob. This allows you to create different heat zones and cook various foods simultaneously. Before adjusting anything, ensure all burners are turned off and close the lid for safety.
Adjusting Like a Pro:
To increase the heat output of a specific burner, simply turn its control knob clockwise. This allows more gas to flow through, resulting in a higher flame and hotter cooking temperature. Conversely, turning the control knob counterclockwise reduces the heat output, leading to a smaller flame and lower cooking temperature.
Trial and Error:
Start with small adjustments to familiarize yourself with your specific Weber gas grill. Each grill model may have slightly different settings and heat outputs. As you make adjustments, monitor flame size and temperature inside the grill. Note any changes and continue fine-tuning until you achieve your desired cooking temperature.
Weather Conditions Matter:
Consider positioning your grill in a sheltered area or using a windscreen in windy situations to maintain heat distribution. Consistency is key for perfectly grilled meals, so be mindful of temperature fluctuations caused by weather conditions.
Preheat and Savor:
Allow the grill to preheat for a few minutes after adjusting the burner controls to your desired temperature before placing food on the grates. This ensures an evenly heated grill for optimal cooking.
Utilizing the Vents Effectively
Grilling is an art, and achieving the perfect temperature plays a crucial role in creating mouthwatering results. To master temperature control on your Weber gas grill, it’s essential to understand how to effectively use the intake and exhaust vents. In this guide, we will walk you through the best practices and step-by-step instructions to help you grill with ease and success.
Step 1: Familiarize Yourself with the Vents
The intake vent, located at the bottom of the grill, and the exhaust vent, positioned on top of the lid, work together to regulate airflow and control temperature inside the grill.
Step 2: Increase Temperature
To crank up the heat, open both vents wider. This allows a rush of oxygen to fuel the fire, resulting in higher temperatures. Remember, adjusting the vents takes time to have an effect, so make small changes and wait for a few minutes before further adjustments.
Step 3: Lower Temperature
To cool things down, partially close both vents or adjust them accordingly. By limiting airflow, less oxygen reaches the fire, reducing its intensity and lowering the grill’s temperature.
Step 4: Fine-tune Temperature Control
Utilize each vent individually to fine-tune your temperature control. If one side of your grill is getting too hot, adjust either the intake or exhaust vent on that side to reduce heat.
Step 5: Consider Other Factors
Don’t forget to consider other factors impacting temperature control. Fuel quantity matters – more fuel generates more heat. Food placement on the grill grates is also crucial. Closer proximity to the fire creates higher heat, while moving food further away reduces temperature.
Additional Accessories for Temperature Control
Grilling aficionados understand that mastering temperature control is the key to creating mouthwatering meals on a Weber gas grill. Luckily, there are additional accessories available that can take your temperature control skills to new heights. In this blog post, we will explore the must-have accessories that contribute to better temperature control. So, don your apron and let’s delve into the world of grilling perfection.
Thermometers: The Ultimate Temperature Guide
A thermometer is an indispensable tool for any griller seeking precision cooking. Digital thermometers are renowned for their accuracy and swift readings, while analog options exude timeless charm. With a thermometer, you can vigilantly monitor the internal temperature of your grill, ensuring flawlessly cooked dishes every time.
Grill Covers: Shield and Preserve Heat
Investing in a top-notch grill cover is a wise move for temperature control. Not only does it safeguard your Weber gas grill from the elements, such as wind and rain, but it also helps maintain a stable cooking environment by locking in heat. Choose a cover that fits snugly over your grill to maximize its effectiveness.
Heat Deflectors: Bid Farewell to Hot Spots
Hot spots can wreak havoc on your grilling endeavors, but fear not. Heat deflectors come to the rescue by evenly distributing heat across the cooking surface. These handy accessories prevent flare-ups and ensure consistent cooking results. Depending on your grill model, place them above the burners or on the grates.
Grill Mats: Tender Cooking for Delicate Delights
Grill mats are an excellent choice for delicate items like vegetables or fish that require gentler cooking methods or lower temperatures. Acting as a protective barrier between your food and the grates, these mats guarantee even heat distribution while preventing small pieces from slipping through the cracks.

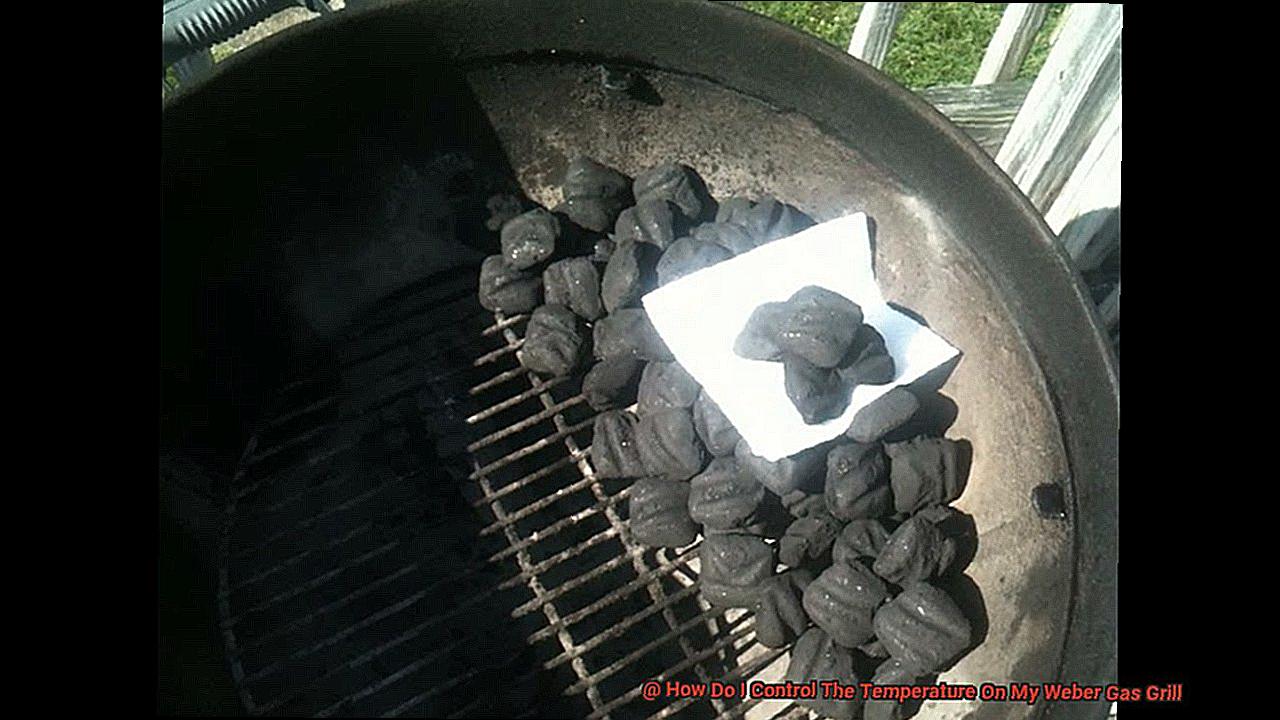
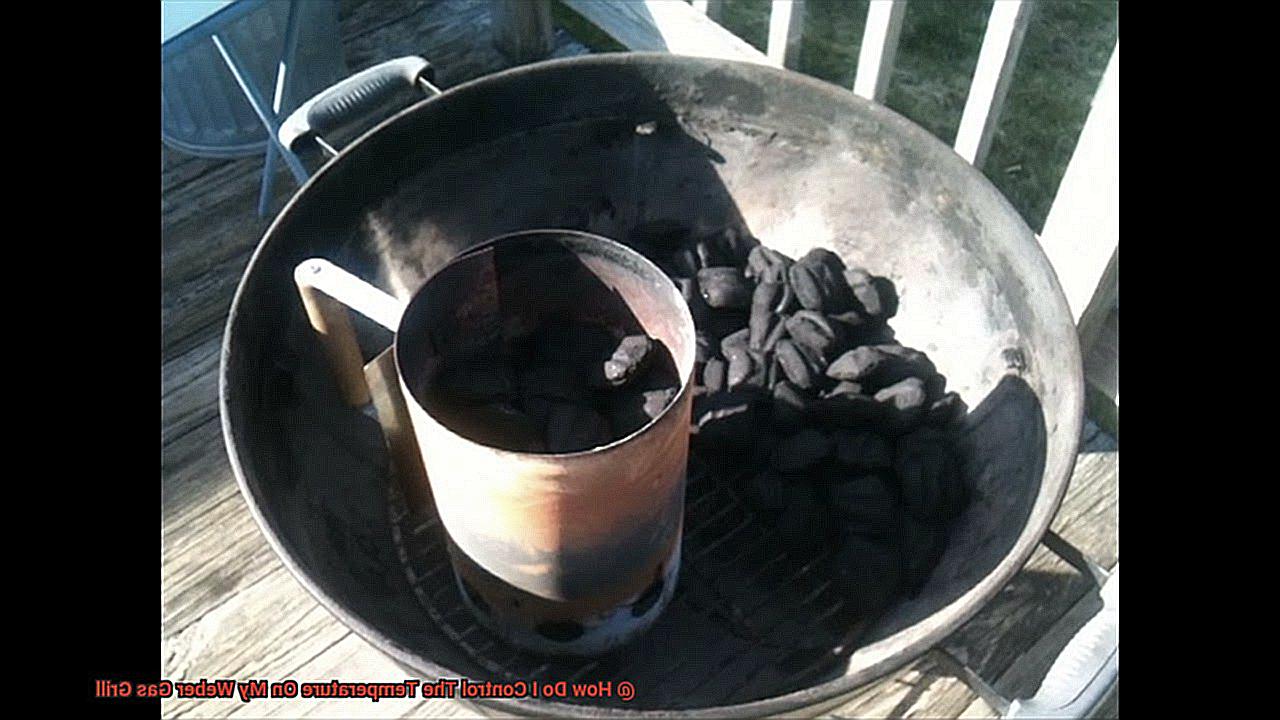
Chimney Starters: Simplify Charcoal Grilling
If you enjoy the distinct flavor of charcoal grilling on your Weber gas grill, a chimney starter is a game-changer. Say goodbye to lighter fluid and hello to a clean taste for your food. Additionally, charcoal baskets help maintain an even spread of charcoal, resulting in consistent heat throughout the grilling process.
Preheating the Grill for Optimal Performance
Look no further. Preheating your Weber gas grill is the key to unlocking grilling perfection. In this article, we will explore the importance of preheating, recommended preheating times, and some expert tips for effectively preheating your grill. Get ready to become a grilling maestro.
Importance of Preheating:
Think of preheating as the foundation for a masterpiece. By preheating your grill, you ensure a clean cooking surface by incinerating any lingering food particles or grease from previous use. This not only prevents cross-contamination but also enhances the flavor of your food.
But that’s not all. Preheating also creates those stunning sear marks that make your grilled dishes look like they came straight out of a professional kitchen. It’s all about that perfect caramelization that occurs when your grill grates reach scorching hot temperatures.
And let’s not forget about temperature control. Preheating allows your grill to achieve a consistent cooking temperature, ensuring that your food cooks evenly every time. No more worries about undercooked or overcooked steaks.
Recommended Preheating Time:
Now that we understand the importance of preheating, let’s talk about how long you should preheat your Weber gas grill. As a general rule of thumb, aim for around 10-15 minutes. This gives your grill enough time to heat up evenly and stabilize its internal temperature.
During this preheating time, crank up all the burners to their highest setting and close the lid. This creates a mini oven effect inside the grill, allowing it to rapidly and efficiently reach the desired temperature.
Expert Tips for Effective Preheating:
To ensure effective preheating, here are some expert tips to keep in mind:
- Clean the grill grates: Before preheating, give your grill grates a thorough cleaning. A squeaky clean cooking surface prevents any unwanted flavors from transferring to your food and ensures a flawless sear.
- Keep the lid closed: Resist the temptation to peek. Keeping the lid closed during preheating traps the heat inside the grill, allowing it to reach the desired temperature faster and maintain a consistent heat level.
- Monitor the temperature: Invest in a reliable grill thermometer to accurately monitor the internal temperature. This tool will help you determine when your grill has reached the desired preheating temperature and maintain consistent heat throughout your cooking process.
- Adjust the burners: After preheating, you may need to adjust the burner settings to achieve your desired cooking temperature. Lowering the heat on one or more burners creates different heat zones on your grill, perfect for cooking various foods at different temperatures simultaneously.
Experimenting with Different Combinations of Heat Zones and Burner Controls
Well, get ready to unlock the secrets of temperature control. With a Weber gas grill, you have the power to experiment with different heat zones and burner controls, giving you unparalleled control over your cooking.
In this blog post, we will embark on a journey into the world of heat zones and burner controls, revealing expert tips and techniques that will help you achieve mouthwatering results every time you fire up your grill.
The Art of Heat Zones:
Heat zones are the key to simultaneous cooking perfection. By creating different heat zones on your Weber gas grill, you can cook various types of food at their optimal temperatures. Picture this: searing a steak over intense heat while gently grilling delicate vegetables nearby. To create these magical heat zones, start by preheating your grill with all burners set to high.
Once the grill is hot, use the control knobs to turn off one or more burners, creating cooler zones. This simple technique allows you to control the temperature precisely and ensures even cooking, no matter what you’re grilling.
Unleashing Burner Controls:
Burner controls are like the maestros of temperature control. Each burner on your Weber gas grill has its own control knob, giving you the power to adjust flame intensity and fine-tune the temperature within each heat zone.
Craving higher temperatures in a specific zone? Turn up the corresponding burner’s control knob, watch flames dance higher, and feel the heat intensify. Need to lower the temperature? Simply dial down the control knob, and watch as the flames bow down before your command.
The Quest for Perfect Temperature:
Finding that elusive perfect temperature requires some exploration and experimentation. Every grill has its quirks, and external factors like wind and outdoor temperature can influence heat distribution.
Start your grilling journey with a medium heat setting and observe how the grill behaves. Is it too hot? Dial down the flames. Is it not hot enough? Amp up the heat
The key is to stay vigilant, rotate or move food as needed, and rely on your instincts. And don’t forget to arm yourself with an instant-read thermometer to check the doneness of your culinary creations.
Tips for Grilling Greatness:
As you embark on your grilling adventure, here are some additional tips to ensure greatness on the grill:
- Rotate or move food as needed for even cooking and those coveted grill marks.
- Utilize an instant-read thermometer to check the internal temperature of your food.
- Embrace practice and experience because mastering the art of temperature control takes time.
Utilizing Windy Conditions to Your Advantage
Grilling is an art form, and just like any other art, it’s all about adapting to the elements. While windy conditions may seem like a challenge, they can actually work in your favor when it comes to grilling on a Weber gas grill. In this guide, we’ll explore some expert techniques to help you harness the power of the wind and achieve grilling greatness.
Positioning is Key:
When setting up your Weber gas grill, take a moment to consider the wind direction. Position the grill so that the wind blows directly into the bottom vents. This creates a natural draft that fuels the fire and helps maintain a steady temperature throughout your grilling session.
Adjust the Vents:
The vents on your Weber gas grill are your secret weapon for controlling airflow. In windy conditions, partially close the top vent and open the bottom vent slightly wider than usual. This allows for better control of air circulation, preventing excessive heat loss due to gusts of wind.
Create a Wind Barrier:
Protect your grill from gusty winds by setting up a temporary windbreak using materials like plywood or metal sheets. Place the wind barrier on the side facing the wind to create a shielded area where your grill can operate more efficiently.
Adapt Your Cooking Time and Techniques:
Strong winds can cause heat loss, so be prepared to adjust your cooking times slightly. Increase cooking times as needed to compensate for the wind’s cooling effect. Additionally, consider using indirect heat methods by placing food on a cooler side of the grill away from direct flames. This technique helps mitigate temperature fluctuations caused by windy conditions.
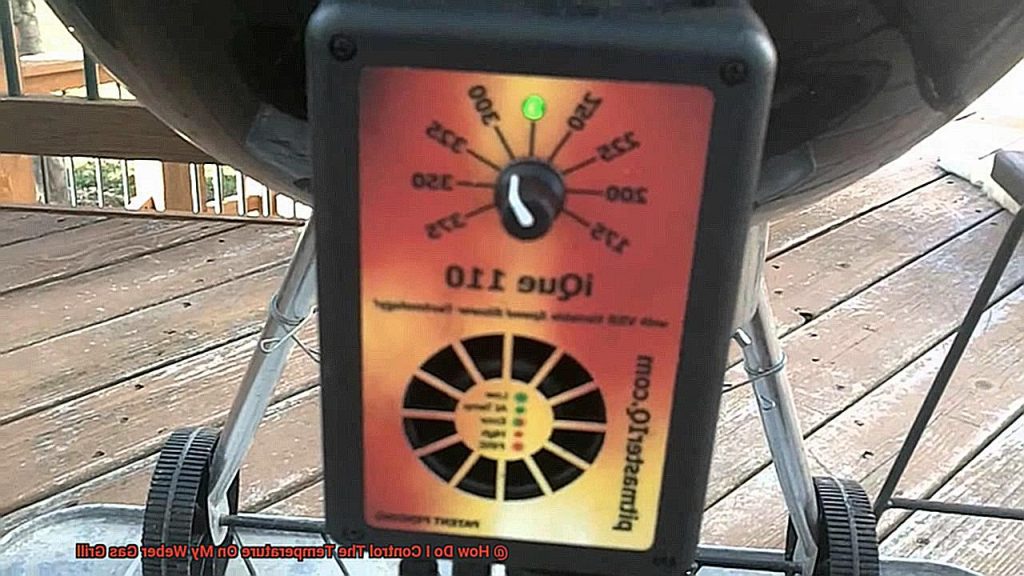
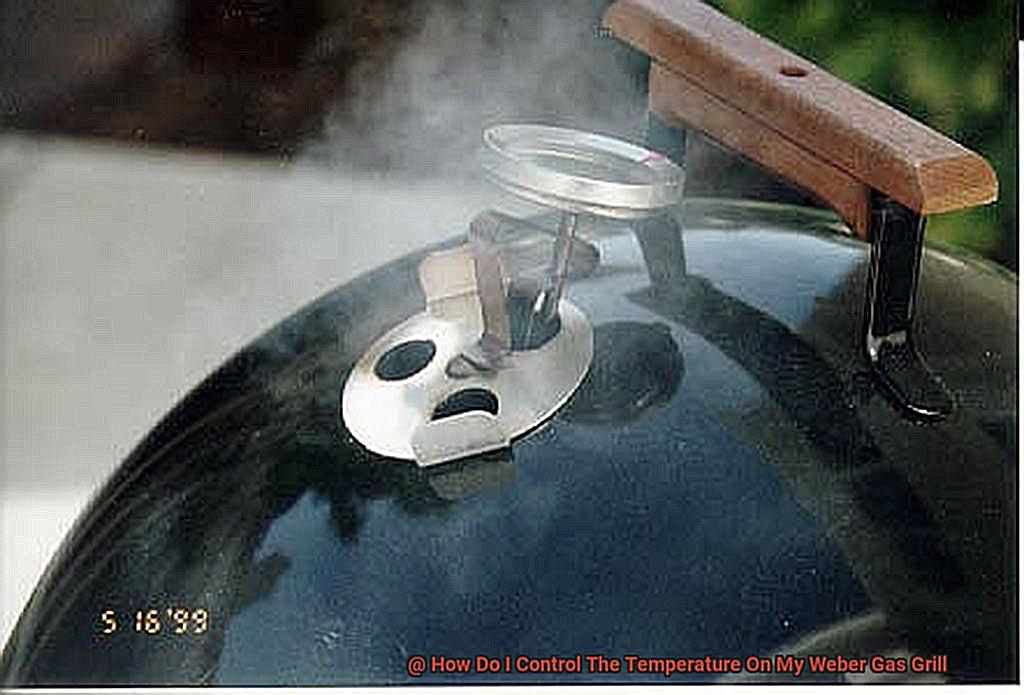
Monitoring Temperature with a Grill Thermometer
Grilling is an art that requires precision, and one of the key factors in achieving perfect results is monitoring the temperature. Your grill thermometer is a trusty companion that ensures your food is cooked to perfection. In this comprehensive guide, we’ll explore the ins and outs of using a grill thermometer, empowering you to take your grilling skills to the next level.
Types of Grill Thermometers:
When it comes to grill thermometers, there are two main types to choose from: analog and digital. The analog thermometer features a classic dial or gauge that displays the temperature, while the digital thermometer boasts a convenient digital screen. Both options can provide accurate readings, so choose the one that suits your personal preference and grilling style.
Placement and Calibration:
To obtain accurate temperature readings, it’s crucial to place your grill thermometer correctly. When monitoring meat, insert the thermometer into the thickest part, away from bones and fat. Alternatively, you can place it on the grill grate to measure the overall temperature. However, remember that calibration plays a vital role in accuracy. Regularly calibrate your thermometer by placing it in boiling water or using an ice bath to ensure precise readings every time.
Probes and Remote Monitoring:
Some grill thermometers are equipped with probes that can be inserted into the meat and connected to a separate monitor or smartphone app. This innovative feature allows for remote temperature monitoring, granting you the freedom to socialize or relax while keeping an eye on your grill. With real-time updates at your fingertips, you can confidently achieve perfectly cooked meats without constantly hovering over the grill.
Avoiding Temperature Fluctuations:
One common mistake among grillers is repeatedly opening the grill lid to check the temperature. However, this constant interruption can cause temperature fluctuations and extend cooking times. Instead, rely on your trusted grill thermometer as your guide. By monitoring the temperature diligently and only opening the lid when necessary, you’ll maintain a stable cooking environment and ensure consistent results.
pDiFOQSwhhg” >
Conclusion
Controlling the temperature on your Weber gas grill is essential for achieving that perfect cook every time.
Luckily, there are a few simple steps you can follow to master this art. Firstly, make sure your grill is preheated to the desired temperature before placing any food on it.
This ensures even heat distribution and prevents any potential hot spots. Next, adjust the burner knobs to regulate the heat output.
Turning them clockwise will increase the temperature, while turning them counterclockwise will decrease it. Remember to make small adjustments and give the grill some time to respond before making further changes.
Additionally, keep an eye on the built-in thermometer or use an external one to monitor the temperature accurately. This will help you maintain a consistent cooking environment throughout the grilling process.
Every grill is unique, and understanding its quirks will allow you to become a true grill master.