Who doesn’t love a good chicken dish? It’s a crowd-pleaser that can be cooked in countless ways. Grilled, baked, or fried – it always tastes divine. But what about cooking chicken on an electric stove?
Electric stoves have gained popularity recently, and the process of cooking chicken on them is quite different from other methods. It requires patience and attention, but the end result is a succulent and mouth-watering chicken that’s perfect for any meal.
In this blog post, we’ll guide you through the steps of cooking chicken on an electric stove. We’ll cover various techniques to ensure your chicken comes out perfectly every time. Plus, we’ll share some insider tips to keep in mind while cooking.
Before we get started with the specifics of cooking chicken on an electric stove, let’s take a moment to appreciate its benefits. Not only is it easier to control the heat on an electric stove, but it’s also more cost-effective and efficient. So whether you’re a seasoned chef or just starting out in the kitchen, read on to discover how to cook chicken on an electric stove.
Contents
The Basics of Cooking Chicken on an Electric Stove
Cooking chicken on an electric stove can be a breeze, as long as you understand the basics. First and foremost, safety should be your top priority – make sure your chicken is fully thawed to ensure even cooking and reduce the risk of foodborne illness.
Next up, consider the type of chicken you’re cooking and the best cooking method for that particular cut. For example, thinner cuts like chicken cutlets or tenders can be cooked quickly in a pan, while thicker cuts like breasts or thighs may require finishing in the oven to ensure they cook thoroughly without burning.
Temperature is also a key factor when it comes to cooking chicken on an electric stove. Preheat your pan to a medium-high heat (around 375-400 degrees Fahrenheit) before adding your chicken. This will help ensure that the chicken cooks evenly and thoroughly.
When it comes to seasoning your chicken, the options are endless. From simple salt and pepper to more complex herb and spice blends, don’t be afraid to experiment with different flavors. Just keep in mind that if you’re using a marinade or sauce, you may need to adjust your cooking time accordingly.
Your choice of cookware can also make a difference in the final outcome of your dish. A cast iron skillet or stainless steel pan is ideal for achieving a crispy exterior on your chicken while still keeping it tender and juicy on the inside. Non-stick pans can also be used but may not provide the same level of crispiness.
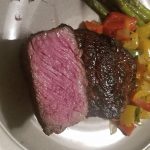
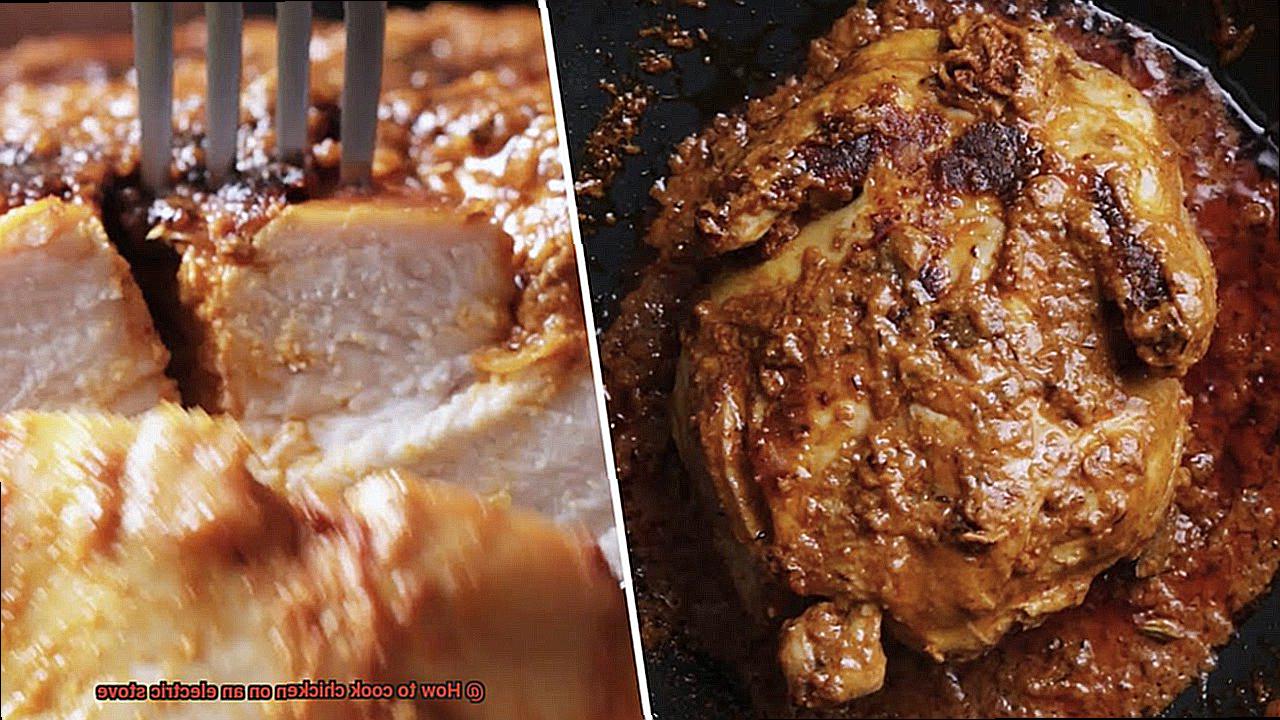
To cook your chicken to perfection, preheat your pan over medium-high heat with a small amount of oil. Once hot, carefully add your chicken to the pan, leaving space between each piece to ensure even cooking. Cook for about 5-7 minutes per side or until the internal temperature reaches 165°F. Use a meat thermometer to check the temperature and avoid cutting into the chicken, which can cause juices to escape and result in dry meat.
Thawing the Chicken Properly
Not only does it guarantee that it’s safe to eat, but it also ensures even cooking and a scrumptious meal. Lucky for you, there are three safe methods for thawing chicken. Let’s dive in.
Method 1: Thawing in the Refrigerator
This method is the safest and most recommended way of thawing chicken. You simply place your chicken on a plate or in a container and put it on the lowest shelf of the fridge. The best part? It requires minimal effort. Just allow 24 hours for every 5 pounds of chicken, and you’re good to go. For example, if you have a 10-pound chicken, it will take approximately 48 hours to thaw completely. This method ensures that your chicken thaws at a safe temperature and prevents bacterial growth.
Method 2: Thawing in Cold Water
If you’re in a rush, this method is a great option. First, place your chicken in a leak-proof plastic bag and submerge it in cold water. Make sure to change the water every 30 minutes to ensure that it stays cold. It takes around 30 minutes per pound of chicken to thaw using this method. But remember, never use warm or hot water as this can cause bacteria to grow.
Method 3: Thawing in the Microwave
This method is the quickest but requires more attention to make sure your chicken doesn’t start cooking during the thawing process. Use the defrost setting on your microwave and follow the manufacturer’s instructions. Be sure to check the chicken frequently to ensure that it’s not cooking during the thawing process.
Now that you know how to thaw your poultry safely, let’s talk about what not to do. Never refreeze raw chicken that has been thawed using any of these methods as it can cause bacterial growth and foodborne illness. Always cook the chicken immediately after it has been thawed to prevent any potential health hazards.
Choosing the Right Pan for the Job
The secret to success lies in choosing the right pan for the job. With a variety of options available, it can be overwhelming to know where to start. Fear not. In this guide, we will explore the benefits and drawbacks of each type of pan and help you make an informed decision.
First up, the trusty stainless steel pan. These durable pans have excellent heat retention and are perfect for searing chicken breasts at high temperatures without warping. However, they can be tricky to clean, with food tending to stick to them like glue.
Enter: cast iron pans. These versatile pans distribute heat evenly and retain it well, making them an excellent option for cooking chicken. They require proper seasoning and maintenance to prevent rusting, but once cared for, these pans can last a lifetime.
For those looking for a healthier option, non-stick pans are a great choice. These pans require less oil and are easy to clean as food doesn’t stick to them. However, they may not be suitable for high-heat cooking and can scratch easily.
Finally, ceramic pans are a relatively new option in the market but are fast gaining popularity due to their non-toxic nature. They distribute heat evenly and do not react with acidic ingredients, making them great for slow-cooking chicken. However, they may not be suitable for high-heat cooking and can crack if exposed to sudden temperature changes.
Preheating the Pan and Adding Oil
Preheating the pan and adding oil are two essential steps that can make all the difference in your chicken-cooking game.
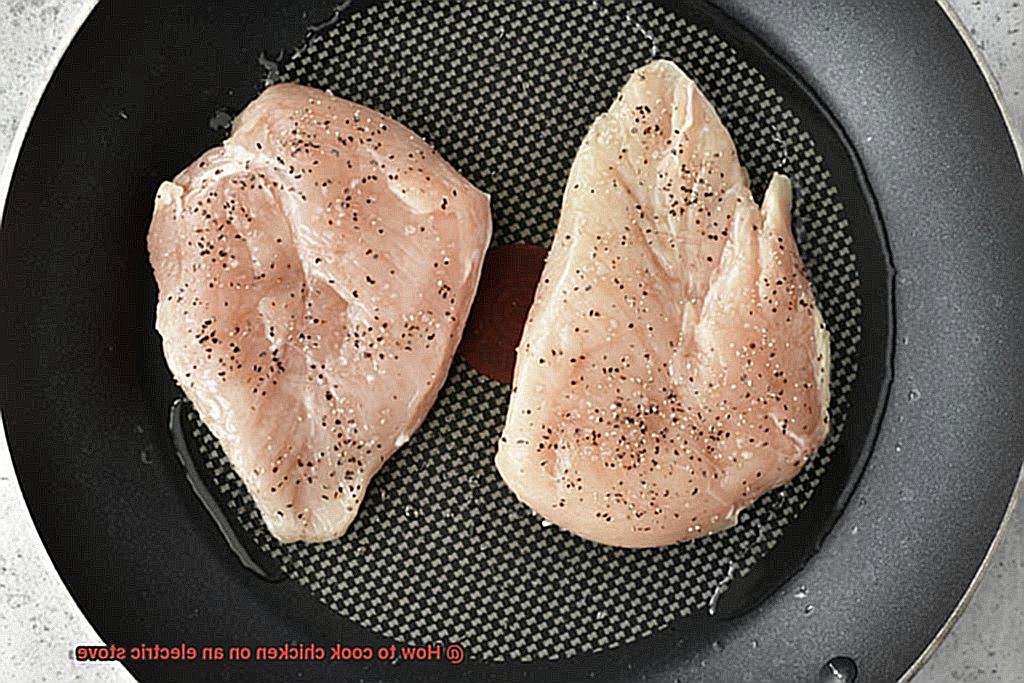
Let’s talk about preheating the pan. This step is critical because it allows the chicken to cook evenly and prevents sticking. To get started, place your chosen pan on the burner and turn up the heat to medium-high. Let it heat up for at least 2-3 minutes before adding any oil or chicken. You can test if the pan is hot enough by sprinkling a few drops of water on it – if they sizzle and evaporate immediately, the pan is ready to use.
Now, onto adding oil. This step is what gives the chicken that mouth-watering golden-brown crust that we all love. Use a neutral oil with a high smoke point such as canola or vegetable oil. Avoid using butter or olive oil as they have lower smoke points and can burn easily. Swirl the oil around the pan to ensure it coats evenly.
It’s time to add your seasoned chicken breasts to the pan. But wait. Don’t overcrowd the pan – you want to give each piece enough space to allow for air circulation. This is important because overcrowding can cause uneven cooking. Allow the chicken to cook undisturbed for 5-7 minutes on one side before flipping. The chicken should release easily from the pan when it’s ready to be flipped.
Cook for an additional 5-7 minutes on the other side until fully cooked through. And voila. You’ve got yourself a perfectly cooked chicken breast.
Placing the Chicken in the Pan
Then mastering the art of placing chicken in a pan when cooking on an electric stove is a must. This crucial step can make or break your dish, but fear not, as I have done my research and am here to share with you the key steps for placing chicken in a pan like a pro.
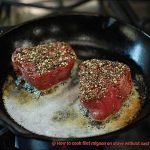
Firstly, preheat your pan on medium-high heat for several minutes. This is an essential step that ensures even cooking and prevents the chicken from sticking to the pan. Once hot, add a tablespoon of oil and swirl it around to coat the bottom of the pan. The choice of oil is yours, but olive oil or vegetable oil both work well.
Next up, it’s time to carefully place your chicken onto the hot pan. If using skin-on chicken, make sure to place it skin-side down. It’s important to leave enough space between each piece of chicken to ensure even cooking and prevent steaming. Overcrowding the pan is a no-no as it can result in rubbery and undercooked meat.
Once you’ve placed your chicken in the pan, let it cook undisturbed for 6-7 minutes until it turns golden brown. This step requires patience and discipline, as moving or touching the chicken during this time will prevent it from forming a crispy crust.
After 6-7 minutes, use tongs or a spatula to flip the chicken over and let it cook for an additional 6-7 minutes until fully cooked. Remember, the internal temperature of cooked chicken should register at 165°F (74°C) when tested with a meat thermometer.
Monitoring Cooking Time and Temperature
Cooking chicken on an electric stove is a delicate process that requires careful attention to detail, particularly when it comes to monitoring cooking time and temperature. As an expert in this field, I can assure you that the key to achieving a perfect chicken dish is not just about tossing the chicken in the pan and waiting for it to cook through. It’s about keeping a close eye on the temperature and time of the cooking process to ensure your chicken is both safe and scrumptious.
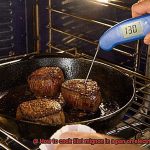
To start, preheating your electric stove to the desired temperature before putting the chicken in the pan is essential. Once this is done, it’s time to begin monitoring the cooking time and temperature. There are two effective ways of doing this: using a meat thermometer and using a timer.
Using a meat thermometer is undoubtedly one of the most effective ways of ensuring your chicken is cooked through. Insert the thermometer into the thickest part of the chicken, making sure not to touch any bones, and wait until it reaches the safe internal temperature of 165°F (74°C). This will give you peace of mind that your chicken is safe and ready to eat.
In addition to using a meat thermometer, using a timer is also crucial in monitoring cooking time. Depending on the cut of chicken you’re using, cooking times may vary. For instance, boneless chicken breasts may take approximately 10-12 minutes per side, while bone-in chicken thighs may take 15-20 minutes per side. Checking your chicken regularly and adjusting the cooking time accordingly will help you achieve a perfectly cooked meal every time.
While monitoring cooking time and temperature, it’s vital to keep an eye on the heat as well. Cooking chicken on an electric stove may require adjusting the heat throughout the cooking process. If the heat is too high, the outside of the chicken may cook too quickly while the inside remains raw. Conversely, if the heat is too low, it may take longer for the chicken to cook through. Adjusting the heat accordingly will help ensure that your chicken cooks evenly.
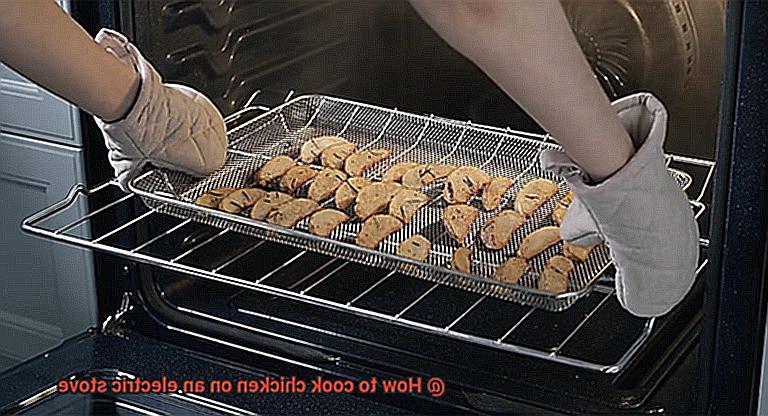
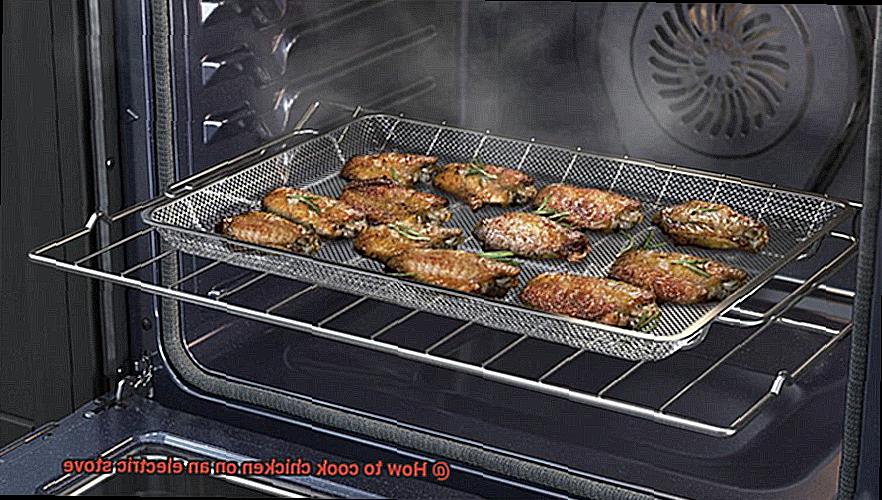
Finishing Thicker Cuts of Chicken in the Oven
As an expert in finishing thicker cuts of chicken in the oven, I have some tips and tricks to help you achieve perfectly cooked and juicy chicken every time.
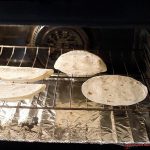
First things first, preheat your oven to 375°F. Once your chicken is seared on both sides on the stovetop, transfer it to an oven-safe dish and place it in the preheated oven. To determine if your chicken is fully cooked and safe to eat, use a meat thermometer to check that its internal temperature has reached 165°F.
But what about cooking time? The thickness of your cut will determine how long it needs to cook. Thicker cuts may take anywhere from 10-20 minutes to cook through. To prevent the chicken from drying out, cover the dish with foil. This will help retain essential moisture and ensure your chicken stays tender and delicious.
Still feeling unsure? Follow these simple steps:
- Preheat your oven to 375°F.
- Sear your chicken on both sides on the stovetop.
- Transfer your chicken to an oven-safe dish.
- Cover your dish with foil.
- Place your dish in the preheated oven for 10-20 minutes.
- Check with a meat thermometer that the internal temperature has reached 165°F.
Tips for Successful Electric Stove Cooking
Cooking chicken on an electric stove can be a daunting task, but with the right tips and tricks, you can achieve delicious and juicy results every time. Here are five steps to help you master electric stove cooking of chicken:
Choose the Right Cookware
Using the right cookware is essential when cooking on an electric stove. A flat-bottomed skillet or frying pan works best for even heat distribution and preventing hot spots. Using a pan with a lid can also help trap in moisture and prevent your chicken from drying out.
Preheat the Pan
Preheating your pan before adding the chicken is crucial to ensure even cooking and prevent sticking. Turn your burner on medium-high heat and let it heat up for a few minutes before adding your chicken.
Avoid Overcrowding the Pan
Overcrowding your pan can cause uneven cooking and prevent proper searing. Cook your chicken in batches if necessary or use multiple pans if you need to cook a large amount of chicken.
Properly Season Your Chicken
Proper seasoning is key to achieving great flavor when cooking chicken on an electric stove. You can use a simple seasoning blend of salt, pepper, and garlic powder or experiment with different herbs and spices. Be sure to rub the seasoning all over the chicken and let it sit for at least 30 minutes in the refrigerator to allow the flavors to penetrate.
Use a Meat Thermometer
Using a meat thermometer is necessary to ensure that your chicken has reached an internal temperature of 165°F before serving. This will ensure that any harmful bacteria have been destroyed and that your chicken is safe to eat.
Also Read: How To Cook Chicken On The Stove
Conclusion
In conclusion, cooking chicken on an electric stove is not only simple but also rewarding when you have a good grasp of the basics. Achieving succulent and mouth-watering chicken every time requires the right techniques, cookware, and attention to detail. Safety should always be your top priority, so ensure that your chicken is fully thawed before cooking.
When it comes to cooking chicken on an electric stove, one must consider the type of cut they are using and choose the best cooking method accordingly. Temperature plays a crucial role in ensuring even cooking; thus, preheating your pan to medium-high heat before adding your chicken is essential.
Choosing the right pan for the job can make all the difference in achieving a crispy exterior while keeping the meat tender and juicy on the inside. Preheating your pan and adding oil are two critical steps that you shouldn’t skip if you want to take your chicken-cooking game up a notch. Monitoring cooking time and temperature is another key factor in ensuring that your chicken is both safe and scrumptious.
Finishing thicker cuts of chicken in the oven requires proper timing and temperature control to prevent drying out. By following these tips, you can master electric stove cooking of chicken like a pro.