Cooking chicken breast is a go-to for many home chefs, especially those who prioritize healthy eating. It’s a protein-packed and versatile ingredient that can be used in countless dishes. But, the million-dollar question remains: how long do you cook a chicken breast on each side? This query has stumped even the most seasoned cooks.
Overcooking chicken breast results in dry and tough meat, while undercooking it can lead to foodborne illness. Hence, getting the cooking time right is crucial for achieving optimal texture and flavor. So, what’s the secret to perfectly cooked chicken breast?
In this blog post, we’ve got you covered with an all-inclusive guide on how long to cook chicken breast on each side using various cooking methods such as grilling, baking, and sautéing. We’ll also share some valuable tips on avoiding dry and overcooked chicken.
So buckle up as we embark on a journey through the world of succulent chicken breasts. By the end of this article, you’ll have all the tools you need to master your chicken-cooking game.
Contents
What Factors Affect the Cooking Time of Chicken Breasts?
Cooking a perfect chicken breast is an art that requires an understanding of the various factors involved in the process. The thickness of the chicken breast, the cooking method used, and the desired level of doneness are all important considerations that can affect the cooking time of chicken breasts.
Starting with thickness, it is crucial to recognize that thicker chicken breasts take longer to cook than thinner ones. The range of thickness can vary from 1/4 inch to over an inch, so it’s essential to adjust your cooking time accordingly. As a general rule of thumb, it’s recommended to cook chicken breasts for 6-8 minutes on each side. However, if your chicken breast is particularly thick, you may need to cook it for longer.
Another factor that affects the cooking time of chicken breasts is whether they are boneless or bone-in. Boneless chicken breasts will cook faster than bone-in ones because bones can act as insulators and slow down the cooking process. If you’re short on time, boneless chicken breasts may be the way to go.
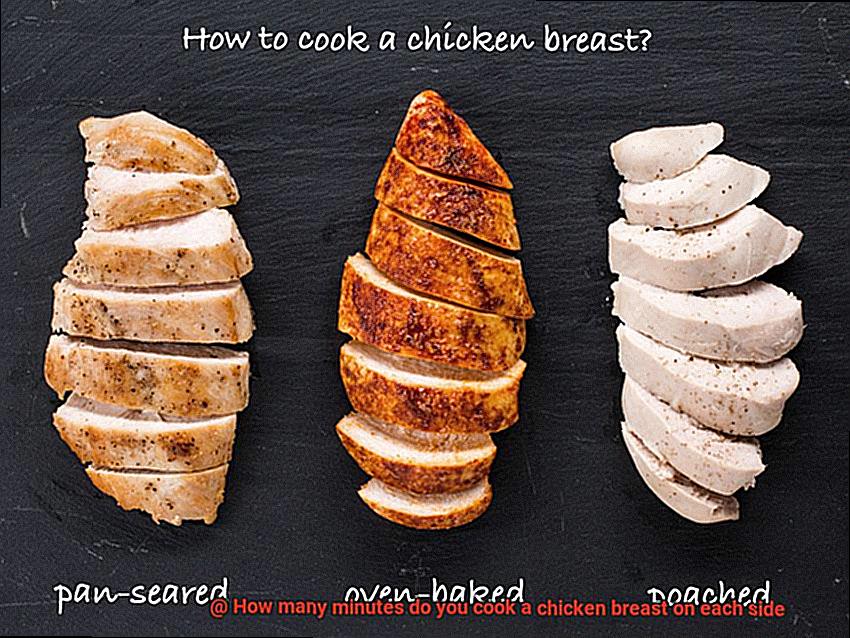
The cooking method used also plays a significant role in how long it takes to cook chicken breasts. Grilling, baking, frying, and broiling are all popular methods for cooking chicken breasts, but each method may require different cooking times and temperatures. For example, grilling chicken breasts at a high temperature may require less time than baking them in the oven at a lower temperature.
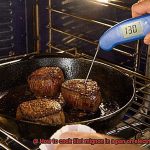
Lastly, the desired level of doneness is also an important factor to consider when cooking chicken breasts. Some people prefer their chicken breasts to be well-done, while others prefer them to be slightly pink in the middle. To ensure that your chicken breasts are cooked thoroughly, it’s recommended to use a meat thermometer to check the internal temperature. The internal temperature of cooked chicken should reach 165 degrees Fahrenheit.
A General Rule of Thumb for Cooking Chicken Breasts
Cooking chicken breasts to perfection can be a tricky task, but with the right technique, you can achieve a tender and juicy result every time. Let’s explore the general rule of thumb for cooking chicken breasts and some helpful tips to ensure a safe and delicious meal.
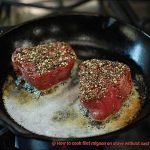
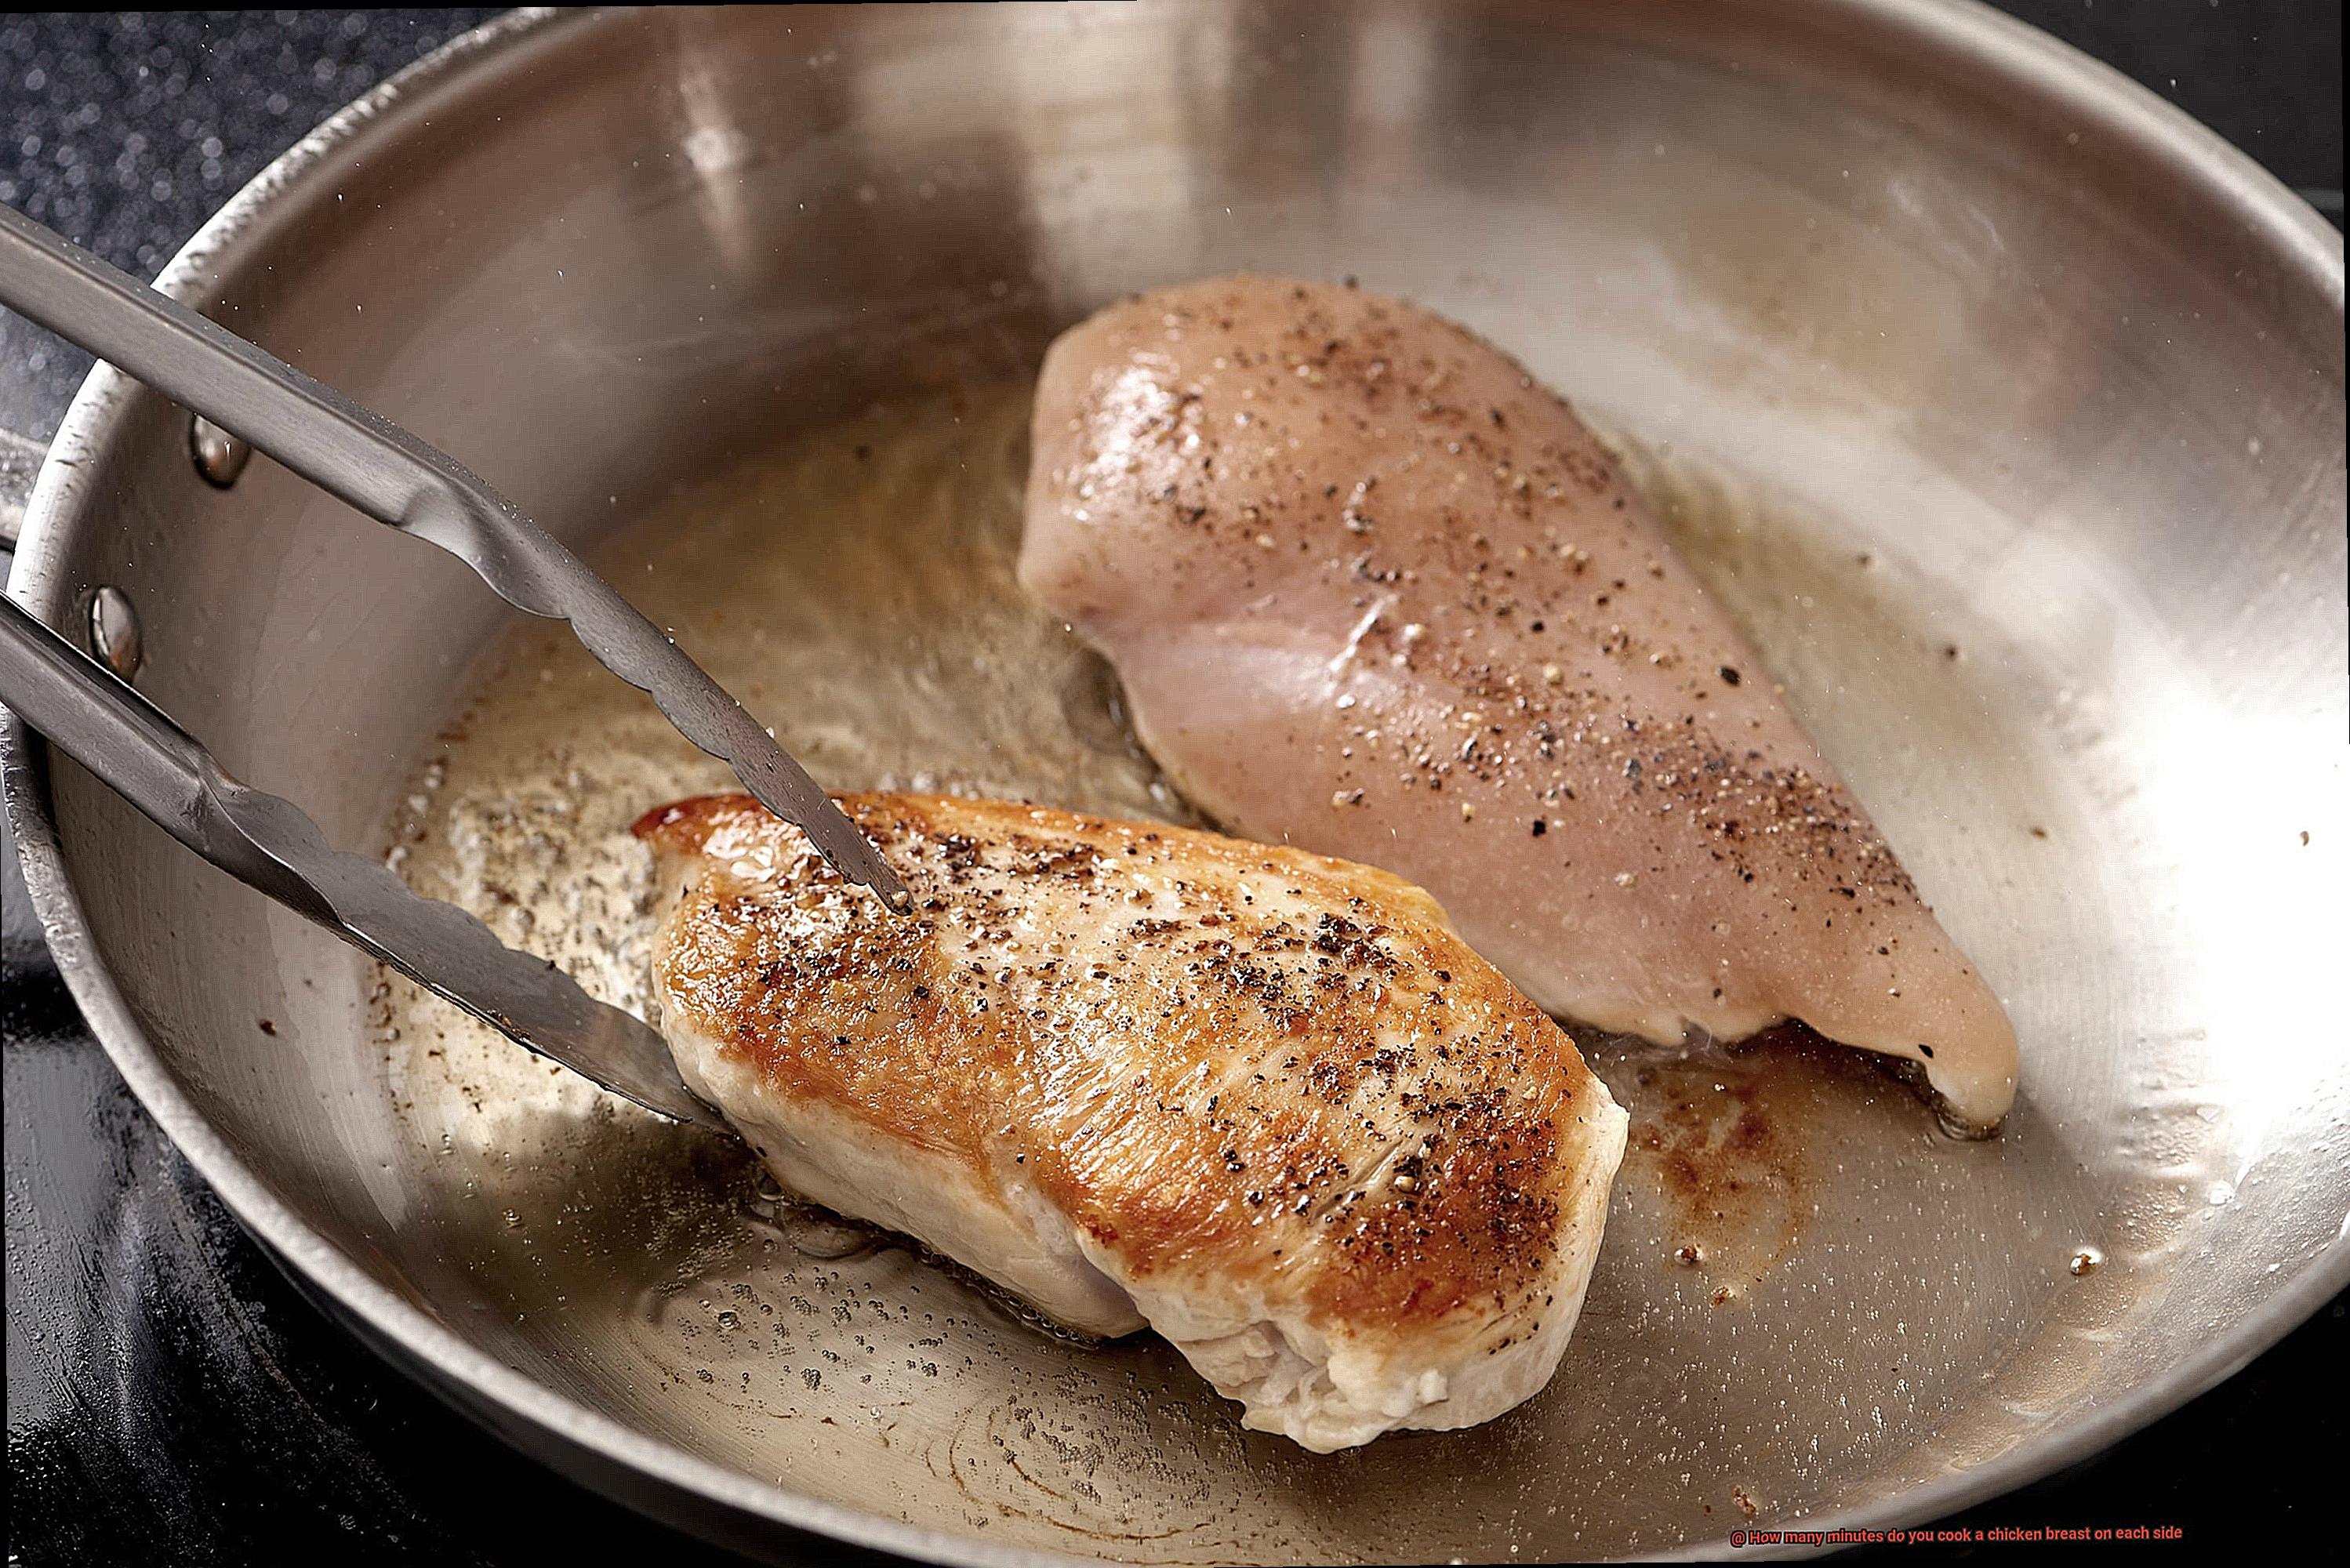
To begin, preheat your pan or grill on medium-high heat. Then, cook the chicken breasts for 6-8 minutes per side. However, keep in mind that the thickness of the chicken breasts can impact the cooking time. If they are thicker than usual, you’ll need to cook them for a little longer.
It’s also important to consider the cooking method you’ll be using. Grilling, baking, and pan-frying each have their own unique temperature requirements and cooking times. For example, grilling chicken breasts will require a higher heat and shorter cooking time than baking them in the oven.
Now, how do you know when your chicken is fully cooked? A meat thermometer is your best friend here. Ensure that the internal temperature of the chicken reaches 165°F (74°C), which is the safe minimum temperature for consuming poultry. This will help prevent any foodborne illnesses caused by undercooked chicken.
Here are some additional tips to keep in mind when preparing your chicken breasts:
- Always let your chicken rest for a few minutes before cutting it to allow the juices to redistribute and keep it moist.
- Season your chicken breasts generously with salt and pepper before cooking to enhance their natural flavors.
- If you’re using a marinade or sauce, brush it on during the last few minutes of cooking to prevent burning.
- Consider brining your chicken breasts beforehand to ensure they stay juicy and tender.
The Importance of a Meat Thermometer
Cooking chicken breast can be a daunting task, but with the right tools, you can achieve a succulent and juicy meal every time. One such essential tool in your kitchen arsenal is a meat thermometer. Trust us, investing in one is worth its weight in gold.
Here are some reasons why using a meat thermometer is crucial when cooking chicken breast:
- Eliminates Guesswork: Cooking chicken breast to perfection can be tricky, and relying on guesswork can lead to disastrous results. A meat thermometer takes out all the guesswork and ensures that your chicken is cooked to perfection every time.
- Ensures Safety: Undercooked chicken is a significant health hazard as it may contain harmful bacteria such as Salmonella or Campylobacter. Using a meat thermometer helps ensure that your chicken is cooked to the right temperature, making it safe for consumption.
- Prevents Overcooking: Overcooked chicken can be dry and tough, making it unappetizing and unpleasant to eat. With a meat thermometer, you can avoid overcooking your chicken and enjoy a tender and juicy meal.
By monitoring the internal temperature of your chicken with a meat thermometer, you can guarantee that it’s cooked to the perfect temperature every time. Chicken needs to be cooked to an internal temperature of 165°F (74°C) to be considered safe for consumption. Without a meat thermometer, it’s difficult to determine if your chicken has reached this temperature, leading to undercooked or overcooked chicken.
Using a meat thermometer is simple and easy. Just insert the probe into the thickest part of your chicken breast, making sure not to touch any bones or the bottom of the pan. Wait for the temperature reading to stabilize before removing the thermometer and checking the temperature.
Boneless vs Bone-in Chicken Breasts
Whether you’re a seasoned pro in the kitchen or just beginning your culinary journey, deciding between boneless and bone-in chicken breasts is an important consideration. Let’s dive into the differences and explore some tips and tricks to achieve mouth-watering results every time.
First up, we have boneless chicken breasts – the go-to option for many home cooks. Their popularity stems from their convenience and versatility. They are easy to prepare and cook quickly, making them perfect for those busy weeknights when time is of the essence. Plus, they can be sliced or chopped with ease, making them ideal for salads, stir-fries, and sandwiches.
But be warned, boneless chicken breasts can dry out quickly if overcooked. To avoid this culinary catastrophe, use a meat thermometer to monitor the internal temperature and remove from heat once it reaches 165°F. Don’t settle for mediocre chicken when you can achieve juicy and succulent results every time with this simple step.
On the other hand, we have bone-in chicken breasts – a more flavorful and juicy option that takes a bit more time to prepare. The bones help to retain moisture and add depth of flavor to the meat, making them perfect for grilling or roasting. Plus, they are a great option for those who love to get creative in the kitchen.
When it comes to cooking bone-in chicken breasts on the grill, start by searing them over high heat for 2-3 minutes per side. Then, move them to a cooler part of the grill and cook for an additional 25-30 minutes until the internal temperature reaches 165°F. This method ensures that the meat is cooked through while maintaining its juiciness and flavor.
Marinating and Seasoning Your Chicken Breast
It’s time to spice things up. As an expert in the field, I know that marinating and seasoning your meat is the secret to achieving mouthwatering results in the kitchen.
Let’s start with marinating. A marinade is a flavorful mixture of acidic ingredients like vinegar or citrus juice, along with herbs, spices, and oil. This magical elixir infuses your chicken breast with delicious flavors, resulting in a tender and juicy outcome. Some popular marinade options include tangy lemon herb, savory garlic and soy sauce, and sweet and tangy honey mustard. After creating your marinade, make sure to coat your chicken breast thoroughly and refrigerate for at least 30 minutes or overnight for maximum flavor absorption.
Next up, seasoning. The possibilities are endless when it comes to adding flavor to your chicken breast. Keep it simple with salt and pepper for a classic taste or get creative with paprika, cumin, or thyme for a unique twist. Rub your desired seasoning onto both sides of the chicken breast before grilling to ensure that every bite is bursting with flavor.
Now that your chicken breast is marinated and seasoned to perfection, it’s time to fire up the grill. Cooking time will vary depending on the thickness of your chicken breast, but a general rule of thumb is to grill each side for about 5-6 minutes over medium-high heat. To make sure your chicken is cooked thoroughly, use a meat thermometer to ensure that the internal temperature reaches 165°F before removing from the grill.
Tips for Perfectly Cooked Chicken Breasts Every Time
Perfectly cooked chicken breasts can be the centerpiece of a delicious and healthy meal. However, it can be challenging to ensure that they are juicy and tender every time. Here are five tips to help you achieve perfectly cooked chicken breasts every time:
Season your chicken properly
Before cooking your chicken breasts, make sure to season them properly. A simple seasoning blend of salt, pepper, garlic powder, and paprika is a classic option, but try experimenting with your own blend of herbs and spices for a unique flavor profile. Seasoning not only adds flavor but also helps keep the meat moist while cooking.
Heat your grill or pan to the right temperature
It’s crucial to ensure that your grill or pan is heated to the correct temperature before adding the chicken breasts. For grilling, preheat your grill to medium-high heat (around 400-450°F). For pan-searing, heat a tablespoon of oil in a skillet over medium-high heat until hot.
Cook for the right amount of time
For boneless, skinless chicken breasts that are about 6-8 ounces each, cook them for 6-7 minutes on each side, flipping only once. If you’re using a meat thermometer, the internal temperature should reach 165°F when fully cooked. If you’re cooking chicken breasts that are thicker or thinner than recommended, adjust the cooking time accordingly.
Let your chicken rest after cooking
After cooking your chicken breasts, let them rest for a few minutes before cutting into them. This allows the juices to redistribute throughout the meat and keeps it moist. Cover the chicken with foil to help retain heat while resting.
Marinate your chicken before cooking
Marinating your chicken before cooking can add flavor and moisture, making it more tender. Some popular marinade options include lemon and herb, honey mustard, and balsamic vinegar. Be careful not to over-marinate your chicken as this can cause the meat to become mushy and break down.
Conclusion
In summary, cooking the perfect chicken breast may seem like an intimidating task, but it’s definitely achievable with the right approach and equipment. To ensure that your chicken breasts are cooked to perfection, it’s important to consider various factors such as thickness, cooking method, and desired level of doneness. By following a general guideline for cooking chicken breasts and utilizing a meat thermometer to guarantee safety, you can create succulent and juicy results every single time.
Whether you prefer boneless or bone-in chicken breasts, adding seasoning and marinating your meat can enhance its flavor while keeping it moist and tender. Don’t forget to let your chicken rest after cooking so that the juices can evenly distribute throughout the meat.
By implementing these tips and tricks into your culinary arsenal, you’ll be able to cook flawlessly cooked chicken breasts each time.