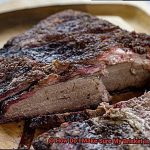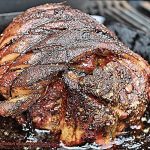
Picture this: the tantalizing scent of perfectly smoked meat wafting through the air, making your mouth water in anticipation. Ah, the joys of cooking on a Weber Smokey Mountain smoker. But let’s face it – taming that heat can be as tricky as wrangling a wild stallion.
Whether you’re a seasoned pitmaster or just starting out on your smoky journey, one thing is clear – controlling the temperature inside your trusty Weber Smokey Mountain is the secret to barbecue bliss. In this guide, we’ll unlock the secrets to reducing heat and putting it under your command.
From battling unpredictable weather to slowing things down for those long, leisurely cooks, we’ve got your back. So grab your apron and let’s dive right in, ready to fine-tune that heat on your Weber Smokey Mountain and take your smoking game to new heights.
Contents
How do I reduce the heat on my Weber Smokey Mountain?
Adjusting the Air Vents:
When it comes to reigning in the heat on a Weber Smokey Mountain, nothing beats mastering those air vents. These little wonders are located at both ends of the smoker – one at the bottom and one up top – controlling how much air flows in and out.
To lower that temperature, simply start by partially closing those bottom vents. This restricts oxygen flow, curbing combustion inside and bringing down that fiery frenzy. Remember though, it’s all about tiny tweaks here; even a gentle nudge can make a world of difference.
Water Pan Configuration:
Now let’s talk about managing that water pan like a pro. Situated just above the charcoal chamber, this humble hero does so much more than add moisture – it’s also responsible for stabilizing temperatures and diffusing heat.
To bring down that sizzle factor, consider adding some ice or cold water to the pan. It’s like a refreshing splash in a hot summer day, absorbing some of that scorching energy radiating from the coals and keeping things cool inside. And don’t forget to keep an eye on that water level throughout your cook; if it starts to vanish into thin air, top it up pronto.
Controlling Fuel Consumption:
The amount and arrangement of charcoal you use can make or break your heat control game. For a cooler smoke, go easy on the coals – fill only half or three-quarters of that charcoal chamber.
Adjusting Airflow
Achieving the perfect temperature for your grilling adventures requires mastery of the art of adjusting airflow on your Weber Smokey Mountain. By gaining full control over the airflow, you can reduce heat levels and enhance your cooking experience. In this comprehensive guide, we will explore the various vents, provide step-by-step instructions, and offer essential tips to help you become an expert in adjusting airflow.
Understanding the Vents:
The Weber Smokey Mountain boasts three vents that play a pivotal role in regulating airflow and temperature: the bottom vent, top vent, and side vents (on select models). These vents work in harmony to create an ideal cooking environment.
Step-by-Step Instructions:
Begin by partially closing the bottom vent to restrict air intake and lower the temperature. However, be cautious not to close it completely, as this may result in insufficient oxygen supply and hinder fire and heat production.
Adjust the top vent by partially closing it to limit the escape of hot air and maintain a lower temperature inside the grill.
If your Weber Smokey Mountain is equipped with side vents, partially close them too for further regulation of airflow and effective heat reduction.
Make small adjustments to each vent and observe how they impact the temperature. Gradual changes are advised to avoid sudden fluctuations in heat levels.
Additional Tips:
Take external factors into account, such as weather conditions and outdoor temperature, which can influence heat levels. Make necessary adjustments on scorching summer days or chilly winters.
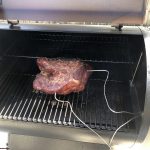
Monitor the temperature throughout your grilling session using a built-in or external thermometer to ensure consistent temperatures for perfectly cooked meals.
Utilize a water pan to regulate temperature and maintain moisture levels during cooking. Fill it with water or other liquids like apple juice or beer, creating a barrier between the heat source and your food. As the liquid evaporates, it absorbs heat, resulting in lower temperatures overall.
If needed, reduce the amount of charcoal or wood chunks used to control heat levels. Less fuel means reduced combustion and lower temperatures.
Insulation significantly affects heat control. Consider using insulation blankets or wrapping your smoker in aluminum foil to retain heat and prevent temperature spikes.
Closing the Vents
Achieving perfectly cooked meals on your grill requires precise temperature control. One effective technique to reduce heat levels on your Weber Smokey Mountain smoker is by closing the vents. As an expert griller, I will guide you through this essential skill and help you elevate your grilling game.
Mastering the Bottom Vents:
The bottom vents are your secret weapon for controlling airflow and heat intensity. Here’s how to close them like a pro:

- Locate the adjustable vents at the base of your smoker.
- Partially close them to restrict airflow and reduce heat.
- Monitor the temperature closely and make small adjustments as needed.
- Strike a balance between restricting airflow and maintaining a consistent fire.
Fine-tuning with the Top Vent:
The top vent plays a crucial role in maintaining consistent airflow and temperature control. Follow these steps to close it effectively:
- Find the vent cap on the lid of your smoker.
- Rotate it clockwise to partially or completely close the vent.
- Experiment with different positions for your desired heat reduction.
- Keep an eye on smoke levels, as it impacts both temperature and flavor.
Monitoring and Adjusting:
Practice makes perfect when it comes to grilling. Here are additional tips for monitoring and adjusting your vents:
- Make small adjustments when opening or closing vents.
- Monitor the temperature closely throughout the grilling process.
- Remember it’s easier to increase heat by opening vents than to decrease it if you overshoot your desired temperature.
- Use a thermometer for precise readings and optimal cooking results.
Elevating Your Skills:
Take your vent-closing skills to the next level with these additional tricks:
- Use a water pan for indirect heat and moisture control.
- Insulate your smoker with blankets or wraps to reduce heat loss.
- Experiment with different fuel types, such as wood chips or chunks, for unique flavors.
Adjusting the Top Vent
Mastering the art of temperature control is essential for taking your grilling skills to the next level. And when it comes to achieving optimal heat regulation, adjusting the top vent on your Weber Smokey Mountain smoker is a key component. In this comprehensive guide, we will explore the ins and outs of adjusting the top vent to reduce the heat inside and enhance your grilling experience.
To understand the role of the top vent, let’s first delve into its function. The top vent plays a crucial role in regulating the temperature inside the smoker. By adjusting this vent, you have control over the amount of airflow, which directly impacts the heat levels within.
To effectively reduce the heat on your Weber Smokey Mountain, start by opening the top vent fully. This allows for increased ventilation, enabling excess heat to escape and effectively lowering the temperature inside. However, keep in mind that solely adjusting the top vent might not always be sufficient to significantly reduce the heat.
Several factors come into play when maintaining a desired temperature. Outside temperature, wind conditions, and the amount of fuel in the smoker all contribute to heat regulation. If opening the top vent doesn’t achieve desired results, consider partially closing it to restrict airflow. By limiting the amount of oxygen entering the smoker, you can effectively reduce heat production.
Experimentation is key when finding the right balance for your specific grilling needs. Try different combinations of top vent positions to consistently achieve your desired temperature range. It is crucial to make gradual adjustments in small increments as sudden changes in airflow can lead to temperature fluctuations.
While adjusting the top vent is an important aspect of temperature control, it is just one piece of the puzzle. Other techniques such as controlling fuel quantity and placement, using water pans or heat deflectors, and managing airflow through other vents (such as bottom vents) also contribute to achieving optimal temperature control.
To ensure accurate temperature monitoring, invest in a reliable thermometer. Regularly monitor and gauge the effect of any adjustments you make to the top vent or other variables. This practice will help you fine-tune your grilling game and consistently achieve perfectly cooked meals.

Using a Water Pan
Using a Water Pan is an effective way to conserve water and increase crop yield. It is a technique commonly used in agriculture, especially in regions with limited water resources or in areas prone to drought.
The concept behind using a Water Pan is simple. A shallow pan or basin is filled with water and placed near the crops. The water in the pan acts as a reservoir, providing a constant source of moisture for the plants. As the sun shines and the temperature increases, the water in the pan evaporates, creating a microclimate around the plants that is cooler and more humid.
There are several advantages to using a Water Pan in agriculture. Firstly, it helps conserve water by reducing evaporation from the soil. The water in the pan acts as a barrier against evaporation, preventing moisture loss from the ground. This means that farmers can use less water for irrigation, saving this precious resource.
Secondly, using a Water Pan can help increase crop yield. The cooler and more humid microclimate created by the evaporation of water in the pan is beneficial for plant growth. It reduces stress on the plants caused by high temperatures and dry conditions, leading to healthier and more productive crops.
To successfully implement the use of a Water Pan, there are a few key considerations. Firstly, it is important to choose an appropriate location for the pan. It should be placed near the crops, ensuring that the evaporating water reaches the plants effectively.
Secondly, the size and depth of the pan should be determined based on factors such as crop type, climate conditions, and available water resources. The pan should be large enough to hold an adequate amount of water but not too deep that it becomes difficult to refill or maintain.
Regular monitoring of the water level in the pan is essential to ensure that there is enough water for evaporation to occur consistently. Refilling the pan when necessary will help maintain optimal moisture levels for the crops.
It is also worth noting that the use of a Water Pan is most effective when combined with other water conservation techniques, such as mulching and efficient irrigation systems. These practices work together to create a sustainable and efficient water management system for agriculture.
Adding Additional Fuel
Prepare to elevate your cooking game to new heights as we delve into the art of adding additional fuel to your Weber Smokey Mountain smoker. Whether you’re a seasoned pitmaster or a novice in the world of grilling, understanding how to control and reduce heat is crucial for achieving mouthwatering results. Join us as we explore the ins and outs of this essential skill.
Choosing the Right Fuel:
When it comes to fuel options for your Weber Smokey Mountain, two stars take center stage: charcoal briquettes and wood chunks. Charcoal briquettes offer consistent heat output and longer burn time, while wood chunks infuse a unique smoky flavor into your food. For steady temperature maintenance, opt for unlit charcoal briquettes. And if you desire an extra burst of flavor, pre-soaked wood chunks will do the trick.
The Process:
Prepare your smoker by removing the cooking grates and water pan, giving you access to the charcoal grate.
Arrange unlit charcoal briquettes or soaked wood chunks on the charcoal grate, ensuring proper airflow for optimal combustion.
Light the charcoal using a chimney starter or lighter fluid (avoid lighter fluid for wood chunks).
Wait until the coals reach a grayish-white ash color before cooking, ensuring they are fully ignited for optimal performance.
Adjust the vents on your Weber Smokey Mountain to control airflow and maintain your desired temperature.
Throughout the cooking process, monitor the temperature closely and make necessary adjustments.
Tips for Success:
- Gradually add additional fuel during long smoking sessions to maintain a consistent temperature.
- Avoid sudden temperature spikes or drops by adding small amounts of fuel at a time.
- Soak wood chunks in water before use to prevent excessive heat and ensure optimal smoke quality.
- Patience is key; allowing coals to fully ignite is crucial for achieving perfect results.
Insulation for Heat Control
Insulation is a critical factor in achieving optimal heat control when it comes to grilling on a Weber Smokey Mountain. By incorporating insulation into your smoker setup, you can effectively manage heat levels and maintain a steady cooking temperature. Thankfully, there are various insulation options available that can revolutionize your grilling experience.
One popular choice for insulation is the thermal blanket. These remarkable wraps snugly envelop your smoker, providing an extra layer of insulation that traps heat inside. Imagine giving your smoker a cozy little blanket to snuggle up with, preventing any pesky heat loss and ensuring a consistent cooking temperature. It’s like creating a warm haven for your Weber Smokey Mountain.
Another method of insulation involves using heat-resistant gaskets or seals. These clever devices are strategically installed on the doors and vents of your smoker, creating an airtight seal that keeps heat from escaping. Bid farewell to those annoying leaks. With proper sealing, you can minimize heat loss and gain better control over those delectable cooking temperatures.
For those seeking exceptional heat retention, fire bricks and ceramic tiles are the MVPs of insulation. By strategically placing these powerhouses inside your smoker, you create a thermal mass that stabilizes temperatures and reduces those dreaded fluctuations. Perfect for those long-duration cooks or chilly grilling sessions, these materials will ensure your Weber Smokey Mountain remains at the ideal temperature throughout the entire cooking process.
Feeling crafty? You can even explore DIY insulation methods using aluminum foil or welding blankets. Wrapping aluminum foil around your smoker reflects heat back into the cooking chamber, while welding blankets provide additional insulation when draped over the smoker. Get creative and experiment with these versatile materials to achieve optimal heat control.
Before embarking on your insulation journey, it’s crucial to prioritize safety by following guidelines and manufacturer recommendations. Ensure that any materials used are heat-resistant and won’t pose a fire hazard. Monitor the temperature of your smoker at all times and make necessary adjustments to maintain optimal cooking conditions.
Experimenting with Different Techniques
When it comes to achieving grilling greatness, controlling the temperature is key. And if you’re looking to reduce the heat on your beloved Weber Smokey Mountain, experimenting with different techniques is the way to go. So, let’s dive into the world of grilling and explore the various methods you can try to achieve that perfect cook.
- Adjusting the airflow: The Weber Smokey Mountain features vents at the bottom and top, giving you control over the temperature. To reduce the heat, start by partially closing the bottom vents. By limiting the oxygen supply to the fire, you’ll slow down combustion and lower the temperature inside your smoker. Keep an eye on the temperature gauge and make small adjustments until you reach your desired heat level.
- Harnessing the power of water pans: The Weber Smokey Mountain comes with a water pan that sits above the fire source. This little beauty helps regulate and stabilize the temperature inside the smoker. To reduce heat, fill the water pan with cold water or even ice. This will absorb and dissipate some of the heat, effectively lowering the temperature inside. Just remember to consider humidity levels when planning your cooking preferences.
- Playing with fuel quantity: Using less charcoal or wood chunks will generate less heat, while adding more will increase it. Start by reducing the amount of fuel initially added to your smoker and see how it affects the temperature. Make additional adjustments along the way to achieve that perfect cooking condition.
- Choosing your fuel wisely: Charcoal briquettes burn at a more consistent rate compared to lump charcoal, which can burn hotter and faster. By using briquettes, you can have better control over the temperature and reduce the heat as desired. Similarly, different wood varieties can impact heat output. Some woods burn hotter than others, so opting for milder woods can lower overall heat.
- Embracing heat deflection: Placing a heat deflector or a water pan between the fire source and the cooking grates can help distribute the heat more evenly and create a cooler cooking zone. This is perfect for delicate ingredients that need gentle cooking or when you want to slow down the overall cooking process.

Monitoring and Adjusting Accordingly
It’s an aroma that stirs the senses and ignites the taste buds. But achieving that perfect cook requires more than just tossing food on the grates and crossing your fingers. It’s all about mastering the art of temperature control, particularly when using a Weber Smokey Mountain. In this blog post, we’ll delve into why monitoring and adjusting the temperature is crucial for grilling success. Get ready for some handy tips and techniques that will elevate your grilling game and help you achieve optimal results.
The importance of temperature monitoring:
- Accurate readings: Invest in a reliable thermometer to ensure precise temperature measurements, both inside the smoker and in your meat.
- Consistency is key: Maintaining a steady temperature throughout the cooking process ensures even cooking and prevents dreaded over or undercooking.
Essential tools for temperature control:
- Digital thermometer: This trusty companion provides more accurate readings than the built-in lid thermometer, giving you greater control over your cooking.
- Recipe or cooking guide: Each recipe may require specific temperature instructions, so consult your guide for the ultimate grilling experience.
Adjusting the vents:
- Bottom vents: When you close these vents, oxygen intake decreases, reducing fire intensity and lowering the temperature. Experiment with small adjustments until you find your sweet spot.
- Top vent: Open it wider to allow heat and smoke to escape, or partially/close it to trap heat inside—finding the right balance is crucial.
Harnessing the power of a water pan:
- Adding moisture magic: A water pan helps retain moisture in the cooking environment, ensuring succulent and juicy food.
- Heat sink effect: Fill the water pan with hot water to absorb excess heat, keeping the temperature stable and under control.
Adjusting fuel quantity:
- Taming the flames: Too much fuel, such as excessive charcoal or wood chunks, can lead to higher temperatures. Remove or adjust accordingly for the perfect fire.
- Fire size manipulation: Skillfully altering the fire’s size allows you to bring the temperature down to your desired range—master this technique for grilling greatness.
Conclusion
Reducing the heat on your Weber Smokey Mountain can be a challenge, but fear not. There are some simple steps you can take to tame those fiery temperatures and achieve barbecue perfection.
Firstly, adjust the air vents. These little guys are key to controlling the heat. By opening them up, you allow more oxygen to flow in, increasing the heat. Conversely, closing them down restricts airflow and lowers the temperature. It’s like playing with fire, quite literally.
Next, consider using a water pan. This magical device acts as a heat sink, absorbing excess energy and helping to regulate temperature. Simply fill it with water and place it between the charcoal and the cooking grate. The water will evaporate slowly, creating a cooling effect that keeps things nice and steady.
If these methods still haven’t cooled things down enough for your liking, try reducing the amount of fuel you’re using. Less charcoal means less heat production. It’s all about finding that perfect balance between flavor and temperature control.
And finally, don’t forget about timing. Cooking at a lower temperature may require a bit more patience, but trust me when I say it’s worth it. Slow and steady wins the race when it comes to barbecuing.
So there you have it – some tried-and-true techniques for reducing the heat on your Weber Smokey Mountain. With these tips in your grilling arsenal, you’ll be able to conquer any fiery challenge that comes your way.