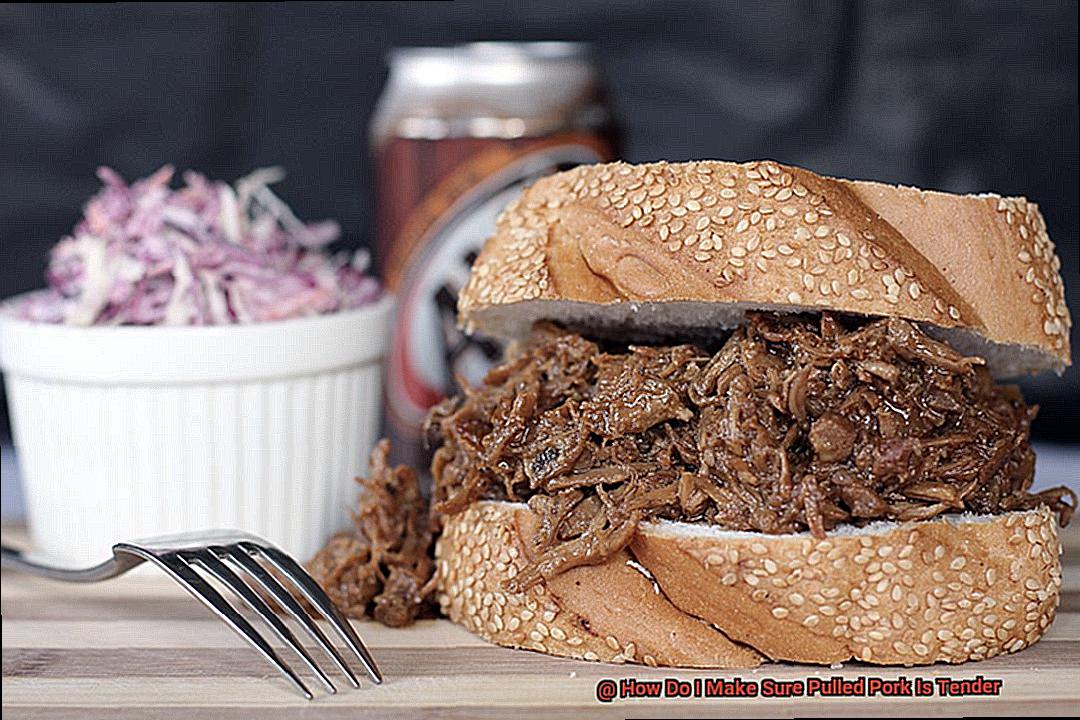
Picture this: sinking your teeth into a heavenly sandwich overflowing with succulent, flavor-infused strands of pork that practically melt in your mouth. Pure bliss, right? But let’s face it – achieving that perfect tenderness can sometimes feel like embarking on an elusive culinary quest. Fear not, my friends, because today we’re about to unlock the secrets to making sure your pulled pork is tender enough to make your taste buds do a happy dance.
Get ready for an exhilarating journey as we delve into the art of transforming this humble cut of meat into a tantalizing delicacy. From those initial seasonings that make your senses tingle with anticipation to the slow-cooking process that transforms toughness into tenderness, we’ll uncover all the essential tips and techniques that will skyrocket your pulled pork game.
Gone are the days of worrying about chewy, stubbornly tough pork that leaves you longing for more. Armed with knowledge and a few expert tricks up your sleeve, you’ll soon be creating pulled pork so tender it’ll practically dissolve on your tongue. Prepare to amaze your loved ones with your newfound mastery of this irresistible dish.
Stay tuned as we dive headfirst into the nitty-gritty details, unraveling the mysteries behind achieving that sought-after tenderness that will turn you into the ultimate pitmaster. Your culinary adventures are about to reach new heights, my friend – and trust me when I say you won’t want to miss a single mouthwatering step along the way.
Contents
Selecting the Right Cut of Pork
The key to achieving mouthwatering pulled pork lies in selecting the right cut of pork. Different cuts have varying levels of fat, marbling, and connective tissue, all of which greatly impact the final texture and tenderness of the meat. This guide will take you through the process of choosing the ideal cut for your pulled pork masterpiece.
The Mighty Pork Shoulder:
One popular choice for pulled pork is the pork shoulder, also known as the Boston butt or pork butt. This cut comes from the upper part of the shoulder and contains a good amount of marbling and connective tissue. During low and slow cooking, these fats and tissues break down, resulting in succulent and easily shredded meat.
Lean and Tender Loin:
For a leaner option that still yields tender pulled pork, consider using a boneless center-cut pork loin. This cut requires a lower temperature and longer cooking time to prevent drying out. However, with proper technique, it can still produce deliciously tender results.
Meaty Country-Style Ribs:
Another excellent choice for pulled pork is country-style ribs, derived from the shoulder or blade end of the pork loin. These ribs are meatier and contain more fat and connective tissue, making them perfect for slow cooking methods that result in tender, juicy meat.
Other Cuts Worth Exploring:
While the pork shoulder, loin, and country-style ribs are popular options, don’t overlook other cuts such as picnic shoulder, spareribs, or St. Louis-style ribs. Each cut may require slight variations in cooking techniques or times, but they can still deliver fantastic pulled pork.
Trimming Excess Fat
In this article, we will explore the significance of trimming fat and provide step-by-step instructions to ensure your pulled pork is moist, flavorful, and absolutely irresistible.
Choose the Right Cut:
Begin by selecting a pork shoulder or butt with a moderate amount of marbling. This marbling provides enough fat to keep the meat moist during cooking while avoiding an overwhelming greasy texture.
Inspect and Trim:
Place the pork on a cutting board and carefully inspect it for any large chunks of fat. Use a sharp knife to trim away these fatty areas, being cautious not to remove too much meat in the process. Leaving a thin layer of fat intact is crucial as it adds flavor and helps retain moisture.
Enhance Smoke Penetration and Caramelization:
Removing excessive fat allows for better smoke penetration and caramelization of the meat, resulting in enhanced flavors and a rich profile for your pulled pork.
Pat Dry:
After trimming off excess fat, pat the pork dry with paper towels to remove any surface moisture. This step is essential for developing a perfect crust during cooking and ensuring optimal texture in your pulled pork.
Proper Disposal:
Dispose of any trimmed fat properly to prevent fire hazards. Remember, fat can be flammable if left near an open flame or hot grill.
Applying a Dry Rub
Welcome to the world of culinary adventure, where we explore the secrets of applying a dry rub to create tender and flavorful pulled pork. A dry rub is like a secret weapon, a blend of herbs, spices, and flavorings that can elevate your taste buds to new heights.
But what exactly is a dry rub, and how does it work its magic? A dry rub is a mixture of carefully selected ingredients that are applied to the surface of the pork before cooking. Its primary purpose is to infuse the meat with flavor, but it also has the added benefit of tenderizing the pork. The combination of spices and seasonings work their wonders, coaxing out tenderness while creating a symphony of flavors.
Let’s dive into the step-by-step process of applying a dry rub for tender pulled pork:
Step 1: Begin with a clean slate
Before applying the dry rub, ensure that the pork is patted dry with paper towels. This removes any excess moisture and allows the rub to adhere better to the meat.
Step 2: Sprinkle, massage, and embrace the magic
Now comes the fun part – sprinkle the dry rub generously all over the pork, embracing every inch of the meat. Use your hands to massage the rub into every nook and cranny, ensuring that it coats every surface. This intimate massage not only spreads the flavors but also helps tenderize the meat.
Step 3: Time for a little patience
After applying the dry rub, allow it some time to work its magic. Let the pork rest at room temperature for about 30 minutes. During this time, the flavors seep deep into the meat, enhancing its succulence.
Step 4: The waiting game (for those with patience)
For those who possess patience, consider taking it one step further by marinating the pork in the dry rub overnight in the refrigerator. This extended time allows the flavors to meld and infuse into the meat, resulting in a taste that is truly exceptional.
Step 5: Choose your weapon of choice
Now that the dry rub has worked its wonders, it’s time to decide how you want to cook your pulled pork. Whether you opt for the smoky embrace of a grill, the gentle heat of a slow cooker, or the controlled environment of an oven, rest assured that the flavors from the rub will permeate the meat, creating an irresistible crust on the outside.
Step 6: Keep an eye on perfection
Remember, a dry rub alone cannot guarantee perfectly tender pulled pork. To ensure optimal doneness without sacrificing juiciness, monitor the internal temperature with a reliable meat thermometer.
Step 7: The moment of transformation
Once your pulled pork reaches perfection, allow it to rest for a few minutes before embracing its transformation. Gently shred or pull it apart with two forks, allowing the juices to redistribute throughout the meat. This moment of rest ensures that every bite is succulent and bursting with flavor.
Low and Slow Cooking
Low and slow cooking is a method that involves slow-cooking the pork at a low temperature for an extended period of time, resulting in tender and flavorful pulled pork. The process begins with selecting the right cut of pork, such as a pork shoulder or Boston butt, which are well-marbled with fat and contain collagen that breaks down during cooking.
To enhance the flavor, a dry rub is applied to the pork, consisting of spices like paprika, brown sugar, garlic powder, onion powder, salt, and pepper. This rub is generously applied to all sides of the meat and allowed to sit for several hours or overnight to infuse the flavors.
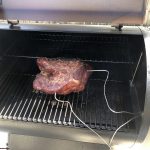
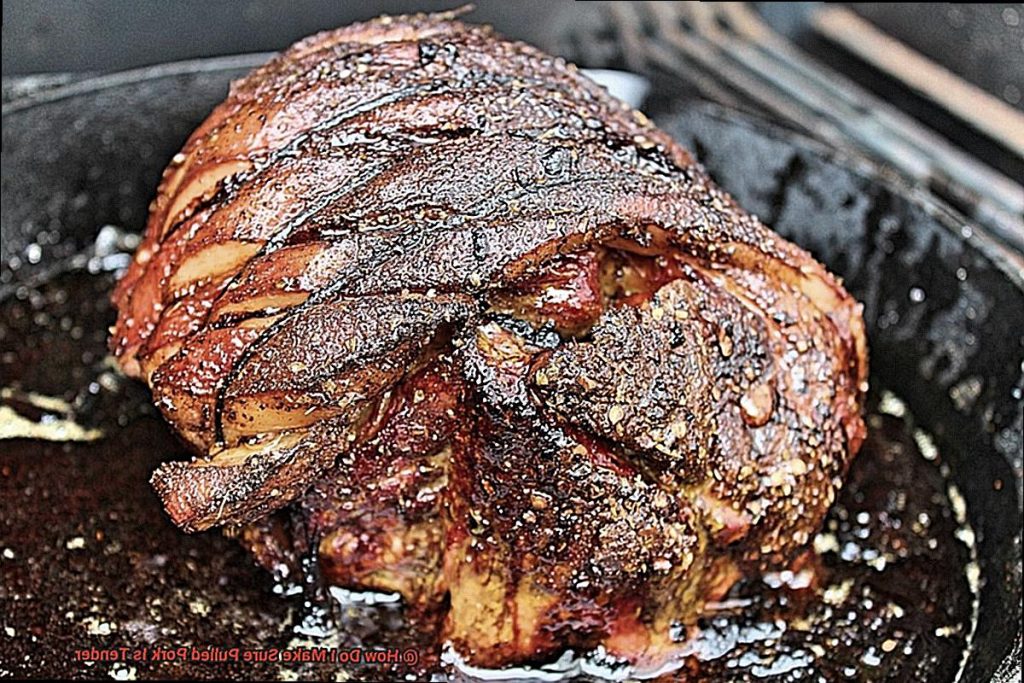
Next comes the smoker. Preheating the smoker to around 225-250 degrees Fahrenheit (107-121 degrees Celsius) is essential for maintaining a consistent cooking temperature. The low temperature ensures slow and even cooking, while adding wood chips or chunks creates that desired smoky flavor.
Once the pork is in the smoker, it’s important to resist the urge to constantly check on it. Opening the smoker frequently can cause temperature fluctuations and increase cooking time. Trusting the process is key.
Cooking time can vary depending on the size of the pork, but a general guideline is 1.5 to 2 hours of cooking time per pound of meat. However, relying on internal temperature rather than time alone is more accurate. When the pork reaches an internal temperature of around 195-205 degrees Fahrenheit (90-96 degrees Celsius), it’s ready to be pulled.
Before shredding the meat, it’s crucial to let it rest for at least 30 minutes. This allows the juices to redistribute throughout the meat, resulting in a more flavorful end product.
Using Indirect Heat
Indirect heat is a cooking method that brings together the art of slow cooking and the smoky flavors we all love. If you’re aiming to master the art of tender and delicious pulled pork, then understanding how to use indirect heat is essential. In this comprehensive guide, we’ll take you through everything you need to know to achieve perfect pulled pork every time.
At its core, indirect heat involves placing the meat away from direct flames or a heat source. This method is commonly used for slow cooking large cuts of meat like pork shoulder or Boston butt, which are ideal for making pulled pork. By cooking the meat slowly and evenly, indirect heat allows the connective tissues to break down and become tender.
To set up your grill for indirect heat, you can create a two-zone fire. This means having one side of the grill with direct heat and the other side without any direct heat. By placing the meat on the side without direct heat, it can slowly cook over a longer period, resulting in succulent pulled pork.
If you don’t have access to a grill or prefer using an oven, fear not. You can still achieve fantastic results by utilizing indirect heat. Simply preheat your oven to 225-250°F (107-121°C) and place your pork in a roasting pan on a rack. This setup allows the heat to circulate evenly around the meat, ensuring tender results.
Maintaining a consistent temperature throughout the cooking process is crucial for achieving that perfect pulled pork texture. Use a thermometer to monitor the temperature and adjust the vents or burners accordingly. Aim for a temperature range of 225-250°F (107-121°C) and try to maintain it throughout the cooking time.
To add an extra layer of flavor to your pulled pork, consider using wood chips or chunks to create smoke. Soak the wood in water for about 30 minutes, then place it directly on the hot coals or in a smoker box for gas grills. The smoke from the wood will infuse your pork with a delicious smoky flavor as it slowly cooks to perfection.
Lastly, don’t forget to use a drip pan underneath the meat to catch any drippings and prevent flare-ups. This simple step will help ensure that your pulled pork stays moist and tender throughout the cooking process.
Basting or Mopping the Meat
Look no further than the tantalizing techniques of basting or mopping your meat. Brace yourself, because this is about to be a game-changer.
Why should you bother basting or mopping your succulent pulled pork? Let me break it down for you. First and foremost, this method ensures that your meat doesn’t suffer the dreaded fate of drying out on the grill. Picture sinking your teeth into dry, tough pork – not exactly a delightful experience. But fear not. By regularly applying a luscious liquid mixture to your meat, you’re infusing it with moisture and keeping it juicy, tender, and oh-so-satisfying.
But wait, there’s more. Basting or mopping doesn’t just rescue your pork from the perils of dryness – it also takes its flavor to dazzling new heights. Picture this: a magical elixir of herbs, spices, and seasonings cascading onto your meat like a symphony of taste. As you brush or mist this liquid concoction onto the pork, every nook and cranny becomes an explosion of mouthwatering flavors, leaving your taste buds dancing with joy.
Now, let’s dive into the methods and mixtures that will make your pulled pork sing. There are a plethora of options at your fingertips when it comes to basting or mopping. You can go classic with a trusty basting brush or mop, ensuring that every inch of the meat is coated to perfection at regular intervals during the cooking process. Or perhaps you’re feeling adventurous – in that case, grab a spray bottle and spritz that liquid mixture onto your pork like a refreshing mist, adding an extra touch of finesse to your grilling routine.
As for the liquid mixture itself, the possibilities are endless. Some grill enthusiasts opt for simplicity with a blend of apple cider vinegar, water, and spices, letting the natural flavors of the pork shine through. Others dive headfirst into bold marinades or mouthwatering barbecue sauces bursting with personality. The choice is yours, my friend, and it all depends on your personal taste preferences.
Remember, consistency is key. Don’t forget to regularly apply that liquid mixture throughout the cooking process to ensure that your pulled pork remains a tender and moist masterpiece.
Wrapping in Foil
Calling all grill aficionados and pitmasters. Are you ready to take your pulled pork game to the next level? Look no further than the magical technique of wrapping in foil. Today, we will unravel the secrets behind this tried-and-true method that guarantees tender, juicy, and downright delicious pulled pork. So, grab your aprons and let’s dive in.
Retaining Moisture:
Imagine sinking your teeth into a mouthwatering piece of slow-cooked pork, only to be met with disappointment – it’s dry and chewy. Fear not. Wrapping your pulled pork in foil acts as a moisture lock, trapping the natural juices and steam. Each succulent bite will ooze with flavor, ensuring a tantalizing experience.
Even Cooking Environment:
Say goodbye to “hot spots” ruining your culinary masterpiece. Wrapping in foil provides an even distribution of heat, eliminating any potential inconsistencies. Every inch of your pork will cook at a consistent temperature, resulting in a tender and evenly cooked final product.
Sealing the Deal:
To achieve pork perfection, creating a tight seal when wrapping in foil is crucial. This ensures that no precious steam escapes during the cooking process. Simply fold those edges tightly together, creating a snug pouch for the meat to cook in its own juices. Seal the deal and watch the magic unfold.
The Wrapping Ritual:
Now that we’ve covered the benefits, let’s talk about how to wrap your pulled pork like a pro. Start by placing your cooked pork on a sheet of aluminum foil, including any accumulated juices or sauce for extra flavor. Carefully fold the edges of the foil over the pork, sealing it tightly to create a secure package. For an added layer of insulation and protection, double-wrap the pork with another layer of foil.
The Grand Finale:
After wrapping your pulled pork, you have two options: return it to your grill or smoker for further cooking or let it rest. Resting allows the flavors to meld while the residual heat gently continues to cook the meat, breaking down connective tissues and rendering it tender and succulent. The choice is yours – both paths lead to pulled pork paradise.
Resting Period
The resting period is a crucial step in achieving the perfect pulled pork – tender, flavorful, and juicy. After all the hard work and effort put into cooking the pork to perfection, it’s essential not to overlook this important stage. The resting period allows the meat to relax and reabsorb its juices, transforming it into a mouthwatering masterpiece.
So why is the resting period so important? Let’s break it down. When pork is cooked, the muscle fibers contract, resulting in tough meat. But fear not. The resting period comes to the rescue. During this time, the fibers relax and reabsorb some of the expelled moisture, leading to a tender and succulent texture.
To ensure optimal results, it’s recommended to let the pork rest for around 30 minutes to an hour, depending on the size of the cut. This allows the meat to reach an ideal temperature for easy pulling apart and shredding.
Properly wrapping the cooked pork is key to a successful resting period. Use aluminum foil or butcher paper to tightly wrap the meat, retaining heat and moisture. This helps facilitate the redistribution of delicious juices within the pork, enhancing its flavor.
While waiting for the resting period to complete, take advantage of this time wisely. Prepare mouthwatering sides or whip up a tantalizing sauce that will complement your pulled pork masterpiece.
If you find yourself needing more time before serving, don’t worry. You can extend the resting period by keeping the wrapped pork in a cooler or insulated container. This will help maintain its temperature and keep everything juicy and delicious.
Conclusion
To ensure your pulled pork is tender, there are a few key steps you can take. First and foremost, choose the right cut of meat. Opt for a pork shoulder or Boston butt, as these cuts have the perfect balance of fat and connective tissue that will break down during cooking, resulting in melt-in-your-mouth tenderness.
Next, it’s all about the seasoning. A dry rub or marinade can work wonders in enhancing the flavor and tenderness of your pulled pork. Be generous with spices like paprika, garlic powder, brown sugar, and black pepper. Let the flavors mingle by allowing the meat to marinate for at least a few hours or overnight.
When it comes time to cook your pork, low and slow is the name of the game. This means cooking at a low temperature (around 225-250°F) over an extended period (8-10 hours). This slow cooking method allows the collagen in the meat to break down gradually, resulting in tender strands that easily pull apart.
Another crucial step is to keep your pork moist throughout the cooking process. Basting with a flavorful liquid like apple juice or beer can help prevent dryness and add extra layers of flavor. You can also consider using a water pan in your smoker or grill to create a humid environment that keeps the meat juicy.
Once your pork reaches an internal temperature of around 195°F, it’s time for the final step: resting. Remove the meat from heat and let it rest for at least 30 minutes before pulling it apart. This allows the juices to redistribute throughout the meat, ensuring each bite is moist and tender.
In conclusion, achieving tender pulled pork requires selecting the right cut of meat, properly seasoning it, cooking low and slow with moisture retention techniques, and allowing for adequate resting time.