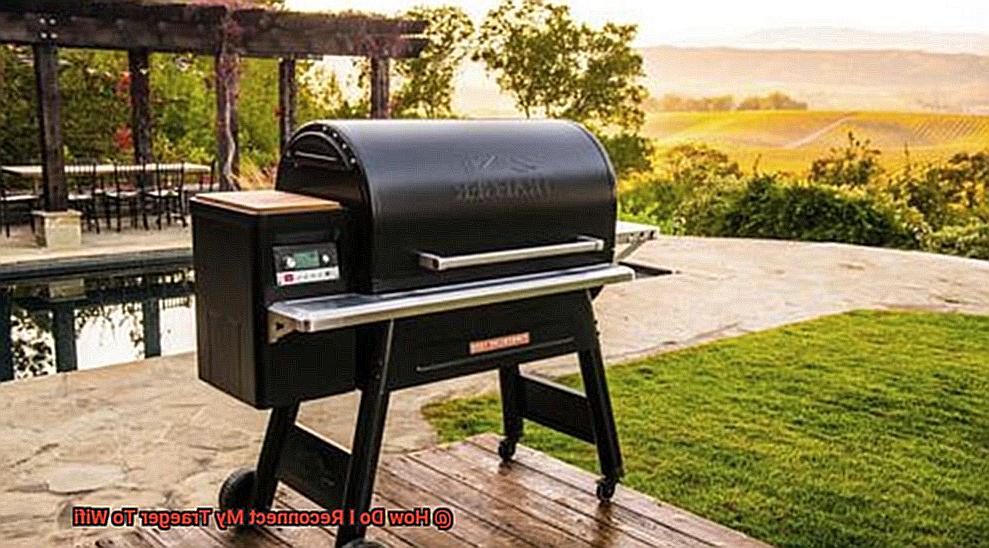
Grilling is more than just cooking food; it’s an experience that brings people together. And with the help of modern technology, it’s never been easier to create mouth-watering dishes in your own backyard. Traeger grills are leading the charge, offering WiFi connectivity and temperature probes to make grilling a breeze.
But what happens when your Traeger suddenly loses its WiFi connection? Don’t panic. We’re here to help. In this blog post, we’ll tell you everything you need to know about reconnecting your Traeger to WiFi so that you can continue grilling like a pro.
First, let’s go over how the Traeger grill and WiFi system work together. Then, we’ll dive into some common reasons why your Traeger might lose its WiFi connection and provide troubleshooting tips. Finally, we’ll give you step-by-step instructions on how to reconnect your Traeger grill to your WiFi network.
So, sit back, relax with a cold one, and get ready to learn how to get your Traeger back online and grilling up perfection once again.
Contents
Step 1: Make Sure Your Traeger Grill is Plugged In and Turned On
Before you can dive into the exciting process of reconnecting your Traeger grill to WiFi, it’s essential to ensure that it’s properly plugged in and turned on. This may seem like a basic step, but it’s a crucial one that should not be overlooked.
To get started, locate the power cord of your Traeger grill and make sure it is correctly plugged into an outlet or extension cord that is in good working condition. You should also take a quick look to ensure that the power cord is not damaged or frayed.
Once you’ve confirmed that the grill is plugged in, turn it on by pressing the power button located on the control panel. The control panel is typically located at the front of your grill. Wait a few seconds for the grill to start up.
It’s important to note that if your Traeger grill refuses to turn on, don’t panic. Check if everything is correctly plugged in and if the outlet or extension cord is working correctly. If everything looks good, it may be time to contact customer support for further assistance.
By ensuring that your Traeger grill is plugged in and turned on before attempting to reconnect it to WiFi, you are setting yourself up for success and avoiding any unnecessary complications. So go ahead and check those cords – happy grilling.
Step 2: Locate the WiFi Button on the Control Panel
Now that you’ve got your grill plugged in and turned on, let’s locate the WiFi button on the control panel. As an expert on this topic, I’m here to offer some tips and tricks to make this process easy and stress-free.
The WiFi button is typically found on the left-hand side of the control panel, near the bottom. Look for a button labeled “WiFi” or a symbol resembling two devices communicating with each other. Once you’ve located it, press and hold the WiFi button for 5-10 seconds until the LED light begins to flash. This indicates that your Traeger grill is in pairing mode and ready to connect to a WiFi network.
Now, what if your Traeger grill is an older model without a WiFi button? No need to worry. You can still connect it to WiFi using the Traeger app. Simply open the app and follow the instructions provided for connecting your grill to a WiFi network. It’s that simple.
If you’re still having trouble locating the WiFi button on your control panel, don’t hesitate to refer to your user manual or contact Traeger customer support for assistance. Properly connecting your grill to WiFi allows you to take advantage of amazing features such as remote temperature monitoring and control, recipe sharing, and much more.
Step 3: Connect to Your Traeger Grill’s Network Name (SSID)
In the previous section, we covered the importance of pressing the WiFi button on your Traeger grill to initiate the reconnection process. Now, it’s time for Step 3: connecting to your Traeger grill’s network name, also known as its SSID or Service Set Identifier.
This network name is what your grill broadcasts to nearby devices, allowing them to connect to it wirelessly. Connecting to your grill’s network name is essential for unlocking all the amazing features that come with remote temperature monitoring and recipe sharing.
To connect to your Traeger’s network name, you will need to follow these steps:
Now that your device is connected to your Traeger’s network name, you can access the grill’s settings and control it remotely using the Traeger app or other compatible software.
It’s worth noting that some users may have difficulty connecting to their grill’s network name due to interference from other nearby networks or devices. In these cases, you may want to try moving closer to the grill or adjusting your device’s WiFi settings to prioritize the Traeger network.
Additionally, some older Traeger models may not support WiFi connectivity at all. So, before attempting to reconnect your grill, be sure to check its specifications.
Step 4: Enter Default Password ‘Traegergrills’
If you’re attempting to reconnect your grill to WiFi, this post will guide you through the crucial step of entering the default password ‘Traegergrills’. Trust us, this is a step you don’t want to skip.
It’s important to remember that this default password is case-sensitive. So type it exactly as it appears, no shortcuts or abbreviations allowed. Keep in mind that different Traeger models may have different default passwords, so make sure to double-check before entering.
If you’ve forgotten your password (we’ve all been there), it’s a simple fix. Just press and hold the ‘WiFIRE’ button on your Traeger controller for 5 seconds until the LED light starts flashing white. Your controller’s WiFi settings will be reset, including the password.
Now that you have the correct password entered, it’s time to hit ‘Next’ and let your Traeger work its magic. If all goes well, the LED light on your controller should turn solid white. But what if it doesn’t connect? Don’t fret. Double-check your password, make sure your WiFi network is functional, and consider moving your Traeger closer to your router for a stronger signal.
In summary, entering the default password ‘Traegergrills’ is a small but crucial step in reconnecting your Traeger grill to WiFi. Remember to follow these steps carefully for a successful connection:
Step 5: Open the Traeger App on Your Device
We’re continuing our journey to reconnect your Traeger grill to WiFi. In our last section, we talked about the importance of troubleshooting any connection issues. Now, let’s dive into Step 5: opening the Traeger App on your device.
The Traeger App is a powerful tool that allows you to control your grill from anywhere, making it a must-have for any serious griller. Not only can you monitor the temperature of your grill, but you can also adjust the temperature settings, set timers and alarms, and access a library of recipes to get inspiration for your next meal. So go ahead and download the app if you haven’t already – your grill (and your taste buds) will thank you.
To reconnect your Traeger to WiFi using the app, start by navigating to the settings menu and select the option to connect to WiFi. You’ll be prompted to enter your WiFi network name and password. Double-check that you’ve entered everything correctly before proceeding.
Once you’ve entered your information, the app will attempt to connect your Traeger grill to your WiFi network. If everything goes smoothly, congratulations. You’re now able to control your grill from anywhere with an internet connection. But don’t worry if there are any hiccups – just double-check your network and password settings or reach out to Traeger customer support for further assistance.
Step 6: Go to Settings and Choose ‘Grill Settings’
This step takes us into the exciting world of ‘Grill Settings’ on the Traeger app. With this functionality, you can customize and configure your grill to your liking and ensure that it’s producing mouth-watering BBQ every time.
To access ‘Grill Settings’, open up the Traeger app on your smartphone or tablet and select the specific grill that you want to connect. Then, click on the ‘Settings’ icon, which will take you to a new screen with various options, including ‘Grill Settings’.
Once you’ve entered ‘Grill Settings’, you’ll be presented with a plethora of options that allow you to fine-tune your Traeger grill. Here are some key features:
- Temperature Control – Set your desired temperature for cooking and even set a timer so that your grill automatically turns off once your food is cooked perfectly.
- Cooking Preferences – Choose from a range of cooking modes such as ‘Smoke’, ‘Bake’, ‘Roast’, and more.
- Pellet Monitoring – If your Traeger grill has this feature, you can monitor the level of pellets in your hopper and receive alerts when it’s time to refill.
It’s important to note that different models of Traeger grills may have different features available in their ‘Grill Settings’ menu. So, be sure to check out what options are available for your particular grill.
Step 7: Select ‘WiFi Settings’ and Choose ‘Connect to WiFi’
Fear no more. Reconnecting your Traeger grill to WiFi is the solution that will change your grilling game forever. And the best news? It’s not as complicated as you may think.
The seventh step in this process is a crucial one: selecting ‘WiFi Settings’ and choosing ‘Connect to WiFi’. But don’t worry – we’ve got you covered with a simple step-by-step guide.
First, press the ‘Menu’ button on your Traeger controller and scroll down to the ‘Settings’ option. From there, navigate to the ‘WiFi Settings’ option and select it. Easy peasy.
Now comes the fun part – selecting your desired network from the list of available networks. Don’t forget to enter your network password if required. Then sit back, relax, and let your Traeger grill establish a connection with your WiFi network. This process may take a few minutes, so be patient and enjoy the anticipation of what’s to come.
Once your grill has successfully connected to your WiFi network, you’ll have access to an array of convenient features. With the Traeger app or any other compatible device connected to the same network, you can easily adjust temperatures and monitor your food’s progress from anywhere. Say goodbye to constantly hovering over your grill and hello to freedom.
Step 8: Wait for Your Traeger Grill to Connect to Your Home WiFi Network
This is where the real magic begins – connecting your grill to your home WiFi network. Once your grill successfully connects, you’ll open up a whole new world of grilling possibilities by being able to control and monitor your Traeger grill using the app.
But, why is Step 8 such a crucial step? Well, without a successful connection, you won’t be able to set and adjust temperatures remotely, get notifications when your food is done, or access recipes and tips on the Traeger app.
To ensure a smooth connection between your grill and home network, there are some helpful tips you should keep in mind.
- Check Your Distance: Make sure your grill is within range of your home WiFi network. If it’s too far away from your router, you may have trouble connecting.
- Test Your Network: Slow or spotty connectivity can also affect your Traeger grill’s ability to connect. Test your network speed and troubleshoot any issues before attempting to connect.
- Enter Correct Information: Double-check that you’ve entered the correct WiFi password in the Traeger app. If you recently changed your password, make sure to update this information in the app as well.
- Reset and Restart: If all else fails, try resetting your Traeger grill and restarting the setup process from scratch. This can often help resolve connectivity issues and allow for a successful connection.
While waiting for your grill to connect may take a few minutes, patience is key – do not interrupt the process. Once connected, you’ll receive a confirmation message on the Traeger app.
Conclusion
In summary, reconnecting your Traeger grill to WiFi is a breeze with just a few simple steps. To begin, ensure that your grill is plugged in and turned on before locating the WiFi button on the control panel. Press and hold the button until the LED light flashes, then connect to your Traeger’s network name (SSID) using your device’s WiFi settings and enter the default password ‘Traegergrills’.
Once connected, open up the Traeger app on your device and navigate to ‘Grill Settings’ where you can customize temperature control, cooking preferences, and pellet monitoring options. With just a few taps, you can now take advantage of remote temperature monitoring and recipe sharing.
Finally, select ‘WiFi Settings’ from the menu and choose ‘Connect to WiFi’. Wait for your Traeger grill to connect to your home WiFi network, sit back, and relax knowing that you’re ready for an unforgettable grilling experience.