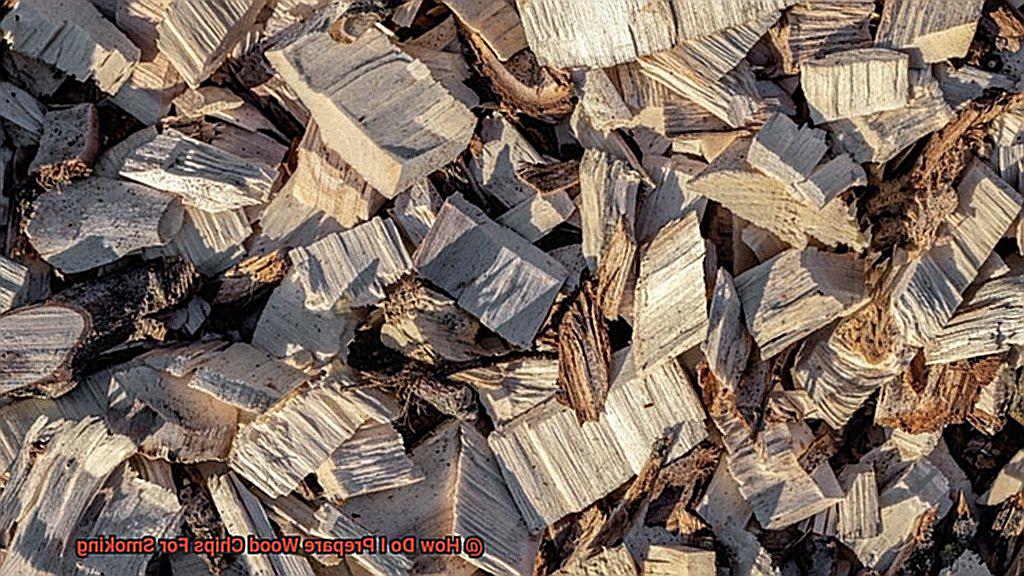
Smoking meat isn’t just a cooking method – it’s a way of life. There’s nothing quite like the tantalizing aroma of barbeque and smoking meats wafting through the air. But did you know that the type of wood chips you use can make all the difference when it comes to flavor? Whether you opt for hickory, mesquite, or apple wood, your choice of wood chips will influence the final taste of your smoked meat.
Before tossing your wood chips into your smoker, it’s crucial to prepare them properly to ensure maximum flavor. In this article, we’ll cover the basics of how to prepare your wood chips for smoking. We’ll explore different techniques for getting them ready, such as soaking them overnight or using a smoke box. Plus, we’ll dive into best practices for using prepared wood chips – including how to add them to your smoker correctly and when to add more during the smoking process.
Whether you’re an experienced smoker or just starting out, understanding how to prepare your wood chips for smoking is key in achieving that perfect, mouthwatering flavor. So grab those wood chips, fire up that smoker, and let’s get smokin’.
Contents
Choosing the Right Wood Chips
The type of wood chips you use will affect the flavor and aroma of your meat, so it’s essential to select the right one for your desired taste.
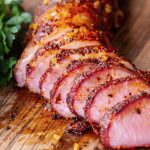
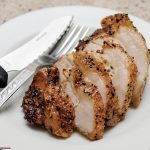
The options are endless when it comes to wood chips, but some popular choices include hickory, mesquite, applewood, and cherrywood. Hickory is a classic choice that gives meat a bold and smoky flavor, while mesquite chips offer a southwestern-style taste that’s perfect for beef. For a sweet and mild flavor, applewood chips are ideal for poultry and pork. Cherrywood chips also offer a sweet taste and enhance the natural flavors of meat.
When selecting wood chips, it’s important to avoid any that have been chemically treated or contain additives. These can negatively affect the taste of your meat and even be harmful to consume. Additionally, choose high-quality chips that have been stored correctly to avoid contamination with mold or bacteria.
Another factor to consider when selecting wood chips is their size. Smaller chips burn faster and release smoke quicker and more intensely, while larger ones last longer and release smoke slower and more evenly. It’s up to you to decide which size works best for your smoking needs.
Before using your chosen wood chips, it’s crucial to soak them in water. This allows the wood to absorb moisture, which slows down the burning process and results in a more even smoke. Soak your chips overnight for maximum absorption or for a few hours before use if you’re short on time.
Soaking the Wood Chips
Look no further than the technique of soaking wood chips before smoking your meats. As an expert in all things grilling, I can attest that this simple yet effective method is a game-changer when it comes to adding flavor to your favorite cuts of meat.
So, how does soaking wood chips work? When wood chips are submerged in water, they absorb moisture, which results in them producing smoke when heated. This smoke infuses your meats with that delicious, smoky flavor we all crave.
The key to properly soaking your wood chips is timing. The amount of time required for soaking depends on the type of wood being used and your personal preference. Some grill masters prefer a quick 30-minute soak, while others opt for an overnight soak. However, it’s important to note that soaking for too long can result in waterlogged chips and a weaker flavor.
Another crucial factor is the temperature of the water used for soaking. Cold water is the way to go, as it allows the chips to absorb moisture slowly and evenly. This results in optimal smoke production and flavor. And if you’re feeling adventurous, try adding other liquids such as beer or wine to the soak for added depth of flavor.
Once you’ve soaked your wood chips, it’s time to get smoking. Remember to drain the chips and place them in a smoker box or directly onto the coals of a charcoal grill. Keep in mind that wet wood chips will produce more steam than smoke initially, but as they dry out during the smoking process, they will begin producing smoke.
To summarize, here are some important tips for soaking wood chips:
- Timing is key: The amount of time required for soaking depends on personal preference and the type of wood being used.
- Use cold water: This allows for slow and even moisture absorption, resulting in optimal smoke production and flavor.
- Drain before smoking: Wet wood chips will produce more steam than smoke initially, but as they dry out, they will begin to produce smoke.
- Get creative: Try adding other liquids such as beer or wine to the soak for added depth of flavor.
Draining and Preparing for Use
It’s time to step up your game and learn about the essential process of draining and preparing your wood chips for smoking. This crucial step can turn average meals into mouthwatering, smoky masterpieces.
Firstly, remember that soaking your wood chips is key to achieving that perfect smoky flavor. However, be wary of oversoaking as it can lead to extinguishing the chips and producing steam instead of smoke. Now, let’s dive into the steps for draining and preparing your wood chips like a pro.
Step 1: Drain Them
Begin by placing your soaked wood chips in a colander or strainer and rinse them thoroughly with cold water. This eliminates any excess water from the chips, ensuring they won’t extinguish.
Step 2: Dry Them Out
After draining the chips, shake off any excess water and spread them out on a clean, dry surface such as a baking sheet or tray. Allow the wood chips to air dry for at least 30 minutes until they are no longer dripping wet. This step is crucial in ensuring the chips smoke properly.
Step 3: Get Creative
Now that your wood chips are drained and dried, it’s time to spice things up by adding extra flavor. Soak your wood chips in other liquids such as beer or fruit juice to give your dishes a unique twist. This enhances the taste of your grilled meats or vegetables and adds complexity to your dishes.
Using a Smoker Box
Enter the smoker box – a small metal box that can transform your gas grill into a smoky masterpiece. Here’s how to use one like a pro:
First, soak your wood chips in water for at least 30 minutes. This will help them smoke more slowly and evenly. While the chips are soaking, preheat your grill on high for about 10-15 minutes.
Once the grill is hot, turn off one or more of the burners and place the smoker box directly on top of the lit burner(s). Spread out the soaked wood chips in the smoker box and close the lid of the grill. Let the chips smoke for about 10-15 minutes before placing your food on the grill.
But beware – using a smoker box may cause flare-ups on your grill, especially if you’re using a lot of wood chips. Keep an eye on the temperature and adjust as needed. You may also need to add more wood chips periodically throughout the cooking process.
Looking to step up your smoking game even further? Here are some additional tips:
- Experiment with different types of wood chips to achieve different flavors. Mesquite is great for beef, while applewood pairs well with pork.
- Try seasoning your meat with a dry rub before smoking for even more flavor.
- For longer smoking sessions, consider using a water pan in addition to your smoker box. This will help keep your meat moist and prevent it from drying out.
Placing the Wood Chips on Hot Coals or in a Smoker Box
Look no further than the proper placement of wood chips on hot coals or in a smoker box. As an expert in this field, let me guide you through the process step by step.
First things first, if you’re using a charcoal grill, wait until the coals are hot before adding the wood chips. This ensures that the chips start smoking immediately and infuse your food with that irresistible smoky flavor. Sprinkle a handful of wood chips on top of the coals and spread them out evenly to ensure even smoking.
For gas grillers, a smoker box is your trusty sidekick. Fill it with your favorite wood chips and place it on top of the grates, near the flames. This allows the wood chips to start smoking and add flavor to your food.
But wait, there’s more. Soak your wood chips in water for at least 30 minutes before use to prevent them from burning up too quickly and to produce more smoke. And don’t be afraid to experiment with different types of wood chips – hickory pairs well with beef and pork, while applewood lends itself to poultry and fish.
Monitoring Temperature and Airflow
To take your smoking game to the next level, it’s time to master the art of monitoring temperature and airflow. Don’t worry, it’s not as complicated as it may sound. With a few tips and tricks, you’ll be smoking like a pro in no time.
Temperature is the first key factor in perfectly smoked meats. To achieve the ideal temperature range of 200-250 degrees Fahrenheit, using a thermometer is crucial. While many smokers come with built-in thermometers, it’s always a good idea to double-check with an additional thermometer for accuracy. Place the thermometer in a location that accurately reflects the temperature of the cooking area. Keep it away from the heat source or too far away from the food.
Airflow is the second crucial factor in efficient smoking. It ensures that oxygen reaches the fire, allowing the wood chips to burn efficiently and produce smoke. Without proper airflow, you may experience fluctuations in temperature and a lack of smoke. Keep the vents open on both the smoker or grill and the lid to allow air to flow freely through the cooking area.
Overcrowding is another issue that can affect airflow. Avoid placing too much food or too many wood chips in the cooking area, as this restricts airflow and affects the efficiency of the smoking process.
Benefits of Preparing Wood Chips for Smoking
Look no further than preparing your wood chips for smoking. Not only does it enhance the flavor and aroma of your food, but it also provides several other benefits that will take your smoking to the next level.
Firstly, preparing wood chips infuses additional flavors into your smoke. By soaking the wood chips in liquids like beer or wine, you can add a subtle yet transformative twist to your dishes. The results? A symphony of flavors that complement the meat or fish being smoked and take it from good to great.
Secondly, controlling the intensity of the smoke is essential for a perfect smoke. By soaking the wood chips, you can regulate the amount of smoke produced and adjust it to your preference. This not only enhances the flavor of your food but also eliminates the possibility of over-smoking or under-smoking.
Thirdly, preparing wood chips helps to create a more even burn. Soaking them in liquid prevents them from catching fire too quickly and burning out too fast. This means that you can maintain a steady temperature throughout the smoking process, resulting in more evenly cooked food.
Moreover, this method is cost-effective since you can purchase wood chips in bulk and prepare them yourself at home instead of buying pre-soaked ones at a higher price. This gives you complete control over the type of wood and liquid used to soak them.
Finally, preparing wood chips is environmentally friendly as soaking them reduces the amount of smoke produced during the cooking process, resulting in less air pollution. It also helps to prolong the life of your smoker by reducing the buildup of creosote and other harmful substances.
Common Mistakes to Avoid
Before you start preparing your wood chips, it’s important to avoid some common mistakes that can ruin the taste of your food.
Firstly, not soaking your wood chips is a big no-no. It’s like seasoning your smoker with wood chips, and not soaking them can lead to an acrid smoke that ruins the taste of your food. So, take the time to soak your wood chips for at least 30 minutes, depending on their thickness.
Next up, using too many wood chips can overpower the flavor of your food. While we all want that smoky taste in every bite, using too many wood chips can lead to a thick and heavy smoke that ruins the flavor of your dish. Keep in mind that a little goes a long way; use about 1 cup of wood chips for every hour of smoking.
Another mistake is choosing the wrong type of wood chips. Different types of woods give different flavors to your food. For instance, mesquite wood is perfect for beef but can be overwhelming for poultry or fish. Do some research and choose wood chips that complement the type of meat you’re smoking.
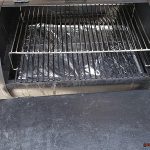
Lastly, not cleaning your smoker or grill before smoking can transfer foul odors and tastes to your food. It’s essential to clean your smoker or grill thoroughly before each use to ensure that you get the best possible flavor from your wood chips.
Conclusion
In conclusion, the art of smoking meat is not complete without knowing how to prepare wood chips. The perfect smoky flavor can be achieved by carefully selecting the right type of wood chips, soaking them correctly, and using a smoker box or placing them on hot coals with precision. During the smoking process, it’s crucial to monitor temperature and airflow for even cooking and optimal smoke production.
Preparing wood chips offers several benefits beyond enhancing the flavor and aroma of your food. Infusing additional flavors, controlling smoke intensity, creating a more even burn, being cost-effective, and environmentally friendly are just some of the advantages. However, common mistakes such as not soaking the wood chips or using too many can ruin your efforts. Choosing the wrong type of wood chips or neglecting to clean your smoker or grill before use can also lead to less-than-perfect results.
Whether you’re a seasoned pro or a novice in the world of smoking meat, mastering the preparation of wood chips is essential in achieving that mouthwatering flavor that will have everyone asking for seconds.