You’ve got your smoker all set up, the meat is marinated to perfection, but there’s just one hitch – the temperature isn’t quite where it needs to be. No worries, we’ve all been there.
Whether you’re a newbie or a seasoned pro at smoking, knowing how to crank up that heat is key to nailing that irresistible cook. In this blog post, we’ll delve into the techniques and tips that’ll have your smoker firing on all cylinders in no time.
So, let’s dive right in and take your smoking game up a notch.
Contents
Types of Fuel Sources
Today, we embark on an exciting journey through the diverse realm of fuel sources for smokers. The right fuel can elevate your culinary creations to new heights, infusing them with tantalizing flavors and achieving that perfect temperature. So, let’s ignite our passion and delve into the mesmerizing world of different fuel sources that can turn your smoker into a culinary powerhouse.
Charcoal: The Timeless Favorite
When it comes to smoking, nothing beats the classic allure of charcoal. Its simplicity and reliability have made it a tried and true favorite among barbecue aficionados. Whether you opt for charcoal briquettes or embrace the natural beauty of lump charcoal made from real wood, both options offer a steady heat output and add a distinct smoky flavor to your food. For those seeking a more authentic taste, lump charcoal burns hotter and faster, making it ideal for high-temperature smoking that will leave taste buds tingling with delight.
Wood Chips and Chunks: A Symphony of Flavors
If you crave an enchanting symphony of flavors in your smoked dishes, look no further than wood chips and chunks. These aromatic wonders come in a variety of tantalizing options like hickory, mesquite, apple, or cherry. Each wood type brings its own unique aromas and character to your culinary creations. To enhance the experience, soak the wood chips in water before adding them to your smoker. This releases more smoke, intensifying the flavors and leaving an indelible mark on your taste buds.
Wood Pellets: Where Convenience Meets Flavor
For those who embrace the ease and precision of pellet smokers, wood pellets are an absolute game-changer. These small but mighty compressed sawdust pellets offer an array of flavors to choose from. They effortlessly infuse your food with that irresistible smoky taste while providing the convenience of automatic feeding into the smoker’s firebox. With wood pellets, you can master temperature control with ease, allowing you to focus on the art of creating culinary masterpieces.
Propane or Natural Gas: The Art of Control
When it comes to mastering the art of precise temperature control, propane or natural gas smokers take center stage. With a simple turn of a knob, you have complete command over your smoking experience. These fuel sources offer convenience and consistency in heat levels, ensuring that your delicacies are cooked to perfection. While they may not deliver the same depth of smoky flavor as other options, they more than compensate with their user-friendly nature.
Electric Smokers: A Symphony of Simplicity
Convenience and simplicity are the hallmarks of electric smokers. Powered by electricity, these smokers provide you with effortless control over temperature throughout the smoking process.
Adjusting Air Vents
Today, we’re going to dive into the secrets of adjusting air vents on your smoker to increase its temperature. Achieving that perfect heat level is the key to mouthwatering smoked meats. So, grab your apron and let’s get grilling.
Understanding the Role of Air Vents:
Air vents are the unsung heroes of your smoker. They control the flow of oxygen, which directly influences the heat inside. By adjusting these vents, you can create the ideal cooking environment for that smoky goodness.
Identifying Intake and Exhaust Vents:
Most smokers have two types of vents: intake vents at the bottom and exhaust vents at the top. Opening or closing these vents regulates the amount of oxygen entering and exiting the smoker.
Opening Both Vents Fully:
To kickstart your temperature increase, open both intake and exhaust vents fully. This allows maximum airflow, ensuring that oxygen can reach the fire or charcoal.
Gradual Adjustments:
If maximum airflow doesn’t achieve your desired temperature, it’s time for some fine-tuning. Start by slightly closing the exhaust vent while keeping the intake vent fully open. This restricts airflow and raises the temperature inside.
Finding the Perfect Balance:
Temperature control is a delicate dance between intake and exhaust vents. Experiment with different combinations to strike that perfect balance for your smoking adventure.
- Partially closing intake vent reduces airflow and lowers temperature.
- Adjustments may be needed based on external factors such as wind and weather conditions.
- Monitor and make additional changes to maintain optimal heat level.
- Consult your smoker’s manual for specific instructions.
Utilizing Dampers and Chimneys
Look no further than the secret weapons hiding in your smoker: dampers and chimneys. These often underestimated components hold the key to achieving the perfect sear on your grilled meats. In this guide, we will explore the art of utilizing dampers and chimneys effectively to elevate your grilling game.
Harnessing the Power of Dampers:
- The Intake Vent: Located at the bottom of the smoker, the intake vent is your gateway to controlling fire intensity. By widening it, you allow more oxygen to fuel the flames, resulting in a hotter fire. Strike the perfect balance between airflow and temperature control.
- Gradual Adjustments: Mastering temperature control requires patience. Make small, deliberate adjustments to the intake vent, carefully observing their impact on temperature. Remember, slow and steady wins the grilling race.
Unleashing Chimney’s Potential:
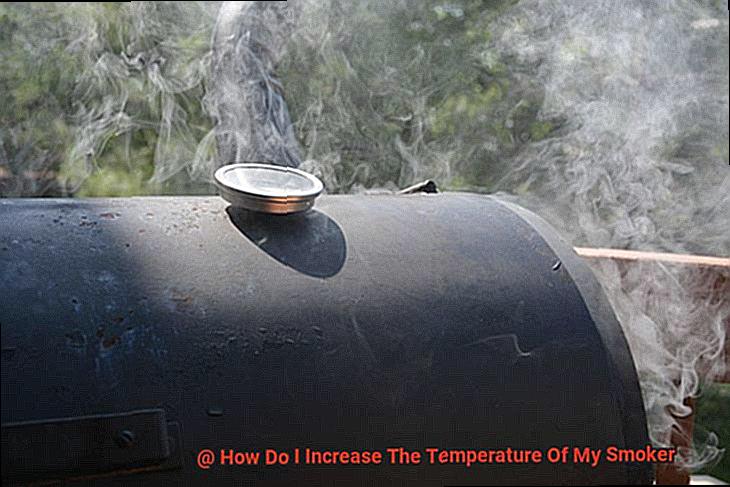
- The Exhaust Vent: Positioned at the top of the smoker, the exhaust vent or chimney is your commander of airflow within the cooking chamber. Cracking it open creates a draft, pulling fresh air through the intake vent to stoke the fire.
- Cleanliness is Key: Ensure your chimney remains unobstructed by debris or buildup that may hinder airflow. A pristine chimney guarantees efficient temperature control.
Pro Tips for Boosting Temperature:
- Preheating Ritual: Before adding food, treat your smoker to a preheating session of at least 15-20 minutes with all vents wide open. This ensures an even distribution of heat throughout.
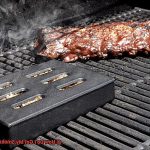
- Fuel Selection Matters: Opt for charcoal briquettes or hardwood lump charcoal for intense and sustained heat. These options deliver higher temperatures compared to other fuel sources.
- Smoke Infusion: Soak wood chunks or chips in water and introduce them to the fire. The result? A symphony of smoke and heat that elevates the temperature inside your smoker.
Mastering the Art:
- Patience is Key: Increase the temperature gradually by finely tuning the dampers and chimneys. Avoid sudden changes that may lead to unwelcome spikes or drops in temperature.
- Practice Makes Perfect: Embrace experimentation. Play with different settings, fuel sources, and cooking techniques to discover your grilling sweet spot.
- Enjoy the Journey: Becoming a grilling master takes time and dedication. Revel in the process of honing your skills and delighting in delicious, perfectly cooked meats.
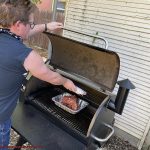
Preheating the Smoker
Preheating your smoker is a crucial step in achieving the desired temperature for grilling. It not only ensures even heat distribution but also helps to burn off any residues from previous cookings, creating a clean and safe cooking environment. In this article, we will guide you through the process of preheating your smoker, providing detailed instructions, tips, and considerations to help you become a true grilling master.
Choose Your Fuel Source:
When it comes to preheating your smoker, the first step is selecting your fuel source. If you prefer the classic smoky flavor, charcoal is the way to go. Arrange the charcoal in a pyramid shape and ignite them using either a chimney starter or lighter fluid. Wait until the coals are covered with white ash, indicating they are ready for cooking. For those who enjoy the aroma of wood, place a few dry wood chunks or chips on top of the fire and let them ignite. Adjust the airflow to control the intensity of the fire. If you prefer a more convenient option, gas smokers are ideal. Simply turn on the burner and adjust the temperature control knob to your desired setting.
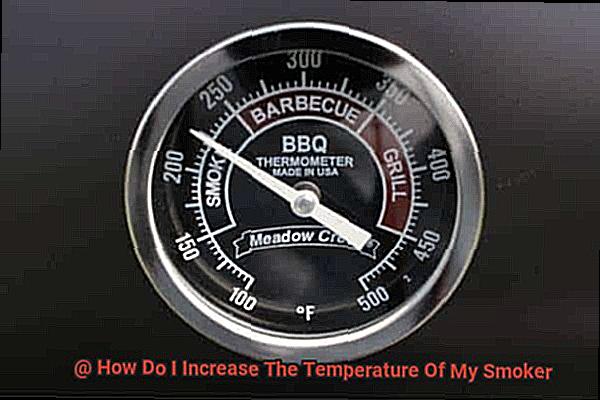
Monitor Temperature:
To ensure your smoker reaches and maintains the desired temperature, it’s essential to monitor it closely. Utilize either the built-in thermometer or an external thermometer placed inside the smoker. Keep an eye on the temperature gauge and aim for the desired range specified in your recipe or smoking guidelines. Remember to be patient—especially with charcoal or wood fuel sources—as it may take some time for the smoker to reach your desired temperature.
Close the Lid:
Once your fuel source is ignited, close the lid of your smoker. This simple act allows the smoker to heat up efficiently and evenly as it traps the heat within, resulting in consistent cooking temperatures.
Preheating Time:
Patience is key when preheating your smoker. Allow it to warm up for at least 20-30 minutes before adding any food. During this time, the smoker will reach and stabilize at the desired temperature. Avoid the temptation to frequently open the lid, as this can cause temperature fluctuations and prolong the preheating process. Remember, good things come to those who wait.
Clean and Safe Cooking Environment:
Preheating your smoker not only brings it up to temperature but also serves another essential purpose—burning off any residues from previous cookings. As the smoker heats up, these residues are incinerated, ensuring a clean and safe cooking environment for your food. By preheating your smoker, you create the perfect foundation for mouthwatering grilling masterpieces.
Using Water Pans or Drip Trays
Now that you’ve preheated your smoker like a pro, it’s time to take things up a notch and explore the world of water pans and drip trays. These underrated tools are the secret weapons for increasing the temperature of your smoker and achieving that perfect, juicy flavor in your grilled delicacies. So, let’s dive right in.
Water pans or drip trays are a game-changer when it comes to regulating and boosting the temperature of your smoker. Here’s how they work their magic:
- Maintaining a steady temperature: By adding water to a pan or tray, you create a moist environment that helps maintain a consistent temperature. The water absorbs heat from the smoker and evaporates, creating a cooling effect that prevents the temperature from skyrocketing. This is particularly useful for long smoking sessions where you want to control the heat.
- Adjusting the heat: But what if you want to crank up the heat? Fear not, my grilling comrades. Simply use less water in the pan or tray. By doing so, more heat will be absorbed by the smoker, resulting in a higher temperature. It’s important to keep an eye on the water levels and refill as needed to maintain that desired heat.
Now, let’s talk about drip trays and their advantages:
- Preventing flare-ups: Drip trays are placed beneath the cooking grates to catch any drippings from your sizzling food. This is important because those delicious drippings can cause flare-ups, which not only affect the overall temperature but also result in charred spots on your food. By using a drip tray, you prevent flare-ups and ensure that more heat is available for cooking.
- Easy cleanup: Opt for disposable aluminum drip trays for easy cleanup after each use. These trays save you precious time and effort, allowing you to focus on what really matters – enjoying your tasty creations.
Placement is key when it comes to maximizing the effectiveness of water pans or drip trays:
- Positioning: Place the water pan or drip tray directly above or below the heat source for optimum results. This ensures that the heat is evenly distributed and utilized efficiently.
- Choosing the right size: Select a water pan or drip tray that fits your smoker properly. A smaller pan or tray might not hold enough water or catch all the drippings, while a larger one could impact airflow and temperature regulation. Finding the right size for your specific smoker model is crucial for achieving the desired results.
Remember, grilling is an art, and experimentation is part of the journey. Fine-tune the amount of water or the position of your pans and trays to find that sweet spot for your specific smoker model.
Limiting Lid Openings
Using a smoker for grilling requires more than just skillful cooking techniques. To achieve mouthwatering flavor and perfectly grilled smoked delights, one crucial factor often gets overlooked – limiting lid openings. In this article, we will delve into the importance of keeping the lid closed and provide practical tips to maintain a steady temperature inside your smoker.
Retaining Heat and Smoke:
When you open the lid frequently, you risk losing valuable heat and smoke, disrupting the cooking process. By limiting lid openings, you can keep the precious heat trapped inside, ensuring even and thorough cooking.
Plan Ahead and Stay Organized:
Preparation is key to minimizing lid openings. Gather all your ingredients, tools, and equipment before starting the smoking process. Being organized saves time and reduces the need to open the lid repeatedly for forgotten items.
Have a Clear Plan of Action:
Know exactly what you need to do when opening the lid. Whether it’s flipping meat or checking internal temperatures, having a plan helps minimize the time the lid remains open.
Preparing in Advance:
Preheat your smoker, soak wood chips or pellets if required, and have your meats or vegetables seasoned and at room temperature before opening the lid. This preparation allows for a smoother cooking process with fewer interruptions.
Utilize Thermometers or Probes:
Make use of built-in thermometers in your smoker to monitor temperatures without opening the lid unnecessarily. Alternatively, invest in a digital thermometer or probe to monitor internal meat temperatures accurately.
Resist Temptation:
Avoid incessantly checking on your food. Trust the process and allow it to cook undisturbed. Frequent lid openings significantly impact cooking times and temperature stability.
Quick and Efficient Basting:
If basting or adding sauces/marinades is necessary, do so quickly and efficiently, minimizing the time the lid remains open. This ensures minimal heat loss during the process.
Avoid Peeking:
Resist the urge to peek through vents or other openings. Heat loss can occur, affecting the cooking process. Trust that the smoker is doing its job.
Experimenting with Different Methods
If you’re craving that perfect smoke-infused flavor, it’s time to dive into the world of experimenting with different methods to maximize the temperature of your smoker. Prepare to embark on a sizzling journey as we explore the art of heat manipulation.
First up, let’s talk airflow. Picture it as the fiery breath that fans the flames of your smoking adventure. By adjusting vents and dampers, you can control the influx of air into your smoker, fueling the fire and raising the temperature. Finding the delicate equilibrium is key – too much airflow, and your fire will blaze out of control; too little, and it will struggle to reach its full potential.
Now, let’s ignite our curiosity about fuels. Enter hardwood charcoal, the secret weapon for achieving scorching temperatures. It unleashes an unparalleled heat output compared to its briquette counterparts. But why stop there? Venture further by experimenting with various wood chips or chunks, adding layers of flavor while influencing the temperature to your liking.
But wait, there’s more. Adding more fuel to your firebox can be a game-changer. Stoke up that fire by piling on extra charcoal or wood, creating a roaring inferno that will skyrocket the temperature. Just remember to keep a watchful eye on this blazing beast and avoid sudden temperature spikes that could leave your food charred to a crisp.
Preheating – an essential prelude to grilling greatness. Give your smoker ample time to warm up before introducing your tantalizing ingredients. By allowing it to bask in heat’s loving embrace, you ensure that the internal temperature reaches its desired zenith, setting the stage for an epic culinary performance.
Now let’s introduce a little moisture magic – enter the water pan. This mystical contraption resides within your smoker, creating a sanctuary of steamy wonders. Fill it up and watch as it works its sorcery by maintaining higher temperatures. Acting as a heat sink, this water wonder absorbs and disperses heat throughout, ensuring a controlled and consistent cooking environment.
But what if we could unlock the secrets of heat efficiency? Behold, the power of insulation. Wrap your smoker in an insulating blanket specifically designed to keep the heat locked in, or construct a fortress of insulation around it. By harnessing this thermal barrier, you unleash the full potential of temperature efficiency, transforming your smoker into a mighty heat powerhouse.
Remember, dear grilling aficionado, experimenting with different methods requires patience and a willingness to embrace the unpredictability of each smoking vessel. Keep a record of your temperature-altering exploits, noting the impact of each adjustment on your culinary endeavors. In time, you shall uncover the holy grail of heat manipulation – the optimal method that unlocks the full potential of your smoking adventures.
CuVIwLv30tI” >
Conclusion
To boost the temperature of your smoker and achieve that perfect sear on your meats, there are a few tricks you can employ. First and foremost, ensure proper ventilation by adjusting the air intake and exhaust vents. This will allow for better airflow and thus increase the heat inside your smoker.
Another technique is to use smaller pieces of fuel, such as wood chips or charcoal. These will burn faster and generate more intense heat. Additionally, you can try preheating your fuel before adding it to the smoker. This will give it a head start in reaching higher temperatures.
Don’t shy away from experimenting with different types of fuel either. Certain woods, like oak or hickory, produce hotter flames than others. So don’t be afraid to mix it up and discover which fuel works best for you.
Moreover, keep an eye on the water pan in your smoker. If you’re aiming for higher temperatures, consider removing or reducing the amount of water in the pan. This will prevent moisture from absorbing too much heat and allow for a more intense cooking environment.
Lastly, be patient but vigilant. Increasing the temperature of your smoker may take time as it adjusts to your desired setting. But remember to monitor it closely to avoid overshooting your target temperature.