Are you a Traeger fanatic whose temperature probe has gone haywire? Don’t sweat it – this is a common problem among Traeger owners, and we’re here to help. It can be frustrating when your meat isn’t cooking correctly in the middle of a cook. But don’t worry, we’ve got your back. In this post, we’ll walk you through everything you need to know about fixing your Traeger temperature probe.
We’ll start with the basics – what exactly is a temperature probe and why is it crucial for cooking up that perfect meal? Then, we’ll dive into some common issues that might arise with your probe and how to troubleshoot them like a pro.
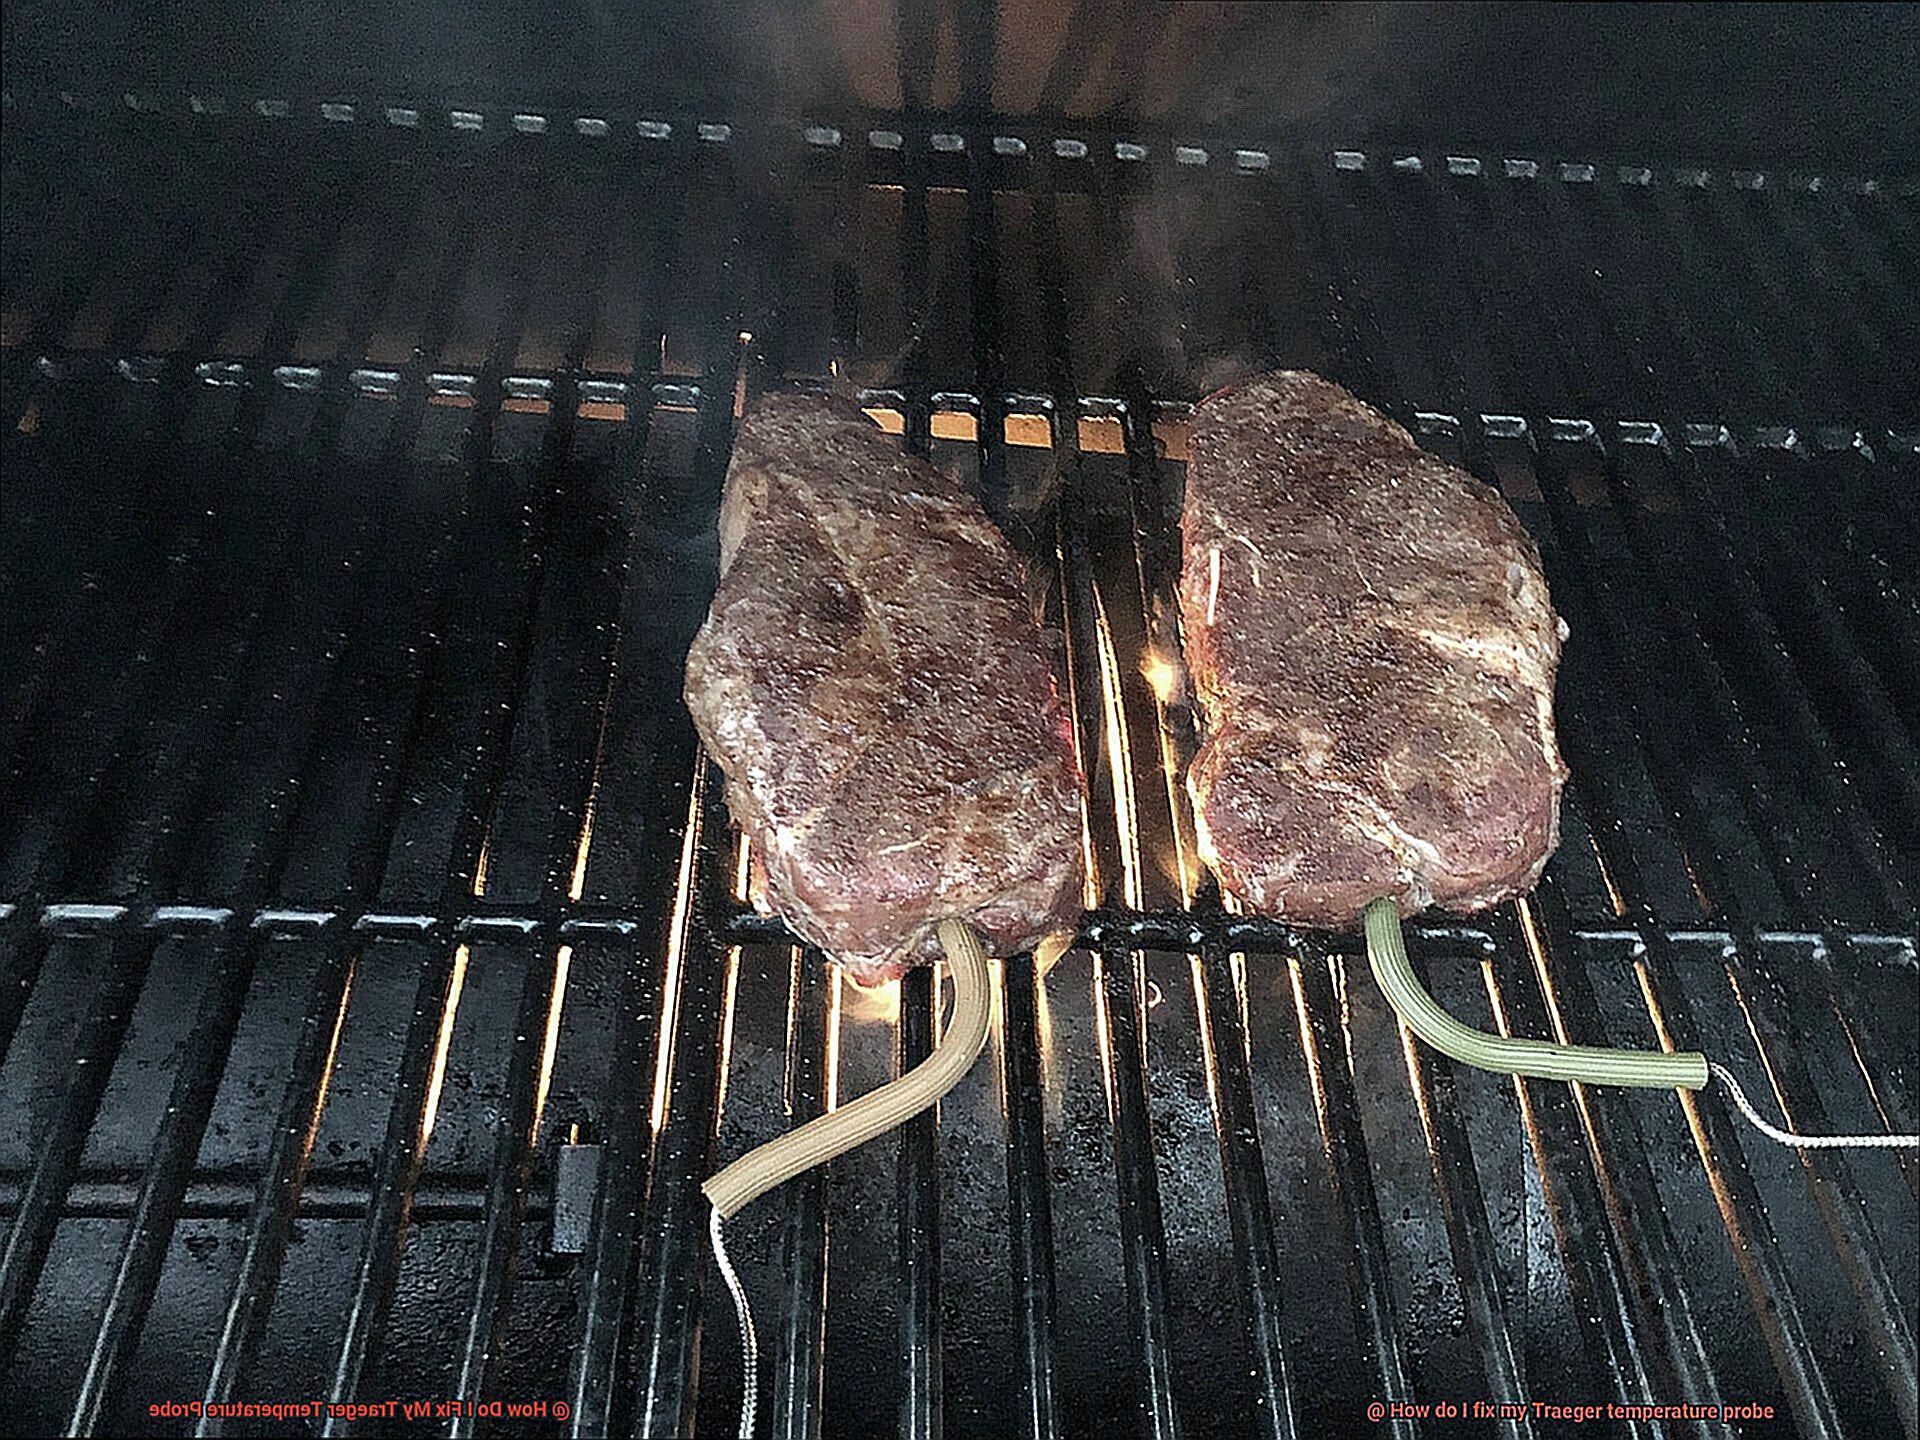
But wait, there’s more. We’ll also give you some tips on how to maintain your temperature probe properly to prevent any future issues from popping up. We’ll provide step-by-step instructions and even throw in some helpful visuals to make the process as easy as possible.
By the time you finish reading this post, you’ll have all the knowledge necessary to tackle any temperature probe issue with confidence. You’ll be grilling up scrumptious meals on your beloved Traeger grill again in no time. So let’s get started and fix that pesky temperature probe once and for all.
Contents
Identifying the Issue
When it comes to perfectly smoked meats, precise temperature control is key. However, if you’re experiencing issues with your Traeger temperature probe, it can be frustrating and ruin your grilling experience. The first step in fixing the issue is to identify what’s causing it.
There are a few potential culprits that could be impacting the accuracy or functionality of your temperature probe. Let’s explore them one by one:
- Physical Damage: Check your probe for any visible damage or signs of wear and tear. If it’s been bent or exposed to extreme temperatures or moisture, it may not be able to accurately measure temperatures. In this case, you’ll need to replace the probe.
- Wiring and Connections: Loose or damaged wiring can also cause issues with temperature readings. Make sure all connections between your probe and grill’s control panel are secure and free from damage or corrosion.
- Control Panel or Thermostat Malfunction: If other components of your grill are not functioning properly, it may be affecting the accuracy of your temperature readings. Try resetting your control panel by unplugging it and plugging it back in.
- Proper Usage: Ensure that you’re using your temperature probe correctly by following the manufacturer’s instructions carefully. Make sure the probe is properly inserted into your food for accurate readings.
Checking the Connection Between the Probe and Control Panel
Nothing can ruin your hard work quite like a malfunctioning temperature probe. So, let’s dive into the essential first step of tackling this issue: checking the connection between your probe and control panel.
To get started, unplug the probe from the control panel and give it a thorough inspection. Take note of any visible signs of damage or wear and tear, as this can cause accuracy issues. Once you’ve ensured that everything looks good, plug the probe back into the control panel securely.
Now it’s time to put your grill to the test. Turn it on and check the temperature reading on the control panel. Does it match the actual temperature inside your grill? If not, don’t fret. Try moving the probe around to different parts of the grill to see if you get a more accurate reading.
If things are still not adding up, grab a soft cloth or brush and gently clean the probe to remove any debris that may be interfering with its connection. It’s also important to take a moment to inspect the wiring between the probe and control panel for any breaks or loose connections.
To recap, here are some key steps to keep in mind when checking your Traeger temperature probe:
- Unplug and inspect for damage or wear and tear
- Plug back in securely
- Test temperature readings on control panel
- Move probe around for accuracy
- Clean probe with soft cloth or brush
- Inspect wiring for breaks or loose connections
Examining the Probe for Damage
Don’t let a damaged Traeger temperature probe get in the way of your grilling game. Let’s dive into the steps of examining your probe for any signs of damage.
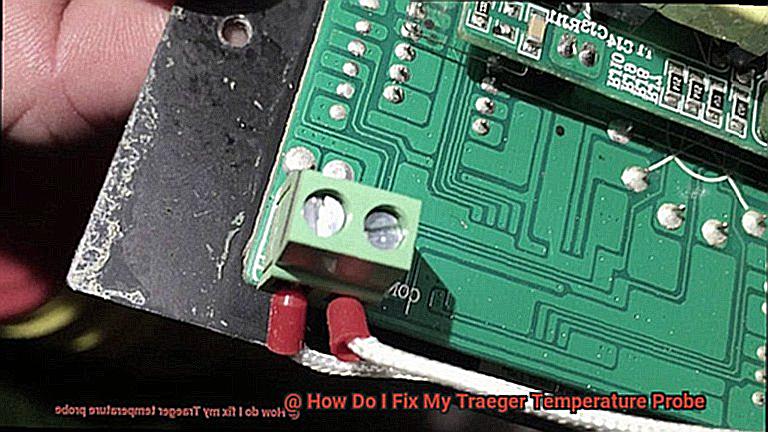
First, give your Traeger temperature probe a thorough inspection from top to bottom. Look for frayed wires, cracks, or breaks in the probe casing. These physical damages can occur during use or storage and can skew temperature readings leading to overcooked or undercooked meats. If you notice any damage, take note of it so that you can address it accordingly.
Next, check the wires that connect the probe to the thermometer unit. Ensure they are securely attached and free from kinks or tangles that could interfere with proper temperature readings. Loose or damaged wires can cause your Traeger grill to misread temperatures and result in unevenly cooked meals.
But what if you do notice damage to your probe or wires? Don’t attempt a DIY repair. Traeger offers replacement probes and wires on their website and through authorized dealers. Make sure you purchase the correct replacement parts for your specific model to ensure a perfect fit.
By taking the time to examine your Traeger temperature probe for damage before attempting any repairs or replacements, you’ll start with a solid foundation for accurate temperature readings and perfectly grilled meats. Trust us, your taste buds will thank you.
Resetting the Control Panel
Resetting the control panel may be the solution to your troubles. As a seasoned expert in Traeger grilling, I’m here to walk you through this simple yet vital process.
To begin, ensure your safety by turning off your Traeger grill and disconnecting it from the power source. Wait for at least five minutes before plugging it back in and turning it on again. This will allow the control panel to reset and eliminate any errors or glitches that may have occurred.
However, suppose resetting the control panel does not resolve the issue. In that case, there may be an underlying problem with the temperature probe itself. Check for any signs of damage such as frayed wires, cracks, or breaks. Additionally, make sure the wires connecting the probe to the thermometer unit are securely attached with no kinks or tangles.
If you do notice any damage, it’s best to avoid DIY repairs and purchase replacement parts from Traeger’s website or authorized dealers. This guarantees that you don’t compromise on quality and end up with perfectly grilled meats to savor.
It’s vital to note that resetting the control panel is not a one-time solution. If you frequently encounter issues with your Traeger temperature probe, there may be an underlying problem that needs attention. This could be due to faulty wiring or other mechanical issues that may require professional assistance.
Calling in a Professional
Dealing with a malfunctioning Traeger temperature probe can be frustrating, especially if you’re not familiar with the inner workings of your grill. In such cases, calling in a professional is often the best course of action. However, finding a reputable and experienced repair service requires some research and careful consideration.
One option is to contact Traeger directly, as they offer customer support and repair services for their grills and accessories. This can be a great starting point for troubleshooting steps and repair services if needed.
Another option is to seek out a local grill or appliance repair service that has experience with Traeger grills and temperature probes. A skilled professional with specialized expertise can quickly diagnose the issue and offer a solution.
Before hiring a repair service, it’s important to weigh the cost versus the potential benefits. Depending on the severity of the issue and the cost of repair, it may be more cost-effective to simply replace the temperature probe or even the entire grill.
To ensure that you’re working with a legitimate company, it’s crucial to do research and read reviews. Here are some reasons why:
- Avoid Scams: Unfortunately, there are fraudulent companies out there that prey on people who need repairs. Researching repair companies online and reading reviews can help you avoid these scams.
- Quality of Service: Reading reviews can give you an idea of the quality of service provided by a repair company. Look for reviews that mention professionalism, expertise, and timely repairs.
- Cost: Reviews can also provide insight into what others have paid for similar repairs, helping you make an informed decision about whether to proceed with repairs or replace your equipment.
- Traeger Experience: Not all repair companies have experience with Traeger grills and temperature probes. Look for a company that has specific knowledge and skills in this area to ensure that your issue is diagnosed and fixed correctly.
Troubleshooting Tips
Don’t let a malfunctioning probe ruin your grilling experience. Here are some troubleshooting tips to help you fix the problem and get back to cooking up delicious meals.
Firstly, ensure that the probe is properly connected and the grill is turned on. The probe may not work if it is not connected correctly or if the grill is not powered on. Once you have verified this, move on to the next step.
Secondly, inspect the probe for any damage or wear and tear. If you find any cracks or breaks in the probe, it may need to be replaced. Additionally, make sure that the probe is clean and free of any debris or grease that may be affecting its functionality. A dirty probe can lead to inaccurate temperature readings.
Thirdly, check the wiring of the probe for any breaks or loose connections. Loose wires can cause inaccurate temperature readings or no readings at all. If there are any issues with the wiring, it may need to be fixed or replaced.
Fourthly, ensure that the probe is calibrated correctly. Calibration can be done by placing the probe in ice water and adjusting it until it reads 32°F (0°C). Alternatively, you can place it in boiling water and adjust it until it reads 212°F (100°C). This will ensure that you get accurate temperature readings and prevent overcooking or undercooking your food.
Lastly, if none of these troubleshooting tips work, don’t worry. Contact Traeger customer support for further assistance. They may be able to provide additional troubleshooting tips or recommend a replacement probe if necessary.
How to Order Replacement Probes
It might be time to replace your temperature probe. Ordering a replacement probe may seem daunting, but it’s actually easier than you think. Here are five steps to help you order the right replacement probe for your Traeger grill.
Identify the Type of Probe You Need
Traeger offers several types of probes, including meat probes, grill probes, and ambient temperature probes. Meat probes measure the internal temperature of meat, while grill probes monitor the temperature of the grill itself. Ambient temperature probes measure the air temperature inside the grill. Make sure you identify the type of probe you need before placing your order.
Order from an Authorized Dealer
To ensure that you’re getting a quality replacement probe that’s compatible with your Traeger grill, it’s best to order from an authorized dealer. You can find a list of Traeger dealers on the company’s website. Ordering from an authorized dealer guarantees that you’re getting a genuine Traeger product.
Consider the Length of the Probe
When ordering a replacement probe, you’ll also need to consider the length of the probe. Most probes come in lengths ranging from 6 inches to 36 inches. Make sure you choose a length that’s appropriate for your grill. A probe that’s too short won’t reach the center of your meat, while a probe that’s too long may touch bone or gristle.
Calibrate Your New Probe
After receiving your new probe, it’s important to calibrate it to ensure accuracy. To do this, put the probe in a cup of ice water and compare the reading on your new probe to that of a thermometer. If there is a difference between the two readings, adjust the calibration on your new probe accordingly. Calibration is crucial for accurate temperature readings.
Have a Backup Probe On Hand
It’s always a good idea to have a backup probe on hand in case of emergencies. This way, you’ll always be able to accurately monitor the temperature of your meat while grilling. Having a backup probe ensures that you won’t be caught off guard if your primary probe fails.
v9wB3zv6wXw” >
Conclusion
In conclusion, a malfunctioning temperature probe can put a damper on any grilling enthusiast’s day. But fear not. With the right know-how and troubleshooting steps, you can fix the issue and get back to cooking up mouth-watering meals in no time.
First things first, it’s essential to identify the problem. Check for physical damage, loose wiring or connections, control panel or thermostat malfunction, and proper usage. Once you’ve pinpointed the issue, it’s time to take action.
If your probe is damaged, don’t attempt DIY repairs – leave it to the experts. Purchase replacement parts from Traeger’s website or authorized dealers instead. Resetting the control panel may also solve some issues. However, if problems persist, it’s best to seek professional assistance from Traeger customer support or a local repair service with specialized expertise.
To prevent future issues, proper maintenance is key. Clean your temperature probe regularly and calibrate it as needed. Having a backup probe on hand can also ensure that you’re always prepared for emergencies.
Overall, fixing your Traeger temperature probe requires patience and attention to detail. But with these steps and tips in mind, you’ll be able to enjoy perfectly grilled meats every time without any hassle or frustration.