Picture sinking your teeth into a mouthwatering chicken, bursting with flavors infused from a beer can. It’s the epitome of summer barbecues and backyard feasts. But here’s the burning question: What temperature should your beer can chicken reach to achieve sheer perfection?
In this blog post, we’ll uncover the mysteries behind creating tender, juicy meat without falling into the trap of undercooking or overdoing it. Mastering the ideal cooking temperature is key to transforming a simple chicken into a culinary masterpiece. Whether you’re an experienced grill guru or an adventurous newbie, understanding how grill temperatures work will take your beer can chicken game to new heights.
Join us as we dive into the captivating world of beer can chicken temperatures, unraveling the science behind achieving poultry perfection. We’ll reveal the ultimate temperature range for a fully cooked delight that will have your guests clamoring for seconds. Get ready to elevate your grilling skills and create unforgettable moments around the dinner table.
Contents
What is Beer Can Chicken?
Impress your friends and family at your next backyard barbecue with the mouthwatering and flavorful delight known as beer can chicken. Also referred to as beer butt chicken or drunken chicken, this grilling technique is sure to elevate your grilling game and leave everyone craving for more. In this article, we will explore the ins and outs of beer can chicken, from preparation to cooking methods, ensuring you achieve the perfect result every time.
Selecting the Perfect Chicken:
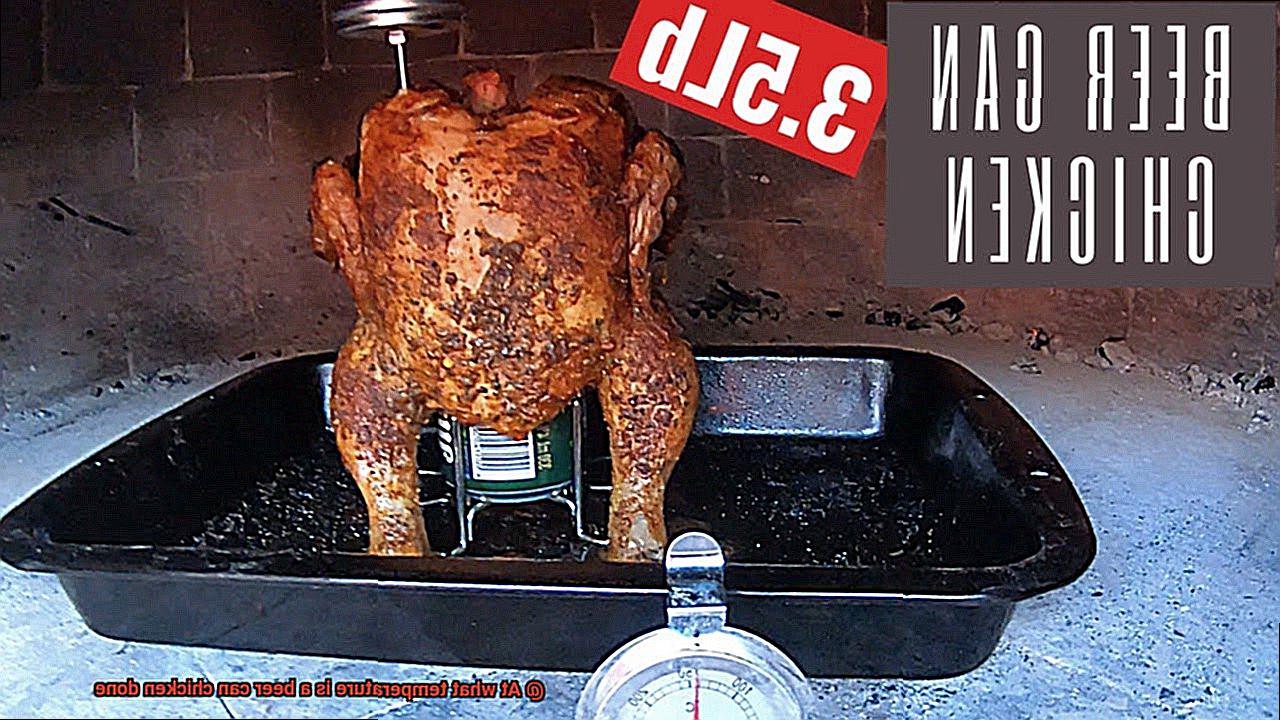
To start, choose a whole chicken weighing around 3-4 pounds. This size ensures the chicken fits comfortably over the beer can and cooks evenly, creating a succulent and juicy bird.
Seasoning for Flavor:
Before placing the chicken on the beer can, season it with your favorite rub or marinade. The options are endless when it comes to seasoning, from a combination of herbs and spices to salt and pepper. Allow the flavors to permeate the meat by marinating for a few hours or applying the rub just before grilling.
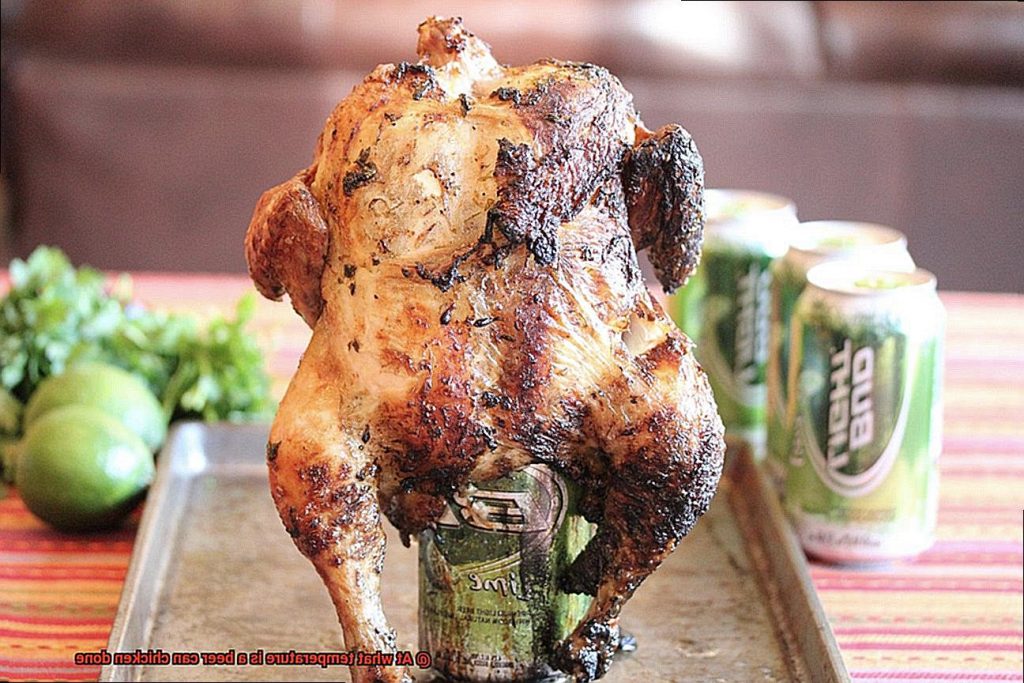
The Beer Can Method:
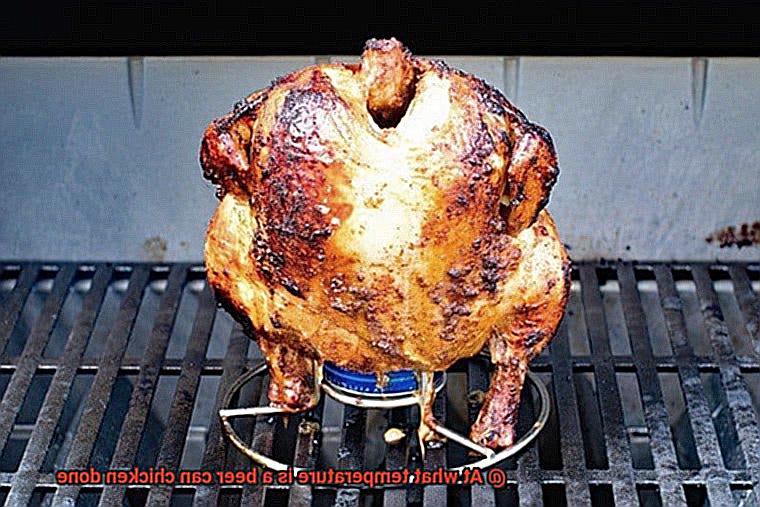
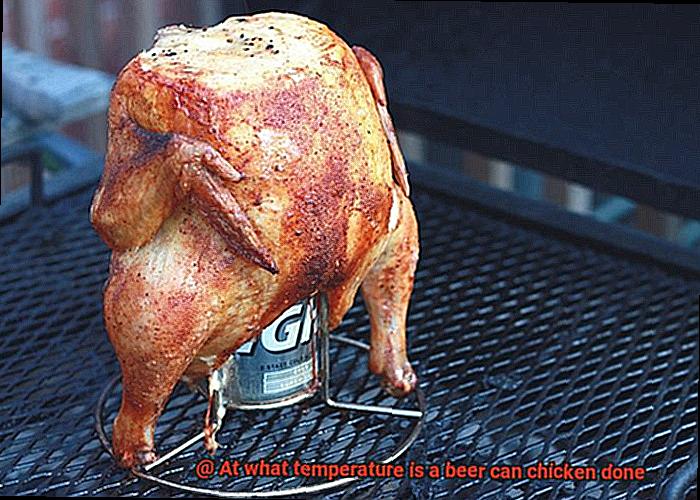
Beer can chicken works its magic by using beer-infused steam to keep the meat moist and impart a subtle flavor. Open a can of your preferred beer (or any other beverage of choice) and place it inside the cavity of the chicken. The can acts as a support, keeping the chicken upright during cooking.
Grilling Method:
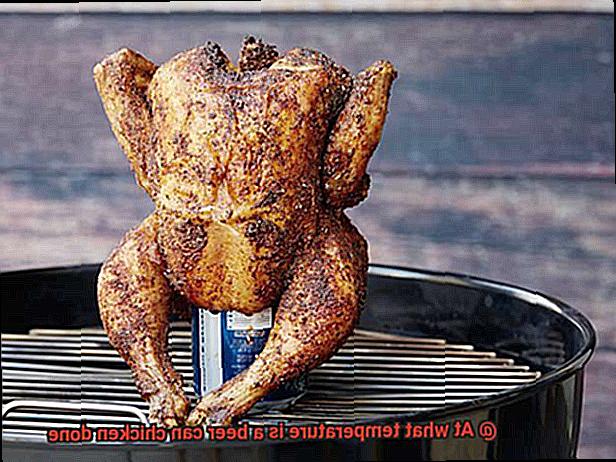
Grilling beer can chicken is a popular choice. Preheat your grill to medium-high heat and carefully place the bird onto the grill grates, ensuring it is balanced on the beer can to prevent tipping over. Cook indirectly over medium-high heat for approximately 1-1.5 hours, adjusting the time based on the size of your bird and grill’s temperature.
Oven Method:
If grilling isn’t an option, fear not. You can still enjoy succulent beer can chicken by using your oven. Preheat your oven to 375°F (190°C) and place the chicken, balanced on the beer can, onto a baking sheet or roasting pan. Cook for about 1-1.5 hours, checking for doneness based on the chicken’s size and internal temperature.
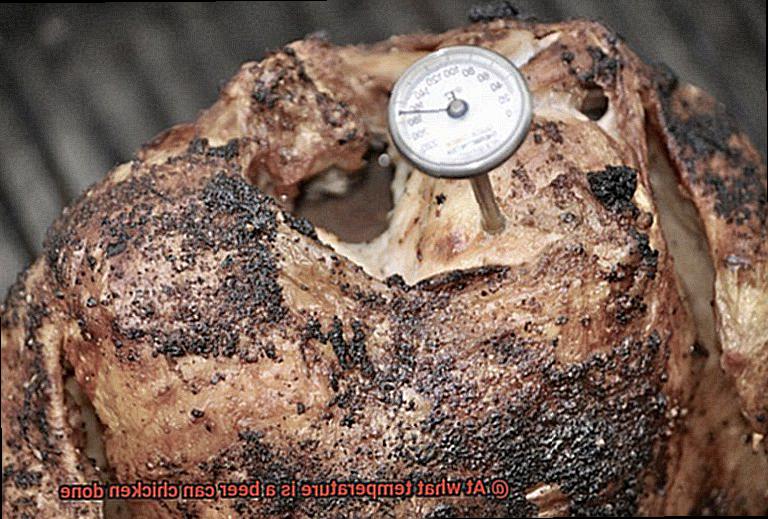
Ensuring Safe Internal Temperature:
To guarantee food safety, monitor the chicken’s internal temperature. Insert a meat thermometer into the thickest part of the thigh without touching the bone or beer can. The USDA recommends a minimum internal temperature of 165°F (74°C) for poultry. However, some prefer to remove the chicken from heat at around 160-162°F (71-72°C) and allow residual heat to finish cooking during resting.
Understanding the USDA Safe Internal Temperature for Poultry
Understanding the USDA Safe Internal Temperature for Poultry
In the world of grilling, mastering the art of beer can chicken is a surefire way to take your skills to the next level. But before you fire up your grill and get started, it’s crucial to understand the USDA’s safe internal temperature for poultry. This temperature is not only important for food safety but also for ensuring that your chicken is cooked to perfection.
The USDA has established guidelines for safe internal cooking temperatures, and when it comes to chicken, the magic number is 165°F (74°C). This temperature is key in killing off any harmful bacteria, such as salmonella, that may be present in the meat. So, while it may be tempting to rely on guesswork or “eyeballing it,” investing in a good meat thermometer is essential. This little gadget acts as a tiny superhero, protecting your taste buds from any potential tummy troubles.
To achieve that perfect internal temperature, simply insert the meat thermometer into the thickest part of the chicken, making sure to avoid contact with bone or the cavity. Wait patiently as the needle climbs to 165°F (74°C), signaling that your chicken is safe to devour. But here’s a pro tip: don’t overcook your chicken. Cooking it beyond this temperature won’t make it any safer; instead, it will result in dry and less flavorful meat. Stick to that golden 165°F (74°C) rule, and your taste buds will thank you.
Once your chicken has reached that perfect internal temperature, don’t forget about rest time. Letting it rest for a few minutes before indulging allows the juices to redistribute, resulting in even more succulent and flavorful meat. It’s like a little flavor party happening right on your plate.
But our job isn’t done yet. To ensure food safety, it’s essential to clean and sanitize any surfaces or utensils that come into contact with raw chicken. We don’t want any cross-contamination ruining our barbecue bliss.
How to Monitor the Internal Temperature of a Beer Can Chicken
Grilling beer can chicken is a delicious and impressive way to cook poultry, but getting the internal temperature just right can be tricky. Don’t worry, though. We’ve got you covered with this comprehensive guide on how to monitor the internal temperature of your beer can chicken. By following these tips, you’ll be able to achieve mouthwatering results that will have your family and friends begging for seconds.
The Importance of Temperature Monitoring:
To ensure that your beer can chicken is cooked thoroughly and safe to eat, it’s crucial to monitor its internal temperature. By doing so, you’ll avoid the risks of undercooking or overcooking, resulting in a perfectly juicy and flavorful bird.
Choosing the Right Meat Thermometer:
Investing in a reliable meat thermometer is key to monitoring the internal temperature accurately. There are two main types: instant-read thermometers and leave-in thermometers. Instant-read thermometers provide quick and accurate readings within seconds, perfect for checking the temperature during grilling. Leave-in thermometers are designed to stay inside the chicken while it cooks, allowing you to monitor the temperature without opening the grill or oven door.
Proper Placement of the Thermometer:
To get an accurate reading, it’s important to insert the thermometer correctly. For both instant-read and leave-in thermometers, aim for the thickest part of the chicken’s thigh without touching any bones or the beer can itself. This area takes longer to cook, so it serves as a reliable indicator for doneness.
Ideal Internal Temperature:
The recommended internal temperature for beer can chicken is 165°F (74°C). This ensures that harmful bacteria are killed off while maintaining optimal juiciness. However, some chefs prefer removing the chicken from heat at around 160-162°F (71-72°C) to allow for residual heat to finish cooking during the resting period.
Alternative Methods:
If you don’t have a meat thermometer available, you can use alternative methods to check if your beer can chicken is done. One method is to pierce the thickest part of the chicken with a skewer or fork. If the juices run clear and there is no pink color, it is likely cooked. However, remember that using a meat thermometer provides the most accurate results.
Conclusion:
By monitoring the internal temperature of your beer can chicken and following these tips, you’ll achieve perfectly cooked and juicy results every time. So fire up your grill, crack open a cold one, and get ready to impress your guests with this mouthwatering dish. Cheers to deliciousness.
Grilling a beer can chicken is an art form that requires precision in monitoring its internal temperature. To achieve mouthwatering results, it’s crucial to invest in a reliable meat thermometer. There are two main types of thermometers to choose from: instant-read and leave-in thermometers.
Instant-read thermometers offer convenience and accuracy, providing quick readings within seconds. They are ideal for checking the temperature during grilling. To use an instant-read thermometer, insert it into the thickest part of the chicken’s thigh without touching any bones or the beer can itself. This area takes longer to cook than other parts, making it a reliable indicator for doneness.
On the other hand, leave-in thermometers are designed to remain inside the chicken while it cooks. These thermometers have probes that stay in the meat while the display sits outside the grill or oven. This allows you to monitor the temperature without opening the grill or oven door, ensuring consistent heat during cooking.
The Benefits of Using a Meat Thermometer
Using a meat thermometer when grilling beer can chicken is like having a trusted partner in the kitchen. It adds precision to your cooking, ensuring that every bite of your bird is a succulent and flavorful delight. Let’s dive deeper into the benefits of using a meat thermometer:
Food safety is of utmost importance when it comes to cooking meat. A meat thermometer allows you to accurately measure the internal temperature of the chicken, ensuring it reaches the safe temperature required to eliminate any risks of foodborne illnesses. With a meat thermometer in hand, you can confidently serve a perfectly cooked and safe meal to your loved ones.
Say goodbye to dry and flavorless chicken. The precise temperature readings provided by a meat thermometer take the guesswork out of determining doneness. No more cutting into the chicken to check its color or relying on intuition. With a meat thermometer, you can achieve that perfect balance between juicy meat and crispy skin, resulting in a mouthwatering culinary masterpiece.
Convenience and ease are at your fingertips with a meat thermometer. No more playing the guessing game or constantly checking the clock. A quick temperature check with a meat thermometer provides convenience and ease of use, making your grilling experience stress-free. You can focus on enjoying the process and spending time with your guests, rather than worrying about whether your chicken is cooked to perfection.
Consistency is key when it comes to grilling. With a meat thermometer, you’ll achieve consistent results every single time. No more undercooking or overcooking disasters that leave you disappointed or scrambling for alternatives. Your beer can chicken will be cooked to perfection, making you the grill master extraordinaire among your friends and family.
Time-saving hero – that’s what a meat thermometer is. No need to repeatedly check for doneness by visually inspecting or cutting into the chicken. A quick temperature check with a meat thermometer saves you time and effort, allowing you to focus on other important things – like sipping on a cold one while your beer can chicken sizzles away. It’s a win-win situation.
Versatility is another advantage of using a meat thermometer. It’s not just for beer can chicken; it can be used for all types of meat. Whether you’re grilling steak, pork chops, or even fish, a meat thermometer is a worthwhile investment for any cooking enthusiast. It’s a versatile tool that will accompany you on your culinary adventures.
Lastly, using a meat thermometer boosts your confidence in the kitchen. Knowing that your beer can chicken is cooked to the right temperature without any guesswork promotes confidence in your cooking abilities. You’ll feel like a grilling pro, impressing your friends and family with your culinary skills. A meat thermometer is the secret ingredient that elevates your grilling game to new heights.
Optimal Temperature for Beer Can Chicken
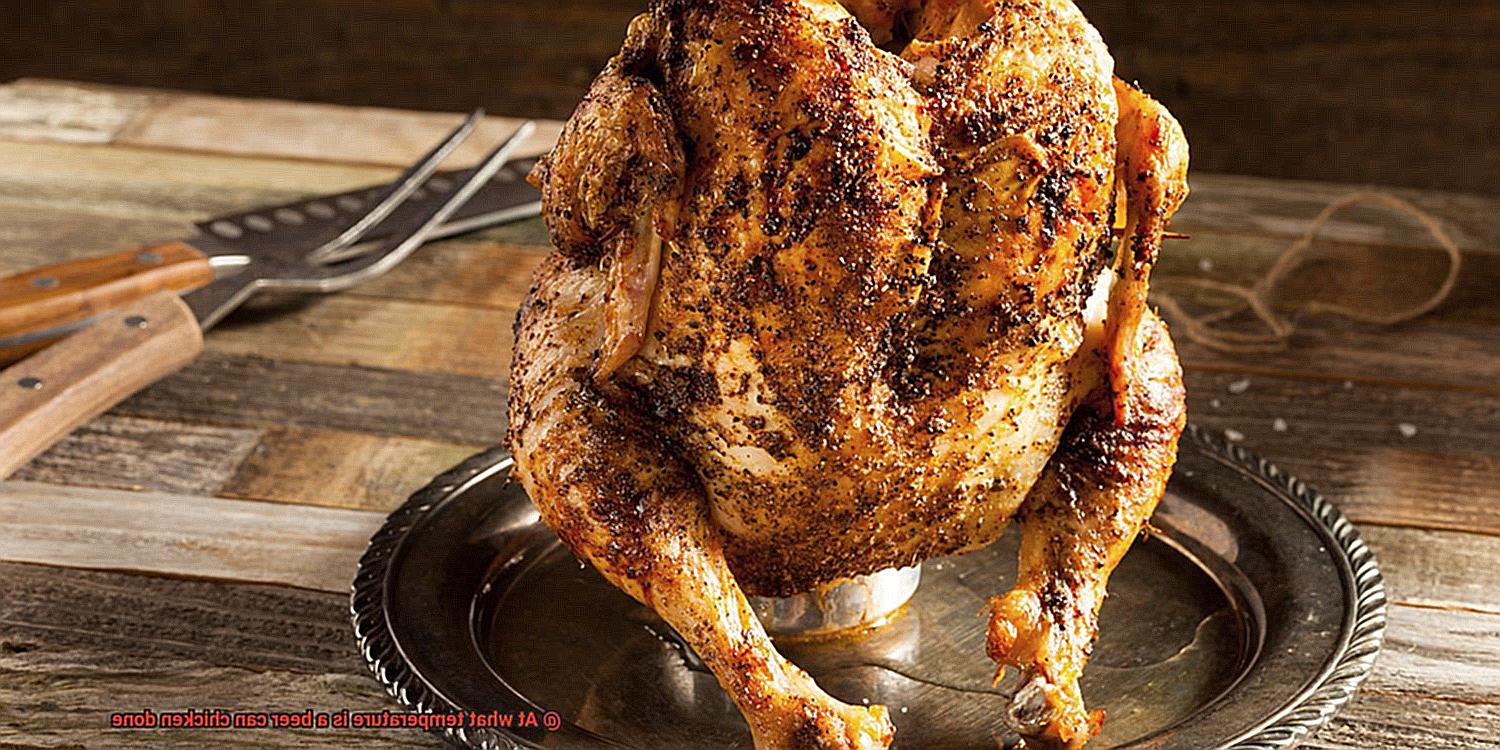
When it comes to cooking beer can chicken, achieving the optimal temperature is key to creating a mouthwatering masterpiece. Picture this: a golden-brown, crispy skin enveloping tender and juicy meat that practically falls off the bone. Are you ready to take your taste buds on a flavor-filled journey? Let’s dive in and discover the secrets behind the perfect temperature.
The optimal temperature for cooking beer can chicken falls within the range of 375°F to 425°F (190°C to 220°C). This sweet spot ensures that your bird cooks evenly and thoroughly while allowing the skin to achieve that irresistible crispiness. It’s like a ballet of flavors and textures, each note perfectly orchestrated for your palate’s pleasure.
Here’s a pro tip: before placing your chicken on the heat source, preheat your grill or oven to your desired temperature. This step helps maintain a consistent cooking environment throughout the process, ensuring even cooking and maximum flavor development. Some grilling gurus even recommend starting at a higher temperature, like 425°F (220°C), for the first 15 minutes to give that skin an extra dose of crispiness. Then, reduce the heat to 375°F (190°C) for the remaining cooking time, letting the flavors meld together harmoniously.
Now, how do you know when your beer can chicken is perfectly cooked? Enter the trusty meat thermometer. When inserted into the thickest part of the chicken—avoiding contact with bones—the internal temperature should reach 165°F (74°C). This magic number guarantees that your chicken is not only delicious but also safe to eat. Don’t play chicken with undercooked poultry; let that thermometer be your guiding light.
But wait, there’s more. Just as important as reaching the optimal temperature is avoiding overcooking. Dry and tough chicken is nobody’s idea of a good time. Once your beer can chicken reaches that ideal internal temperature, remove it from the heat source and let it rest for about 10 minutes before carving. This brief spa-like experience allows the juices to redistribute within the meat, resulting in a final product that’s bursting with flavor and moisture.
Remember, cooking times may vary depending on factors like chicken size and your chosen heat source. So, always rely on that trusty meat thermometer for accuracy rather than strictly adhering to a set cooking time. And don’t forget to handle that scorching hot beer can with care when removing it from inside the chicken. Use oven mitts or tongs to ensure a safe and enjoyable cooking experience.
Residual Heat and its Role in Cooking Beer Can Chicken
Beer can chicken is a beloved dish for its tender and flavorful meat, encased in a crispy golden-brown skin. Achieving this culinary masterpiece requires more than just popping a chicken on a grill – it requires understanding the role of residual heat. In this article, we will dive into the science behind residual heat and how it contributes to cooking beer can chicken to perfection. So grab your apron and let’s get grilling.
The Process:
To cook beer can chicken to perfection, follow these steps:
Preparing the Grill:
Before we dive into residual heat, let’s start with setting up the grill. Preheat the grill to a temperature range between 375°F to 425°F (190°C to 220°C) – this ensures even cooking and maximum flavor development.
Indirect Grilling Method:
To prevent the chicken from burning on the outside while remaining undercooked on the inside, utilize the indirect grilling method. Place the chicken on the grill away from direct heat sources. This allows for gentle and even cooking.
Monitoring Internal Temperature:
The secret to perfectly cooked beer can chicken lies in monitoring its internal temperature. Insert a meat thermometer into the thickest part of the chicken without touching the bone. The desired internal temperature for thoroughly cooked chicken is 165°F (74°C).
Residual Heat Takes Over:
Once the internal temperature reaches around 160°F (71°C), remove the chicken from the grill. But don’t fret. The residual heat will continue to work its magic, raising the internal temperature to 165°F (74°C). This ensures that the chicken is cooked all the way through without drying it out.
Resting Period:
After removing the chicken from the grill, resist the temptation to carve it immediately. Let it rest for about 10 minutes. This resting period allows the residual heat to penetrate and distribute evenly throughout the meat, resulting in a more tender and flavorful beer can chicken.
Importance of Internal Temperature:
Don’t play a guessing game with your chicken’s doneness. The recommended internal temperature for thoroughly cooked chicken is 165°F (74°C). Use a meat thermometer to accurately measure the temperature and ensure food safety.
Adjusting Cooking Times for Size:
Size matters when it comes to cooking beer can chicken. Larger chickens may take longer to cook due to their thickness and size. Always adjust cooking times accordingly and rely on an accurate meat thermometer for determining doneness.
Food Safety Considerations When Cooking Beer Can Chicken
Let’s dive into the world of food safety considerations when cooking beer can chicken.
First and foremost, make sure your chicken is cooked to a safe internal temperature. Aim for 165 degrees Fahrenheit (74 degrees Celsius) and invest in a reliable meat thermometer. No more guessing games here. Stick that thermometer into the thickest part of the chicken, avoiding the bone, to get an accurate reading.
Now, let’s talk hygiene. Before you even think about heating up that grill, ensure everything is squeaky clean. Sanitize your utensils, cutting boards, and surfaces that come into contact with raw poultry. And don’t forget to wash your hands thoroughly after handling raw chicken. We don’t want any cross-contamination ruining our grilling party.
When prepping your beer can chicken, remember that both the chicken and the beer should be at room temperature before you start. We want to avoid any temperature shocks that could mess with the cooking process.
Speaking of cooking, aim for a consistent grill temperature of around 350 degrees Fahrenheit (175 degrees Celsius). This ensures even cooking and helps your chicken reach that magical internal temperature we mentioned earlier.
Once your beer can chicken is off the grill, give it a few minutes to rest. This allows the juices to redistribute within the meat, keeping it moist and flavorful. And when serving, be sure to discard any marinades or sauces that have come into contact with raw chicken. Fresh utensils and plates are the way to go.
4UjB4gpqqLw” >
Conclusion
When it comes to cooking beer can chicken, the temperature is crucial.
You want that bird to be cooked just right – juicy on the inside and crispy on the outside. So, at what temperature is a beer can chicken done?
Well, the magic number is 165 degrees Fahrenheit (74 degrees Celsius). This is the safe internal temperature for poultry, ensuring that any harmful bacteria are killed off.
But don’t stop there. To achieve that mouthwatering golden brown skin and melt-in-your-mouth tenderness, you might want to let it reach a slightly higher temperature, around 175 degrees Fahrenheit (79 degrees Celsius).
So grab your meat thermometer, keep an eye on those numbers, and get ready to savor a truly delectable meal.