Are you a grilling enthusiast searching for the ultimate cooking surface that can handle any meal? Look no further than a blackstone griddle. This versatile and reliable tool is the perfect addition to your outdoor cooking arsenal. However, many new griddle owners overlook the importance of properly seasoning their blackstone griddle before use. Don’t make that mistake. Seasoning your griddle creates a non-stick surface that makes cooking and cleaning a breeze, while also preventing rust and corrosion on the cooking surface.
So, how do you season a blackstone griddle? Fear not. There are plenty of helpful resources available online, including several informative tutorial videos that will guide you step-by-step on how to season a blackstone griddle video. In this post, we’ll take a closer look at the process of seasoning your blackstone griddle and why it’s such an important step in preparing your tool for use. Plus, we’ll share some tips and tricks to help make the process quick and easy so you can start cooking up delicious meals on your brand new blackstone griddle in no time.
Whether you’re a seasoned pro or brand new to using a griddle, keep reading to discover everything you need to know about how to season a blackstone griddle. Get ready to elevate your outdoor cooking game.
Contents
Clean the Griddle Surface
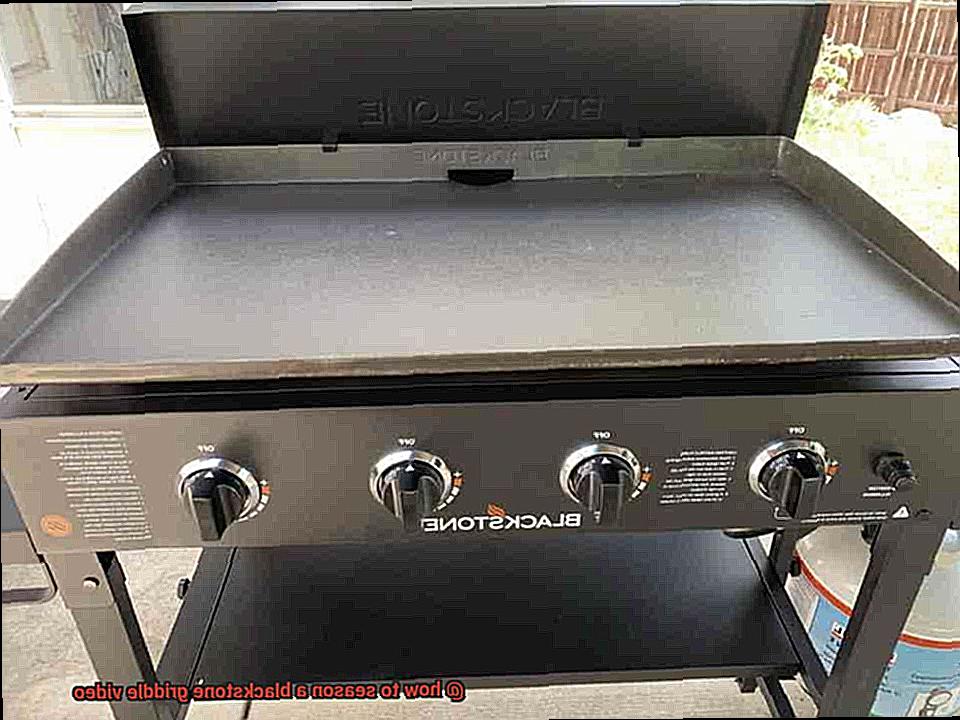
Before you dive into seasoning it, it’s important to thoroughly clean the surface and remove any dirt, debris, or food residue. A well-cleaned griddle ensures that the seasoning process is effective, resulting in a perfectly seasoned griddle that will last for years to come.

Here are the steps you need to follow to clean your Blackstone griddle surface:
Step 1: Turn up the Heat
First things first, turn on your Blackstone griddle and set the temperature to high. Let it heat up for 10-15 minutes. This will help loosen any stubborn grease or food particles that may have accumulated on the surface.
Step 2: Scrape it Off
Using a scraper tool or spatula, scrape off any food debris or grease from the surface of the griddle. Make sure you remove any large chunks of food or burnt residue. This step is crucial, as any remaining debris can affect the effectiveness of the seasoning process.

Step 3: Cleaning Solution
Now that you’ve removed all visible debris, it’s time to use a griddle cleaning solution to clean the surface thoroughly. You can either use a commercial cleaning solution or make one using water and vinegar. This will help remove any invisible dirt particles and disinfect the surface.
Step 4: Scrub it Down
With your cleaning solution applied, use a scrubbing pad or brush to scrub every inch of the surface, including corners and edges. This step is essential in removing any remaining dirt or grease that may have been missed during scraping.
Step 5: Rinse it Off
After scrubbing the surface, rinse it with water to remove any remaining cleaning solution and debris. This step ensures that there are no lingering chemicals left on the griddle surface.
Step 6: Dry it Up
Finally, use a clean towel or cloth to dry the surface of the griddle thoroughly. Any remaining moisture can cause rusting and damage to your griddle.
By following these simple steps, you can have a clean, smooth, and ready-to-season Blackstone griddle surface. Cleaning your griddle before seasoning is an essential step that ensures there are no impurities that may affect the seasoning process. A perfectly seasoned griddle will enhance the flavors of your food and make cooking a breeze.
Apply Oil to the Griddle Surface
After thoroughly cleaning your Blackstone griddle, it’s time to move on to the next critical step in seasoning – applying oil to the griddle surface. This is a crucial step in the seasoning process as it helps create a protective layer that prevents rust and allows for even heating.
Now, choosing the right oil is key. Experts recommend using oils with high smoke points such as canola, vegetable, or flaxseed oil. These oils won’t burn off during the seasoning process, leaving behind a sticky residue.
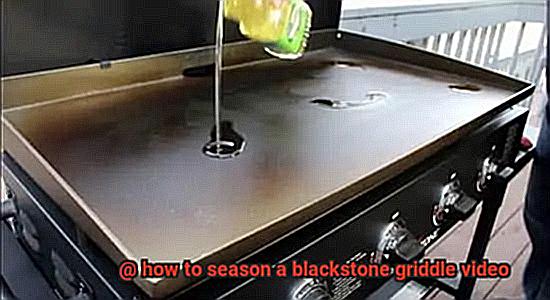
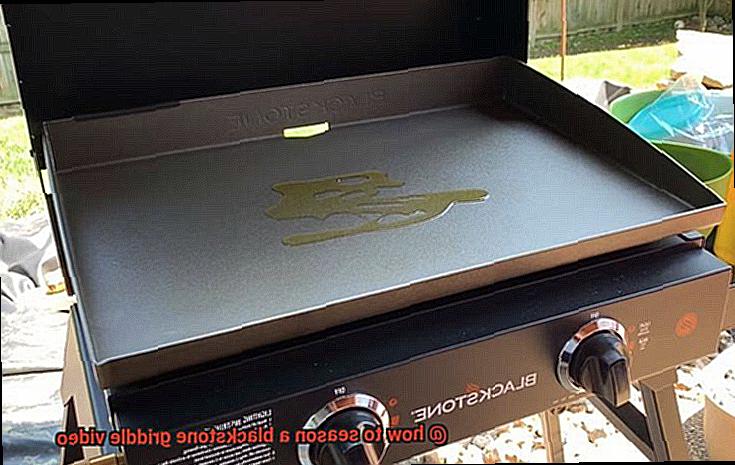
Once you have chosen your oil of choice, it’s time to apply it. Pour a small amount onto the griddle surface and spread it evenly with a paper towel or cloth. Be careful not to use too much oil as this can lead to a buildup of excess oil on the griddle surface.
Now for the exciting part. Crank up the heat to high and let it cook for about 15-20 minutes. This will help create a beautiful darkened layer on the griddle surface, indicating that the seasoning process is complete.
But wait, don’t get too excited just yet. You may need to repeat this process several times before your griddle is fully seasoned. However, trust us; all good things take time.
Heat the Griddle Until it Starts Smoking
Then it’s time to learn about the third step in how to season a Blackstone griddle video: heating the griddle until it starts smoking. This step is crucial to ensure that your griddle is ready for use and that the seasoning process is successful.
To begin, turn on the heat source and set it to high. Using a high heat source such as propane or natural gas will allow the griddle to heat up quickly and efficiently. If you are using an electric griddle, make sure it is set to high heat.
As the griddle heats up, impurities or residues left on the surface from manufacturing or transportation will start to burn off. When you see smoke coming out of the griddle, turn off the heat source and let it cool down completely. This step creates a non-stick surface by bonding oil molecules onto the metal surface of the griddle.
Here are some sub-topics that highlight why heating your Blackstone griddle until it starts smoking is crucial:
- Removes Impurities: When you heat your griddle until it starts smoking, any impurities or residues left on the surface will be burned off. This ensures that your griddle is clean and ready for seasoning.
- Creates a Non-Stick Surface: As the oil molecules bond with the metal surface of the griddle, a non-stick surface is created. This makes cooking easier and prevents food from sticking to the surface.
- Efficient Heating: Using a high heat source helps in heating the griddle quickly and efficiently. This saves time and ensures that your griddle is ready for seasoning in no time.
Let the Griddle Cool Down Completely
You’ve followed the first three steps to seasoning your Blackstone griddle to perfection. But before you start cooking up a storm, there’s one more critical step you can’t afford to skip – letting the griddle cool down completely.
This step may seem like a small detail, but it separates the novice from the experienced griddle chef. It plays a vital role in ensuring that your griddle is well-seasoned and ready for your next culinary creation. So, why is it important to let the griddle cool down completely before wiping it clean? Let’s explore further.
Firstly, letting your griddle cool down allows the seasoning to set and bond with the surface. When you heat up your griddle, the oil seeps into the tiny pores of the surface, creating a non-stick layer. But if you wipe it down while it’s still hot, you risk wiping away that precious seasoning. Allowing it to cool down completely ensures that the seasoning sets and bonds with the surface, resulting in a more durable and effective non-stick surface.
Secondly, waiting for the griddle to cool down prevents burns and injuries. Cleaning up a hot surface is not only uncomfortable but also risky. Waiting for the griddle to cool down completely ensures that it’s safe to handle without any risk of injury.
Thirdly, this step improves the overall quality of the seasoning. Rushing through this step can affect the quality of your seasoning. Allowing it to cool down naturally will ensure that your Blackstone griddle is evenly coated with seasoning and has a better chance of lasting for years to come.
So how long should you wait before wiping it down? It’s recommended to wait at least 30 minutes before wiping it clean. If you’re feeling impatient, you can use a fan or move it outside to a cooler temperature. However, remember not to rush this step as it can affect the overall quality of your seasoning.
Once you’ve wiped down your griddle, it’s important to store it in a dry place to prevent rusting. A well-seasoned Blackstone griddle should not rust easily, but it’s still important to take proper care of it. If you plan on storing it for an extended period of time, cover it with a waterproof cover to protect it from moisture.
Repeat the Heating Process for Another 10-15 Minutes
Don’t celebrate just yet as this step is just as important as the others. In this step, you need to repeat the heating process for another 10-15 minutes.
You might be wondering why this step is crucial. Think of it like a relationship – the initial heating process was like a first date where you got to know each other but didn’t have enough time to form a deep bond. By repeating the heating process, you’re going on a second date, giving more time to form a stronger connection between the oil and the surface of your griddle. This bond will prevent rust and corrosion and make sure food doesn’t stick to the surface.
To repeat the heating process, turn your griddle back on high heat and let it heat up for another 10-15 minutes. It’s normal to notice some smoke and odor during this process. Once the time is up, turn off the heat and let your griddle cool down completely.
Additionally, if you want to get a perfectly seasoned griddle, you may need to repeat this process a few times. The more you use your griddle, the more seasoned it will become over time. Don’t forget to clean it after each use to prevent any build-up of food or oil that can affect the seasoning process.
Tips for Seasoning Your Blackstone Griddle
One of the most crucial steps to achieving this is seasoning your Blackstone griddle. Seasoning will not only ensure that your food cooks evenly but also prevent it from sticking to the surface. Here are five tips to help you achieve a perfectly seasoned Blackstone griddle.
Tip #1: Preheat Your Griddle for Optimal Results
Before seasoning your Blackstone griddle, preheat it for about 10-15 minutes on medium-high heat. This helps open up the pores of the metal and allows the oil to penetrate more easily. As a result, the seasoning will be more effective and long-lasting.
Tip #2: Use the Right Oil for Your Blackstone Griddle
Using an oil with a high smoke point, such as vegetable or flaxseed oil, is critical when seasoning your Blackstone griddle. Avoid using butter or olive oil as they have low smoke points and can damage your griddle. Apply a thin layer of oil onto the surface of the griddle and use a paper towel or cloth to spread it evenly.
Tip #3: Heat It Up and Let It Smoke
After applying a thin layer of oil on your Blackstone griddle, let it smoke and cook for about 15-20 minutes on medium-high heat. This process creates a polymerized layer on the surface of the griddle that acts as a protective barrier against rust and makes it non-stick. Repeat this process two or three times until you see a dark brown color on the surface.
Tip #4: Clean Your Griddle Carefully
Always clean your Blackstone griddle after use with warm water and a scraper. Avoid using soap as this can strip away the seasoning. Instead, use a griddle stone or salt to remove any stubborn residue gently.
Tip #5: Maintain Your Griddle’s Seasoning for Optimal Performance
To maintain your Blackstone griddle’s seasoning, regularly apply a thin layer of oil after cleaning and before storage. This will help prevent rust and keep your griddle in excellent condition. Additionally, avoid using metal utensils that can scratch the surface and remove the seasoning.
Benefits of Seasoning Your Blackstone Griddle
For those who own a Blackstone griddle, seasoning is the cornerstone of great cooking. The process creates a non-stick surface that distributes heat evenly and prevents food from sticking, while also protecting the griddle from rust and other forms of corrosion. But wait, there’s more. Here are some of the top benefits of seasoning your Blackstone griddle:
Enjoy Even Heat Distribution
By seasoning your griddle, you’re creating a non-stick surface that allows heat to be distributed evenly. This means your food will cook consistently and won’t stick to the surface, resulting in perfect cooking results every time.
Enhance the Flavor of Your Food
As you cook on your seasoned griddle, oils and fats accumulate on the surface, creating a unique flavor that cannot be replicated with an unseasoned griddle. Over time, this seasoned flavor builds up and adds depth and complexity to your dishes that can only be achieved with a well-seasoned griddle.
Easy Cleaning
A well-seasoned surface makes cleaning a breeze, as food particles don’t stick easily. By regularly seasoning your Blackstone griddle, you can prevent grease and other debris from building up and becoming difficult to clean over time.
Maintain the Appearance of Your Griddle
Unseasoned griddles can become discolored or develop rust spots over time due to exposure to moisture and other elements. However, by seasoning your griddle regularly, you can help prevent these issues and keep your griddle looking like new for years to come.
Common Mistakes to Avoid When Seasoning Your Blackstone Griddle
Before you start cooking up a storm, it’s crucial to season your griddle properly. Not only does this enhance the flavor of your food, but it also helps protect your appliance from rust and other forms of damage.
However, there are some common mistakes that you should avoid when seasoning your Blackstone griddle. Here are some tips to ensure that your seasoning process goes smoothly:
Firstly, don’t forget to clean your griddle before seasoning it. Any leftover debris or grease can negatively impact the seasoning process and even lead to rust on your griddle.
Secondly, while oil is necessary for seasoning, using too much can leave a sticky residue that will make food stick in the future. To avoid this, use a light coating of oil and spread it evenly across the surface.
Thirdly, using the right type of oil is important. Stick to oils with high smoke points like vegetable or canola oil as they can withstand high heat without burning or smoking.
Fourthly, heat up your griddle properly before seasoning it. Failing to do so can result in an uneven seasoning which may cause hot spots on your cooking surface.
Lastly, take your time. Properly seasoning a Blackstone griddle requires patience and attention to detail. Rushing through the process can lead to an uneven seasoning which could potentially damage your appliance.
5DZ_V4IYvUI” >
Conclusion
In conclusion, seasoning your Blackstone griddle is not only a crucial step but also an art form that requires patience and attention to detail. By following the steps outlined in this article, you can create a non-stick surface that enhances the flavor of your food and makes cleaning a breeze. The key is to start with a clean slate by thoroughly cleaning your griddle before applying oil and heating it until it starts smoking.
But don’t stop there. Maintaining your griddle’s seasoning by regularly applying a thin layer of oil after cleaning and using the right type of oil with a high smoke point is equally important. It’s like giving your griddle a spa treatment – pampering it with the best ingredients to keep it in top shape for years to come.
However, be warned that common mistakes such as using too much oil or failing to heat up your griddle properly can negatively impact the seasoning process and potentially damage your appliance. So take your time, follow these tips and tricks, and avoid any shortcuts that could compromise the quality of your seasoning.
Once you’ve achieved a perfectly seasoned Blackstone griddle, get ready to elevate your outdoor cooking game. Whip up some delicious meals on its non-stick surface while enjoying even heat distribution. Your taste buds will thank you for it.