Are you a fan of the irresistible smoky taste of roasted green chiles but unsure how to achieve that perfect charred exterior on your electric stove? Worry not. I’m here to share my expert tips and tricks for roasting green chiles at home.
You might ask, why go through the trouble of roasting your own chiles? Well, freshly roasted green chiles have a flavor that’s impossible to replicate with store-bought ones. Plus, once you master the art of roasting, you can savor your favorite dishes all year round – from enchiladas to green chile cheeseburgers.
So let’s dive in. In this post, I’ll guide you through the entire process – from selecting the right chiles to prepping them for roasting and achieving that perfect char. And hey, I’ll even throw in some mouth-watering recipe ideas to make the most out of your freshly roasted green chiles.
Whether you’re a seasoned cook looking to up your green chile game or just someone who loves trying new flavors in the kitchen – this post is definitely for you. So grab an apron and let’s get started on our flavorful journey.
Contents
What You Need to Roast Green Chiles
If you’re looking to add some smoky flavor to your meals, roasting green chiles is a simple and delicious way to do so. It’s perfect for making salsas, chili, or using them as toppings on burgers or tacos. In this article, we’ll discuss the necessary tools and ingredients needed to roast green chiles on an electric stove.
First and foremost, you’ll need fresh green chiles. You can choose mild or hot varieties depending on your preference. However, make sure to select peppers that are firm and free from any blemishes or soft spots. Once you have your chiles, the next tool you’ll need is a pair of tongs to turn them while they are roasting.
It is essential to have a large baking sheet or tray to place the chiles on once they are done roasting. If you have an electric stove, don’t worry. You can still roast chiles on it, but it may take a bit longer than on a gas stove. Additionally, you’ll need a plastic or paper bag to put the roasted chiles in after they’re done roasting. Finally, gloves are essential to handle the hot chiles.
Before starting the roasting process, ensure that all your tools and equipment are clean and dry. This will prevent any unwanted flavors or bacteria from affecting the taste of your chiles.
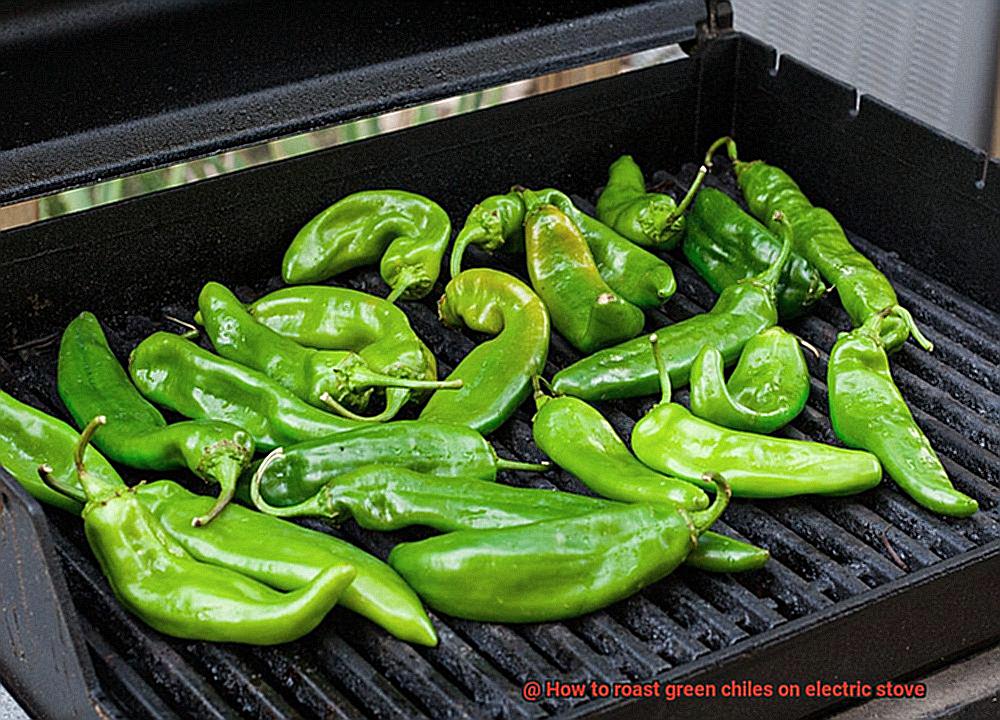
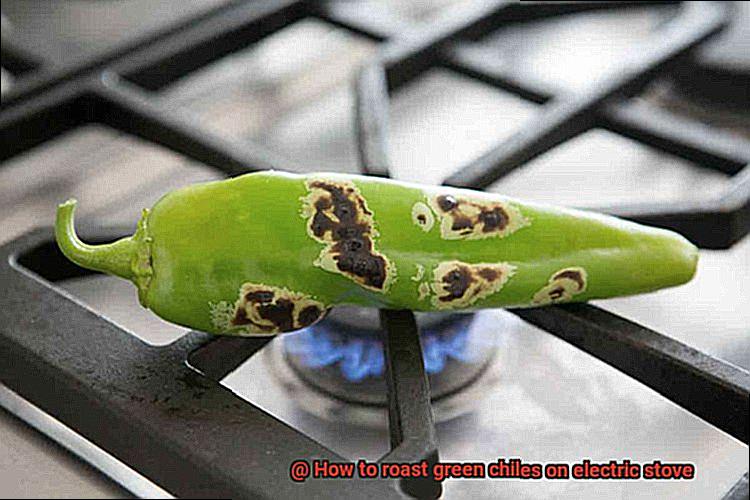
To begin roasting, preheat your electric stove to high heat. Once it’s heated, place the chiles directly onto the grates of the electric stove using your tongs to turn them occasionally until they are charred on all sides. This process should take about 5-7 minutes.
Once the chiles are charred evenly, remove them from the heat and place them in a bowl. Cover the bowl with aluminum foil and let them sit for about 10 minutes. This will allow the steam from the chiles to loosen the skin, making it easier to peel off.
After 10 minutes, remove the foil from the bowl and take out each pepper one at a time. Gently rub off the charred skin with your fingers or a paper towel. Avoid rinsing them under water as this will wash away some of the flavorful oils.
Next, remove the stem and seeds from each pepper and slice them into thin strips. You can now use them immediately in your recipe or store them in an airtight container in the fridge for up to a week.
Preheat the Electric Stove
Before you get started, it’s crucial to know how to properly preheat your electric stove for optimal roasting results. Here’s a step-by-step guide to ensure perfectly roasted chiles every time.
First, clear off your stove burners of any pots or pans. This allows the burners to heat up evenly and without obstruction. Next, turn the burner to high heat and let it heat up for at least five minutes. This ensures that the burner reaches its maximum temperature and is ready for roasting.
Keep in mind that not all electric stoves are created equal when it comes to preheating. Differences in wattage or heating element type can affect the time it takes to preheat. So, make sure to consult your stove manual for specific instructions on preheating.
Once your burner has heated up, use tongs to place your fresh green chiles directly on top of the burner grate. Space them out evenly to ensure uniform roasting. Avoid overcrowding the burner as this can cause uneven cooking.
Now comes the fun part – turning those chiles. Use tongs or a spatula to turn them every few minutes until they are evenly roasted on all sides. Depending on the size and thickness of the chiles, this process typically takes about 10-15 minutes.
Place the Chiles on the Grates
The first step is crucial – placing those beauties on the grates. But don’t fret, with a little bit of knowledge and attention, you’ll be roasting like a pro in no time.
To start, make sure your stove is on high heat and that the grates are clean and free from any debris or residue. You want to avoid unwanted flavors or odors interfering with your chile roasting masterpiece.
Next, carefully choose your chiles. Opt for fresh and firm ones that can withstand the heat of the roasting process. And keep in mind that wearing gloves when handling these spicy little guys can prevent any skin irritation.
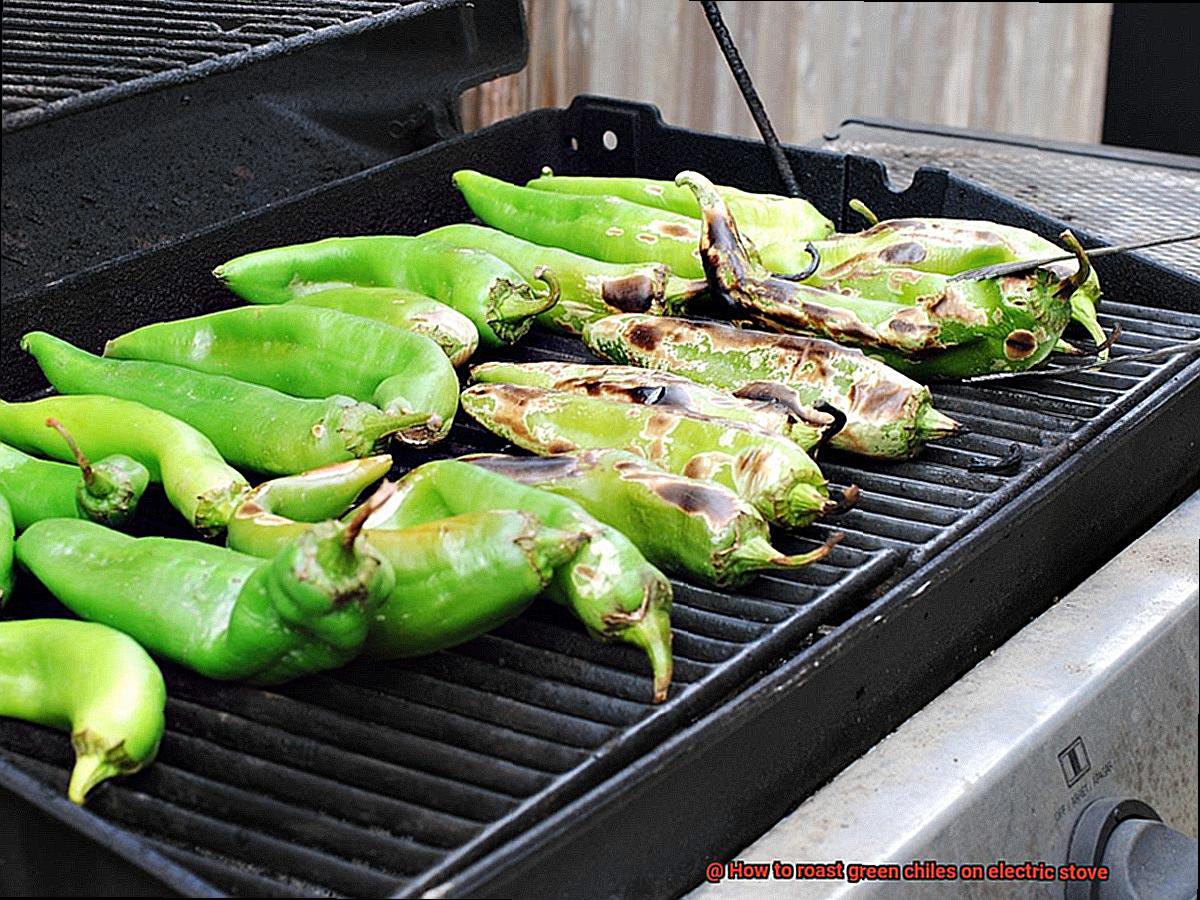
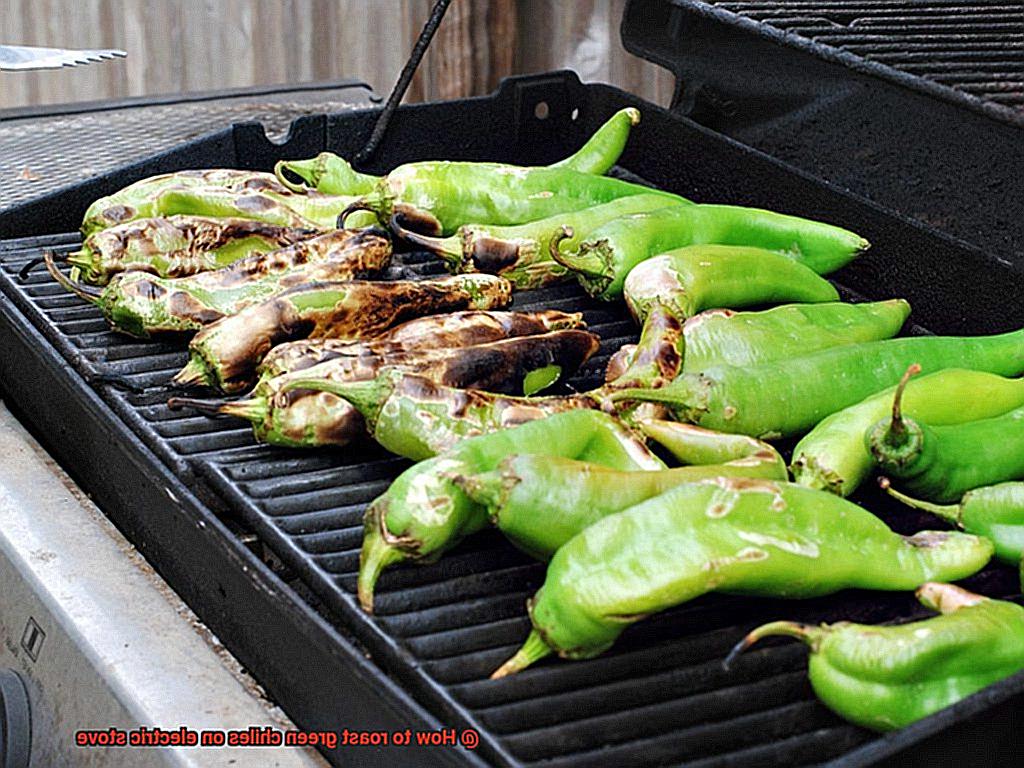
Now, it’s time to place the chiles on the grates. Make sure they’re evenly spaced apart so that they cook evenly on all sides. And don’t hesitate to rotate them every now and then to ensure they cook to perfection.
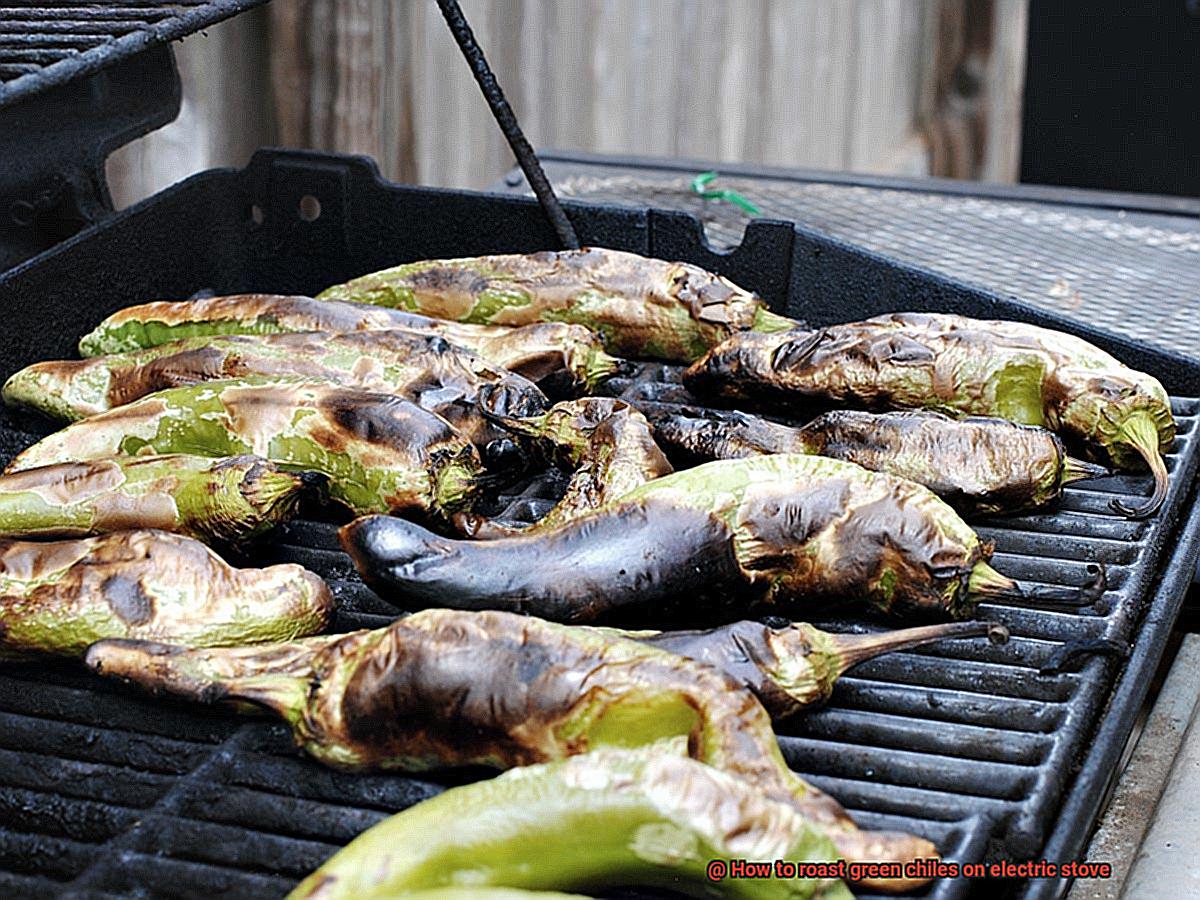
As the chiles roast, you’ll notice that they start to char or blister on the outside. This is an excellent sign that they’re cooking properly and developing incredible flavors and textures. However, keep an eye on them and adjust the heat or move them to a cooler part of the stove if necessary to prevent burning.
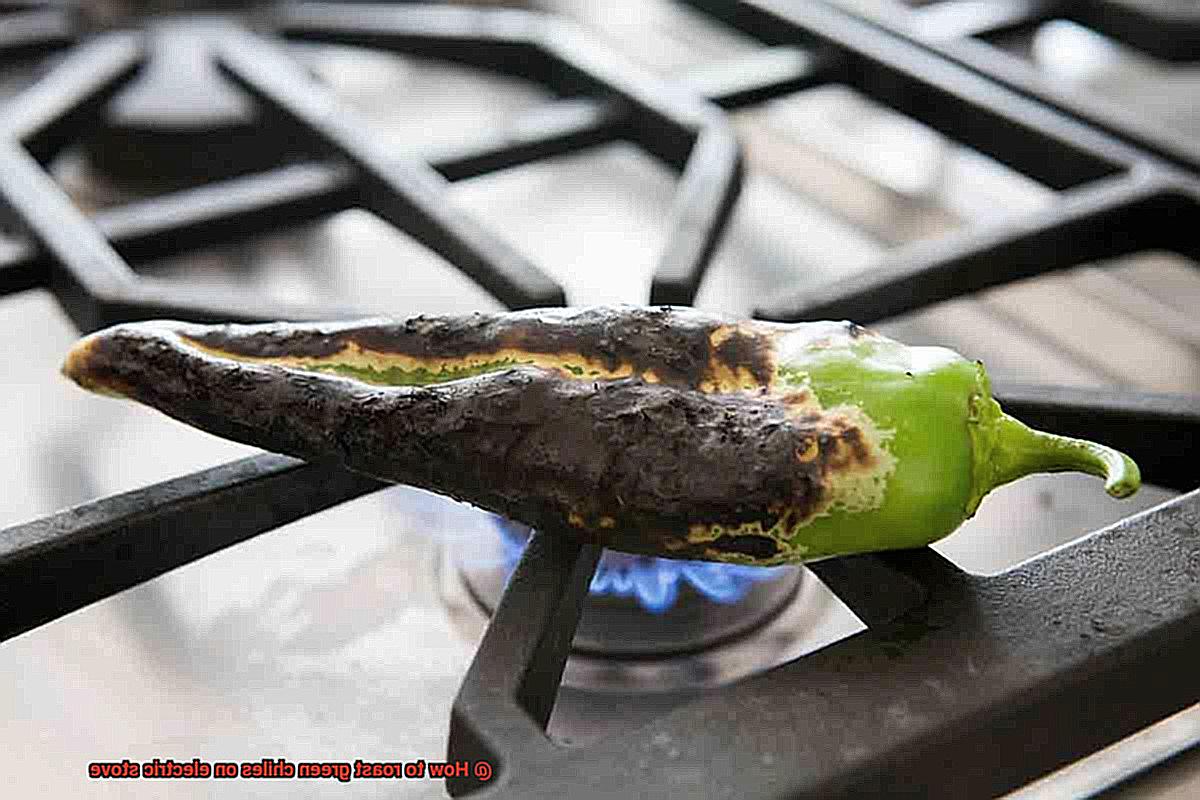
Charring the Chiles
Look no further than the simple yet essential step of charring your chiles on an electric stove. Not only does this impart a delicious, smoky flavor, but it also makes peeling off the skin a breeze.
But how exactly do you achieve that perfect char? One of the most common methods is to use a wire mesh or cast-iron skillet placed over medium-high heat on your electric stove. Carefully arrange your fresh and firm green chiles on top, being sure not to overcrowd them. Then, using tongs, rotate the chiles frequently until they are blackened and blistered on all sides – a process that typically takes 5-10 minutes.
If you’re feeling adventurous, you can try placing the chiles directly on the burner and using tongs to turn them until they’re charred to your liking. However, this method requires extra attention and caution as the chiles can easily catch fire.
Once your chiles are perfectly charred, remove them from the heat source and place them in a bowl covered with a damp cloth or plastic wrap for 5-10 minutes. This allows steam to work its magic, loosening the skin and making it much easier to peel off.
Place in a Bowl and Cover with Aluminum Foil
You’ve just completed the first step in making the perfect roasted green chiles. But, don’t celebrate just yet because the next step is just as important: placing the roasted green chiles in a bowl and covering them with aluminum foil.
This simple yet crucial step is key to achieving perfectly cooked and easy-to-peel green chiles. The aluminum foil helps trap in heat and steam, making it easier to remove the skin without damaging the chiles.
To start, ensure that you have a bowl that’s large enough to hold all of your roasted green chiles without stacking or squishing them. Damaging the skin can make peeling more difficult, so handle with care.
Once you’ve placed your roasted green chiles in the bowl, completely cover them with aluminum foil. It’s important to seal any gaps or holes tightly to trap in as much heat and steam as possible. This will help to cook the chiles further and make peeling a breeze.
The final, and perhaps hardest part, is waiting. Let the roasted green chiles sit in the covered bowl for at least 15-20 minutes. This allows them to continue cooking and loosens up the skin, preparing them for easy peeling.
Peel Off Charred Skin
You’ve achieved the ultimate roasting victory – perfectly charred green chiles. However, the next step is just as important: peeling off that charred skin. Not only does this make for a tastier dish, but it also allows the flavors of the chile to develop fully. With a little patience and skill, you’ll be a pro at peeling off charred skin in no time.
Once your roasted chiles have cooled down, carefully slice off the stem end of each chile with a sharp knife. Then, create a small slit down the length of each chile, being careful not to cut too deep into the flesh. This will make it easier to peel off later on.
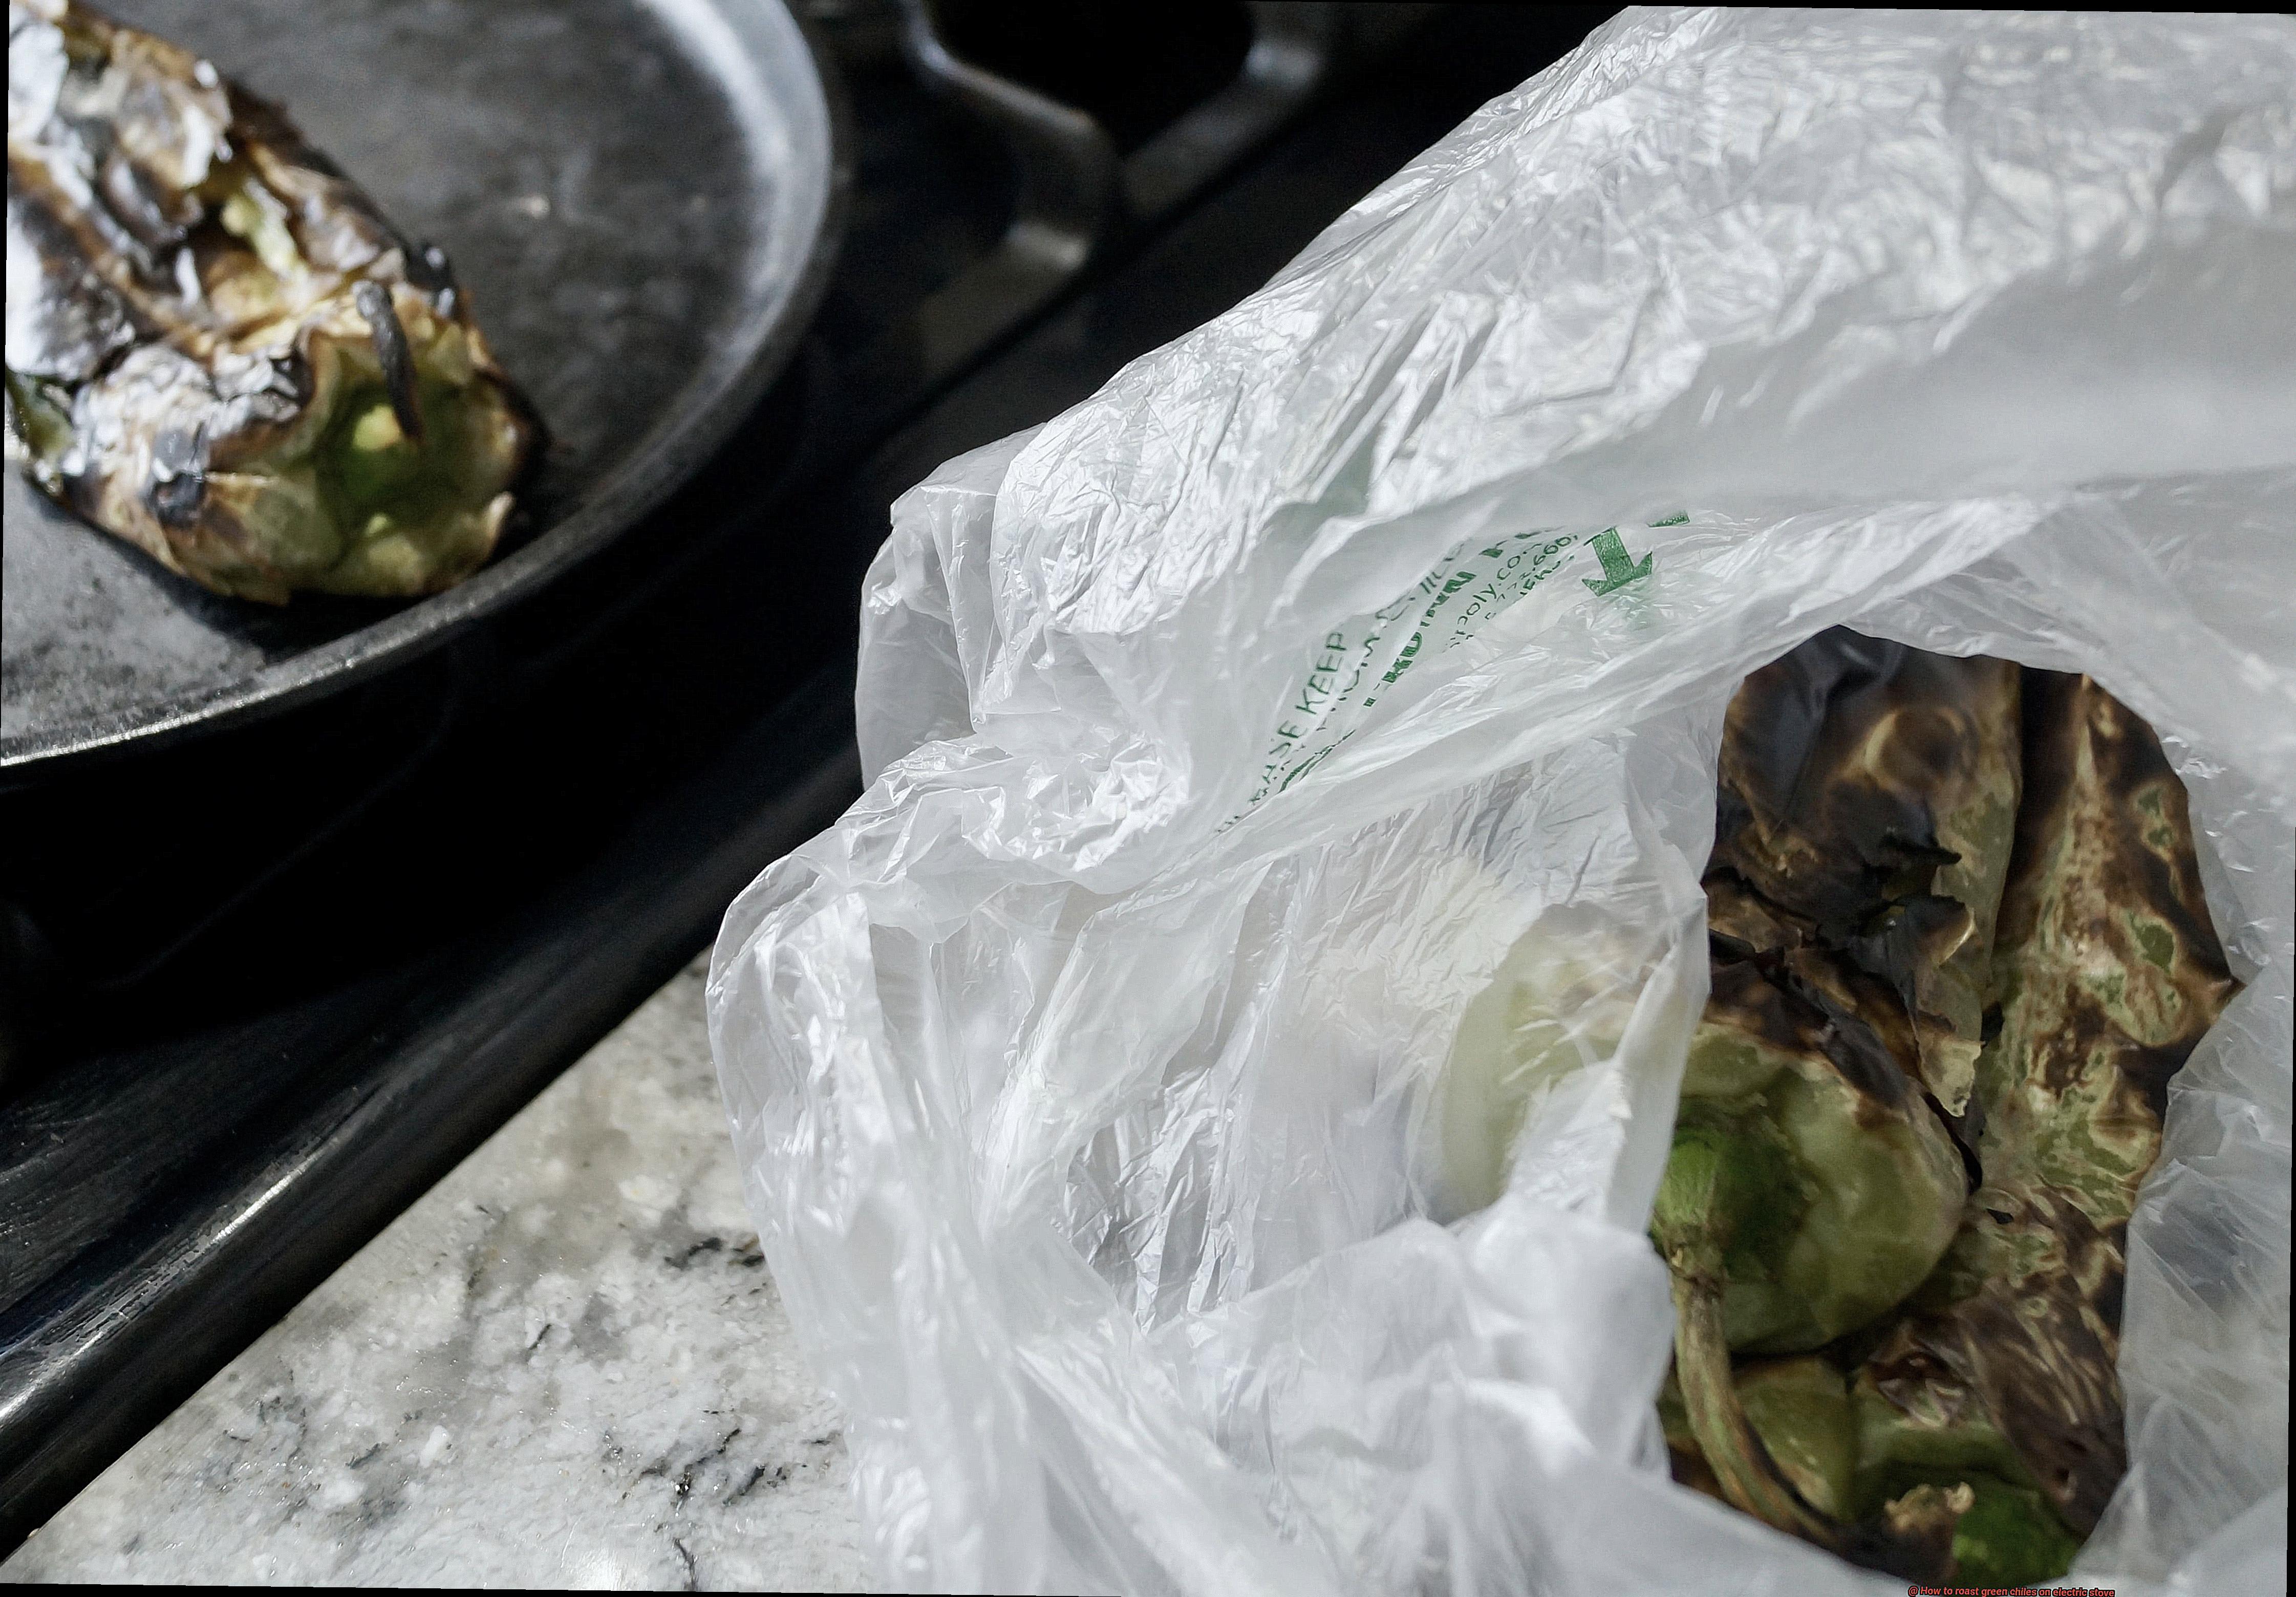
Now comes the magic step. Place your chiles in a sealed plastic bag or covered container for 10-15 minutes. This allows steam to loosen the skin and makes it much easier to peel off. If you want a smokier flavor, leave them in for longer.
After 10-15 minutes, remove your chiles from the bag and start peeling off that charred skin. Use your fingers or a small knife and be gentle so as not to damage the flesh underneath. It’s crucial to remove all of the charred skin while leaving as much of the flesh intact as possible.
Congratulations. Your perfectly peeled green chiles are now ready to be used in your favorite dishes. Whether you’re making salsas, sauces, soups, stews or anything else, these roasted green chiles are versatile ingredients that will add depth and flavor.
In summary, here are the steps to peel off charred skin:
- Let roasted chiles cool down slightly
- Slice off stem end of each chile with a sharp knife
- Make a small slit down the length of each chile
- Place chiles in sealed plastic bag or covered container for 10-15 minutes
- Remove chiles from bag and peel off charred skin using fingers or small knife
- Use perfectly peeled green chiles in your favorite dishes
Remove Stem and Seeds from Each Pepper
Before you start heating things up, let’s get down to the nitty-gritty – removing the stem and seeds from each pepper. This step is essential for even cooking and preventing any bitterness in your chiles.
Firstly, gather your green chiles and put on a pair of gloves to protect your skin from the pepper oils. Give the chiles a thorough wash under cold running water and pat them dry with a paper towel.
Now, it’s time to tackle those stems. Hold each chile by the stem and carefully slice it off with a sharp knife, ensuring that you get as close as possible without losing any precious flesh. Once all the stems are removed, use either your fingers or a small spoon to scrape out all the seeds and any white membrane inside each chile.
If you prefer a milder flavor, rinse the chiles under cold running water to remove any remaining seeds and membrane. However, keep in mind that this may also dull the flavor.
With all of your chiles de-stemmed and de-seeded, it’s time to move onto the next step – roasting them on your electric stove. Remember to handle them with care and wash your hands thoroughly afterward to avoid getting any of the oils in your eyes or mouth.
In summary, here’s what you need to do:
- Gather your green chiles and put on gloves
- Wash the chiles under cold running water and pat them dry
- Hold each chile by the stem and cut it off with a sharp knife
- Use your fingers or a small spoon to scrape out all the seeds and any white membrane
- Rinse if desired for a milder flavor
- Roast on your electric stove with care
Slice into Thin Strips
Slicing fresh green chiles into thin strips is the secret to achieving the perfect roast on an electric stove. With just a few simple steps, you’ll be roasting like a pro in no time.
First, gather your tools. You’ll need a sharp knife and a cutting board. Make sure you have plenty of fresh green chiles at the ready.
Begin by washing your chiles and drying them with a kitchen towel. Place them on the cutting board and carefully remove the stem from the top. This will make it easier to slice them into thin strips.
Next, make a small incision along the length of each chile without cutting all the way through. This step will allow you to peel off the skin effortlessly after roasting.
Now comes the fun part – slicing. Use your sharp knife to cut each chile into thin strips, about ¼ inch wide. If you prefer less heat in your roasted green chiles, you can remove the seeds and membranes during this step. However, if you enjoy some extra spiciness, leaving them intact will do the trick.
You’ve successfully sliced your green chiles into perfect strips for roasting on an electric stove. Remember to keep each slice even for optimal results.
Before firing up your electric stove, don’t forget to check out my previous post on how to remove stems and seeds from each pepper for even cooking and preventing bitterness in your chiles.
mJ_bHk6tlFE” >
Conclusion
In conclusion, there’s nothing quite like the smoky and savory flavor of perfectly roasted green chiles. And with a few simple tools and ingredients, you can easily achieve this culinary delight on your electric stove. To start, choose fresh and firm green chiles that are free from any blemishes or soft spots. Then gather your tongs, baking sheet or tray, plastic or paper bag, gloves, and aluminum foil.
To roast the chiles on your electric stove, crank up the heat to high and place them directly onto the grates using tongs to turn them occasionally until they’re charred on all sides. Once evenly charred, remove them from the heat source and let them rest in a bowl covered with aluminum foil for 10 minutes. This will allow the steam to loosen the skin for easy peeling.
Afterward, peel off the charred skin with your fingers or a paper towel before removing the stem and seeds from each pepper. Slice them into thin strips for even cooking and add them to your favorite dishes like salsas, chili, burgers, tacos or anything else that requires some added depth of flavor.
With these expert tips and tricks at your disposal, you can enjoy freshly roasted green chiles all year round.