Are you tired of serving up a dish that’s missing that one crucial element? A simple bowl of white rice can take your meal to the next level, but cooking it perfectly can be intimidating. Don’t worry though, with the right tips and tricks, cooking white rice on an electric stove top is a breeze.
If you’re like most people, you’ve struggled with making rice that’s either too mushy or too dry. But fear not, because this blog post will provide you with detailed instructions on how to make perfect white rice every time using an electric stove top.
First things first: let’s cover the basics. We’ll discuss what type of rice to use, the correct amount of water needed and what pot is best for cooking. Additionally, we’ll share some insider tips and tricks that will ensure your rice comes out fluffy and light every time.
Next up, we’ll dive into the step-by-step process of cooking the rice. You’ll learn how to bring the water to a boil, when to reduce heat and how long to let it simmer. We’ll also go over common mistakes to avoid and how to know when your rice is ready.
By the end of this blog post, you’ll be able to confidently cook perfect white rice on an electric stove top every time. So grab your favorite brand of rice and let’s get started.
Contents
What You Need to Cook White Rice on an Electric Stove Top
Cooking white rice on an electric stove top is a simple yet delicate process that requires only a handful of essential items. To achieve perfect, fluffy rice every time, you will need to ensure that you have the right tools and ingredients.
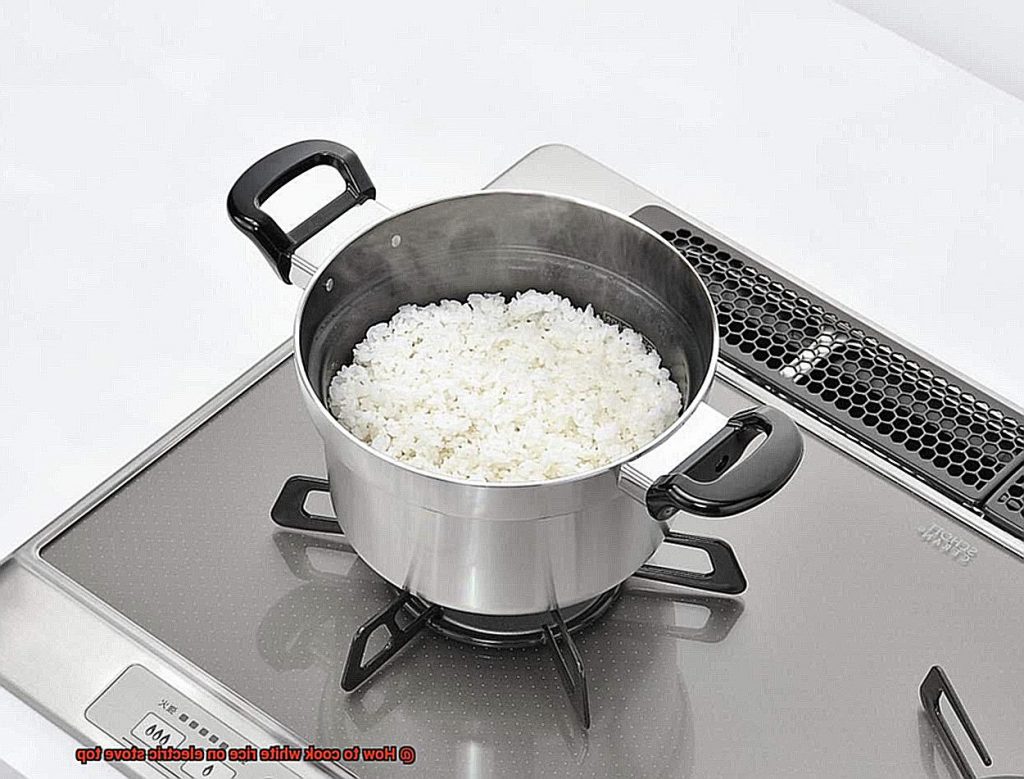
Firstly, you will need a pot with a tight-fitting lid. It’s best to use a pot made of stainless steel or aluminum as these materials distribute heat evenly and prevent the rice from sticking to the bottom. The size of the pot will depend on how much rice you want to cook.
Next, choose your white rice carefully. Long-grain white rice is the most commonly used type of rice for cooking as it has a mild flavor and fluffy texture. However, if you’re making dishes like sushi, short-grain white rice would be more suitable.
Water is another essential ingredient in cooking rice. The amount of water required varies depending on how much rice you’re cooking. A good rule of thumb is to use two cups of water for every cup of rice.
Lastly, you will need an electric stove top. Electric stovetops are popular in many households as they’re easy to use and provide even heat distribution. Make sure your stove top is clean and functioning correctly before you begin cooking rice.
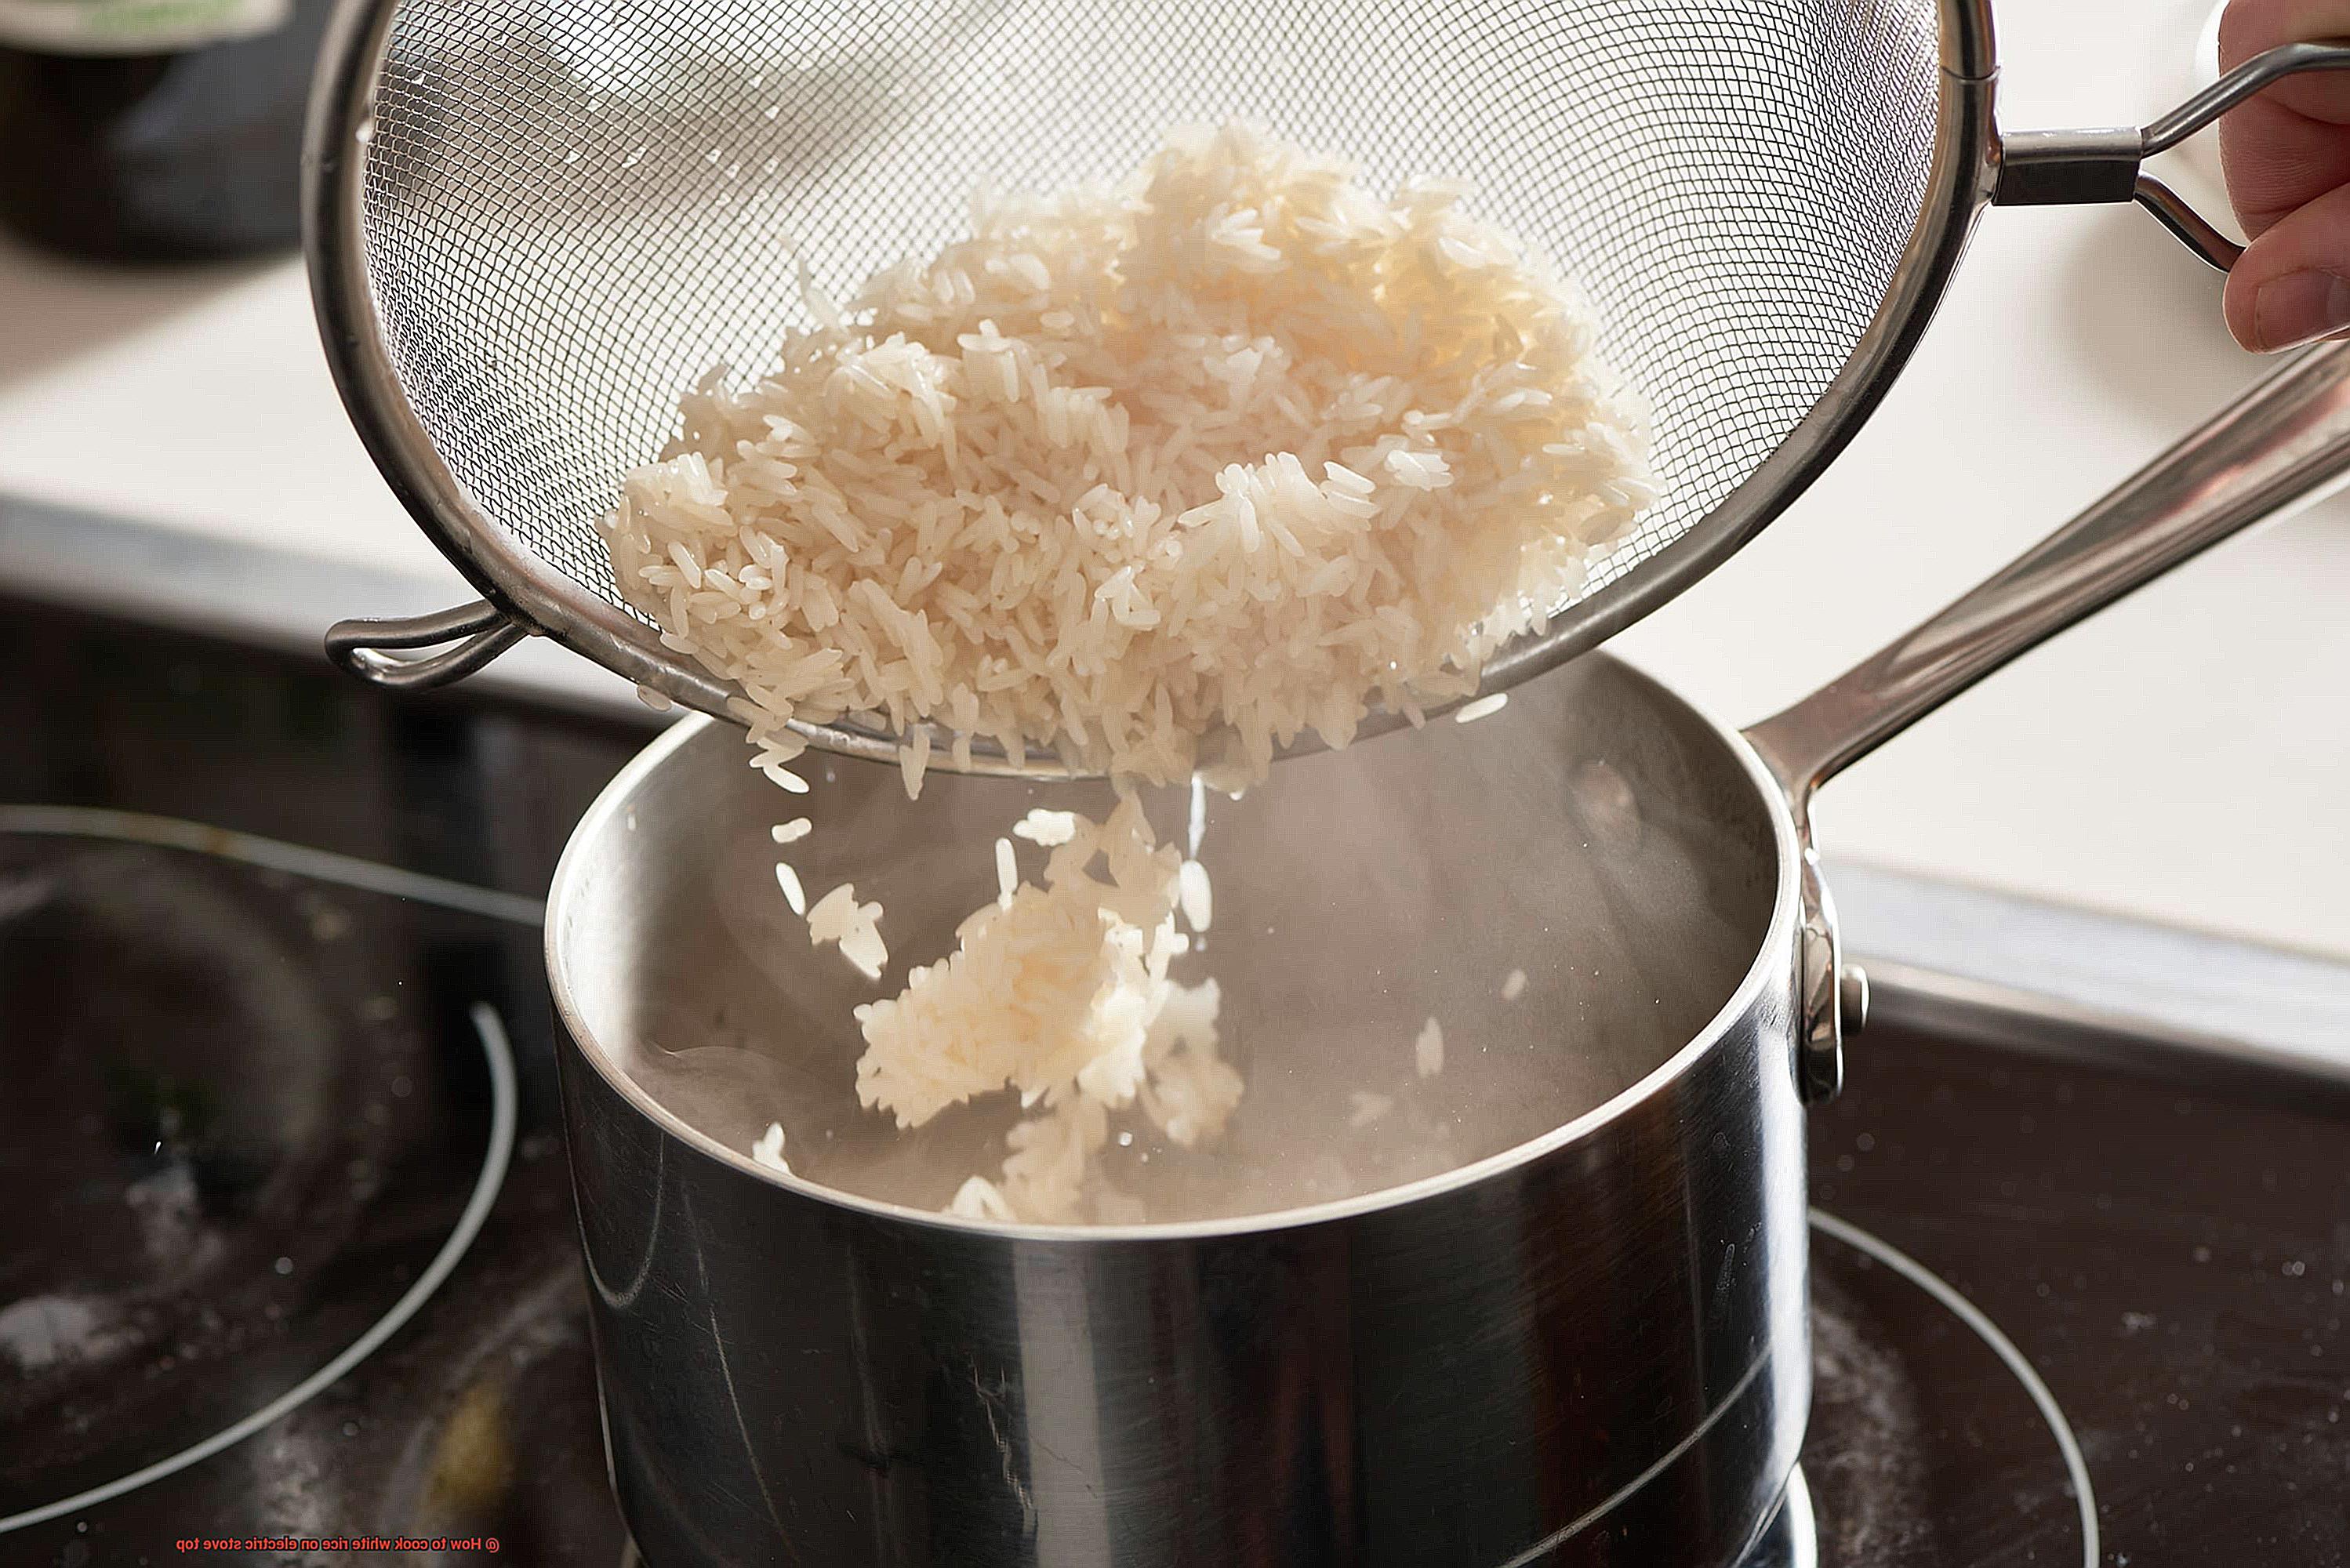
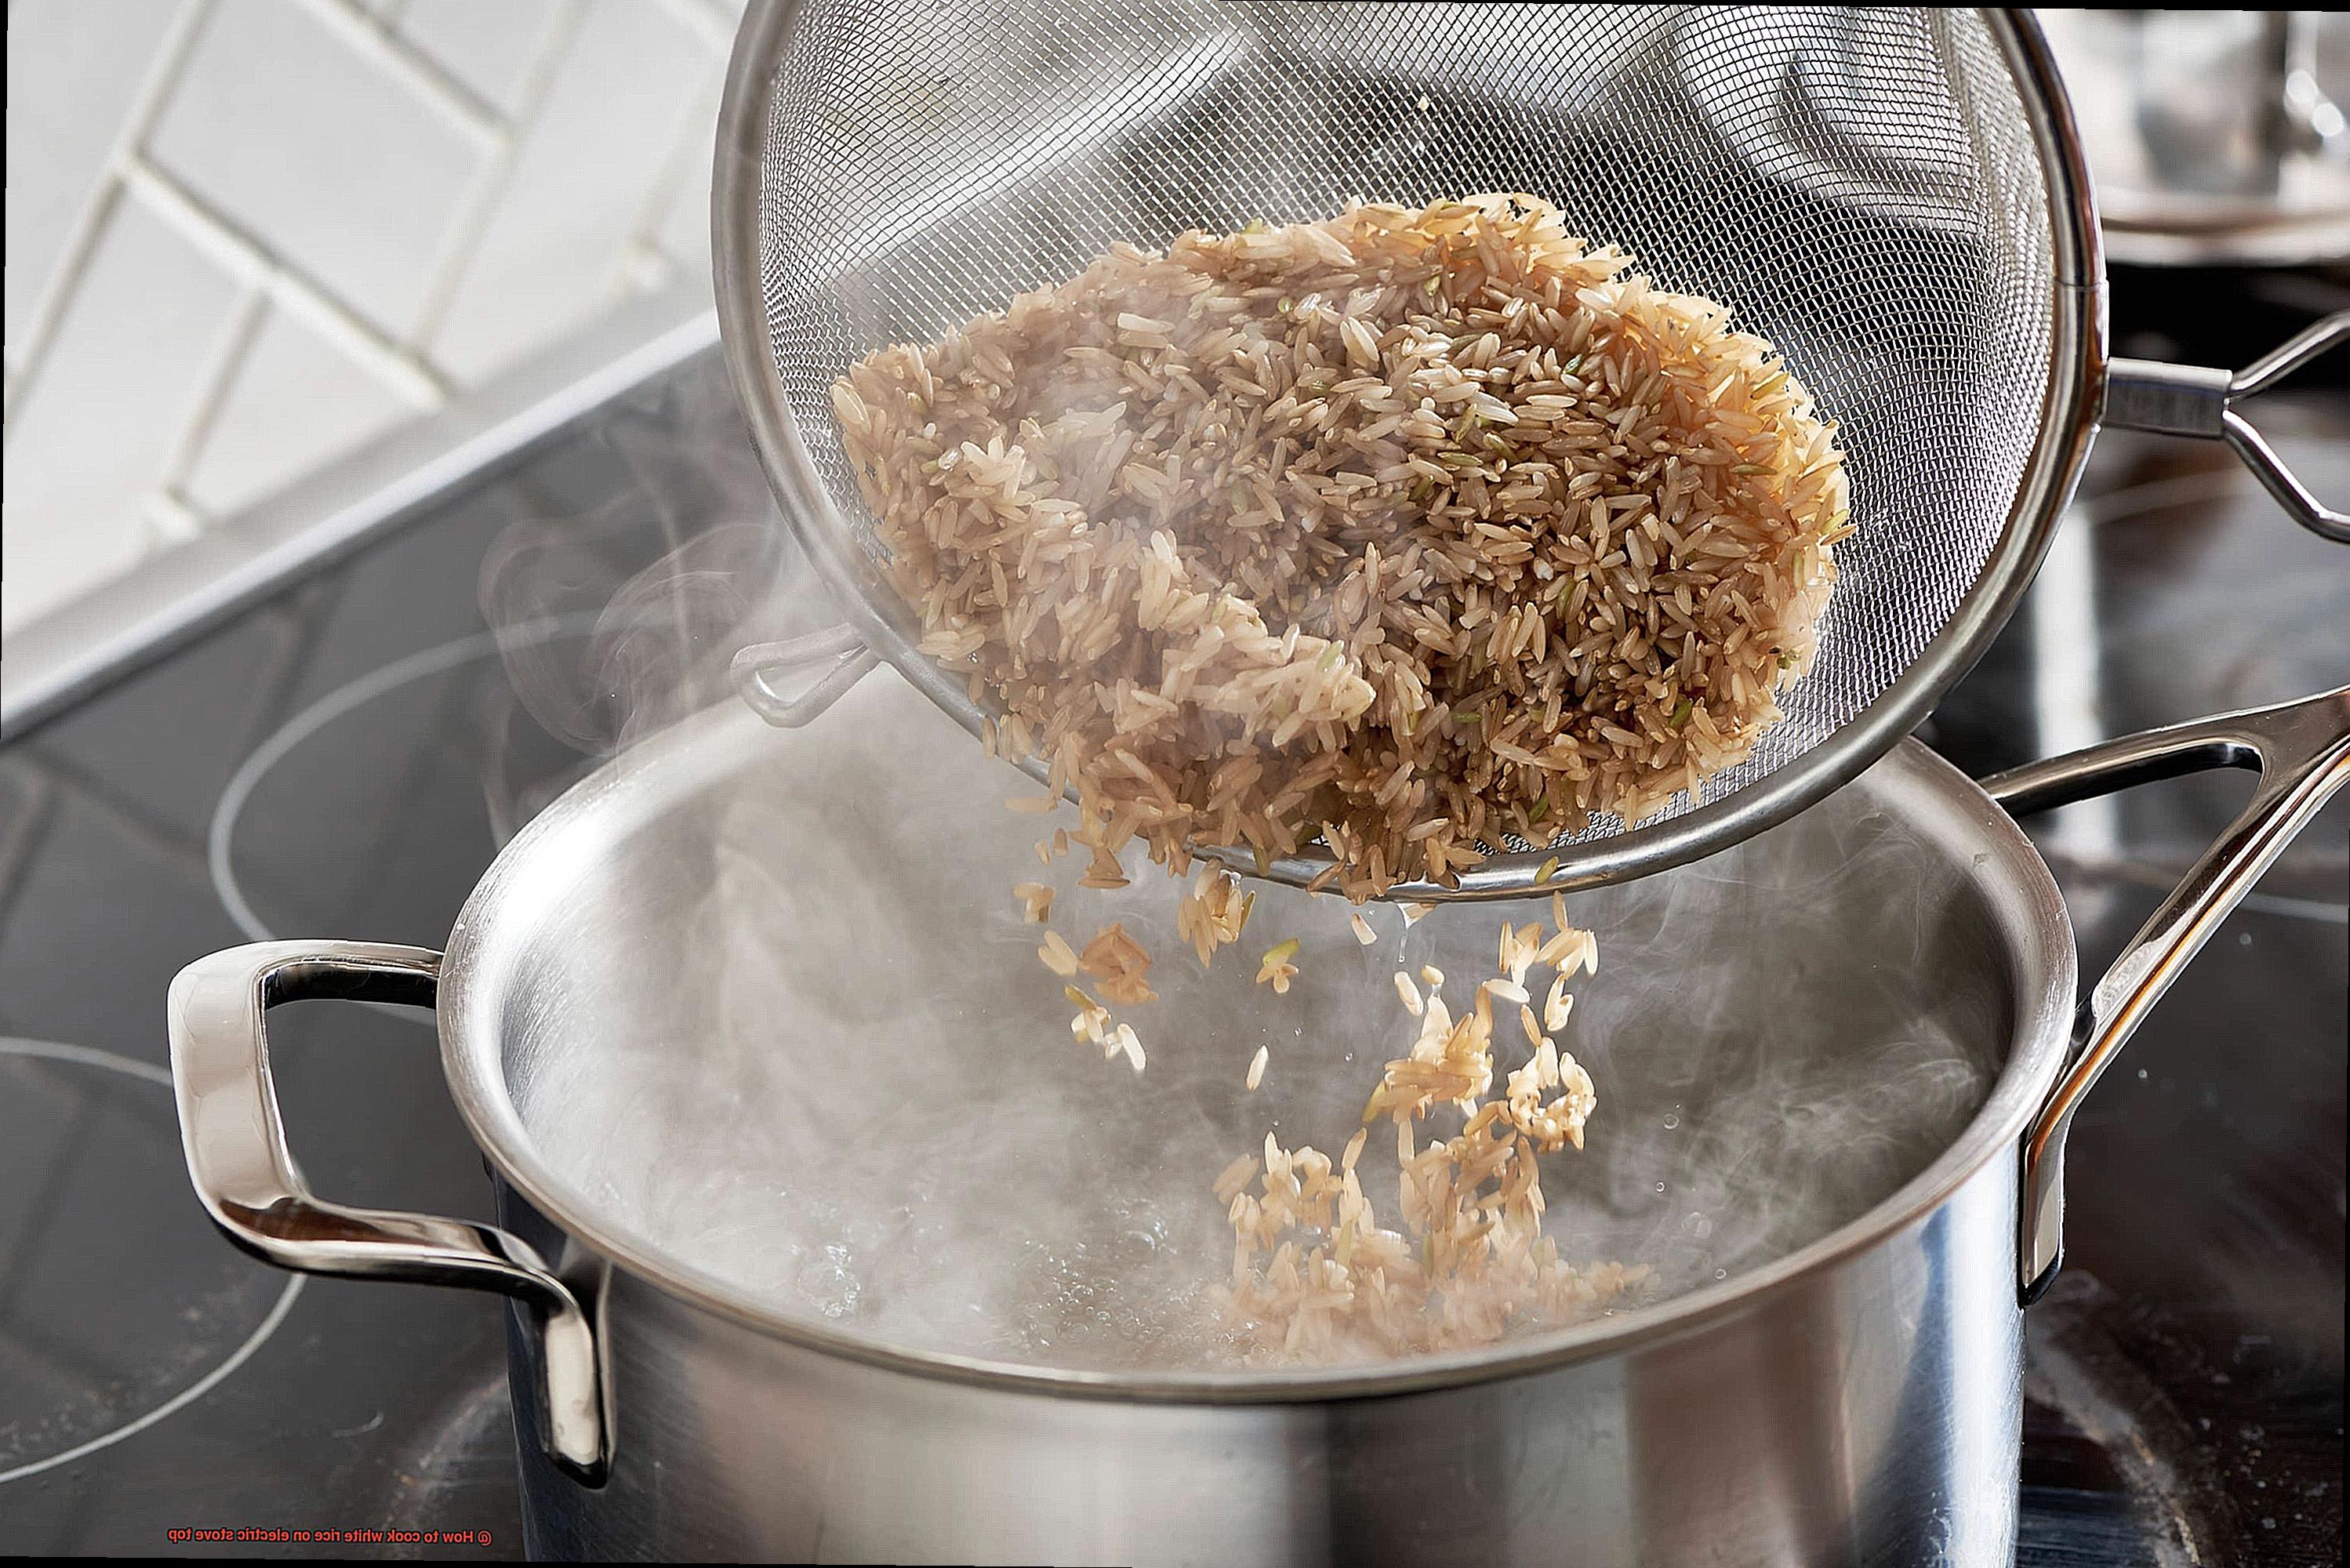
Now that you have all your items ready, it’s time to start cooking. Begin by measuring out the desired amount of rice and rinsing it thoroughly under cold running water to remove excess starch or debris.
Add the rinsed rice to the pot and pour in the appropriate amount of water. For every cup of rice used, add two cups of water. Place the pot on your electric stove top burner and turn it on to medium-high heat. Wait for the water to come to a boil.
Once boiling, reduce the heat to low and cover the pot with a tight-fitting lid. Allow the rice to simmer gently on low heat for approximately 18-20 minutes or until all the water has been absorbed and the rice is tender and fluffy.
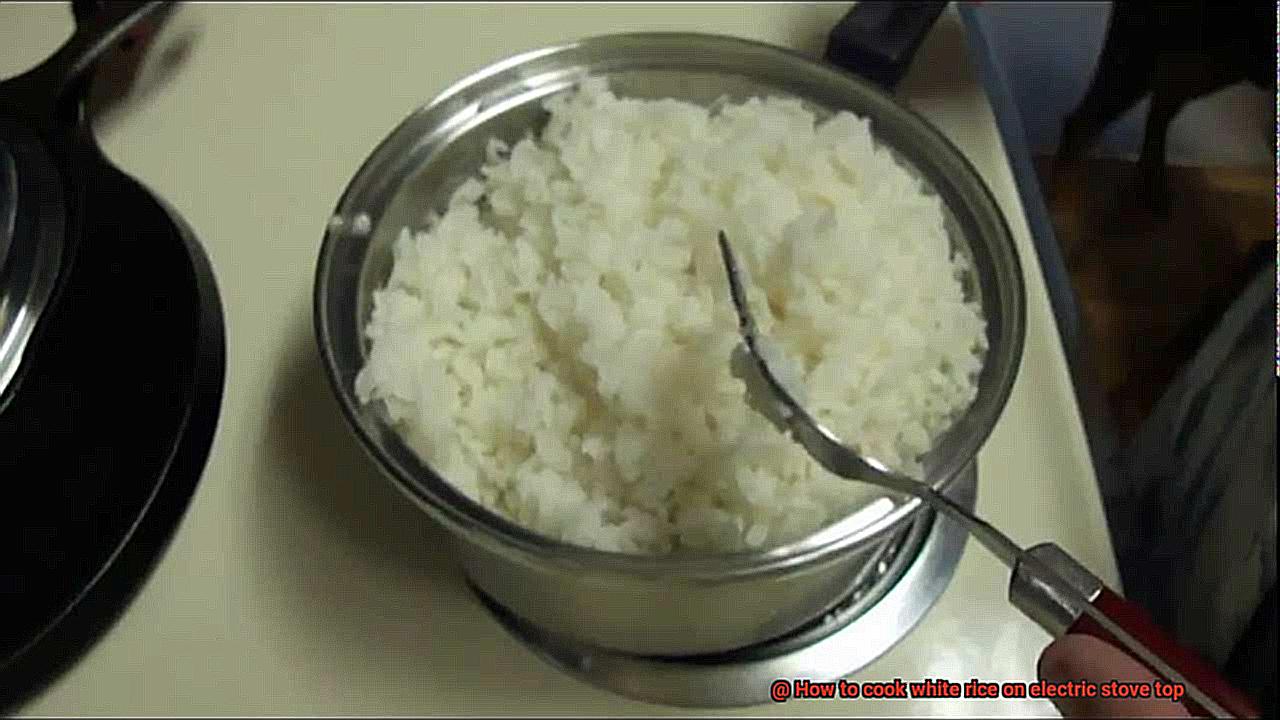
Check on the rice occasionally by lifting the lid and giving it a quick stir with a fork. When the rice is fully cooked, turn off the heat and let it sit for a few minutes before fluffing it with a fork and serving.
Measuring Out the Rice and Rinsing It Thoroughly
Cooking rice may be a simple task, but it requires a few essential steps to ensure that the end result is perfect. Measuring out the rice and rinsing it thoroughly before cooking it on your electric stove top are two such crucial steps that you don’t want to overlook.
To start, measuring out the correct amount of rice is vital as using too little or too much can have a significant impact on the texture and taste of the final product. As a general rule, one cup of uncooked rice will yield approximately three cups of cooked rice. So, if you’re cooking for a family of four, you’ll need two cups of uncooked rice.
After measuring the rice, the next step is rinsing it thoroughly. This step is essential as it eliminates excess starch and impurities that can impact the texture and flavor of the cooked rice. To rinse the rice, place it in a fine-mesh strainer and rinse it under cold running water until the water runs clear. Be patient and don’t rush this step as it may take several minutes to rinse the rice thoroughly.
Once you’ve completed rinsing the rice, allow it to drain for several minutes before cooking it. This ensures that any excess water is removed, allowing the rice to cook evenly. A useful tip is to transfer the rinsed rice to a large bowl and let it sit for approximately 10-15 minutes.
Adding the Rice and Water to a Pot
Cooking perfect white rice on an electric stove top is more than just a task; it’s an art that requires precision and care. The first step in this symphony of flavors is adding the rice and water to a pot. But what does it take to get it right? Let’s dive into the steps that will help you achieve the perfect texture and consistency for your white rice.
The first step is to rinse your rice thoroughly with cold water. This crucial step removes any excess starch and dirt that might affect the taste and texture of the rice. Once you’ve rinsed the rice, add it to a pot with the appropriate amount of water. The ideal ratio is 1:2, which means one cup of rice requires two cups of water.
Using a pot with a tight-fitting lid is essential to ensure that the steam doesn’t escape while cooking. Turn on the heat to high and bring the water to a boil while stirring occasionally to prevent the rice from sticking to the bottom of the pot. Once it comes to a rolling boil, reduce the heat to low and cover the pot tightly with a lid.
Now, let’s talk about patience. Allow your rice to simmer for 18-20 minutes, or until all of the water has been absorbed, and the rice is cooked through. Don’t be tempted to lift the lid and check on your rice as this can release steam and affect its texture. Trust the process, and your patience will be rewarded.
Once your timer goes off, remove your pot from heat and let it sit covered for 5-10 minutes before fluffing it with a fork. This step allows any remaining moisture to be absorbed, resulting in perfectly cooked fluffy rice that’s ready to be served.
In summary, here are the steps for adding rice and water to a pot:
- Rinse thoroughly with cold water.
- Add to a pot with appropriate amounts of water (1:2 ratio).
- Use a pot with a tight-fitting lid.
- Bring to a boil while stirring occasionally.
- Reduce heat to low and cover the pot tightly with a lid.
- Allow your rice to simmer for 18-20 minutes.
- Remove from heat and let sit covered for 5-10 minutes before fluffing with a fork.
Turning on the Heat and Bringing the Water to a Boil
Cooking white rice on an electric stove top may seem intimidating, but don’t let that stop you from creating a culinary masterpiece. The foundation of this dish lies in turning on the heat and bringing the water to a boil, so let’s dive into the process.
First things first, measure out your desired amount of rice and rinse it thoroughly in cold water until the water runs clear. This step removes excess starch and ensures even cooking. Once your rice is clean, place it in a pot or saucepan with enough water to cover it by about an inch.
Now comes the exciting part – turn up the heat to high and cover the pot with a lid. Wait patiently for the water to come to a boil, then reduce the heat to low and let the rice simmer gently for 18-20 minutes. Resist the temptation to sneak a peek under the lid during this time, as it can release steam and affect the cooking process.
After 18-20 minutes, check if your rice is fully cooked by fluffing it gently with a fork. If it’s not quite there yet, let it simmer for another 2-3 minutes. Once fully cooked, turn off the heat and let the rice sit covered for another 5-10 minutes. This allows any remaining moisture to be absorbed and makes for fluffier rice.
Remember that cooking times may vary depending on your desired texture and altitude. Take note of these factors to ensure perfectly cooked rice every time.
In summary, here are the key steps to turning on the heat and bringing the water to a boil for white rice:
- Rinse your desired amount of rice thoroughly in cold water
- Add rice to pot/saucepan with enough water to cover by 1 inch
- Turn heat to high and cover with a lid
- Wait for water to come to a boil, then reduce heat to low and simmer for 18-20 minutes
- Check if rice is fully cooked, and let it simmer for another few minutes if needed
- Turn off heat and let rice sit covered for 5-10 minutes to absorb remaining moisture
Reducing the Heat and Covering the Pot with a Lid
Fear not, because the secret to achieving fluffy, perfectly cooked white rice every time is reducing the heat and covering the pot with a lid.
To get started, bring the water to a boil over high heat. Once it’s boiling, reduce the heat to low and cover the pot with a tight-fitting lid. By doing this, you’ll create a gentle simmer that’s perfect for cooking rice evenly and without burning.
It’s important not to lift the lid during cooking. Even though it may be tempting to peek, lifting the lid can release steam and cause the rice to cook unevenly. So resist the urge and let your rice cook undisturbed for the recommended cooking time.
When the timer goes off, turn off the heat and let the rice sit for 5-10 minutes with the lid still on. This allows any remaining moisture to be absorbed and results in fluffy, perfectly cooked rice.
In summary, here are the steps to follow:
- Bring water to a boil over high heat.
- Reduce heat to low and cover pot with tight-fitting lid.
- Let rice cook undisturbed for recommended cooking time.
- Turn off heat and let rice sit for 5-10 minutes with lid still on.
- Use a pot with a heavy bottom to prevent burning or sticking.
- Rinse your rice before cooking to remove excess starch.
- For added flavor, cook your rice in chicken or vegetable broth instead of water.
- Experiment with different types of rice such as jasmine or basmati.
- Absorbing excess water: As rice cooks, some grains may absorb more water than others, leading to unevenly cooked rice. By turning off the heat and letting the rice sit, any excess water will be absorbed by the grains, resulting in perfectly cooked and fluffy rice.
- Finishing the cooking process: Even though you’ve turned off the heat, residual heat in the pot will continue to cook the rice through to completion. This ensures that all of the grains are thoroughly cooked without being undercooked or overcooked.
- Resting period: Just like humans need to rest after a long day, so does our rice. By letting it sit undisturbed, we allow the flavors to meld together and for the rice to settle into its final form.
- To execute this step properly, timing is key. After simmering your rice for 18-20 minutes (or longer for brown rice), turn off the heat and let it sit for an additional 5-10 minutes. During this resting period, resist the urge to lift the lid or stir the rice as this can disrupt the cooking process by releasing steam. Remember that patience is a virtue when it comes to achieving perfect textured and flavorful white rice.
Simmering the Rice for 18-20 Minutes
Cooking rice may seem like a simple task, but it can be a challenge to get it just right. One crucial step in cooking white rice on an electric stove top is simmering it for the appropriate amount of time. The ideal time for simmering white rice is between 18 and 20 minutes, but this can vary depending on the type of rice and personal preferences.
To begin, add the appropriate amount of water to a pot and bring it to a rolling boil. Once the water has boiled, add the rice and stir briefly to ensure even distribution in the pot. Then, reduce the heat to low and cover the pot with a tight-fitting lid.
Here’s where patience comes into play – resist the temptation to lift the lid during simmering. Doing so can cause steam to escape, leading to unevenly cooked rice. Set a timer for 18 minutes and allow the rice to simmer undisturbed until it goes off.
After 18 minutes have passed, check the rice by fluffing it with a fork. If it’s still slightly undercooked, let it simmer for another minute or two before checking again. Once fully cooked, remove from heat and let it sit covered for 5-10 minutes to absorb any excess moisture.
Here are some additional tips for perfect rice:
Checking on the Rice Occasionally
Let’s dive into why this step is so crucial and how to do it correctly.
Firstly, checking on the rice ensures that it doesn’t burn or stick to the bottom of the pot. Burnt rice not only tastes terrible but can also ruin your pot. To prevent this, gently stir the rice every 5-10 minutes after the initial boiling stage using a fork or spoon. Take care not to crush the grains while stirring.
Secondly, checking on the rice ensures even cooking. Stirring the rice allows each grain to cook evenly, preventing clumping or sticking together. This step is especially important for larger batches of rice.
Lastly, checking on the rice allows you to adjust the heat setting if necessary to prevent over or undercooking. The frequency of checking on the rice depends on several factors such as the amount of water used, the type of rice being cooked, and the heat setting of the stove. Typically, it is recommended to check on the rice every 5-10 minutes after the initial boiling stage and adjust the heat setting if necessary.
Remember to keep the lid on while checking on the rice to avoid losing steam and heat, which can affect the cooking process. If there isn’t enough water left in the pot and the rice is still uncooked, add a small amount of hot water and continue cooking with the lid on.
Once most of the water has been absorbed, and the rice grains are soft and fluffy, turn off the heat and let it sit for a few minutes before fluffing it up with a fork. This step allows excess moisture to evaporate and ensures that each grain of rice is evenly cooked.
Turning Off the Heat and Letting It Sit
Cooking rice on an electric stove top can be a delicate process, but with the right technique, you can achieve fluffy and evenly cooked grains every time. One of the most important steps in this process is turning off the heat and letting the rice sit.
Why is this step so crucial? Let’s dive deeper:
xo_f-Wf4ceo” >
Conclusion
In conclusion, cooking white rice on an electric stove top is a delicate art that requires attention to detail and patience. By following the steps outlined in this article, you can achieve perfectly cooked, fluffy rice every time. First, gather all the necessary items: a pot with a tight-fitting lid, long-grain white rice, water, and an electric stove top. Then, measure out the desired amount of rice and rinse it thoroughly under cold running water until the water runs clear.
Next up, add the rinsed rice to the pot with the appropriate amount of water and bring it to a boil over high heat. Once boiling, reduce the heat to low and cover the pot with a tight-fitting lid. Now comes the hard part – resist the temptation to lift that lid. Doing so can release steam and affect the texture of your rice.
After simmering for 18-20 minutes or until fully cooked (depending on your desired texture), turn off the heat and let it sit covered for 5-10 minutes before fluffing it up with a fork. This allows excess moisture to evaporate while ensuring that each grain of rice is evenly cooked.
Remember that cooking times may vary depending on altitude and desired texture. To avoid burning or sticking together, stir gently occasionally while checking on your rice.