The amount of time it takes for a newly purchased Weber grill to burn out depends on several factors.
In general, it can take anywhere from 8 to 12 months for the mechanism of the charcoal-based fuel system to fully burn. So, how long do you burn off new weber grill?
A weber grill can last many years if properly taken care of. If the grill is regularly cleaned and oiled, it can last 5 to 8 years.
However, if the grill is rusty or not properly cleaned, it can rust and need to be replaced after only a few years. Nevertheless, it’s still best to keep the grill clean at all times.
Keeping it clean can prolong its life and ensure it looks good for years to come.
Contents
How Long to Burn off New Weber Grill
Preheating a new Weber charcoal grill is usually required before cooking on it for the first time or after cleaning the grill with soap and water.
This preheating process will burn off excess grease and food particles that may be left on the grill from the manufacturing process.
So, how long does it take to burn off a gas grill? Well, this depends on the size of the gas grill and how dirty it is from the manufacturing process.
For a new gas grill, the preheating process usually takes between half an hour and an hour to complete.
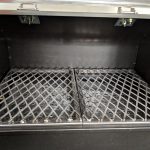
The grill grates should then be cleaned thoroughly using soapy water and a brush.
This ensures that any oil or other residue has been removed from the grill to prevent food sticking on to it during cooking.
This step should be performed regularly after every few uses.
This is a simple cleaning procedure for your grill which can be completed in less than 30 minutes of your time but can save you a lot of time and frustration in the future.
Is It Necessary to Clean the Weber Grill Before Using It for the First Time?
A clean Weber grill improves its life, and your enjoyment while cooking on it. Cleaning a charcoal grill can be messy and time-consuming, but it is necessary if you want to enjoy great tasting food without spending a lot of money on charcoal and other fuels for your barbecue.
Your new grill may seem clean, but it contains oil, grease and ash that can affect the taste of your food if not removed before your first use.
You and your family might love the smoky flavor that comes from using charcoal in your outdoor barbecue, but the chemicals found in burned coals can be dangerous if inhaled or ingested.
If you’re not sure how to clean your charcoal grill properly, read the following tips and instructions first.
How to Clean a New Weber Grill
- Ensure that you correctly build your Weber grill before you begin cleaning it. Your grilling experience will be ruined if you begin cleaning the grill before it is fully assembled. It is also a good idea to use tongs instead of your hands when assembling and cleaning your barbeque to avoid getting burned by the hot metal handles.
- Turn on the grill while it is still cold and let it run for a few minutes.
- Set the temperature on all burners to high and close the lid for 10 minutes.
- Close the grill lid and turn on the gas valve on each burner one at a time until the burner flames die down. This can take up to five minutes per burner. When the burners are turned off, the grill should be clean and ready to use. Repeat this process for each burner on your brand new weber gas grill to ensure it is thoroughly cleaned before you use it for the first time. Keep these instructions in mind the next time you buy a new weber bbq so you will be able to easily remove the grease and oil from it and be ready to grill your next meal with ease.
- Turn off the burners after 20 minutes by switching them off at the regulator, and then wait an additional hour before cleaning the grates with steel wool or scrapers.
- Remove the lid and thoroughly wipe it clean with a cloth dampened with water.
How to Install a New Weber Gas Grill
Examine the Owner’s Manual
Take your time reading and comprehending the instructions found in the owner’s manual that came with your new weber bbq before you attempt to assemble it yourself.
Always follow the instructions precisely in order to prevent damage to the barbeque during the process of assembly.
Pay special attention to the diagrams provided in the manual to ensure you understand how to properly assemble your weber bbq before you begin the process.
The diagrams in the owner’s manual are color-coded to help you identify the different parts and pieces that you will need to install on your new barbeque during the assembly process.
Carry out the Leak Test
It is recommended that you do a “leak test” on your new BBQ before you attempt to use it for the first time.
This will ensure there are no leaks in the gas line connections on the barbeque itself. Simply connect one end of the hose to the propane cylinder and then attach the other to the gas outlet on the unit itself.
Open the regulator by turning it to the “ON” position and allow the hose to run for about a minute before you turn it off again.
Turn the valve back to the “OFF” position and allow it to sit for a few minutes before removing it and checking for any leaks that may have developed along the hose or valve connection points.
To do the leak test, turn off your barbeque completely (by turning the valve to the “OFF” position), remove the regulator from the barbecue, and then place your thumb over the hole where the pressure release is located.
Then, using a brush, gently tap around the valve to ensure that there are no cracks or leaks present anywhere on the valve body or the rubber hose.
If you see any developing bubbles, it indicates that the internal o-rings need to be replaced and the valves should be replaced as well.
Before replacing any leaking parts on your grill, make sure to turn off the gas supply at the tank and disconnect the hoses from the burners to prevent any possible gas leaks.
Repeat the leak test to double check that the gas has been shut off properly.
You may start using the barbecue again when the repair is complete and ensure that the propane gas tank is full before turning it on for the first time.
If you are unable to repair the leaks yourself, contact a professional appliance repair service for assistance.
Properly Season The Grill
Seasoning the Weber grill is the final step in ensuring that it is ready for use before the first use.
When you season a grill, you protect the surface from rust and make future cleanup easier by removing excess grease and oil from the surface during the cooking process. Follow the instructions below to season your new weber bbq.
Place a paper towel soaked in vegetable oil over the briquettes and turn it on high for 10 minutes without adding any fuel.
Then, turn the burner off and allow the paper towel to cool before removing it and disposing of it.
Conduct Safety Inspections
Regular safety inspections on your new Weber BBQ are important to prevent damage and injury from occurring due to faulty components or improper maintenance.
You may avoid unwanted flareups by making sure there is proper ventilation in your cooking area.
If flares occur, immediately turn the gas off and open the hood of your grill to release the pressure and prevent fires from starting.
Make sure the burners are cool to the touch before attempting to remove any components of the grill for cleaning or repair purposes.
Never use oven cleaners to clean any part of the Weber BBQ as these chemicals may damage the paint finish of the unit.
Always use a soft damp cloth and mild detergent to clean the exterior surfaces of your grill and lid, making sure to rinse thoroughly to remove all residue.
How to Season a Weber Grill for the First Time
- Ascertain that your Weber has been thoroughly cleaned and dried before commencing with seasoning it for the first time.
- Turn on the grill and place an empty aluminium foil tray on the middle burner – this will collect any drippings and prevent staining of the cooking grates, etc.
- Close the grill cover and place the kettle on the heat – do not add any food to the grill at this stage.
- Set a timer for 20 minutes and then turn the grill off – do not add any more briquettes or food at this point. After 20 minutes, remove the tray and clean it with soapy water, rinsing it well to remove any debris. Repeat this step one more time. When finished, leave the kettle to cool for 30 minutes before wiping the exterior down with a dry cloth. Store your Weber in a cool dry place when not in use to ensure longevity and avoid rusting and corrosion of the metal parts.
- After 30 minutes, increase the temperature to its highest setting and add about a tablespoon of vegetable oil to a tray and place it on the top shelf of the grill or directly under the meat you are cooking.
- Remove the grill lid and, if using a charcoal grill, put a handful of unlit charcoal briquettes to one side of a chimney starter and light them – you will need this to add smoke to the food later.
- You may now either cook on high or low heat for between 45 minutes and an hour depending on the size of the chicken, depending on how well done you like it.
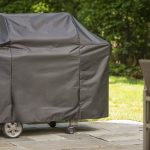
Also Read: Are Weber Grill Covers Machine Washable?
Conclusion
In conclusion, the Weber grill is a great product.
It’s well-made, lasts a long time, and can cook anything. However, the Weber grill is an expensive product.
The grill itself costs $250-$300, and it costs $200-$300 to install.
Therefore, if you’re on a budget, a grill from Target or a department store might be a better option.
However, if you’re willing to cough up the dough, the Weber grill is a great product.