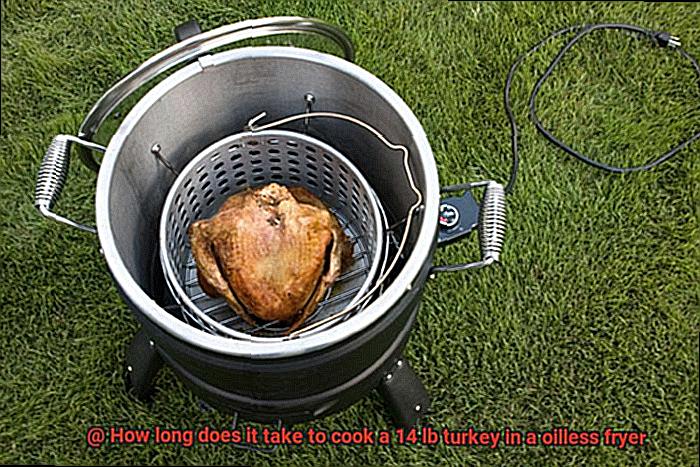
Ah, the holidays. The time of year when we gather with loved ones to share laughter, memories, and of course, a mouthwatering turkey dinner. But let’s be real – cooking a turkey can be intimidating. Luckily, oil-less fryers have made the process easier and healthier than ever before. If you’re planning to cook a 14 lb turkey this season, you’re probably wondering: how long does it take to cook a 14 lb turkey in an oilless fryer?
Well, my friend, the answer isn’t as simple as popping it in and setting a timer. Your oil-less fryer’s brand, model, and size all play a role in determining the ideal cooking time. So should you trust your manufacturer’s recommended cooking time or rely on your own skills? It’s all about finding the sweet spot.
In this blog post, we’ll dive deep into the topic of cooking a 14 lb turkey in an oilless fryer. We’ll explore the factors that influence cooking time and offer some tips for ensuring your bird comes out perfectly juicy and delicious – no matter which oil-less fryer you’re using. By the end of this post, you’ll feel confident and ready to impress your guests with a perfectly cooked holiday feast.
Contents
What is an Oilless Fryer?
An oilless fryer uses hot air to cook food instead of oil, resulting in crispy and delicious meals without the added fat and calories.
Oilless fryers are gaining popularity among health-conscious consumers for their ability to prepare fried foods without compromising on taste or health. By using a heating element and a fan, hot air is circulated around the food, creating a crispy exterior without the need for oil. This means that you can enjoy your favorite fried foods with up to 80% less fat and calories than traditional frying methods.
In addition to being healthier, oilless fryers are also more convenient than traditional fryers. They require little to no preheating time, and most models can cook food quickly. Plus, they are much easier to clean than traditional fryers because there is no messy oil to deal with.
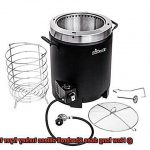
There are many different types of oilless fryers available on the market, ranging from small countertop models to larger, more advanced units. Some models come with additional features such as rotisserie functions and multiple cooking modes, making them versatile appliances for any kitchen.
One of the most significant advantages of an oilless fryer is its versatility. You can cook a variety of foods in it, including chicken wings, fries, fish fillets, and even desserts like donuts and churros. And let’s not forget about the Thanksgiving turkey. An oilless fryer is a great option for cooking a whole turkey without the need for gallons of oil.
Factors that Affect the Cooking Time of a 14 lb Turkey in an Oilless Fryer
As the holidays approach, you may be considering cooking a 14 lb turkey in an oilless fryer. However, do you know which factors will affect the cooking time and ensure that your turkey is juicy and perfectly cooked? Here are some essential factors to consider:
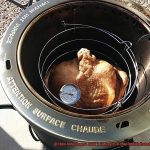
Firstly, the size and weight of your turkey are crucial factors that will impact the cooking time. A 14 lb turkey is a relatively large bird and will require more time to cook than a smaller bird. Plan on cooking your turkey for around 3-4 hours to achieve the perfect cook.
Secondly, the temperature of your oilless fryer plays a significant role in cooking time. The temperature range on an oilless fryer is typically between 300°F to 400°F degrees. The higher the temperature, the faster the cooking time. However, it’s important to be cautious not to set the temperature too high as this can result in overcooked or burnt turkey.
Thirdly, the method of cooking also plays a significant role in cooking time. If your oilless fryer has pre-set cooking programs for specific types of food, including turkey, this can make cooking much more manageable. These programs automatically adjust the cooking time and temperature to ensure perfect results. However, if your oilless fryer does not have pre-set programs for turkey, you will need to manually adjust the cooking time and temperature.
Fourthly, the shape and thickness of your turkey also play a vital role in cooking time. A thicker bird will take longer to cook than a thinner bird, while an irregular-shaped bird will take longer than one with a uniform shape. Properly trussing your turkey before placing it in the oilless fryer will help ensure even cooking.
Lastly, altitude is another factor that affects cooking time. At higher altitudes, there is less air pressure which can cause food to cook more slowly than at sea level. If you are cooking at higher altitudes, you may need to increase the cooking time by 5-10 minutes per pound to ensure that your turkey is fully cooked.
The Make and Model of the Fryer
If you’re planning to cook a succulent 14 lb turkey in an oilless fryer this holiday season, don’t underestimate the importance of selecting the right make and model. The make and model of the fryer can significantly impact the cooking time and affect the overall taste and safety of your turkey.
When shopping for an oilless fryer, it’s crucial to consider its cooking capacity. Some models may have smaller cooking baskets that could limit the size of the turkey you can cook. To avoid overcrowding and safety concerns, look for a fryer that can comfortably accommodate a 14 lb turkey.
In addition to cooking capacity, adjustable temperature controls are another crucial feature to consider. Different make and models of oilless fryers can have varying power levels, which can affect the cooking time for a turkey of this size. With adjustable temperature controls, you can set the desired cooking temperature for your turkey, ensuring it’s cooked evenly and thoroughly.
But don’t just rely on guesswork when it comes to cooking your turkey in an oilless fryer. It’s always recommended to refer to the manufacturer’s instructions for specific guidelines on cooking times and temperatures. By following these recommendations, you can be confident that your turkey will be cooked properly and safely without any risk of undercooking or overcooking.
Temperature Adjustments
Then, let’s talk temperature adjustments. Achieving a succulent, evenly cooked bird requires more than just guesswork. But don’t worry, with some expert tips, you’ll be on your way to a mouth-watering feast in no time.
First off, the ideal temperature for cooking your turkey in an oilless fryer is around 325°F. This ensures that your turkey is cooked evenly and thoroughly without being too dry or undercooked. However, several factors can affect the cooking time, such as the type of oilless fryer used, the size and shape of the turkey, and the desired level of doneness. So, it’s crucial to make temperature adjustments accordingly.
One crucial tip is preheating your oilless fryer for at least 15 minutes before placing the turkey inside. This simple step ensures that your fryer reaches the desired temperature and helps ensure even cooking throughout your bird. Furthermore, some oilless fryers come with a built-in temperature control feature that allows you to adjust the temperature as needed during the cooking process.
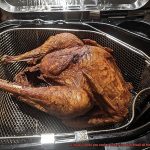
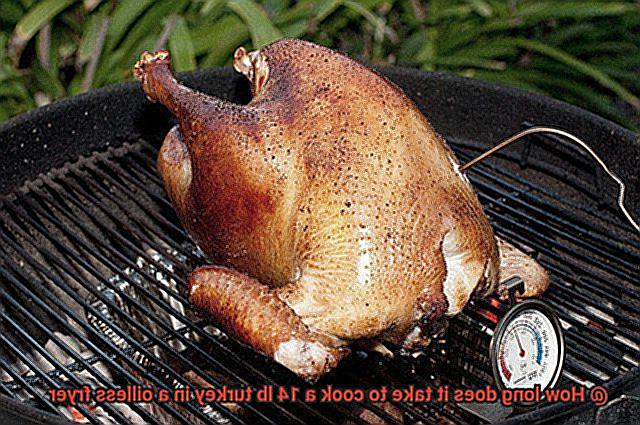
To ensure that your turkey is cooked to perfection, make sure to monitor its internal temperature regularly using a meat thermometer. The ideal temperature for fully cooked turkey is 165°F in both the thickest part of the breast and thigh. If the turkey has reached an internal temperature of 145°F but isn’t fully cooked yet, continue cooking it at a lower temperature to prevent overcooking.
Preparing the Turkey Before Cooking
Preparing the turkey before cooking is a crucial step that will make all the difference. As an expert in this topic, I have compiled some helpful tips to ensure that your turkey is not only safe to eat but also full of flavor.
First and foremost, ensure that your turkey is fully thawed before cooking. Trying to cook a frozen turkey in an oilless fryer is not only dangerous but also affects the quality of the meat. Allow the turkey to defrost in the refrigerator for at least three days before cooking.
Once fully thawed, remove the turkey from its packaging and rinse it under cold water. After rinsing, pat it dry with paper towels to prevent the oilless fryer from splattering and ensure that the skin becomes crispy during cooking.
Now comes the fun part – seasoning. Experiment with different spices and herbs to give your turkey a unique flavor profile. Some popular options include garlic powder, onion powder, paprika, salt, and pepper. Rub the seasonings all over the turkey, including under the skin and inside the cavity. This ensures that every bite is packed with flavor.
If you want to take your seasoning game up a notch, consider brining your turkey before cooking. Brining involves soaking the turkey in a saltwater solution for several hours before cooking. This process tenderizes the meat and infuses it with flavor, resulting in a juicy, flavorful bird.
To keep the legs in place during cooking and prevent the turkey from drying out or falling apart, tie them together with kitchen twine.
Finally, it’s time to cook your deliciously prepared turkey in your oilless fryer. Remember to monitor its internal temperature regularly with a meat thermometer to ensure that it’s thoroughly cooked.
Monitoring the Cooking Time and Temperature
Cooking a delicious and juicy turkey in an oilless fryer can seem like a daunting task, but with the right techniques and tools, it’s easier than you think. One of the most critical aspects of cooking a 14 lb turkey in an oilless fryer is monitoring the cooking time and temperature. Here are some essential tips to help you achieve a perfectly cooked turkey.
Firstly, it’s important to understand that cooking times may vary depending on the type of oilless fryer you have. That’s why it’s crucial to refer to the manufacturer’s instructions for specific cooking times and temperatures for your model. By doing so, you can ensure that your turkey is cooking at the optimal temperature, ensuring safety and deliciousness.
Monitoring the internal temperature of your turkey is also key to achieving a perfectly cooked bird. Use a meat thermometer to check the temperature in multiple places, including the thickest part of the breast, thigh, and wing. It’s recommended to aim for an internal temperature of 165°F to ensure that your turkey is safe and ready to eat.
While monitoring the cooking process, it’s crucial to avoid opening the oilless fryer frequently. Doing so can cause heat loss, leading to longer cooking times and potentially dry meat. Instead, consider using a transparent lid or window that allows you to check on the progress without losing heat.
Once your turkey is cooked to perfection, remember to let it rest for at least 15 minutes before serving. This allows the juices to redistribute throughout the meat, resulting in a moist and flavorful turkey that your guests will love.
Tips for Creating a Delicious and Healthy Turkey
Creating a mouth-watering and nutritious turkey in an oilless fryer takes more than just throwing it in and hoping for the best. Here are five effective tips to make sure your turkey turns out both delicious and healthy:
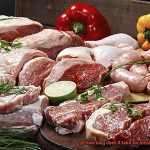
Choose a high-quality turkey
A free-range and organic bird is an excellent option as it tends to be healthier and more flavorful compared to other options.
Season well
Proper seasoning is key to adding flavor and depth to the meat. Using herbs, spices, marinades, or even stuffing the bird with fruits and vegetables can give additional moisture and taste.
Follow manufacturer’s instructions
Make sure to preheat the fryer before placing the turkey inside. Keeping a close eye on the temperature is crucial to ensure that it stays within the recommended range.
Use a meat thermometer
Checking the internal temperature of the turkey with a meat thermometer is essential to ensure that it has reached 165°F before removing it from the fryer. This will prevent undercooking or overcooking, which can result in dry or unsafe meat.
Let your turkey rest
Resting your turkey for at least 15-20 minutes before carving allows the juices to redistribute throughout the meat, resulting in a more tender and flavorful bird.
In addition to these tips, basting regularly while cooking can help keep your turkey moist and tender. Be creative with your seasonings, but avoid high-sugar or high-fat ingredients that can add unnecessary calories and unhealthy fats.
4eULn5aZU9E” >
Conclusion
In summary, cooking a 14 lb turkey in an oilless fryer is a fantastic choice for anyone looking to enjoy a scrumptious and nutritious holiday meal. However, it’s crucial to bear in mind that the cooking duration will depend on various factors such as the bird’s size and weight, your oilless fryer’s temperature, its make and model, and altitude. To ensure that your turkey comes out perfectly juicy and delectable, adhere to these expert tips:
- Opt for a high-quality turkey
- Season generously
- Observe manufacturer’s instructions
- Utilize a meat thermometer
- Allow your turkey to rest
By following these guidelines, you can be confident that your turkey will be flawlessly cooked and bursting with flavor. Furthermore, using an oilless fryer has numerous benefits over traditional frying methods. Not only does it result in healthier meals with up to 80% less fat and calories than traditional frying methods, but it’s also more convenient and easier to clean.
Remember always to consult the manufacturer’s instructions for specific cooking times and temperatures.