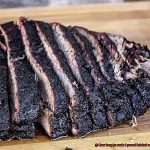
Imagine a sunny summer day, where the tantalizing aroma of fried food wafts through the air. You crave that crispy, savory goodness, but don’t want to deal with the mess and health hazards of traditional frying methods. Enter the Charbroil oilless fryer – your savior from all things oily. This innovative appliance uses hot air to fry food, giving you that same mouthwatering taste and texture without any of the hassle.
But wait, how long do you cook your favorite foods in a Charbroil oilless fryer? The answer isn’t as simple as you might think. Cooking times can vary depending on factors like food thickness and quantity. But fear not. In this blog post, we’ll delve into how long you should cook various foods in a Charbroil oilless fryer. From chicken wings to French fries, we’ve got you covered with helpful tips and tricks to ensure perfect results every time.
So whether you’re a seasoned pro or new to the kitchen game, read on for everything you need to know about cooking up a storm in your Charbroil oilless fryer. Get ready for some seriously delicious eats.
Contents
What Is a Charbroil Oilless Fryer?
Look no further than the Charbroil oilless fryer. This revolutionary kitchen appliance uses infrared technology to cook food without the need for oil, making it a healthier alternative to traditional deep-frying methods.
The Charbroil oilless fryer typically consists of a cooking chamber, heating element, and fan. The heating element produces infrared heat that is evenly distributed throughout the cooking chamber, while the fan circulates hot air around the food. This results in a crispy exterior and juicy interior without the added fat from oil.
What’s more, the Charbroil oilless fryer offers a multitude of benefits. For one, it’s incredibly versatile, allowing you to cook a range of dishes from chicken to fish, vegetables to desserts. And because it doesn’t require oil, it’s safer than traditional deep-frying methods that use hot oil which can lead to accidents and burns.
Cooking with the Charbroil oilless fryer is also quick and easy. Simply follow the manufacturer’s instructions for your specific model to ensure optimal results. As a general rule, cooking times are shorter than traditional frying methods. For example, chicken wings can be cooked in 12-15 minutes at 375°F, and French fries can be cooked in 10-12 minutes at the same temperature.
Benefits of Using an Oilless Fryer
Say goodbye to the mess and guilt of traditional deep fryers and hello to the numerous benefits of using an oilless fryer. As an expert on this kitchen essential, I can confidently say that it will change the way you think about cooking.
First and foremost, using an oilless fryer means you can enjoy crispy and delicious food without all the added fat and calories. By eliminating the need for oil, you can indulge in your favorite fried foods while maintaining a healthy lifestyle. Say goodbye to greasy fingers and hello to guilt-free indulgence.
Safety is always a top priority when it comes to cooking, and an oilless fryer offers unparalleled peace of mind. Without hot oil involved, there is no risk of splattering or spilling hot oil, which can cause serious burns and injuries. In addition, most oilless fryers come equipped with safety features such as automatic shut-off and overheating protection, ensuring that your cooking experience is both enjoyable and safe.
Convenience is another major perk of using an oilless fryer. With little to no preheating necessary, you can start cooking your food right away. Some models even have pre-set cooking programs for specific foods, taking the guesswork out of cooking. And when it’s time to clean up, simply wipe down the appliance – no messy oil spills or greasy clean-up required.
In addition to all these amazing benefits, using an oilless fryer can also save you money in the long run. While the initial cost may be higher than a traditional deep fryer, you won’t need to purchase gallons of oil every time you want to use it. This translates into significant savings over time, especially if you use your oilless fryer frequently.
Factors That Impact Cooking Time in an Oilless Fryer
An oilless fryer is an incredible appliance that can help you indulge in your favorite fried foods guilt-free. However, cooking time with an oilless fryer can vary depending on certain factors. As an expert in oilless fryers, let me take you through the different factors that impact cooking time.
The type of food you’re cooking is a crucial factor that impacts cooking time. For instance, chicken wings take longer to cook than French fries, so it’s vital to plan your meals accordingly. Similarly, the size of the food also affects cooking time. Smaller pieces of food will cook faster than larger ones, so be sure to adjust your cooking time accordingly.
Starting temperature is another essential factor that affects cooking time. Cold food will take longer to cook than room temperature food, which is why it’s crucial to let your food sit out for a few minutes before cooking. In addition, airflow in your oilless fryer can impact cooking time. If there isn’t enough airflow, your food may cook unevenly or take longer to cook. Therefore, it’s crucial to read the manufacturer’s instructions carefully and follow them.
Lastly, altitude can have an impact on cooking time in an oilless fryer. If you reside at a higher altitude, you may need to adjust the cooking time to compensate for lower air pressure.
By keeping these factors in mind, you can ensure that your food comes out perfectly cooked every time with your Charbroil oilless fryer. Remember to plan your meals according to the type and size of the food you’re cooking, let your food sit out for a few minutes before cooking for optimum starting temperature, ensure sufficient airflow in your oilless fryer by following the manufacturer’s instructions and adjust cooking time based on altitude.
How to Preheat Your Charbroil Oilless Fryer
Preheating your Charbroil oilless fryer is crucial to achieving perfectly cooked and delicious food every time. Here’s a step-by-step guide on how to preheat your fryer:
Set the Temperature
The first step is to set the temperature to your desired cooking temperature. Make sure to check your recipe or food packaging for the recommended temperature as different foods require different cooking temperatures.
Allow Time for Preheating
Give your fryer at least 5-10 minutes to preheat, depending on the recipe. This ensures that the cooking temperature is consistent throughout the cooking process, resulting in evenly cooked food.
Use Cooking Spray
During preheating, you can add a small amount of cooking spray or oil to the cooking basket or tray to prevent sticking. This also helps your food achieve a crispy texture.
Don’t Overcrowd the Basket
It’s essential not to overcrowd the cooking basket or tray as this can result in uneven cooking and longer cooking times. Cook multiple batches if necessary, ensuring that each batch is adequately spaced out.
Stay Safe
Before turning on the fryer, ensure that the cooking basket is in place to prevent accidents or injuries while the fryer is heating up.
It’s worth noting that preheating time may vary depending on your Charbroil oilless fryer model and the type of food you are cooking. For example, frozen food may require extra preheating time to ensure even cooking.
Tips for Cooking Chicken Wings in an Oilless Fryer
Cooking them in an oilless fryer may be just what you need. Not only will they satisfy your cravings, but they’ll also help you avoid the added fat from deep frying. Here are some tips to make sure your chicken wings turn out perfectly:
Preheat your oilless fryer
Before cooking, preheat your oilless fryer to 400°F. This will allow for even cooking and crispy results.
Season to taste
Use your favorite spices or marinade to season the chicken wings generously. This will add flavor and prevent them from tasting bland.
Flip halfway through cooking
To ensure that both sides of the wings cook evenly and avoid burnt spots or raw areas, flip them halfway through cooking.
Check internal temperature
To ensure that the chicken wings are fully cooked, use a meat thermometer to check that the internal temperature has reached 165°F. If not, continue cooking for a few more minutes.
Let them rest
Once the chicken wings are fully cooked, let them rest for a few minutes before serving. This will allow the juices to redistribute throughout the meat, resulting in tender and juicy wings.
In addition to these tips, it’s important to note that cooking time may vary depending on the size of the wings and the temperature of the fryer. Generally, it takes about 20-25 minutes at a temperature of 375°F. Also, be sure to pat the wings dry with paper towels before cooking to remove any excess moisture and achieve optimal crispiness.
Tips for Cooking French Fries in an Oilless Fryer
Consider cooking them in an oilless fryer for a healthier alternative. Here are some tips to help you achieve perfectly crispy and golden fries every time.
Preheat Your Fryer
Before cooking your fries, make sure to preheat your oilless fryer to ensure even cooking. Follow the manufacturer’s instructions for your specific model, as the preheating time may vary.
Cut Your Potatoes Thinly
To ensure that your fries cook evenly and crisp up nicely, cut your potatoes into thin, uniform slices or strips. This will also prevent overcrowding in the fryer basket.
Dry Your Potatoes Thoroughly
Excess moisture on your potatoes can lead to soggy fries, so it’s important to pat them dry with a paper towel before placing them in the fryer basket.
Use a High Smoke Point Oil
Even though you’re using an oilless fryer, it’s still recommended to use an oil with a high smoke point like canola or vegetable oil. This will prevent the oil from burning or producing smoke, which can affect the flavor of your fries.
Cook in Small Batches
Cooking your fries in small batches will ensure that they cook evenly and turn out crispy. Overcrowding the fryer basket can lead to uneven cooking and steaming rather than frying, resulting in soggy fries.
Adjust Cooking Time as Needed
The cooking time for French fries in an oilless fryer may vary depending on the brand and model of your fryer and personal preference for how crispy you like your fries. Check on them periodically and adjust the cooking time as needed.
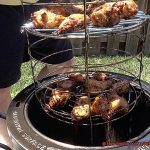
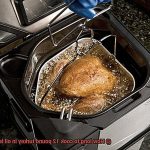
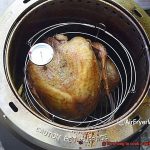
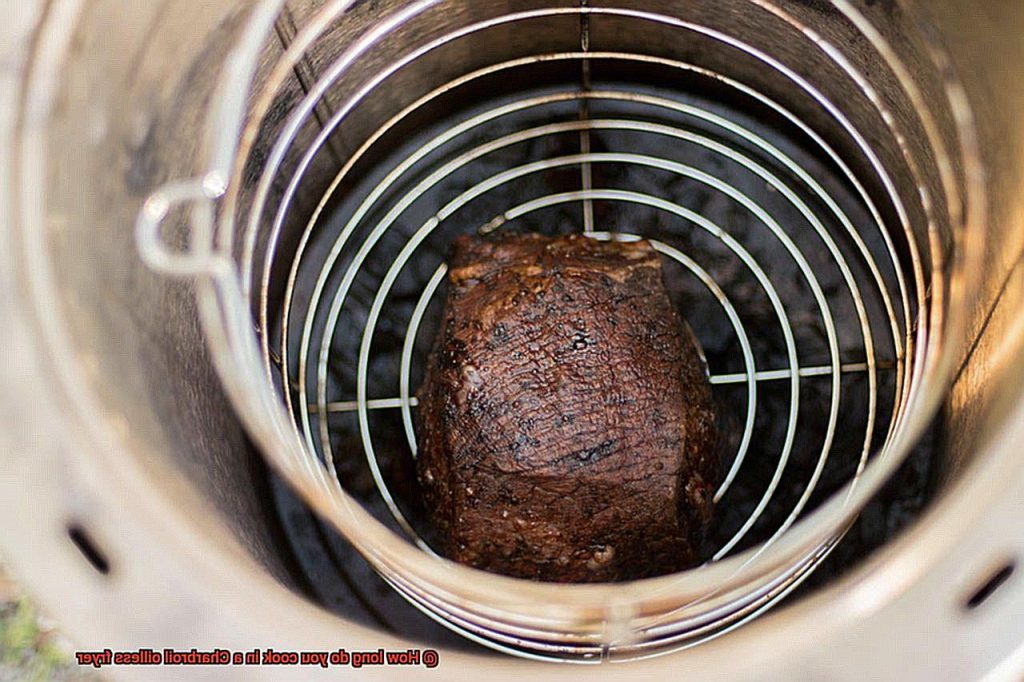
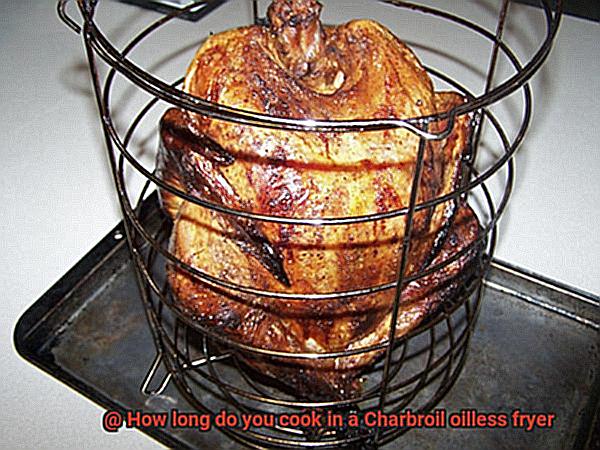
Tips for Cooking Larger Items in an Oilless Fryer
Cooking larger items in an oilless fryer can be a great way to enjoy healthier meals at home. However, it requires a bit of patience and attention to detail. Here are some tips and considerations to help you get the best results:
Preheat Your Fryer
Before adding your food, it’s important to preheat your oilless fryer to the desired temperature. This will ensure that your food cooks evenly and thoroughly. Follow the manufacturer’s instructions for preheating your specific model.
Use a Meat Thermometer
When cooking larger items like whole chickens or roasts, it’s crucial to use a meat thermometer to check the internal temperature of the food as it cooks. This will ensure that the meat is cooked safely and thoroughly all the way through.
Consider Size and Shape
The size and shape of the item you’re cooking will affect how long it takes to cook and how evenly it cooks. Large, thick cuts of meat may need to be turned over halfway through cooking to ensure even browning. Some oilless fryers come with accessories like racks or rotisserie attachments that can help cook larger items more evenly.
Follow Guidelines
Different types of food may require different cooking times and temperatures, so make sure to follow any recommended guidelines provided by the manufacturer or recipe instructions. This can help ensure that your food turns out perfectly cooked every time.
Be Patient
Cooking larger items in an oilless fryer may take longer than smaller items, so be patient and don’t rush the process. Keep an eye on the food as it cooks and adjust the temperature or cooking time as necessary.
4eULn5aZU9E” >
Conclusion
In summary, the Charbroil oilless fryer is a game-changer in the world of kitchen appliances. With its ability to deliver crispy and delicious fried foods without the added health hazards and mess of traditional frying methods, it’s no wonder that this appliance has gained popularity among foodies and health enthusiasts alike.
When it comes to cooking times, there are several factors to consider such as food thickness, quantity, and starting temperature. However, with some helpful tips and tricks, you can ensure perfect results every time. Preheating your fryer is key to achieving perfectly cooked and delicious food every time. And for larger items like chicken or turkey, using a meat thermometer can help ensure that they are cooked safely and thoroughly all the way through.
The benefits of using an oilless fryer are numerous. Not only does it offer healthier cooking options but also safety features like automatic shut-off and overheating protection. Plus, it’s incredibly convenient with little to no preheating necessary – saving you both time and energy. And let’s not forget about the significant cost savings over time compared to traditional frying methods.
So whether you’re cooking up some crispy chicken wings or indulging in some sweet potato fries, keep factors like food type and size, airflow in your fryer, altitude, and manufacturer’s instructions in mind when using your Charbroil oilless fryer.