Do you love the taste of perfectly grilled meat? As a backyard grill master, you know that getting your natural gas grill hot enough is crucial for achieving that signature char and sear marks. But if you’re struggling to achieve the desired temperature, don’t worry. We’ve got you covered with some simple tips and tricks.
Firstly, adjusting the air vents to control the oxygen supply can increase the heat output. Secondly, cleaning or replacing worn-out grill grates ensures even heat distribution across the cooking surface. Lastly, make sure your gas tank is full and correctly connected to improve your grill’s performance.
In this blog post, we’ll explore these tips in-depth so that you can fire up your natural gas grill with confidence and achieve perfect results every time. Let’s dive into how to make your natural gas grill hotter and more efficient.
Contents
Check the Gas Pressure
The culprit may be low gas pressure. Checking the gas pressure is an essential step in making your grill hotter and ensuring proper cooking temperature.
To check the gas pressure, start by turning off the gas supply and disconnecting the propane tank or natural gas line from the grill. Attach a manometer to the grill’s regulator, which measures the amount of gas pressure. Turn on the gas supply and wait for a few seconds for the pressure to stabilize before taking a reading from the manometer.
If the gas pressure reading is below the recommended range for your grill, you may need to adjust or replace the regulator. However, it’s important to note that adjusting or replacing the regulator can be dangerous if not done correctly. Seek professional help if unsure about how to proceed.
But before adjusting or replacing the regulator, check for blockages in the gas line or burners that could restrict the flow of gas. Inspect the burners and clean them with a wire brush or compressed air if necessary.
Regular maintenance and cleaning of your grill can also help increase its heat output. Clean your grill regularly and adjust air vents to allow more oxygen to flow into the grill.
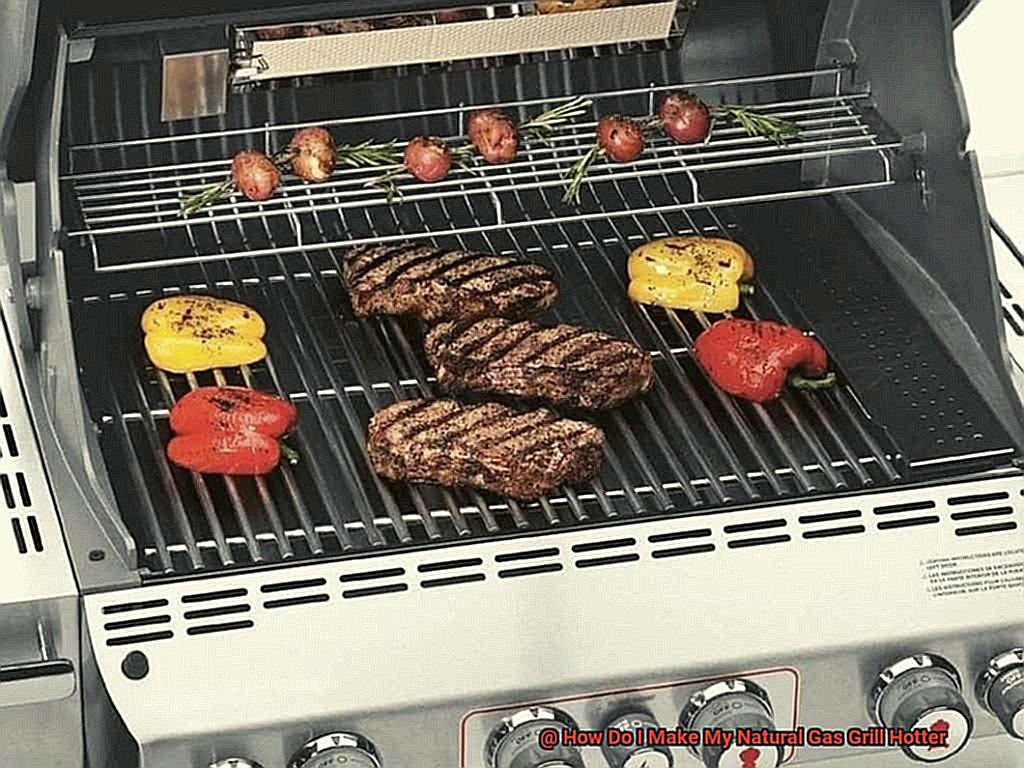
For those who want to upgrade their grilling experience, consider investing in high-quality burners that distribute heat evenly and provide a stronger flame. Adding a sear burner can also reach temperatures of up to 900 degrees Fahrenheit and give your food a restaurant-quality sear.
Clean Your Grill Regularly
Believe it or not, the solution might be as simple as regular cleaning. Not only does cleaning your grill increase its lifespan, but it also significantly improves its performance.
So why is it essential to clean your grill regularly? Here are some reasons:
- Improved Performance: A clean grill ensures better airflow and heat distribution, leading to hotter and more consistent cooking temperatures and ultimately better-tasting food.
- Longer Lifespan: Regular cleaning can prevent corrosion and rust buildup that can cause damage and reduce the lifespan of your grill.
- Health and Safety: Dirty grills can harbor harmful bacteria that can make you ill. Cleaning your grill can help prevent bacteria growth and ensure that your food is safe to eat.
Now, let’s dive into how to clean your natural gas grill effectively. Keep in mind that before you begin, make sure that the grill has completely cooled down.
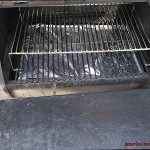
Firstly, brush off any leftover food particles from the grates using a grill brush. For stubborn grime, use a scraper tool to get rid of it. Then, remove the grates from the grill and soak them in hot soapy water for at least 30 minutes. While the grates are soaking, tackle the burners and heat shields with a wire brush or scraper tool to clean off any debris or rust. If your burners are clogged, use a thin wire to poke through the small holes to unclog them.
Once done with the burners and heat shields, move on to cleaning the inside of the grill by wiping down the walls with warm soapy water and a sponge or cloth. Rinse everything off with clean water and dry it all with a towel.
Lastly, reassemble all the parts of your grill and ignite it to burn off any remaining residue or debris. This process helps sanitize your grill, preventing bacteria growth.
Adjust the Air Vents
The air vents work as the gas pedal in your car, allowing more or less oxygen into your grill to control the temperature. Let’s dive into how to adjust those vents and get your grill sizzling.
Firstly, locate the vents on your grill. Most grills have two vents – one at the bottom and one at the top. The bottom vent controls the flow of oxygen into the fire, while the top vent controls how much heat and smoke are released from the grill.
To make your grill hotter, open both vents fully. This allows more oxygen to enter your grill, fueling those flames and increasing the temperature. Keep an eye on the temperature gauge and adjust as needed to maintain your desired temperature. If you want to lower the temperature, close one or both of the vents partially to reduce the amount of oxygen entering your grill.
It is important to note that adjusting air vents can take some trial and error. Every grill is different, and factors such as wind, humidity, and altitude can affect how your grill performs. However, with some practice and experimentation, you will find just the right settings for achieving your perfect grilling experience.
In addition to adjusting air vents, there are other tips to make your natural gas grill hotter. Preheat your grill for at least 10-15 minutes before cooking to ensure it has reached the desired temperature before cooking. Also, clean your grill regularly using a wire brush or scraper to remove any grease or debris that can block airflow and reduce heat output.
Upgrade Burners or Add a Sear Burner
Don’t settle for subpar searing and flavor. Instead, consider upgrading your burners or adding a sear burner to your grill to take your grilling game to the next level.
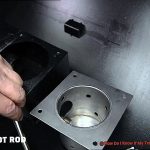
Firstly, let’s talk about upgrading burners. Burners are the beating heart of your grill, responsible for generating the heat necessary to cook your food. If you notice that your grill isn’t producing enough heat, it may be time for an upgrade. You have two options: replace existing burners with high-quality stainless steel ones or add additional burners. Upgrading your burners to stainless steel models can increase heat output and result in faster cooking times. Adding an extra burner, on the other hand, will give you better control over heat distribution and allow you to cook multiple dishes simultaneously at different temperatures.
If you’re looking for even more precision in your grilling, a sear burner is an excellent option. This high-intensity burner can reach temperatures of up to 1000°F and is specifically designed for searing meat. By locking in juices and flavor, a sear burner can turn your home-cooked meals into restaurant-quality dishes. Installing a sear burner will significantly enhance the performance of your natural gas grill and take your grilling skills to new heights.
To ensure optimal performance, it’s essential to choose high-quality burners that are compatible with your grill and installed correctly. By doing so, you’ll achieve perfect searing and flavor every time you fire up your grill.
Consider an Infrared Grill
It’s time to take your grilling game to the next level with an infrared grill. As an expert, I can tell you that an infrared grill has many advantages over a traditional gas grill.
One of the most significant benefits of an infrared grill is its use of advanced technology. Infrared radiation emitted by the ceramic plate or burner heats up the cooking grates and food directly, allowing you to cook your meals in just a few minutes. With temperatures of up to 700 degrees Fahrenheit, you can achieve a perfect sear on your meats, giving them that crusty exterior and juicy interior that you crave.
But that’s not all. Infrared grills come in both built-in and freestanding models, making them versatile for any outdoor space. They are available in various sizes and price points, so you can select one that fits your needs and budget.
If investing in an infrared grill isn’t feasible right now, don’t worry. You can still increase the heat output of your traditional natural gas grill by following a few simple steps. Regularly cleaning the burners and cooking grates ensures optimal performance, while adjusting the air vents on your grill allows more oxygen into the combustion chamber, increasing flame size and temperature. Preheating your grill for 10-15 minutes also helps ensure it reaches the desired temperature.
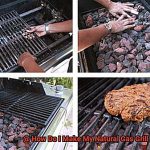
Use Hot Coals or Wood Chunks for Extra Heat
Look no further than using hot coals or wood chunks to add extra heat and flavor to your natural gas grill.
To use hot coals, start by lighting them up in a charcoal chimney. Once they’re hot and glowing, carefully transfer them to the bottom of your grill. Place the cooking grates back on top, and let the grill preheat for a few minutes before adding your food. This method is perfect for searing meat at high temperatures or achieving that perfect char on your veggies.
But why stop there? Wood chunks can also be used to add extra heat and flavor to your grill. Soak them in water for about an hour before placing them directly on top of the cooking grates over the burners. The water will help the wood chunks produce smoke, which will infuse your food with a delicious smoky flavor. Whether you’re grilling up some ribs or a juicy steak, this technique is sure to impress your guests.
Keep in mind that using hot coals or wood chunks will increase the temperature of your grill quickly, so make sure to keep an eye on your food and adjust the temperature as needed. And always remember to use gloves or tongs when handling hot coals or wood chunks to avoid burns.
Choose the Right Grate Material
Look no further than your grill grates. The right grate material can make all the difference in achieving those delicious sear marks and juicy flavors. But with so many options to choose from, how do you know which one is right for you?
Let’s break down the most common grill grate materials and explore their unique benefits and drawbacks.
First up, stainless steel. These grates are known for their durability and easy maintenance, making them a popular choice among grill enthusiasts. However, they don’t retain heat as well as other materials, which can make it difficult to achieve those high temperatures needed for a perfect sear.
Next, we have cast iron. Cast iron grates are revered for their excellent heat retention and ability to create those gorgeous sear marks we all love. However, they require more maintenance than stainless steel grates and can rust if not properly seasoned and cared for.
If you’re looking for a balance of heat retention and low maintenance, porcelain-coated cast iron may be the way to go. These grates combine the heat retention of cast iron with the easy cleaning of stainless steel. However, they can chip or crack if not handled carefully.
For those looking for an extra burst of flavor, ceramic grates are worth considering. These grates hold high temperatures for extended periods of time, making them ideal for searing meats. However, they are more fragile than other materials and can crack if mishandled.
Ultimately, the choice of grate material comes down to personal preference and cooking needs. Consider factors such as durability, heat retention, maintenance, and sear marks when selecting the right grate material for your natural gas grill.
To summarize:
- Stainless steel: Durable and easy to clean but doesn’t retain heat as well.
- Cast iron: Excellent heat retention and creates beautiful sear marks but requires more maintenance.
- Porcelain-coated cast iron: A balance of heat retention and low maintenance, but can chip or crack if not handled carefully.
- Ceramic: Ideal for searing meats but more fragile than other materials.
Use a Lid Thermometer for Accurate Temperature Readings
Look no further than a lid thermometer to help you achieve accurate temperature readings and elevate your grilling game.
First, make sure to preheat your grill for 10-15 minutes on high heat before using the thermometer. Once the grill is hot, place the thermometer on the grate and close the lid. Wait a few minutes for the thermometer to stabilize and show an accurate reading. If the temperature isn’t hot enough, turn up the heat and wait for it to rise before checking again.
Using a lid thermometer is essential in achieving different cooking temperatures for various types of food. For instance, steak requires high heat to sear and lock in juices, while delicate fish needs lower heat to prevent overcooking. By using a lid thermometer, you can monitor and adjust the temperature as needed for different types of food. No more overcooked steaks or undercooked fish.
Don’t forget to clean your thermometer regularly to ensure its accuracy. Grease and debris buildup can affect its accuracy and lead to incorrect temperature readings. A simple cleaning with a soft cloth or brush will do the trick.
In summary, using a lid thermometer is a straightforward yet crucial step in achieving mouth-watering grilling results on your natural gas grill. Here’s a quick recap:
- Preheat your grill for 10-15 minutes on high heat before using the thermometer
- Place the thermometer on the grate and close the lid
- Wait for a few minutes for the thermometer to stabilize and show an accurate reading
- Adjust temperature as needed for different types of food
- Clean your thermometer regularly with a soft cloth or brush
Conclusion
In conclusion, mastering the art of grilling on your natural gas grill requires getting the temperature just right. Luckily, there are several easy-to-implement tips and tricks to help you achieve that perfect heat output.
Firstly, adjusting the air vents can be a game-changer in controlling oxygen supply and increasing heat output. Secondly, don’t overlook the importance of clean grill grates; replacing worn-out ones ensures even heat distribution across your cooking surface. Lastly, make sure your gas tank is full and connected correctly to optimize performance.
But why stop there? Regular cleaning and maintenance of your grill can also help increase its heat output. Keep those air vents clear and upgrade burners or add a sear burner for next-level grilling results.
When upgrading or selecting new burners, consider factors such as durability, heat retention, maintenance, and sear marks for optimal performance. And don’t forget to use a lid thermometer – it’s an essential tool in achieving those mouth-watering results.