Do you crave the succulent taste of a well-cooked brisket? If so, then you know how disappointing it is when your brisket turns out dry and tough. But fear not, there are ways to keep your sliced brisket moist and delicious.
If you’ve tried cooking brisket at home, then you’ve probably encountered the challenge of keeping it juicy. It’s frustrating to spend hours slow-cooking a piece of meat only to have it turn out dry and chewy. Luckily, there are simple tricks that can help you retain the moisture in your brisket.
In this blog post, we’ll explore various techniques for keeping your brisket moist, including using the right cooking methods, wrapping it in foil, and letting it rest. We’ll also point out common pitfalls that lead to dry and bland briskets.
Get ready to discover the secrets of a perfectly moist and flavorful brisket that will impress your guests at any gathering.
Contents
Choosing the Right Cut of Brisket
First and foremost, it’s important to understand that there are two primary cuts of brisket: the flat cut and the point cut. The flat cut is leaner and more uniform in shape, while the point cut has more marbling and a distinctive triangular shape. If you want to guarantee that your sliced brisket stays moist and tender during cooking, it’s best to go with the point cut. The extra fat content in this cut helps keep the meat juicy throughout the cooking process.
Another crucial factor when selecting a brisket is the grade of meat. USDA Prime is the highest grade of meat available, with more marbling that contributes to a juicier end result. However, if you’re looking for a more affordable option without sacrificing flavor, USDA Choice is still a great option.
When preparing your brisket, look for a well-marbled piece of meat with streaks of fat running through it to keep it moist during cooking. Additionally, trim any excess fat from the surface of the brisket as too much fat can cause the meat to dry out.
To ensure that your brisket stays moist and tender during cooking, it’s best to cook it low and slow. This means cooking it at a low temperature (around 225-250 degrees Fahrenheit) for several hours (usually 1-1.5 hours per pound of meat). This allows the collagen in the meat to break down and become tender while also allowing time for the fat to render and keep the meat moist.
Proper resting time is also crucial in keeping your brisket moist. Once your brisket is finished cooking, remove it from the heat and let it rest for at least 30 minutes (or up to 2 hours) before slicing into it. This allows the juices to redistribute throughout the meat and prevents them from spilling out when you slice into it.
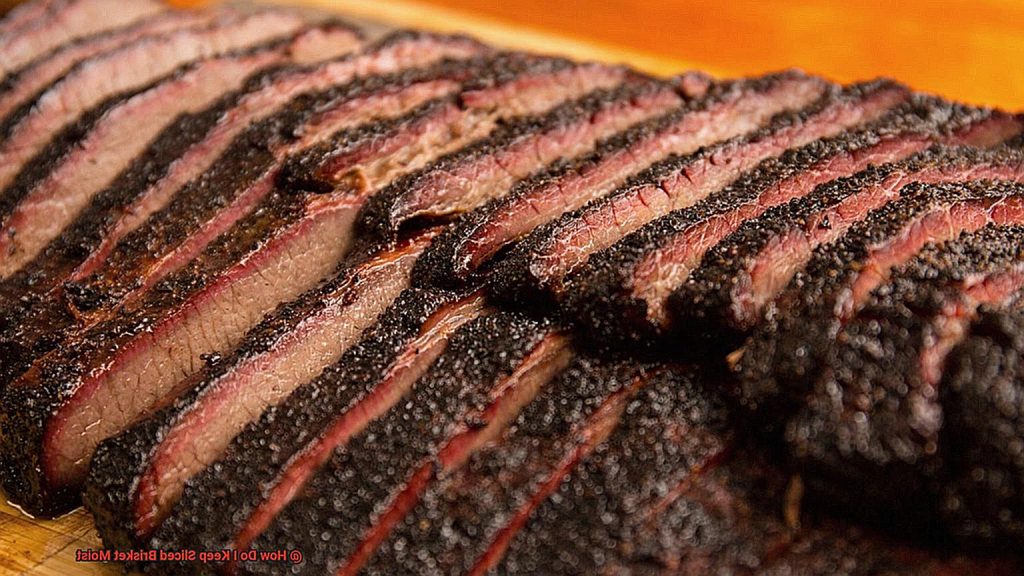
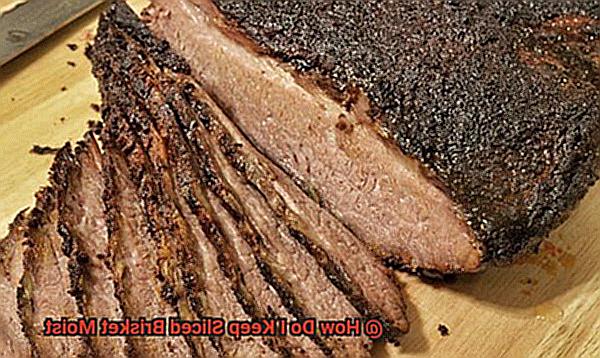
When slicing your brisket, make sure to cut against the grain. This means cutting perpendicular to the direction of the muscle fibers, resulting in more tender and juicy slices.
Trimming Excess Fat from the Brisket
The key is to master the art of trimming excess fat from your meat. While removing all of the fat may seem like a good idea, it’s actually crucial to leave a thin layer on top to keep your meat moist and flavorful.
Begin by grabbing a sharp knife and trimming away any large visible pieces of fat that are thicker than 1/4 inch. This will prevent flare-ups and ensure that your meat stays juicy and tender. Don’t forget to remove any sinew or silver skin from the surface of the brisket as well, as this will make it easier to slice later on.
When trimming the fat, it’s important to leave a thin layer on top of the brisket. This will add flavor and moisture during cooking, while also protecting the meat from drying out. A general rule is to aim for around 1/4 inch of fat on top of the brisket, but feel free to adjust based on personal preference.
It’s worth noting that different types of brisket may require different trimming techniques. Point-cut briskets, for example, have more marbling and fat, so you may need to adjust accordingly.
To summarize, here are some tips for trimming excess fat from your brisket:
- Use a sharp knife to trim away any large pieces of visible fat
- Remove any sinew or silver skin from the surface of the brisket
- Leave a thin layer of fat on top of the brisket for flavor and moisture
- Adjust the amount of fat based on personal preference and type of brisket
Low and Slow Cooking Techniques
Let me, as an expert in low and slow cooking techniques, take you on a journey of smoky flavors, fall-apart tenderness, and mouth-watering juiciness.
Let’s start with smoking. This popular method of cooking brisket involves placing the meat in a smoker and cooking it at a low temperature for several hours. This allows the smoke from wood chips to infuse the meat with a rich and delicious flavor while keeping it moist. Maintaining a consistent temperature throughout the cooking process is crucial, so be sure to keep an eye on it and periodically check the internal temperature of the meat to ensure even cooking.
Roasting is another method for cooking brisket low and slow. Here, the meat is placed in a roasting pan with vegetables and enough liquid to keep it moist. The pan is then covered with foil or a lid and cooked at a low temperature for several hours until it’s tender and juicy. The key is to add just enough liquid to keep the meat moist without making it soupy.
Braising is yet another technique that works well for tougher cuts of meat like brisket. This method involves searing the meat first to lock in flavor before cooking it in liquid for several hours until it’s fall-apart tender. The liquid can be anything from water to beef broth or even beer, depending on your preference.
Once your brisket is ready, remember to let it rest for at least 10-15 minutes before slicing it. This allows the juices to redistribute throughout the meat, keeping it moist and flavorful. And when slicing the brisket, always cut against the grain for maximum tenderness.
Resting Time for Maximum Moisture Retention
This step is essential to achieving that melt-in-your-mouth tenderness and juicy succulence that we all crave.
During the cooking process, juices inside the meat are forced towards the center, creating a pool of deliciousness that we want to keep inside when we slice into it. But if you cut into the brisket right away, these juices will spill out onto your cutting board, leaving you with dry, tough meat.
That’s where resting time comes in – it gives the juices a chance to redistribute throughout the meat evenly. This results in a juicier and more tender final product that will have your taste buds dancing with joy.
But how long should you let your brisket rest? Well, that depends on the size of your cut. A smaller brisket may only need 30 minutes of resting time, while a larger one may require up to an hour. Don’t rush this step – be patient and let those juices do their thing.
While your brisket is resting, cover it with foil or a clean towel to keep it warm and prevent it from drying out. This will also allow the meat to continue cooking slightly as it rests, enhancing its flavor and texture even further.
Here’s a quick summary of what we’ve covered so far:
- Resting time is crucial to keeping sliced brisket moist.
- The juices inside the meat redistribute during this time, resulting in a juicier and more tender final product.
- The length of resting time varies depending on the size of your brisket.
- Covering your brisket during resting time will keep it warm and prevent drying out.
Cutting Against the Grain for Tenderness and Juiciness
The secret to achieving a succulent and flavorful brisket lies in how you cut your meat. Cutting against the grain can make all the difference in achieving tenderness and juiciness.
The “grain” refers to the muscle fibers that run through the meat. When you cut against the grain, you are essentially cutting those fibers into shorter pieces. This results in a more tender and less chewy texture that your taste buds will love.
But that’s not all – cutting against the grain can also help retain moisture. By cutting with the grain, you are more likely to tear the fibers and release the juices, causing the meat to dry out. However, by cutting against the grain, you are minimizing this risk and helping to keep your brisket juicy and flavorful.
So, how do you identify which direction the grain is running? Look for the lines of muscle fibers on the surface of the meat. You want to cut perpendicular to those lines, which means cutting across the width of the brisket rather than along its length.
It’s worth noting that some cuts of brisket may have multiple grains running in different directions. To ensure that each slice is perfectly moist and delicious, take a moment to identify each grain before making your cuts.
Wrapping in Foil to Help Seal in Moisture
Look no further than the age-old technique of wrapping brisket in foil.
As a BBQ expert, I can attest that wrapping brisket in foil is a game-changer. It’s a simple yet effective way to seal in moisture and create a succulent texture that will make your taste buds dance with delight.
To wrap your brisket in foil like a pro, start by removing it from the grill or smoker when it reaches an internal temperature of around 160°F. Then, wrap the meat tightly in a double layer of heavy-duty aluminum foil, ensuring all edges are sealed to prevent steam from escaping.
Return the wrapped brisket to the grill or smoker and continue cooking until it reaches an internal temperature of around 195-205°F. This could take several hours depending on the size and thickness of the brisket. But don’t worry; the wait is worth it.
When you’re ready to remove the brisket from the foil, don’t forget to save any juices that have accumulated inside. These delicious juices can be used to create a mouth-watering sauce or gravy that will elevate your dish to new heights.
Although wrapping brisket in foil is a popular technique, some pitmasters prefer not to use it as it can result in a softer bark on the outside and create a steamed texture instead of a smoky flavor that some people prefer. However, if tenderness and juiciness are your top priorities, then wrapping in foil is definitely worth considering.
In summary, here are some tips for wrapping brisket in foil:
- Remove the brisket from the grill or smoker at 160°F
- Wrap tightly in double layer heavy-duty aluminum foil
- Seal all edges to prevent steam from escaping
- Return to grill or smoker and cook until 195-205°F internal temperature is reached
- Save any accumulated juices for a delicious sauce or gravy
Basting with a Mop Sauce or Other Liquid to Keep it Juicy
As someone who knows a thing or two about brisket, I’m here to share with you the secret to keeping your brisket juicy and succulent: basting with a mop sauce or other liquid.
So what exactly is a mop sauce? It’s a thin, flavorful liquid that can be applied to your meat using a mop or brush. This sauce not only adds an extra layer of flavor but also helps to keep your meat moist throughout the cooking process.
To create your own mop sauce, you can mix together ingredients such as vinegar, soy sauce, Worcestershire sauce, beer, or beef broth. The key is to find the perfect combination of flavors that complement the brisket without overpowering it.
Now, let’s dive into the nitty-gritty of basting with a mop sauce. It’s essential to apply the sauce frequently during the last hour of cooking to ensure that the brisket stays juicy and doesn’t dry out. However, be careful not to go overboard as too much liquid can make the meat soggy.
But what about other liquids that can keep your brisket moist? Apple juice and cider vinegar are great options that add sweetness and tanginess while keeping your meat juicy and tender. And if you really want to elevate your game, try wrapping your brisket in foil or butcher paper during cooking. This helps to trap moisture around the meat, ensuring that it stays juicy and delicious.
Adding Liquid to the Pan During Cooking
Look no further than the simple technique of adding liquid to the pan during cooking. As an expert in this topic, let me guide you through the dos and don’ts of this game-changing method.
First and foremost, choosing the right liquid is crucial. While water may suffice, why not opt for something more flavorful like beer, broth, or even apple juice? These liquids add depth to the meat’s flavor profile, making it more exciting for your taste buds. However, don’t go overboard with the liquid as too much will result in soggy meat.
Now that you have your liquid of choice, it’s time to decide how to use it. You can either pour it into the bottom of the pan before adding the meat or use a basting brush or spoon to periodically coat the surface of the meat during cooking. While both methods work well, using a basting brush or spoon is my preferred technique as it keeps the meat moist and adds more flavor.
It’s important to note that adding too much liquid can lead to overcooked and soggy meat. To avoid this, monitor the amount of liquid in the pan and adjust as necessary. One useful tip recommended by experts is to use a roasting rack or elevated surface to keep the meat from sitting in any excess liquid. This will help ensure that the meat stays tender and juicy while still being infused with flavor from the added liquid.
Finishing Touches: Spritzing with Apple Juice or Wine
The solution lies in spritzing with apple juice or wine. This simple yet effective technique is a game-changer in keeping your brisket moist and adding flavor.
To get started, you’ll need a spray bottle filled with your liquid of choice. While apple juice and wine are popular options, feel free to experiment with other liquids like beer or broth. Enhance the flavor by adding seasonings like Worcestershire sauce, soy sauce or honey.
Now, let’s talk about technique. The key is not to overdo it when spritzing your brisket. A light misting every 30 minutes to an hour during the cooking process is enough to keep the meat moist without making it too wet. It’s important to use an appropriate amount of liquid for the size of your brisket – nobody wants a soggy mess.
But why bother with spritzing at all? The acidity in the apple juice or wine helps break down tough fibers in the meat, making it more tender and juicy. Plus, these liquids add a delicious flavor that complements the smoky taste of the brisket. Apple juice adds sweetness and fruitiness, while wine can add complexity and depth.
Incorporating spritzing with apple juice or wine into your brisket routine may take some practice and experimentation to find the perfect combination of liquids and seasonings. But with a little effort, you’ll be serving up succulent and flavorful brisket that will have your guests begging for more.
Remember to be creative with your spritzing mixture. You can add other ingredients like Worcestershire sauce, soy sauce, or honey to enhance the flavor of the meat. Just be sure not to overdo it as too much liquid can cause the meat to become soggy and affect its texture.
E5fLZDkDqlc” >
Conclusion
In conclusion, achieving a succulent and flavorful sliced brisket can be a challenging task for home cooks. But fear not, with the right techniques and tips, you can impress your guests with a juicy and mouth-watering dish. The first step is crucial – choosing the right cut of meat. Opting for the point cut with its higher fat content will ensure that your brisket stays moist throughout cooking.
Trimming excess fat from the brisket and cooking it low and slow at a consistent temperature for several hours are also key steps to retaining moisture. Proper resting time after cooking allows juices to redistribute throughout the meat, resulting in maximum tenderness.
But wait, there’s more. Wrapping your brisket in foil or butcher paper during cooking traps moisture around the meat, while basting with a mop sauce or other liquid keeps it juicy. Adding liquid to the pan during cooking without making it too wet and spritzing with apple juice or wine are additional techniques that break down tough fibers in the meat while adding flavor.
By using these methods and experimenting with different liquids and seasonings, you can master the art of keeping sliced brisket moist.