Are you tired of your green egg playing temperature tricks on you? We feel your frustration. Getting that perfect 250°F heat can be a real challenge. But fear not, because we’ve got your back. In this blog post, we’re going to spill the beans on how to keep your green egg steady at 250°F, no matter what mouthwatering masterpiece you’re cooking up. So grab your tongs and let’s get down to business – it’s time to unlock the secrets of maintaining that sweet spot of 250°F.
Contents
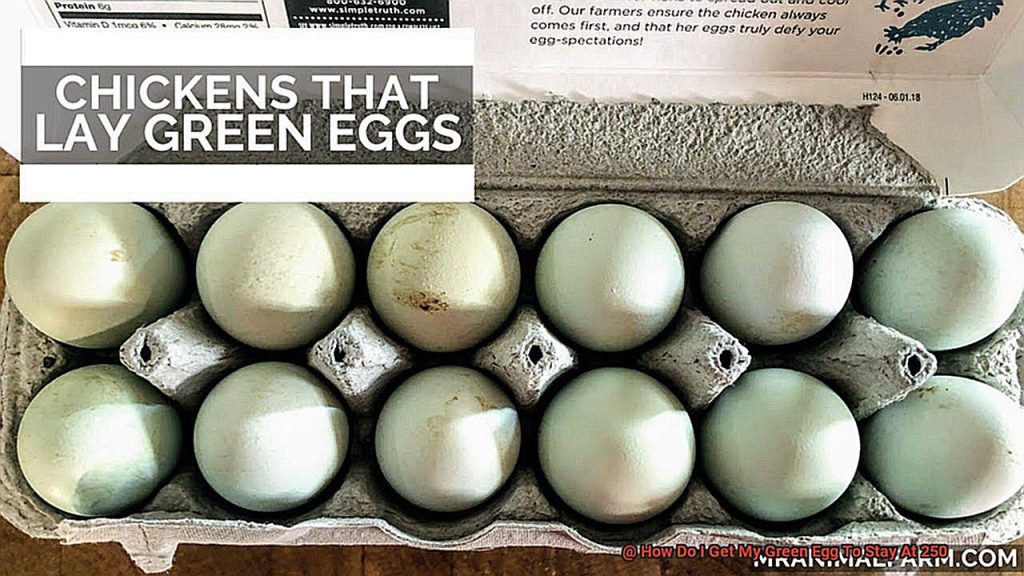
What is a Green Egg?
Look no further than the Green Egg, a remarkable kamado-style grill and smoker that’s sure to ignite your culinary creativity. But what’s the secret behind achieving mouthwatering results every time? It all boils down to one thing: temperature control. In this comprehensive guide, we will delve into the captivating world of the Green Egg and unlock the secrets to maintaining the perfect cooking temperature of 250 degrees Fahrenheit.
The Green Egg: A Culinary Marvel:
The Green Egg is not your ordinary grill. With its iconic egg-shaped design crafted from high-quality ceramic, it boasts exceptional heat retention and distribution capabilities. This versatile cooking machine allows you to grill, smoke, bake, roast, and even indulge in the art of pizza making. The Green Egg comes in various sizes, catering to both intimate gatherings and grand festivities.
Harnessing the Power of Airflow:
The Green Egg’s unique airflow system is your ultimate ally in achieving precise temperature control. To reach and maintain 250 degrees Fahrenheit, master the art of adjusting the top vent and bottom damper. By finding the perfect balance between oxygen intake and fire intensity, you can create a symphony of flavors that will tantalize your taste buds.
Fueling Your Fire:
Choose your fuel wisely for consistent heat and optimal taste. Embrace high-quality charcoal or hardwood lump charcoal for an even burn and distributed heat throughout your cooking journey. Steer clear of lighter fluid or briquettes as they may introduce unwanted flavors and disrupt temperature stability.
Charcoal Arrangement: The Key to Efficiency:
Efficient airflow is crucial in maintaining a steady temperature on your Green Egg. Arrange your charcoal strategically to facilitate optimal oxygen flow within the grill. Remember, fire needs oxygen to thrive. Utilize a chimney starter or electric starter to light your coals evenly before gently transferring them to the Green Egg.
Preheating and Monitoring: The Path to Perfection:
After placing your lit coals in the firebox’s center, close the lid and allow the Green Egg to preheat for 10-15 minutes. Employ a reliable thermometer to monitor the temperature during this crucial phase. Make necessary adjustments to the vents until you achieve and sustain the desired 250 degrees Fahrenheit.
Embrace Lid Discipline:
Every time you open the lid, a burst of heat escapes, causing temperature fluctuations. To minimize these disruptions, plan ahead and have all your ingredients and tools ready before you embark on your culinary journey. By keeping the lid closed as much as possible, you create a consistent cooking environment that nurtures flavors and ensures perfect results.
Preparing the Fuel for the Fire
The Green Egg grill and smoker is a remarkable tool that will have you cooking up mouthwatering meals that will impress even the toughest food critics. But before you start throwing on those steaks and burgers, it’s crucial to understand the importance of properly preparing the fuel for the fire.
First things first, let’s talk about the fuel of choice: charcoal. Charcoal provides a consistent and long-lasting source of heat, making it perfect for maintaining that steady temperature of 250 degrees Fahrenheit. But not all charcoal is created equal. It’s essential to use high-quality charcoal that is free from additives or chemicals. Say no to those briquettes and opt for natural lump charcoal instead. It burns cleaner and produces less ash, giving you a cleaner grilling experience.
Now that you have your charcoal, it’s time to get it ready for action. Start by arranging the charcoal in a nice pile in the center of the firebox, leaving enough space around it for air circulation. We want those coals to breathe. Next, grab your chimney starter or electric starter – avoid that lighter fluid, trust me – and carefully light the charcoal. Watch as the flames dance and flicker, igniting the charcoal with their fiery embrace. Give it about 10-15 minutes to burn until it’s covered with a beautiful layer of gray ash. This is your cue, a signal from the grilling gods, that the charcoal is fully ignited and ready to work its magic.
Once your charcoal is roaring with fiery passion, spread it out evenly across the firebox, creating a single layer of hot coals. This ensures that heat is distributed evenly throughout the grill, giving you that perfect temperature control you’re aiming for. Imagine your food sizzling and searing on this even heat, creating those beautiful grill marks and delicious flavors.
Ah, but wait. Some of you may be thinking about adding some wood chunks or chips for that extra smoky flavor. And hey, I’m all for it. Just remember not to go overboard. Adding too much wood can cause a rapid increase in temperature, making it difficult to maintain that sweet spot of 250 degrees Fahrenheit. Start with a small amount of wood, perhaps a handful of aromatic hickory or mesquite, and adjust as needed to achieve your desired level of smokiness. Let the wood work its magic, infusing your food with that intoxicating smoky essence.
Arranging the Fuel for Optimal Airflow
Arranging the fuel for optimal airflow is the key to achieving and maintaining a steady temperature of 250 degrees on your Green Egg grill. This temperature is the sweet spot for that perfect sear and juicy, tender meat. So let’s dive into the world of arranging fuel and unleash your grilling potential.
First and foremost, let’s talk about the importance of using good quality charcoal and wood chunks. Lump charcoal is highly recommended because it burns cleaner and produces less ash compared to briquettes. And don’t forget about consistent charcoal size – it ensures even burning and airflow. So get yourself some top-notch charcoal and let’s get grilling.
Now, let’s move on to the setup. We suggest creating a two-zone fire by placing more coals on one side of the firebox. This gives you the freedom to move your food from a hotter zone to a cooler one if needed. Who doesn’t love having options, right?
When it comes to arranging the fuel, you have two popular methods at your disposal – the pyramid or snake method. In the pyramid method, stack your charcoal in a cone shape, leaving a small opening in the center for better airflow and faster ignition. Add a few wood chunks on top for that extra smoky goodness.
Feeling adventurous? Try the snake method. Arrange your charcoal in a circle around the outer edge of the firebox, leaving gaps between each piece. This creates a slow-burning fuse-like effect as the fire gradually spreads around the grill. Top it off with some wood chunks for added flavor that will make your taste buds sing.
Now that your fuel is all set, let’s ignite those coals and get cooking. Use natural fire starters or electric starters to light up a few briquettes or small charcoal pieces placed at one end of your fuel arrangement. Let them burn until they’re covered in gray ash – this usually takes just a few minutes.
While your fire spreads and the temperature rises, keep a close eye on those vents. The bottom vent controls the oxygen entering the grill, while the top vent regulates the exhaust. For that perfect 250 degrees, start with both vents open halfway. If the temperature is too high, gradually close the bottom vent to restrict airflow. And if it’s too low, open the vents slightly more to let in more oxygen.
Remember, adjusting the vents takes time to reflect in the temperature, so be patient and make small incremental changes. And please resist the temptation to constantly open the lid – this disrupts the airflow and causes temperature fluctuations that can affect your cooking.
By mastering the art of arranging fuel and controlling airflow through the vents, you’ll unlock a world of grilling possibilities at that magical temperature of 250 degrees Fahrenheit. So fire up your Green Egg grill, experiment with different fuel arrangements and vent adjustments, and get ready to serve up some mouthwatering dishes that will make you the grill master among your friends and family.
Lighting the Fire
Today, we embark on a journey into the captivating world of lighting the fire on your Green Egg grill. This crucial step holds the key to achieving and maintaining that flawless temperature of 250 degrees, ensuring your culinary creations are nothing short of extraordinary. So, let’s dive in and ignite your grilling passion.
The Green Egg: Unleashing Grilling Mastery:
Before we delve into the enchanting realm of lighting the fire, let’s take a moment to appreciate the awe-inspiring capabilities of the Green Egg. This remarkable ceramic grill combines the convenience of a traditional charcoal grill with the precision of an oven, transforming your backyard into a culinary sanctuary. Its unrivaled heat retention and even distribution unleash a world of grilling mastery, elevating your cooking experience to unprecedented heights.
Lighting the Fire: The Gateway to Culinary Brilliance:
Achieving and maintaining a steady temperature of 250 degrees is the holy grail of grilling perfection. It ensures each succulent morsel cooks evenly, retains its tantalizing moisture, and embraces that irresistible smoky essence. Properly lighting the fire lays the foundation for culinary brilliance, setting the stage for unforgettable meals.
Ignite Your Passion: Methods for Lighting the Fire:
Embrace your inner grill maestro by exploring various methods to ignite your Green Egg grill. Traditionalists may opt for charcoal briquettes, while adventurous souls may embark on a flavor-infused journey using wood chips or a tantalizing combination of both. Whichever path you choose, ensure your fuel is of superior quality and embark on this fiery adventure by following these steps:
- Arrange your charcoal or wood chips artfully in a pyramid or snake pattern, allowing for optimal airflow that dances with your ingredients.
- Employ fire starters or a judicious amount of lighter fluid to awaken the flames, avoiding overpowering flavors that may engulf your culinary masterpiece.
- Allow ample time for your fire to establish its presence, patiently waiting until the perfect moment to adjust the airflow and gracefully introduce your food to the heat.
Temperature Control: The Symphony of Grilling Success:
Maintaining a harmonious temperature throughout the cooking process orchestrates a symphony of flavors, tenderness, and precision timing. Let the conductor within you bring this melody to life by using a thermometer to monitor the temperature inside your Green Egg, skillfully adjusting the vents to regulate the sacred dance of airflow.
Preheating the Green Egg
The secret to achieving perfectly cooked food lies in the art of preheating. By following a few simple steps, you can unleash the full potential of your Green Egg and create culinary masterpieces that will impress even the most discerning palates.
First things first, gather all the necessary tools for this grilling adventure. Make sure you have enough charcoal to fill the firebox of your Green Egg. The amount will vary depending on the size of your grill, but aim to fill it up about an inch below the top rim. Now, it’s time to work some charcoal magic.
Arrange your charcoal in a pyramid shape in the center of the firebox. This allows for optimal air circulation and even heat distribution throughout the grill. Use fire starters or lighter cubes to ignite the charcoal. Place a few pieces in different spots around the pyramid and light them up using a long lighter or match. As the flames dance with excitement, you’ll know you’re on the right track.
Once your charcoal is ignited, leave the lid of your Green Egg open for about 5-10 minutes. This initial burn-off period allows for proper airflow and lets those flames die down a bit, ensuring a safer grilling experience. After this brief period, close the lid and get ready to fine-tune those vents.
Ah, the vents. They hold the key to maintaining that magical temperature of 250 degrees Fahrenheit. The bottom vent controls the airflow to the fire, while the top vent controls how much heat escapes from the grill. Adjusting these vents is like finding that sweet spot where grilling dreams come true.
To achieve a steady temperature of 250 degrees, keep an eye on those vents throughout the cooking process. If the temperature starts to rise above 250 degrees, partially close both vents to reduce airflow. On the flip side, if it drops below 250 degrees, open those vents slightly to allow more oxygen in. It’s all about finding that perfect balance, my grilling comrades.
But wait, there’s more. Preheating your Green Egg for at least 20-30 minutes before cooking is highly recommended. This allows the grill to reach its desired temperature and ensures that any residual chemicals or impurities are burned off. Safety and deliciousness go hand in hand.
Now that you’re armed with the knowledge of preheating and maintaining a steady temperature of 250 degrees, it’s time to embark on a culinary journey like no other. Grill those mouthwatering steaks, sizzle those juicy burgers, and smoke that tender brisket with confidence and finesse. With your Green Egg as your trusted sidekick, there’s no limit to the extraordinary flavors you can create.
Remember, practice makes perfect. Experiment with different techniques, flavors, and recipes to unleash your grilling prowess. And always keep an eye on that temperature gauge to ensure your food cooks to perfection.
Monitoring and Adjusting Temperature
If you’re passionate about grilling and want to take your culinary skills to the next level, then monitoring and adjusting the temperature on your Green Egg grill is a must. Today, we’re diving into the importance of temperature control and sharing some expert tips to help you achieve grilling perfection. So grab a cold beverage, put on your apron, and let’s get started.
Why Temperature Matters:
Maintaining a steady temperature is the secret behind mouthwatering grilled dishes. Whether you’re smoking meats or slow-roasting vegetables, a consistent temperature of 250 degrees Fahrenheit is often the sweet spot for achieving delicious results. It allows flavors to develop, tenderizes meats, and ensures even cooking throughout.
The Tools You Need:
To become a temperature control pro, invest in a dual probe thermometer that allows you to monitor both the internal temperature of your food and the ambient temperature inside the grill simultaneously. This tool will be your secret weapon in achieving grilling greatness.
Monitoring and Adjusting:
Pay attention to temperature fluctuations caused by factors such as wind, frequent lid openings, or adding fuel. By closely monitoring these changes, you can make timely adjustments to maintain that ideal cooking environment.
The Art of Adjusting:
When it comes to adjusting temperature, your bottom vent and top vent are your best friends. The bottom vent controls the oxygen intake, while the top vent releases hot air. Find the perfect balance between these two vents to increase or decrease the temperature inside your grill.
The Charcoal Factor:
Don’t forget about the charcoal. Adding or removing charcoal can significantly impact heat levels on your Green Egg. Increase heat by adding more charcoal and lower it by removing some. Remember, small adjustments are key to avoid drastic temperature changes.
Accessories for Temperature Control:
Take advantage of accessories like heat deflectors or pizza stones to regulate and distribute heat evenly throughout your grill. These handy tools can help you maintain a stable cooking environment and achieve consistent results every time.
External Factors:
Keep in mind that weather conditions or altitude can also affect temperature stability. If you’re grilling at higher altitudes, be prepared to make slight adjustments to maintain your desired temperature.
Factors That Affect Temperature Control
Mastering Temperature Control with Your Green Egg Grill: The Key Factors
Introduction:
Grilling enthusiasts understand that temperature control is the secret to achieving succulent, perfectly cooked dishes. With a Green Egg grill, you have the ultimate tool to create culinary magic. In this blog post, we will explore the key factors that affect temperature control with a Green Egg grill, from fuel selection to ventilation and weather conditions. Let’s dive in.
Size and Type of Fuel:
The size and type of fuel you use significantly impact temperature control. Larger charcoal chunks generate more heat, while smaller pieces result in lower temperatures. Experiment with different types of fuel, such as hardwood charcoal or lump charcoal, to find the perfect balance for your grilling needs.
Ventilation:
Proper ventilation is crucial for maintaining a consistent temperature. Adjust the bottom vent to control the amount of air entering the grill, while the top vent regulates airflow and releases excess heat. Fine-tune these vents to increase or decrease temperatures accordingly.
Ambient Temperature and Weather Conditions:
Consider the ambient temperature and weather conditions when grilling with your Green Egg. Hot and sunny days may require less fuel or adjustments to prevent overheating, while colder days may necessitate additional fuel to maintain a steady temperature.
Lid Openings:
Each time you open the lid, precious heat escapes, causing temperature drops. Plan ahead by gathering all ingredients and tools before opening the grill, minimizing lid openings and ensuring consistent cooking temperatures.
Positioning and Insulation:
The positioning of your Green Egg grill plays a vital role in temperature control. Shield it from strong winds or direct sunlight to avoid fluctuations in heat. Additionally, inspect the grill’s gasket regularly to ensure proper insulation between the lid and base for optimal temperature maintenance.
Patience and Practice:
Temperature control mastery with your Green Egg grill requires patience and practice. It takes time to understand how different factors impact temperature and make necessary adjustments. Embrace the journey, experiment, and learn from each grilling session to become a true grill virtuoso.
Minimizing Lid Openings During Cooking
One key element to culinary excellence on this fantastic grill is minimizing lid openings during cooking. In this blog post, we will explore the best strategies to maintain a steady temperature of 250 degrees Fahrenheit, the grilling sweet spot, while keeping lid openings to a minimum.
Plan Ahead:
Before firing up your Green Egg, take a moment to meticulously plan your cook. Prep all your ingredients in advance, ensuring everything is ready to go. This thoughtful preparation reduces the need to frequently open the lid for adjustments or checks, allowing for uninterrupted cooking.
Invest in Quality Tools:
The right grilling tools can make all the difference in minimizing lid openings. Equip yourself with long-handled tongs or spatulas that provide effortless handling and flipping of your food. By doing so, you’ll resist the temptation to sneak peeks inside the grill too often.
Trust the Process:
Excitement can easily lead to excessive checking on your food. Resist. Have faith in the process and give your food ample time to cook undisturbed. Opening the lid too frequently disrupts the temperature and results in uneven cooking. Trust that your carefully planned cook will yield delicious results.
Utilize a Reliable Meat Thermometer:
A trustworthy meat thermometer is an indispensable tool for any grill master. With a thermometer, you can monitor the internal temperature of your food without repeatedly opening the lid. This way, you’ll know precisely when your food is perfectly cooked, delivering consistently delightful meals.
Quick and Efficient Adjustments:
If you require additional fuel or need to adjust airflow, do so swiftly and efficiently without leaving the lid open for extended periods. This ensures minimal disruption to the cooking temperature, allowing for more precise control.
Master the Art of Ventilation:
Understanding your Green Egg grill’s vent system is crucial for temperature management. Take the time to familiarize yourself with the vents and learn how to make precise adjustments to maintain your desired temperature. A mastery of ventilation will greatly reduce the need for lid openings.
Z1JiLWN-gGE” >