Ah, the sweet smell of grilled meat and veggies on a Weber Q. Is there anything better? But let’s face it – after a few rounds of delicious cookouts, the outside of your Weber Q lid can look like it’s been through a warzone. Grease and grime build-up are not only unsightly but can also affect the grill’s performance. So, what do you do when your beloved Weber Q needs some TLC?
Don’t worry; we’ve got you covered with some simple household items and tips to help you clean your Weber Q lid like a pro. Safety first, of course – we’ll cover that too. We’ll show you how to handle stubborn stains and grease build-up without damaging your grill’s finish. Whether you’re a proud owner of a Weber Q 1000 or any other model, this post is for you.
Get ready to learn everything you need to know about cleaning the outside of your Weber Q lid. From choosing the right tools and materials to step-by-step instructions, we’ve got it all covered. Keep reading to discover how to keep your Weber Q looking new for years to come.
Contents
What You Need to Clean Your Weber Q Lid
One of the key elements of maintaining your grill is keeping the outside of your Weber Q lid clean. But have no fear, with the right tools and techniques, this task can be easy and even enjoyable.
First and foremost, you’ll need a high-quality grill brush with stainless steel bristles to remove any stubborn grime or debris. This will ensure that your lid is free from any buildup that could negatively impact its performance.
Next, gather a bucket of warm, soapy water to help loosen dirt and make it easier to scrub away. Be sure to use a simple solution of dish soap and warm water for the best results.
For more delicate areas of the lid, such as the Weber Q logo or thermometer, you may want to use a soft sponge or cloth. And for those tough stains or discoloration, a small amount of baking soda or vinegar mixed with water can be effective for removing them.
Now that you’ve assembled your cleaning arsenal, it’s time to start scrubbing. Begin by using the grill brush to remove any loose debris or dirt from the lid. Apply firm pressure to areas that are particularly dirty and be sure to scrub in a back-and-forth motion.
Next, dip your sponge or cloth into the soapy water and begin scrubbing in circular motions. Work in small sections and rinse your sponge or cloth frequently to avoid spreading dirt around.
For those stubborn stains or discoloration, create a paste made from baking soda or vinegar mixed with water. Apply this paste to the affected area and let it sit for five to ten minutes before scrubbing away with your sponge or brush.
Once you’ve thoroughly cleaned the outside of your Weber Q lid, rinse it off with clean water and dry it with a soft towel. For regular maintenance, consider applying a protective wax or polish to help repel dirt and keep the lid looking shiny and new.
Removing Loose Debris and Dirt
That’s why I’m here to share some essential tips on how to remove loose debris and dirt from the outside of your Weber Q lid.
Safety always comes first, so before beginning any cleaning process, make sure your grill is off and cool to the touch. Now that we’ve got that covered, let’s dive into the steps.
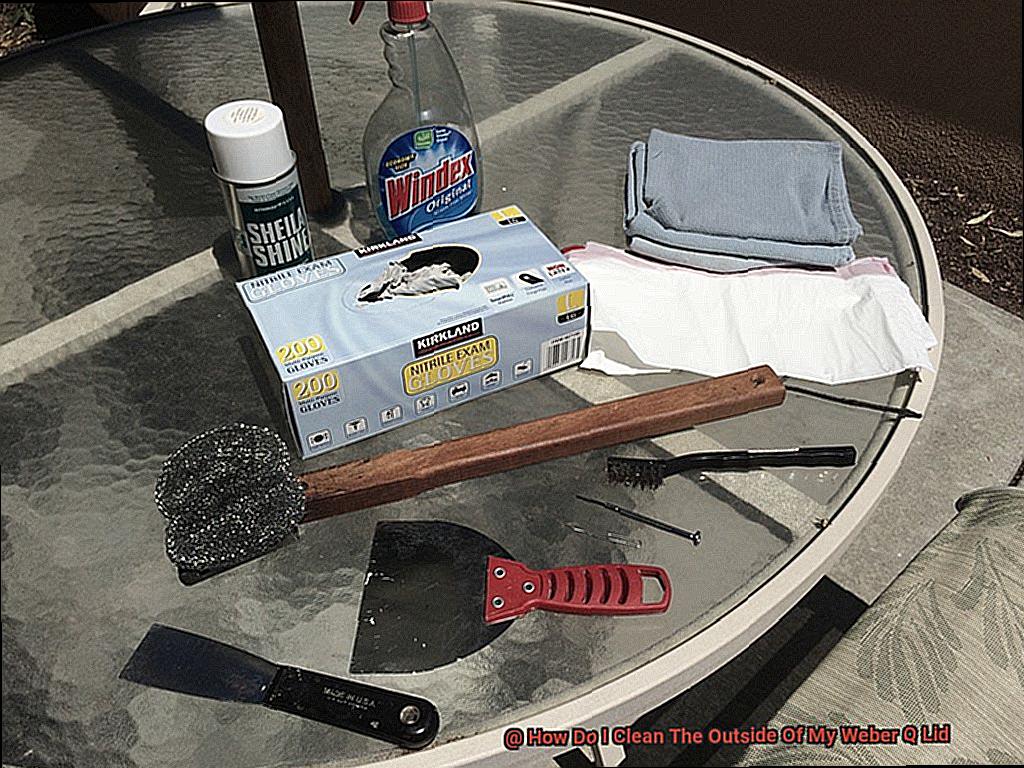
Step 1: Gather Your Tools
To get started, you’ll need a soft-bristled brush or sponge, warm soapy water, and a plastic scraper. It’s important to avoid using abrasive materials such as steel wool or harsh chemicals that could damage the surface of your grill.
Step 2: Scrub Away Loose Debris and Dirt
Using your soft-bristled brush or sponge, gently scrub away any loose debris or dirt from the outside of your Weber Q lid. You can use warm soapy water or a specialized grill cleaner to do this. Be sure to take special care with delicate areas by using a soft sponge or cloth.
Step 3: Tackle Stubborn Spots
If there are any stubborn areas, you can use a plastic scraper to remove any stuck-on debris. For particularly difficult spots, you may need to use a degreaser or an all-purpose cleaner. Be sure to follow the manufacturer’s instructions when using these products.
Step 4: Rinse and Dry
After removing all loose debris and dirt, rinse the lid thoroughly with clean water and dry it off with a soft cloth. This will prevent any water spots or streaks from forming on the surface of your grill.
Cleaning Stubborn Stains and Marks
Picture this: You’ve just finished a fantastic barbecue, but now you’re faced with the daunting task of cleaning your grill. Specifically, those stubborn stains and marks on the outside of your Weber Q lid. But don’t worry, we’ve got you covered with some handy tips to make cleaning a breeze.
First things first, wipe down the lid with a clean cloth or paper towel to remove any loose debris. This will make the cleaning process much easier and prevent any scratches on the surface of your grill.
Now, let’s tackle those stubborn stains. The first step is to identify what type of stain you’re dealing with. Is it grease, rust, or food residue? Once you know what you’re dealing with, you can choose the appropriate cleaning method.
For grease stains, mix equal parts white vinegar and water in a spray bottle and apply it to the affected area. Let it sit for 10-15 minutes before wiping it away with a clean cloth. It’s that simple.
Rust stains can be a bit trickier, but fear not. Use a wire brush or sandpaper to gently scrub the affected area. Be careful not to scratch the surface of the lid. Once you have removed as much rust as possible, wipe down the lid with a damp cloth and dry it thoroughly.
Food residue can be particularly stubborn, especially if it has been left on the lid for an extended period. However, a paste of baking soda and water can work wonders. Apply the paste to the affected area and let it sit for 10-15 minutes before scrubbing it away with a soft-bristled brush.
In some cases, specialized cleaning products designed specifically for grills may be necessary to remove especially stubborn stains. Always read the instructions carefully before using any new product on your grill lid.
But above all, safety first. Always wear gloves and protective eyewear when cleaning your grill to avoid any potential hazards.
Avoiding Abrasive Cleaners and Wire Brushes
Then, it’s important to avoid using abrasive cleaners and wire brushes when cleaning your grill.
Abrasive cleaners and wire brushes can cause unsightly damage to the surface of your grill lid. These scratches and marks not only look bad but can also be difficult to remove. To keep your grill looking its best, use a gentle cleaner specifically designed for use on grills. Look for a non-abrasive and non-toxic product that is safe for use on the lid without causing any damage. Not only will this help maintain the appearance of your grill, but it will also ensure that the food you cook on it is safe to eat.
In addition to using the right cleaner, it’s equally important to use the right tools when cleaning your grill lid. Avoid wire brushes or other abrasive scrubbers that can cause scratches and damage to the surface of the lid. Instead, opt for a soft-bristled brush or sponge that is gentle enough to remove dirt and grime without causing any harm.
To summarize, here are some tips on how to avoid damaging your Weber Q lid:
- Use a gentle cleaner specifically designed for grills that is non-abrasive and non-toxic
- Avoid using wire brushes or other abrasive scrubbers
- Opt for a soft-bristled brush or sponge instead
Avoiding High-Pressure Washers or Hoses
We all know that keeping our Weber Q lid clean is essential for mouthwatering, safe meals. However, some cleaning tools can do more harm than good, especially high-pressure washers or hoses.
While it may seem like a quick and efficient way to clean your grill, these tools can actually damage the finish and promote rust or corrosion over time. The painted surfaces of your Weber Q lid are particularly vulnerable to the forceful jets of water from a high-pressure washer. It strips away the paint and exposes the metal to the elements, leading to unsightly rust and other types of corrosion.
To avoid this, we recommend sticking with gentler cleaning methods. A solution of warm water and mild soap, along with a soft-bristled brush or sponge, is enough to remove dirt, grime, and other buildup from your grill’s surface. Not only does this keep your grill looking great, but it also helps extend its lifespan.
If you need to use a more powerful cleaning tool such as a pressure washer, use it on a low setting and keep it at least 12 inches away from your grill’s surface. This will help prevent any damage while still allowing for thorough cleaning.
In summary, taking care of your Weber Q lid is vital for both meal quality and grill longevity. Avoiding high-pressure washers or hoses is just one step you can take to protect your investment. Here are some tips to remember:
- Use gentle cleaning methods such as warm water and mild soap
- Be cautious when using pressure washers and keep them at least 12 inches away
- Take the time to clean your grill carefully, ensuring long-lasting performance
Rinsing the Lid Thoroughly with Clean Water
When it comes to grilling, the Weber Q is the ultimate choice for any backyard barbecue. To keep this hero shining bright, it requires a little bit of tender loving care, and that starts with rinsing the lid thoroughly with clean water.
Sure, it may seem like a simple step, but it’s an essential one. Loose debris such as dust, dirt, and grime can accumulate on the lid’s surface, causing pesky clogs that hinder your grill’s performance. So let’s dive into the nitty-gritty and learn how to do this correctly.
Before we get started, make sure you have the necessary supplies: a garden hose or a bucket of clean water and a soft sponge or cloth.
If you’re going with the garden hose option, set it to low-pressure mode to avoid any damage to your grill’s surface. Keep the nozzle about a foot away from the lid and spray it evenly across the surface. Start from the top and work your way down using a gentle back-and-forth motion to ensure that all areas are covered.
For those who prefer using a bucket of water, dip your soft sponge or cloth into the water and wring out any excess liquid before wiping the lid’s surface gently. Don’t forget to cover all corners and edges to ensure that all debris is removed.
After you’re done rinsing, inspect the lid for any stubborn stains or debris that might require additional attention. If you spot something that needs some extra love and care, mix a small amount of dish soap with warm water and apply it to the affected area using your soft sponge or cloth. Rinse thoroughly with clean water afterward.
Drying the Lid with a Soft Cloth
And that means paying close attention to every detail, including drying the lid with a soft cloth after cleaning.
Why is this step so crucial? For one, water spots can be pesky blemishes on the surface of your grill that are difficult to remove. But even more concerning is the potential for long-term damage if water is left to sit on the lid for extended periods. Rust or other harm could end up causing expensive repairs or even a replacement grill.
To avoid these problems and keep your grill looking its best, here are some tips to follow when drying the lid:
- Use a gentle touch: Don’t rush through this step. Take your time and use a light pressure when wiping down the lid. This will help avoid any scratches or damage to the surface.
- Pay attention to crevices and seams: These areas are prime spots for water to collect and cause rust. Make sure you get into every nook and cranny with your soft cloth to ensure everything is dry.
- Avoid abrasive materials: Steel wool or scouring pads may be tempting to use, but they can do more harm than good. Instead, opt for a microfiber cloth that won’t leave any lint behind.
Applying Protective Wax or Polish for Regular Maintenance
Not only does it help keep your grill looking new, but it also protects it from the elements and repels dirt and grime.
To start, make sure your lid is clean and free of debris. A mild soap and warm water work wonders, but avoid harsh chemicals or abrasives that could scratch the surface. Once it’s clean and dry, apply a small amount of wax or polish onto a soft cloth.
Now here’s where things get interesting. The magic begins as you rub the cloth onto the surface of the lid in circular motions, making sure to cover the entire area. This might seem like a simple task, but trust me when I say that it’s crucial to follow the manufacturer’s instructions for application and drying times. It’s tempting to rush through this step, but take your time and do it right.
What happens next is truly remarkable. After the wax or polish has dried, use a clean cloth to buff the surface of the lid until it shines. Not only will this add an extra layer of protection against rust and other types of damage, but it’ll make your grill look like new again.
But don’t forget – protective wax or polish should not be used as a substitute for proper cleaning and maintenance. Regular cleaning is essential for keeping your grill in top condition. Here are some tips:
- Remove any grease buildup
- Check for signs of wear or damage
- Keep your grill covered when not in use
iRiaYegzm00″ >
Conclusion
In conclusion, a clean Weber Q lid is the cornerstone of a well-maintained grill. Don’t let dirt and grime compromise your grill’s performance or appearance. With a little elbow grease and the right tools, cleaning your grill can be a breeze.
Safety first. Always ensure that your grill is off and cool to the touch before beginning any cleaning process. Once you’re ready, start by removing loose debris with a soft-bristled brush or sponge and warm soapy water. For stubborn stains or discoloration, create a paste using baking soda or vinegar mixed with water.
Avoid using abrasive cleaners or wire brushes that can cause damage to the surface of your grill. Rinse the lid thoroughly with clean water and dry it with a soft cloth to prevent water spots or streaks from forming on the surface.
Regular maintenance includes applying protective wax or polish to help repel dirt and keep the lid looking shiny and new. Remember not to use high-pressure washers or hoses as they can cause damage over time.
Take care when drying the lid with a soft cloth, paying attention to crevices and seams where water can collect. By following these tips, you’ll be able to enjoy mouth-watering meals every time you fire up your Weber Q for years to come.