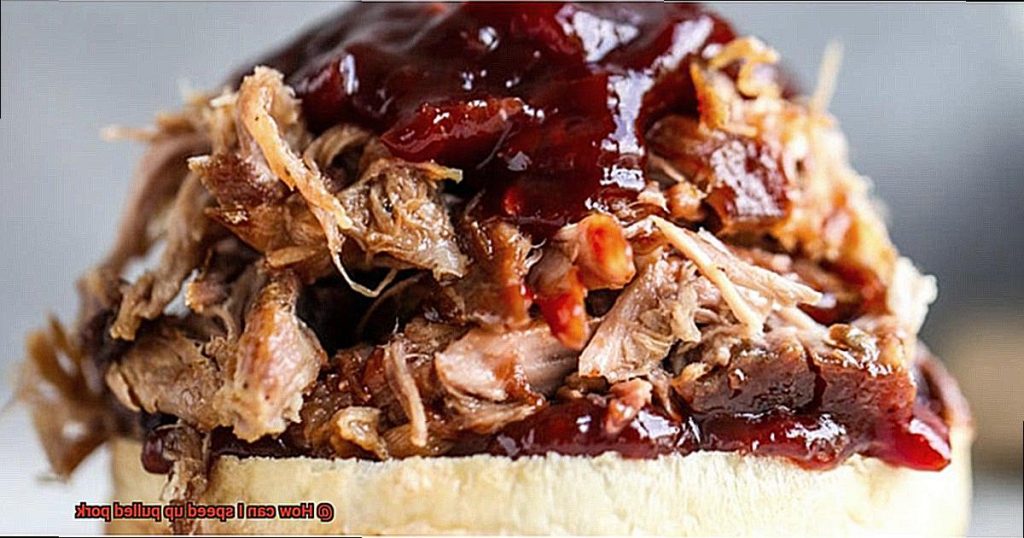
Do you ever find yourself dreaming of sinking your teeth into a mouthwatering pulled pork sandwich, but just can’t spare the hours it takes to cook it?
We’ve been there too. But fear not, because we’re about to spill the beans on how you can whip up some seriously delicious pulled pork in a fraction of the time.
So put on your favorite cooking playlist, roll up your sleeves, and let’s dive into the world of speedy and scrumptious pulled pork.
Contents
Pressure Cooking
Fear not, as pressure cooking is here to revolutionize your BBQ experience. This time-saving technique not only slashes hours off the cooking process but also delivers tender, juicy pulled pork that will leave your family and friends begging for more. In this engaging blog post, we will delve into the benefits of pressure cooking for making pulled pork, along with invaluable tips and tricks to streamline your culinary journey.
Reduced Cooking Time:
Harnessing the power of high pressure and temperature, pressure cooking drastically cuts down on the time required to cook pulled pork. No longer do you need to wait for hours; instead, you can savor delectable pulled pork in a fraction of the time. The intense pressure and heat swiftly break down tough meat fibers, resulting in melt-in-your-mouth tender goodness.
Infused Flavors:
One of the key advantages of pressure cooking lies in its ability to infuse flavors deep into the meat. As the high pressure forces seasonings and marinades to permeate every inch of the pork, each bite becomes a symphony of tantalizing tastes. This means you can achieve perfectly seasoned pulled pork without the need for overnight marination or additional preparation time.
Energy Efficiency:
Pressure cooking not only saves you time but also conserves energy. The shorter cooking duration necessitates less energy consumption, making it an eco-friendly choice. With minimal time spent in the kitchen, you can fully immerse yourself in outdoor grilling activities without fretting over lengthy cook times.
Versatility:
Pressure cooking is not confined to a single recipe or dish. Once you’ve mastered the art of pressure cooking pulled pork, you can embark on a culinary adventure by experimenting with various seasonings, sauces, and flavors. From classic BBQ-style pulled pork to zesty Asian-inspired variations, the possibilities are endless, allowing you to create your own signature dish that will leave a lasting impression.
Slow Cooking
Enter the world of slow cooking, where time and patience are the secret ingredients to creating tender, succulent dishes that burst with flavor. In this article, we will delve into the art of slow cooking, exploring its techniques, benefits, and the mouthwatering results that await you. So grab your apron, dust off your trusty slow cooker, and let’s dive in.
The Essence of Slow Cooking:
Slow cooking is a method that involves cooking food at low temperatures over an extended period of time. This gentle process allows flavors to meld together, creating a depth and richness that cannot be achieved through quick cooking methods. Imagine the aroma of a simmering stew slowly infusing every nook and cranny of your kitchen, tantalizing your senses and building anticipation for the feast that awaits.
The Benefits of Time:
When it comes to slow cooking, time is your greatest ally. It allows tough cuts of meat to transform into melt-in-your-mouth delicacies, as collagen breaks down into gelatin, resulting in tender, juicy bites. The low heat also ensures that proteins retain their moisture, preventing dryness and preserving the natural juices within the food.
Flavors Intensified:
One of the magical aspects of slow cooking is how it intensifies flavors. As ingredients simmer and mingle together for hours on end, their essences meld into a harmonious symphony of taste. Spices deepen, herbs release their aromatic oils, and sauces thicken into luscious gravies, transforming ordinary ingredients into extraordinary culinary creations.
Versatility at its Finest:
Slow cooking isn’t limited to just savory dishes. It’s a versatile technique that can be applied to desserts as well. Imagine indulging in a velvety chocolate lava cake, where the slow cooking process ensures a gooey center that oozes decadence. From braised meats and stews to soups, casseroles, and even homemade yogurt, the possibilities are endless.
Embracing the Slow Cooker:
While slow cooking can be achieved through various methods such as stovetop simmering or oven braising, the slow cooker is a true champion of this culinary art form. With its controlled heat and hands-off approach, it allows you to set it and forget it, freeing up your time while flavors develop and magic happens behind the scenes.
Tips for Success:
To unlock the full potential of slow cooking, here are a few tips to keep in mind. First, choose the right cuts of meat that benefit from long, slow cooking, such as beef chuck roast or pork shoulder. Second, layer your ingredients strategically to ensure even cooking and maximize flavor infusion. Third, resist the temptation to peek inside the slow cooker too often, as this can disrupt the steady cooking process and result in longer cooking times.
Pre-Cooked/Smoked Pulled Pork
If you’re a fan of pulled pork but don’t have the time or patience to cook it from scratch, pre-cooked or smoked pulled pork is here to save the day. In this guide, we’ll explore the best techniques to reheat your pre-cooked or smoked pulled pork while ensuring it retains its moisture and flavor. Get ready to take your grilling game to the next level.
Slow Cooker Sensation:
The slow cooker is your secret weapon when it comes to reheating pre-cooked or smoked pulled pork. Place the pulled pork in the slow cooker, add a splash of liquid like apple juice or broth to keep it moist, and let it simmer on low heat for a few hours. This method allows the flavors to meld together, resulting in tender, juicy pulled pork that will make your taste buds sing.
Oven Lovin’:
For those who prefer a crispy exterior and tender interior, reheating in the oven is the way to go. Set your oven to a low temperature (around 275°F) and place the pulled pork in an oven-safe dish.
Cover it tightly with foil to retain moisture and heat for approximately 30 minutes per pound. To amp up the flavor, add a drizzle of barbecue sauce or a splash of apple cider vinegar before reheating.
Microwave Mastery:
If time is of the essence, fear not. You can still enjoy mouthwatering pulled pork by using your microwave. However, be cautious as microwaving can quickly dry out the meat if not done properly. Place the pulled pork in a microwave-safe dish, cover it with a microwave-safe lid or plastic wrap (leaving a small vent for steam to escape), and heat on medium power in short intervals. Stir occasionally until heated through, being careful not to overcook.
Flavor Explosion:
While pre-cooked or smoked pulled pork already packs a punch in the flavor department, why not take it up a notch? Add your favorite barbecue sauce, spices, or even a splash of liquid smoke to give it that irresistible smoky flavor.
Don’t be afraid to experiment and adjust the seasoning to your liking.
High Temperature Cooking
Prepare to dive into the world of high temperature cooking and discover how it can revolutionize your favorite barbecue dish. Get ready for tender, juicy pulled pork that cooks in record time and leaves your taste buds begging for more.
Grilling: A Fiery Delight
When it comes to high temperature cooking, grilling reigns supreme. It’s the go-to method for barbecue aficionados who crave that mouthwatering crust and those precious, locked-in juices. Picture a flavor explosion waiting to happen.
So, fire up that grill, adjust those heat settings, and get ready for a smoky taste sensation that will leave you speechless.
Oven Magic: Where Speed Meets Flavor
No grill? No problem. Don’t fret, because your trusty oven can work wonders too. Preheat it to a scorching 400°F (200°C) or higher, and watch as the cooking process speeds up before your eyes. Just remember to ensure proper air circulation by using a roasting pan or rack, and don’t forget to baste your pork with a tantalizing sauce or marinade that keeps it moist and bursting with flavor.
The Perfect Temperature
Now, let’s talk about achieving pulled pork perfection. It all comes down to monitoring that internal temperature like a pro. Aim for a range of 195°F (90°C) to 205°F (96°C). Why? Because this is the magic zone where collagen and connective tissues break down, transforming tough meat into tender shreds of succulent deliciousness. Invest in a reliable meat thermometer, and never play guessing games with your masterpiece again.
Texture and Flavor Considerations
While high temperature cooking is a time-saving marvel, it can affect the texture and moisture level of your pulled pork. But fear not. There are tricks up our sleeves to combat this. Choose cuts of pork with a higher fat content, and watch as the melted fat infuses every bite with moisture and richness. Or, take it a step further and marinate the meat beforehand, allowing the flavors to penetrate every nook and cranny, resulting in an explosion of taste that will leave you craving more.
Shredding with Forks
Shredding pork for mouthwatering pulled pork is a crucial step. While the traditional fork method is tried and true, there are alternatives that save time and effort. In this blog post, we’ll compare forks to a stand mixer or food processor for shredding pork. So, grab your apron and let’s dive in.
Shredding with Forks:
The classic fork method offers several advantages:
- Control over texture: With forks, you have complete control over the size and texture of the shredded pieces. Perfect for pulled pork sandwiches, tacos, or barbecue bowls.
- Traditional flavor: Grill enthusiasts swear by the authenticity and flavor that comes from hand-shredding pork with forks.
Simplicity: Minimal equipment required, just use forks at your kitchen counter.
Downsides to consider:
- Time-consuming: Shredding large amounts of pork with forks can be labor-intensive and time-consuming.
- Heat sensitivity: Handling and shredding hot meat with forks may pose challenges and risk burns.
Stand Mixer or Food Processor:
For time efficiency, a stand mixer or food processor provides a quicker alternative:
- Time-saving: Shred pork in a fraction of the time compared to using forks.
- Consistency: Mechanical action results in finer texture, suitable for recipes requiring smoother consistency.
- Effortless shredding: Let appliances do the work, requiring minimal effort.
Caveats to keep in mind:
- Texture variation: Mechanical action may result in slightly different texture compared to hand-shredding.
- Equipment requirement: Using a stand mixer or food processor requires additional equipment not readily available in every kitchen.
Using a Stand Mixer
This powerful kitchen hack can save you time and effort, effortlessly transforming cooked pork into tender, juicy strands. In this guide, we will walk you through the steps of using a stand mixer to shred pork like a pro.
Select the Right Attachment:
When using a stand mixer, it’s crucial to choose the right attachment. While most stand mixers come with a paddle attachment for mixing dough or batters, this won’t work for shredding meat. Instead, opt for a flat beater or dough hook attachment. These attachments are designed to handle tough tasks like shredding meat, making the process easier and more efficient.
Prepare the Pork:
Before using the stand mixer, ensure that the cooked pork has cooled down slightly. This not only makes it easier to handle but also prevents any potential accidents or injuries. Additionally, remove any bones or large pieces of fat from the pork before placing it in the stand mixer.
Cut into Smaller Chunks:
To fit comfortably into the mixing bowl of your stand mixer, cut the pork into smaller chunks or strips. If you have a large amount of pork to shred, it’s best to work in batches. Overloading the mixer can strain the motor and affect its performance.
Shredding Process:
Place the chunks of pork into the mixing bowl and attach your chosen shredding attachment to the stand mixer. Start at a low speed to avoid splattering or mess, gradually increasing the speed as the meat starts to shred. Keep an eye on the meat and adjust the speed accordingly to achieve the desired texture.
Ensure Even Shredding:
As the stand mixer shreds the pork, use a spatula or tongs to push any larger pieces towards the shredding attachment. This ensures that all parts of the meat are evenly shredded and prevents clumps from forming.
Season and Serve:
Once all the pork has been shredded, transfer it to a bowl or serving dish. Season it with your favorite barbecue sauce or spices. If you want to mix the sauce or spices into the shredded pork, use the stand mixer’s paddle attachment on a low speed.
Using a stand mixer to shred pork not only speeds up the process but also ensures that the meat is evenly shredded, resulting in a more consistent and flavorful pulled pork. However, it’s important to note that while a stand mixer can make the process faster, it may not offer the same level of precision and control as shredding by hand. Therefore, closely monitor the shredding process to avoid over-shredding or turning the meat into mush.
Tips for Faster Pulled Pork
No worries. Our expert tips will help you reduce cooking time while still achieving mouthwatering pulled pork. Whether you’re grilling for a summer BBQ or simply want a quick and delicious meal, these techniques will help you enjoy tender, flavorful pulled pork without the long cooking process.
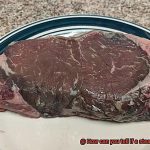
Start with smaller cuts of pork:
To speed up the cooking process, opt for smaller cuts like pork shoulder or pork butt. These cuts are naturally more tender and have more marbling, allowing them to cook faster and result in juicy pulled pork. Look for cuts around 4-6 pounds in weight for optimal results.
Increase the cooking temperature:
While low and slow cooking is traditional for pulled pork, raising the temperature can speed up the process without sacrificing tenderness. Instead of the usual 225°F (107°C), try increasing the heat to around 300°F (149°C). This higher temperature will cook the pork faster while still maintaining its delicious flavor.
Trim excess fat:
Trimming excess fat before cooking can help speed up the process. Fat takes longer to render down and can slow down cooking time. By removing excessive fat, you allow the heat to penetrate the meat more efficiently, resulting in faster cooking.
Marinate or brine the pork:
Marinating or brining your pork before cooking can help tenderize the meat and shorten cooking time. A simple marinade or brine made with ingredients like apple cider vinegar, brown sugar, garlic, and spices can add flavor while breaking down muscle fibers and making the meat more tender. Marinate or brine overnight or for several hours for best results.
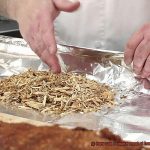
Preheat your grill or smoker:
When using a grill or smoker to cook pulled pork, preheating is essential for faster cooking times. Ensure your equipment is preheated to the desired temperature before placing the meat on the grates. Preheating helps create a sear on the outside of the meat, locking in juices and enhancing the overall flavor. Starting with a hot grill or smoker will help you achieve faster and more delicious pulled pork.
FY837Itnzgg” >
Conclusion
In conclusion, there are numerous methods and techniques at your disposal to expedite the preparation of pulled pork while still ensuring it remains flavorful and tender. Whether you opt for pressure cooking, slow cooking, utilizing pre-cooked or smoked pork, high temperature cooking, or shredding with forks or a stand mixer, each approach offers its own advantages and considerations.
Pressure cooking emerges as a time-saving technique that not only reduces cooking time but also infuses the meat with deep flavors. It’s an energy-efficient method that grants you the freedom to create a plethora of flavor profiles.
Slow cooking allows the flavors to meld together over an extended period, resulting in irresistibly tender and succulent pulled pork. This versatile method can be employed for both savory dishes and delectable desserts.
Reheating pre-cooked or smoked pulled pork can be achieved using a slow cooker, oven, or microwave. Each option presents distinct advantages in terms of texture and flavor.
High temperature cooking via grilling or employing an oven at scorching heat enables rapid yet tender results when making pulled pork. It is vital to monitor the temperature diligently for optimal outcomes.
Shredding with forks offers meticulous control over the texture but can prove time-consuming. Alternatively, employing a stand mixer or food processor provides a quicker alternative while delivering consistent results.
To accelerate the overall process of crafting pulled pork, consider starting with smaller cuts of pork, elevating the cooking temperature, trimming excess fat, marinating or brining the meat in advance, and preheating your grill or smoker.
By implementing these invaluable tips and techniques, you can relish mouthwatering pulled pork in significantly less time without sacrificing an ounce of taste or tenderness.