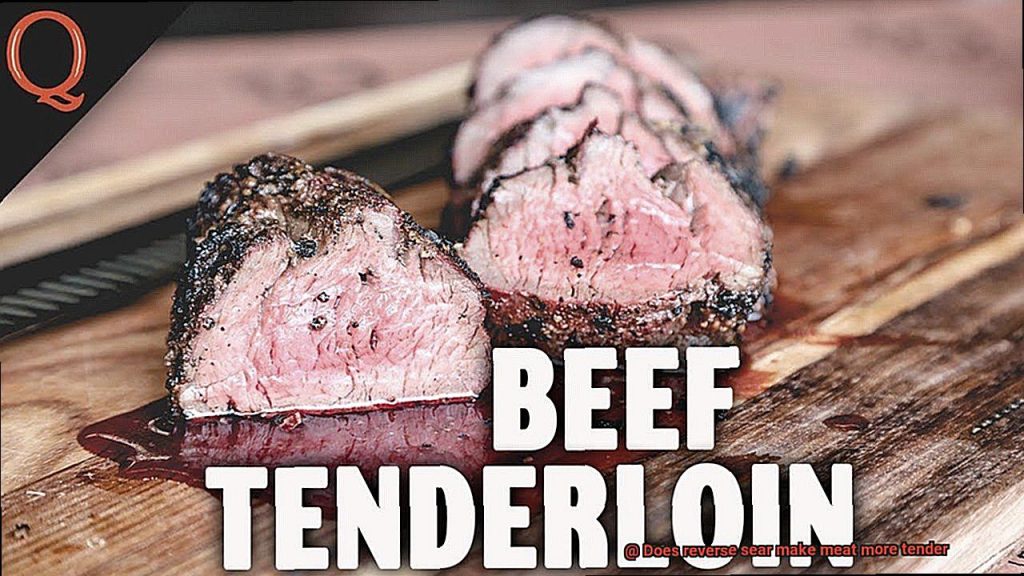
Are you tired of gnawing on tough, overcooked meat? Want to up your grilling game and wow your guests with a steak that’s so tender it practically melts in their mouths? Look no further than the reverse sear method.
But what is reverse sear, exactly? And can it really make your meat more succulent?
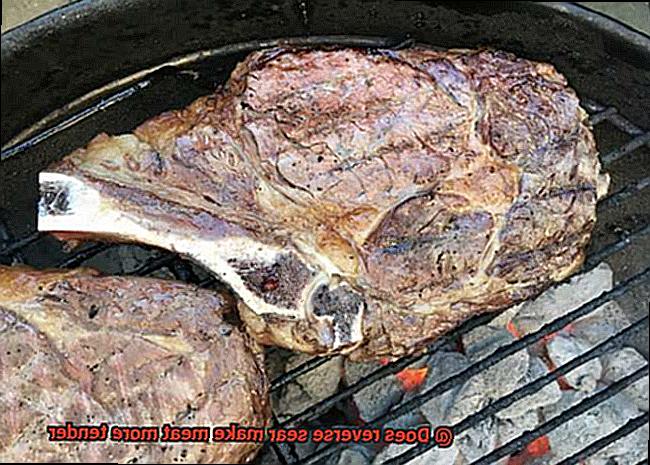
Traditionally, most cooks sear their meat first on high heat before finishing it off in the oven or grill. But this method can leave you with dry, overcooked meat if you’re not careful. Enter the reverse sear: instead of blasting your steak with high heat from the get-go, you cook it low and slow until it reaches your desired internal temperature. Then, and only then, do you give it a quick sear on high heat to create that coveted crispy crust.
Proponents of this method swear by its ability to produce evenly cooked, juicy meat that’s never dry or tough. By cooking slowly and gently at first, they argue, you allow the meat to retain more moisture and achieve a more tender texture overall. The quick sear at the end adds just enough crunch without sacrificing any of that precious juiciness.
In this blog post, we’ll take a closer look at whether reverse searing really does make for more tender meat. We’ll also walk through how to execute this technique like a pro so that you can impress even the most discerning carnivores at your next cookout. So grab your tongs and let’s get started.
Contents
The Benefits of Reverse Searing
Reverse searing is a cooking technique that has been gaining popularity in recent years and is definitely worth exploring. This method involves slow-cooking meat at a low temperature first, then finishing it off with a high-temperature sear. But what are the benefits of reverse searing?
Firstly, reverse searing makes meat more tender. When you cook meat at a low temperature, the heat slowly and evenly penetrates the meat, allowing the proteins to break down gradually. As a result, the final product is more tender and juicier than other cooking methods.
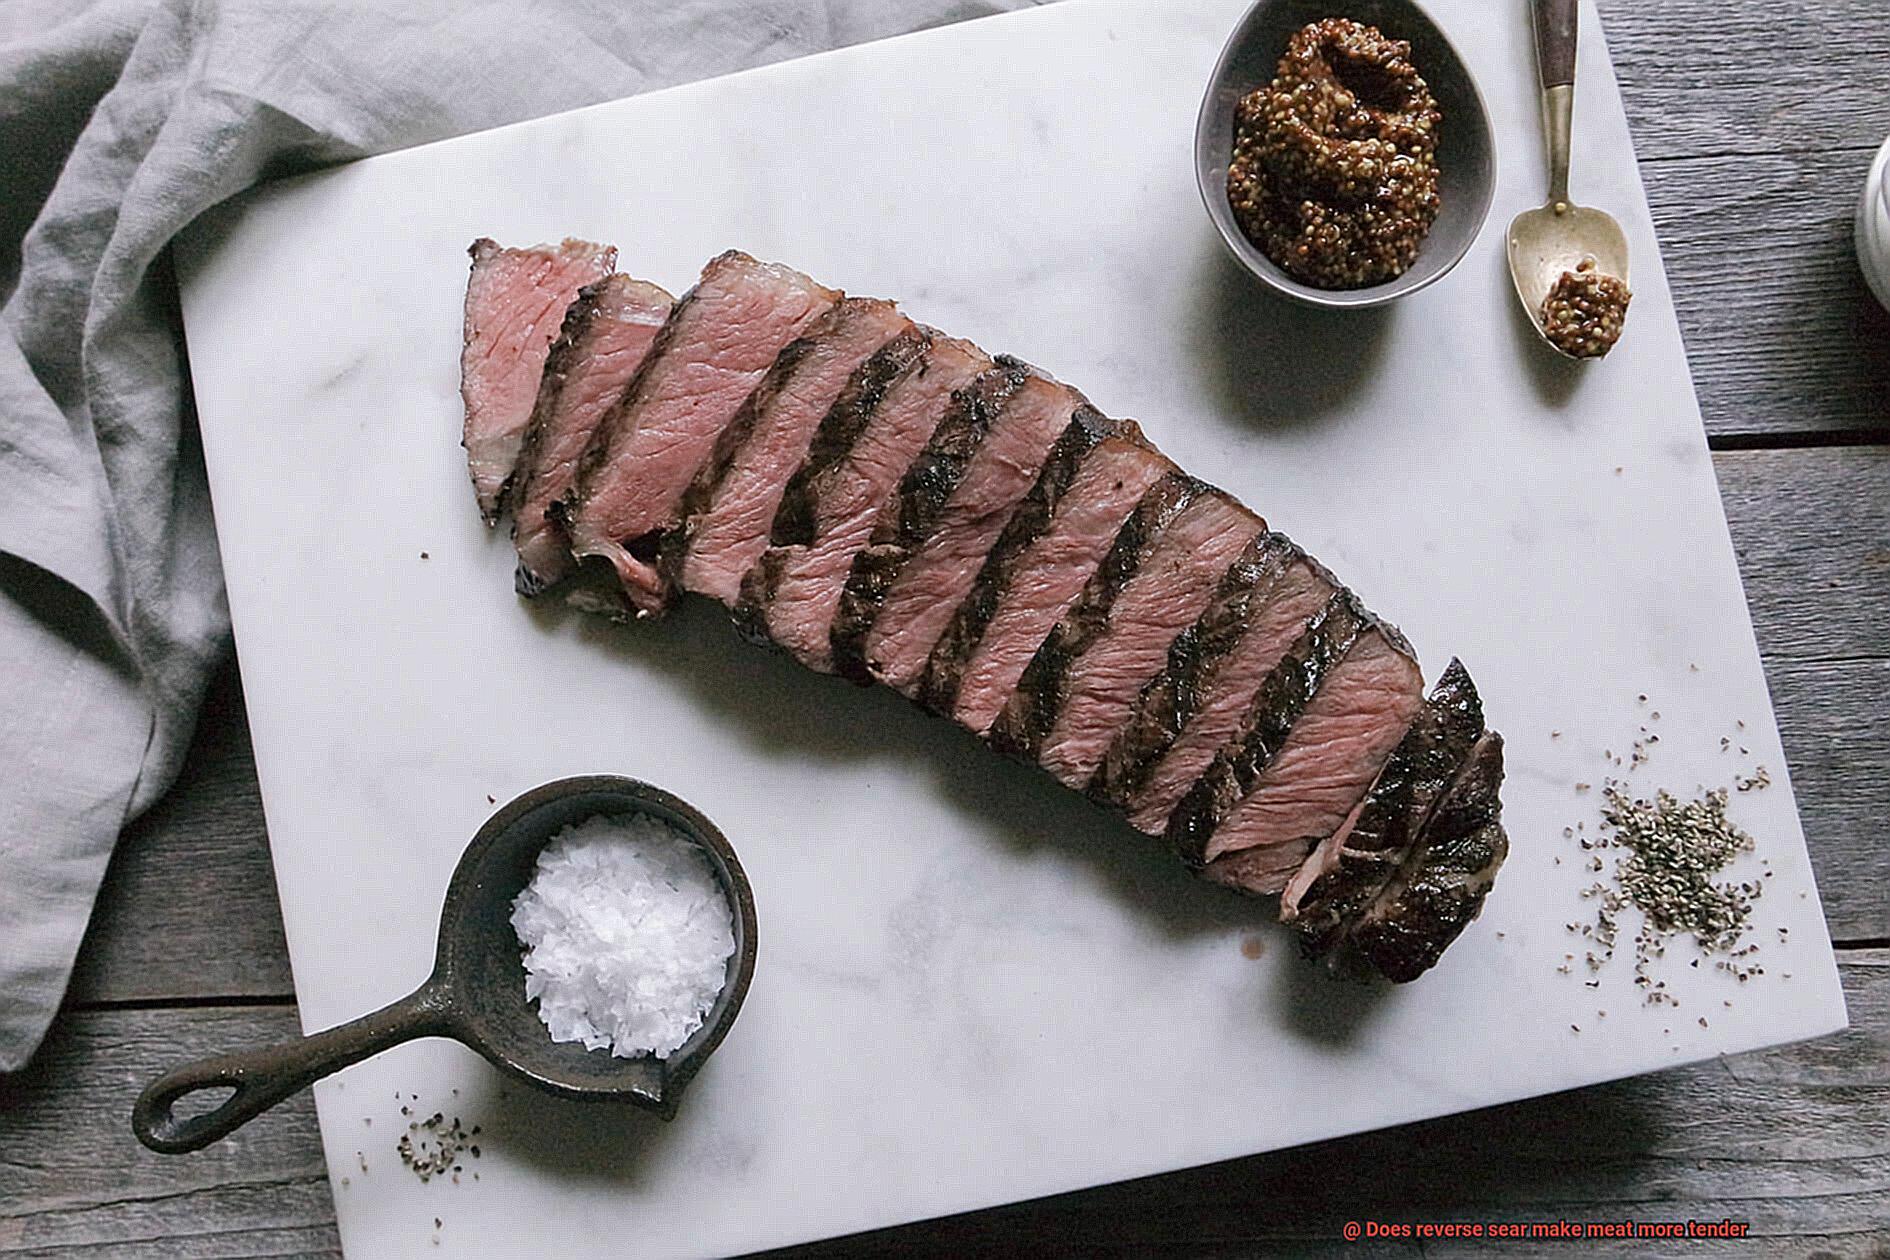
In addition to making the meat more tender, reverse searing also adds an extra layer of flavor and texture. By searing the meat at a high temperature after it has been cooked through, you get a nice caramelization on the surface of the meat. This results in a delicious crust that is sure to impress your dinner guests.
Another benefit of reverse searing is that it allows for more precise control over the cooking process. By cooking the meat at a low temperature first, you can ensure that it reaches the desired internal temperature without overcooking or undercooking it. This is especially important for larger cuts of meat, which can be difficult to cook evenly throughout.
It’s important to note that not all cuts of meat will benefit from reverse searing. Tender cuts like filet mignon or ribeye may not require this cooking method, while tougher cuts like brisket or flank steak can greatly benefit from reverse searing.
How Does Reverse Searing Make Meat More Tender?
Look no further than reverse searing, a culinary technique that has been gaining popularity among grill enthusiasts. As an expert in this method, I can attest that reverse searing is the key to achieving a mouth-watering, juicy piece of meat.
So what makes reverse searing so special? Let’s break it down. First and foremost, cooking the meat at low temperatures allows it to cook evenly from the inside out. This ensures that the outer layer of the meat doesn’t get overcooked and dry while the inside remains undercooked. Then, when you sear the meat at high temperatures, you create a crust on the outer layer that adds flavor and texture.
But wait, there’s more. Cooking meat at high temperatures causes the proteins in the meat to contract, resulting in a tougher and drier texture. However, using the reverse searing method minimizes this effect by first cooking the meat slowly at low temperatures. This gradual process allows the proteins to break down and results in a more tender and juicy piece of meat.
Last but not least, let’s talk about resting. Allowing your meat to rest after cooking gives time for the juices within the meat to redistribute throughout the entire piece. This results in a more evenly cooked and tender outcome.
In summary, reverse searing is a game-changing technique for making any type of meat tender and juicy. By cooking at low temperatures before searing at high temperatures and allowing for resting time, you are ensuring that your meat is cooked perfectly and is as tender as can be. So why not give it a try on your next grill night? Your taste buds (and dinner guests) will thank you.
Not All Cuts of Meat Benefit from Reverse Searing
If you’re looking to elevate your cooking game, reverse searing might be on your list of techniques to try. However, before you dive into this method, it’s important to know that not all cuts of meat benefit from it.
Reverse searing involves slow-cooking the meat at a low temperature before finishing it off with high heat to create a crispy exterior. This technique works wonders for thicker cuts like steaks, roasts, and chops. But if you’re dealing with thinner cuts like chicken breasts or pork tenderloin, they can be cooked quickly over high heat without compromising tenderness.
On top of that, cuts with ample connective tissue like brisket or ribs may not fare well with reverse searing. The slow-cooking process can break down collagen and leave the meat too tender. So if you’re dreaming of some succulent brisket or juicy ribs, consider other cooking methods.
It’s crucial to understand the characteristics of each cut before deciding to reverse sear it. A filet mignon, for example, benefits from a crispy exterior and can handle the gentle slow-cooking process. Meanwhile, a ribeye steak already boasts enough fat content to keep it tender and juicy without reverse searing.
Tips for Successful Reverse Searing
Reverse searing is the cooking technique for you. This method involves slow cooking the meat at a low temperature before finishing it off with a high-heat sear to create a delicious crust. Here are five tips for mastering the reverse sear:
Opt for thick cuts
Not all cuts of meat are created equal when it comes to reverse searing. Choose thick cuts like ribeye or pork chops, which will benefit the most from this cooking method.
Use a thermometer
Don’t leave the success of your dish up to guesswork – use a meat thermometer to monitor the internal temperature of your meat. This will prevent overcooking or undercooking, ensuring perfect tenderness.
Season generously
Don’t be afraid to go heavy on the seasoning. Salt and pepper or your favorite seasoning blend can enhance the flavor of the meat and create a mouth-watering crust when seared.
Preheat your grill or oven
Make sure your grill or oven is preheated to the desired temperature before adding your meat. This will ensure even cooking and a crispy exterior.
Let it rest
After removing your meat from the heat source, give it time to rest before slicing into it. This allows the juices to redistribute throughout the meat, creating a tender and flavorful final product.
What are the Best Cuts of Meat to Use for Reverse Searing?
Not all cuts of meat are created equal for this cooking method. To achieve a tender and juicy result, it’s important to choose the right cut.
Thicker cuts of meat are essential for reverse searing. This allows for a gentle cooking process that results in a perfectly cooked, juicy steak. So, ditch those thin cuts and opt for thick and meaty goodness.
One of the top picks for reverse searing is the ribeye steak. This cut boasts beautiful marbling throughout, which keeps the meat moist and flavorful. Its thickness also allows for a gradual cooking process that ensures an evenly cooked piece of meat.
Another excellent choice is the New York strip steak. Similar to the ribeye, it has good marbling but with less fat, making it a slightly leaner option. Nevertheless, it’s just as delicious and perfect for reverse searing.
If you want to impress your dinner guests, filet mignon, porterhouse, and T-bone steaks are also great choices for reverse searing. Each of these cuts has good marbling and thickness for optimal results.
While cheaper cuts of meat can be used for reverse searing, they may require more attention and care to achieve the desired tenderness. However, choosing a quality cut of meat will make all the difference in your final product.
In summary, the best cuts of meat for reverse searing are:
- Ribeye steak: boasts beautiful marbling throughout and perfect thickness
- New York strip steak: good marbling with less fat and ideal thickness
- Filet mignon, porterhouse, and T-bone steaks: excellent marbling and thickness
How Long Should You Cook the Meat When Reverse Searing?
Reverse searing may be the answer to your problems. This cooking method guarantees a juicy, perfectly cooked steak every time, but the key to success lies in understanding how long to cook the meat.
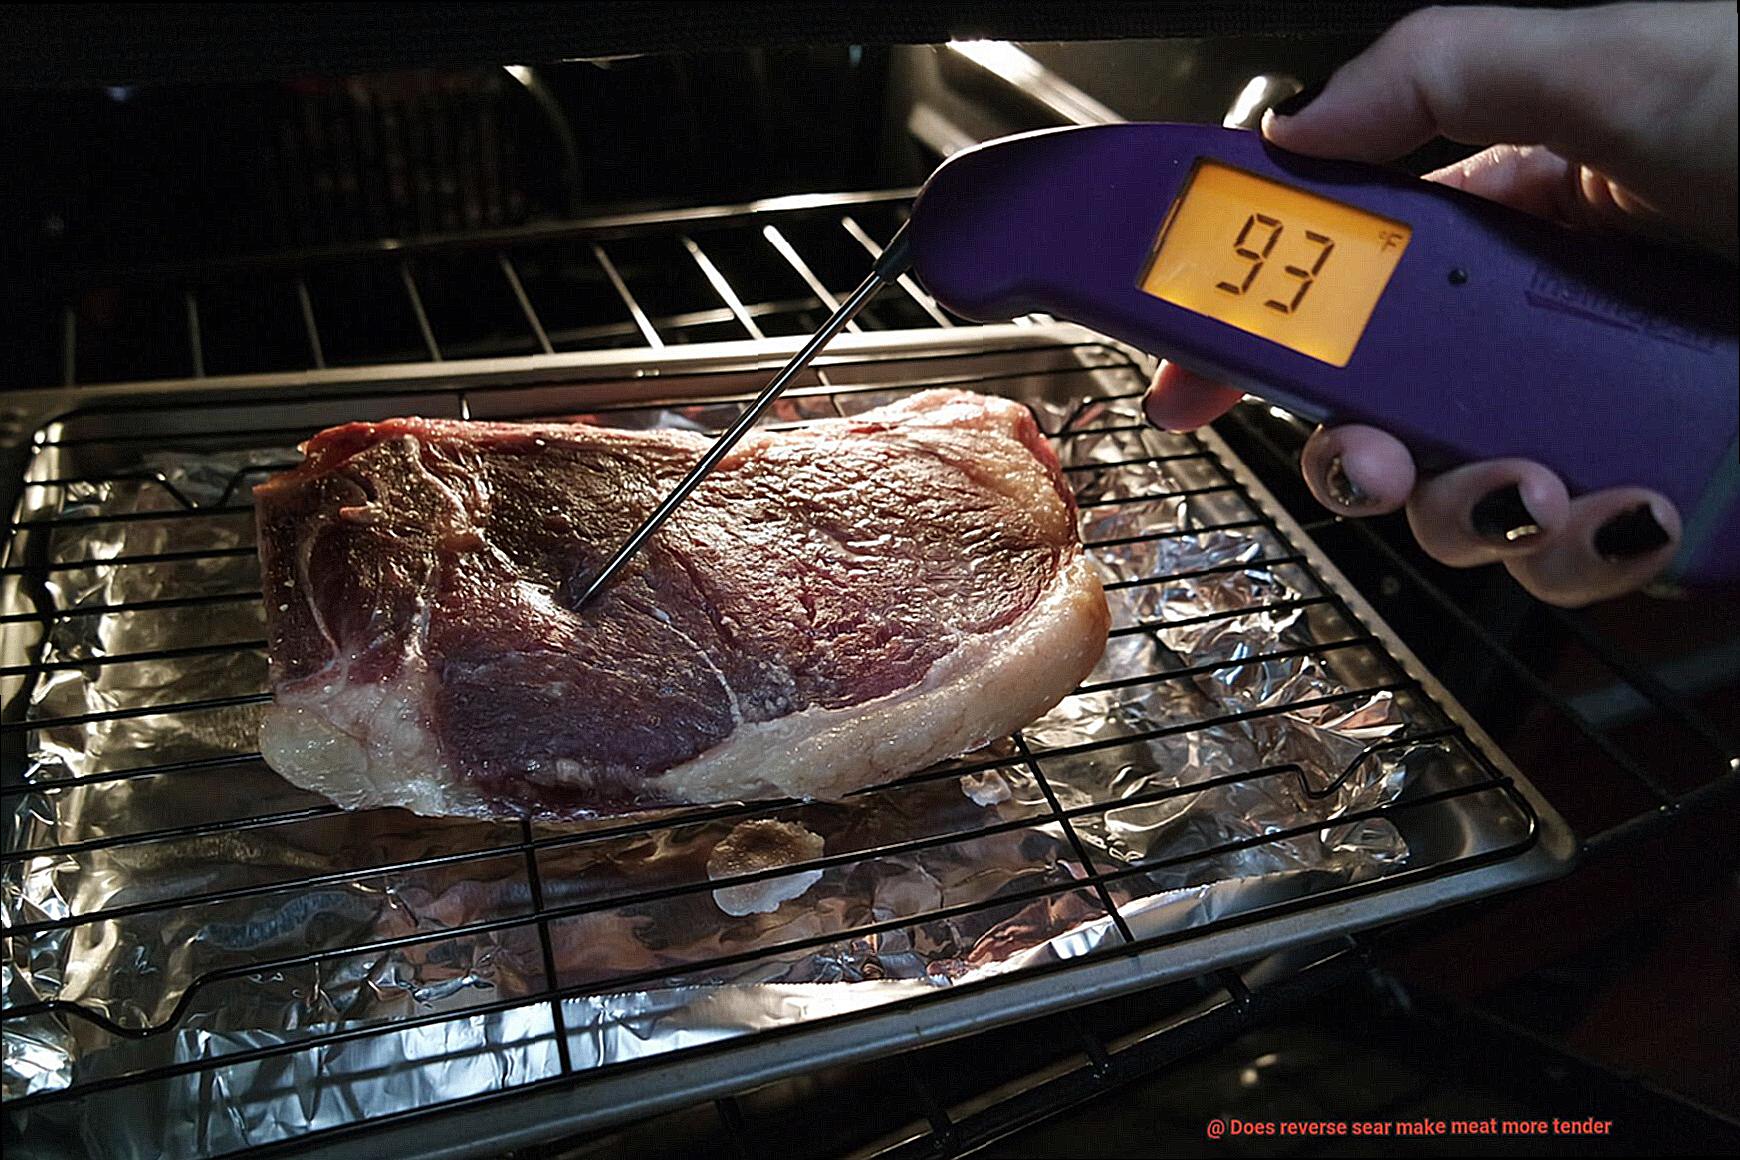
The reverse sear method involves cooking the meat low and slow until it reaches an internal temperature of 10-15 degrees below the desired final temperature. This ensures even cooking while preserving the meat’s natural juices. After that, the meat is seared over high heat for a short time to create a beautiful crust and enhance flavor.
The length of time for the low and slow cooking process varies depending on the size and type of meat. For example, thick cuts, such as ribeye or New York strip, may require an hour or more in a low-temperature oven or on indirect heat on a grill. On the other hand, thinner cuts like pork chops may only need 30-40 minutes.
It’s essential to use a meat thermometer to check the internal temperature accurately to prevent overcooking or undercooking, resulting in tough or dry texture. Once the meat reaches 10-15 degrees below the desired final temperature, it’s time to sear over high heat for that perfect crust.
In summary, there’s no exact answer to how long to cook meat when reverse searing as it depends on factors such as the thickness and type of meat and personal preferences for final internal temperature. However, with practice and experimentation, you’ll be able to determine the ideal cooking time for your favorite cuts of meat using this method.
What Temperature Should You Use for Reverse Searing?
Look no further than the reverse sear method. But before you start, let’s talk about the temperature. It’s the key to unlocking that perfect flavor and texture.
First, let’s talk about thicker cuts of meat like a juicy steak or roast. To achieve the best results, start with a lower initial cooking temperature of 200-250°F (93-121°C). This slow and even cooking allows the meat to develop its flavor while retaining moisture. Once the meat has reached about 10-15°F (5-8°C) below your desired finished temperature, it’s time to move on to the high heat searing phase. Crank up the heat to around 450-500°F (232-260°C) for a quick sear that locks in all those delicious juices.
But what about thinner cuts like pork chops or chicken breasts? For these cuts, a higher initial cooking temperature of 350-375°F (177-191°C) is recommended. This ensures that the meat is cooked all the way through before moving onto the searing phase.
It’s crucial to remember that not every cut of meat is created equal. Different types of meat may require slightly different temperatures and cooking times. It’s always best to use a meat thermometer to ensure your meat has reached a safe internal temperature and is cooked to your desired level of doneness.
In summary, using the right temperature for reverse searing is essential in achieving that perfect texture and flavor. Here are some key points to keep in mind:
- Thicker cuts: 200-250°F (93-121°C) initial cooking temperature
- Thicker cuts: 450-500°F (232-260°C) searing phase temperature
- Thinner cuts: 350-375°F (177-191°C) initial cooking temperature
- Use a meat thermometer to ensure safe internal temperature and desired level of doneness
How Do You Know When the Meat is Done Cooking?
As an expert on the question “How Do You Know When the Meat is Done Cooking?”, I have some tips to help you cook your meat to perfection every time.
Firstly, temperature is key. Using a meat thermometer is the most accurate way to determine the internal temperature of your meat. Different meats require different temperatures for safe consumption. For example, beef should be cooked to a minimum internal temperature of 145°F for medium rare, while pork should reach a minimum internal temperature of 145°F for safety reasons. Knowing the recommended temperature for your meat before cooking is essential.
In addition, try the touch test. Pressing on the meat with your finger and feeling for resistance can give you an idea of its doneness. If it feels soft and squishy, it’s not yet cooked. If it feels firm and springy, it’s done cooking. However, this method takes some practice and is less reliable than using a thermometer.
Once your meat is cooked to the desired temperature, remember to let it rest. This step is crucial in ensuring a juicy and flavorful final product. Allowing your meat to rest for at least 5-10 minutes after cooking will result in the juices redistributing throughout the meat resulting in a more tender bite.
akO6D_tc0lo” >
Conclusion
To put it simply, the reverse sear method is a culinary game-changer. This technique involves slow-cooking the meat at a low temperature before finishing it off with high-heat searing to create that perfect crust. But what are the benefits of this method? For starters, the reverse sear makes meat more tender and juicy by allowing it to retain more moisture during cooking. Plus, the slow-cooking process adds an extra layer of flavor and texture that will leave your taste buds begging for more.
Of course, not all cuts of meat are created equal when it comes to reverse searing. Thicker cuts like ribeye or pork chops are ideal candidates for this method, while thinner cuts like chicken breasts may not require it. It’s also crucial to use a thermometer to monitor the internal temperature accurately, ensuring perfect tenderness every time.
To execute this technique like a pro, there are a few key steps to keep in mind. First, opt for thick cuts of meat that will benefit from slow cooking. Second, season generously with your favorite herbs and spices. Third, preheat your grill or oven to ensure even cooking throughout. Fourth, use a thermometer to check the internal temperature and remove from heat once it reaches your desired level of doneness. Finally, let the meat rest before slicing into it to allow juices to redistribute evenly.
So which cuts of meat are best-suited for reverse searing? Look no further than ribeye steak, New York strip steak, filet mignon, porterhouse, and T-bone steaks – all of which can benefit from this mouth-watering cooking method.
In conclusion, mastering the art of reverse searing takes practice and experimentation but can result in truly unforgettable meals that will impress even the most discerning carnivores at your next cookout.