Are you gearing up to cook a turkey for your next family gathering or Thanksgiving dinner? If so, then you must be aware of the golden rule for turkey safety: every part of the bird has to reach an internal temperature of 165 degrees Fahrenheit. But have you ever pondered over why this temperature is so crucial, and whether it applies to every turkey part like the legs, thighs, and wings?
Cooking turkey is not just about making it look good on the outside but ensuring that it is safe and delicious to eat on the inside without any risk of foodborne illness like salmonella or E. Coli. Experts recommend cooking all parts of the turkey to the same minimum internal temperature of 165 degrees Fahrenheit to obliterate any harmful bacteria present.
However, does this temperature apply uniformly to all parts of the turkey, including the thickest and thinnest portions? And how can you ensure that the turkey is evenly cooked without overcooking or undercooking different parts? In this blog post, we’ll delve into these questions and provide you with some tips and tricks to cook a perfect turkey that’s safe, juicy, and flavorful. So let’s get started and master the art of cooking a turkey.
Contents
What is the Recommended Internal Temperature for Turkey?
Cooking a turkey for the holidays is a beloved tradition. However, it’s crucial to ensure that it’s cooked safely and thoroughly to avoid any potential foodborne illnesses. The United States Department of Agriculture (USDA) recommends an internal temperature of 165°F (74°C) in all parts of the bird to ensure that any harmful bacteria present in the meat are destroyed.
It’s essential to check the temperature in several places on each piece of the turkey, using a reliable meat thermometer. Insert the thermometer into the thickest part of the meat without touching a bone to get an accurate reading. Clean the thermometer after each use to prevent cross-contamination and ensure food safety.
Remember, even if the turkey appears fully cooked on the outside, it may not have reached a safe internal temperature. To avoid this, always use a meat thermometer to ensure that every part of the turkey has reached a safe internal temperature before serving.
When cooking a whole turkey, it’s also recommended to let it rest for at least 20 minutes before carving to allow the juices to redistribute and the temperature to continue rising. This ensures that your turkey is both delicious and safe-to-eat.
Why is it Important to Reach an Internal Temperature of 165°F?
It’s not just about making sure your Thanksgiving dinner is delicious, but also about keeping your loved ones safe from foodborne illness.
Why is it so crucial to reach 165°F in every part of the turkey? Let’s break it down:
Bacteria lurk on and inside the meat
Raw poultry, including turkey, can be contaminated with harmful bacteria like Salmonella and Campylobacter. These bacteria can cause serious illness if consumed in undercooked meat. Cooking turkey to an internal temperature of 165°F is the best way to kill these microscopic villains and prevent food poisoning.
Different parts of the turkey may cook at different rates
The thickness and proximity to the heat source can vary across different parts of the turkey, meaning some areas may cook faster than others. This is why it’s essential to use a food thermometer to check the internal temperature in multiple areas of the turkey, including the thickest part of the breast, thigh, and wing.
Letting the turkey rest allows for even cooking
After cooking your turkey to an internal temperature of 165°F, it’s important to let it rest for at least 15 minutes before carving. This allows the temperature inside the meat to even out and helps ensure that all parts of the turkey have reached a safe internal temperature.
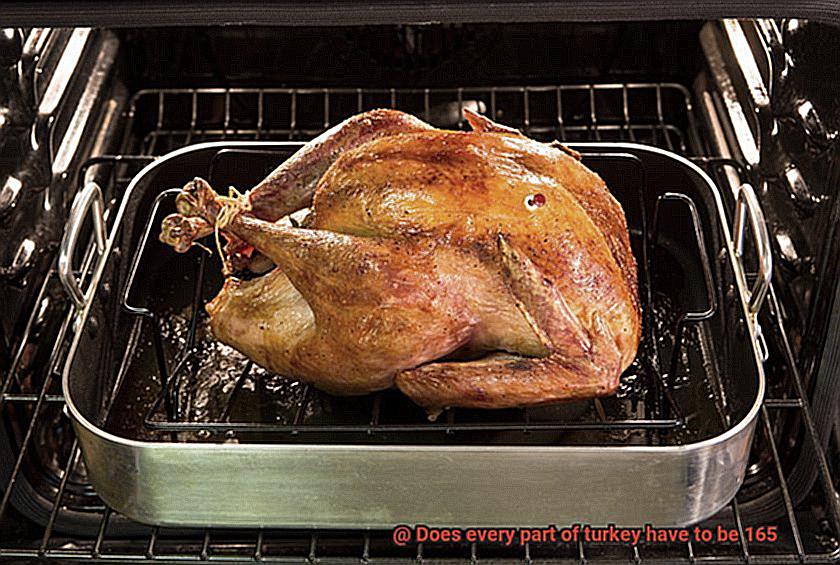
How to Check the Internal Temperature of a Whole Turkey
Cooking a whole turkey can be a daunting task, but there is no need to worry. One of the most crucial steps in ensuring that your turkey is safe to eat is checking its internal temperature. The United States Department of Agriculture (USDA) recommends a minimum internal temperature of 165°F (74°C) for a whole turkey, including the thickest part of the bird, such as the thigh and breast. Here are some tips to help you check the temperature of your turkey:
Use a Meat Thermometer
A meat thermometer is a must-have tool when it comes to checking the internal temperature of a turkey. To use it, insert the thermometer into the thickest part of the bird, ensuring that it doesn’t touch any bones or the pan. Wait for a few seconds until the reading stabilizes, and then take note of the temperature.
Check Different Parts Separately
Different parts of the turkey cook at different rates; therefore, it’s essential to check each part separately. The breast meat cooks faster than the thighs and legs, so it’s recommended to check their temperatures separately. To check the temperature of the breast, insert the thermometer into the thickest part of the meat without touching any bones. For checking the thighs and legs’ temperature, insert the thermometer into their thickest parts.
Focus on the Thigh
The thigh takes longer to cook than other parts, so it’s essential to focus on this area when checking for doneness. Insert your meat thermometer into the thickest part of the thigh, being careful not to touch any bones.
Check the Stuffing Too
If you cooked stuffing inside your turkey, it’s necessary to check its internal temperature too. The stuffing should reach a minimum internal temperature of 165°F (74°C) to be safe to eat. Insert your meat thermometer into the center of the stuffing to check its temperature.
Rest Before Carving
Once your turkey has reached a minimum internal temperature of 165°F (74°C), remove it from the oven and let it rest for at least 20 minutes before carving. This allows the juices to redistribute and ensures that your turkey will be moist and delicious.
What About Different Parts of the Turkey?
As the centerpiece of a Thanksgiving feast, cooking the perfect turkey can be a daunting task. But fear not, for I am an expert in turkey cooking and have some valuable tips to ensure that all parts of the bird are cooked to perfection.
Firstly, it’s essential to check the internal temperature of your turkey. The USDA recommends that all parts of the bird reach a minimum internal temperature of 165°F (74°C) to eliminate any harmful bacteria.
However, different parts of the turkey cook at varying rates, which can pose a challenge in achieving an evenly cooked bird. The breast meat tends to cook faster than the dark meat, which can result in overcooked breast meat and undercooked thighs.
But don’t worry. There are some solutions. One option is to use a meat thermometer to check the temperature of different parts of the turkey as it cooks. Ensure that the thickest part of the breast reaches 165°F (74°C), while the thigh and drumstick should reach a temperature of 175-180°F (79-82°C). Avoid touching any bones with the thermometer for accurate readings.
Another effective method is spatchcocking or butterflying the turkey. This involves removing the backbone so that the bird lies flat on the grill or in the oven. This technique allows for more even cooking and ensures that each part of the turkey reaches the correct temperature without overcooking any area.
Factors That Can Affect Cooking Time
Whether you’re a seasoned chef or a beginner in the kitchen, these tips will help you achieve the perfect turkey every time.
First and foremost, the size of the turkey plays a significant role in determining its cooking time. A larger bird will take longer to cook than a smaller one, so it’s crucial to plan accordingly and adjust cooking times accordingly. The general rule of thumb is to allow 13-15 minutes of cooking time per pound of turkey. However, this varies depending on the type of oven or cooking method being used.
The type of oven or cooking method can also affect cooking time. For instance, roasting a turkey in a convection oven usually takes less time than using a traditional oven. Grilling or smoking the bird also requires more time than roasting it in an oven. Therefore, it’s essential to consider which cooking method works best for your turkey and adjust your cooking times accordingly.
Another critical factor that can impact cooking time is the starting temperature of the turkey. If your bird is taken straight from the refrigerator, it will take longer to cook than if it had been allowed to come to room temperature beforehand. To ensure your bird cooks evenly, remove it from the fridge and let it sit at room temperature for at least an hour before cooking.
The amount of stuffing used in the turkey can also affect cooking time. When packing too much stuffing into the cavity of the bird, it takes longer for heat to penetrate and cook the meat thoroughly. The recommended amount is enough stuffing to fill loosely, so be mindful of this when preparing your bird.
Finally, using an accurate thermometer is crucial in achieving a perfectly cooked turkey. A thermometer that isn’t calibrated correctly can give an inaccurate reading, leading to either undercooked or overcooked meat. Therefore, it’s essential to calibrate your thermometer before use and measure the internal temperature of your turkey to ensure it’s safe to eat.
Tips for Ensuring All Parts of the Turkey Reach 165°F
Cooking a turkey is a special culinary experience, but it can be overwhelming to ensure that all parts of the bird have reached a safe internal temperature of 165°F. Here are some tips that will help you achieve this:
Use a Meat Thermometer:
A meat thermometer is an essential tool when cooking a turkey. You can insert the thermometer into the thickest part of the turkey, such as the thigh, to check for doneness. It’s important not to touch any bones as they can give you a false reading. The thermometer should read 165°F or above in all parts of the turkey.
Check Multiple Areas:
To ensure that all parts of the turkey have reached 165°F, check the temperature in multiple areas, including the breast, thigh, and wing. This is because different areas of the bird cook at different rates and temperatures.
Let it Rest:
When you remove the turkey from the oven, let it rest for at least 20 minutes before carving. This allows the juices to redistribute and ensures that all parts of the turkey are cooked evenly. Covering the turkey with foil while it rests will also help retain moisture and allow it to cook further.
Properly Thaw:
It’s important to properly thaw the turkey before cooking. If the bird is not fully thawed, certain parts may cook faster than others, resulting in some areas being overcooked while others are still undercooked. The best way to thaw a turkey is by placing it in the fridge for several days before cooking.
Consider Spatchcocking:
Spatchcocking is a technique that involves removing the backbone and flattening the bird out before roasting. This method allows for more even cooking and can help ensure all parts of the turkey reach 165°F. Plus, it allows you to cook your turkey in less time.
The Importance of Letting the Turkey Rest Before Carving
Cooking a turkey can be quite the challenge, but with the right techniques, you can create a mouthwatering and delicious bird that will impress all your guests. While it’s important to focus on getting the internal temperature to 165°F, there’s another crucial step that many people tend to overlook – letting the turkey rest before carving.
Why is it so important to let your turkey rest? Well, when you cook a turkey, the juices accumulate in the center of the bird. If you carve the turkey immediately after taking it out of the oven, those juices will spill out onto your cutting board instead of remaining inside the meat. This results in a dry and unappetizing meal. However, if you let your turkey rest for at least 20-30 minutes, those juices will redistribute throughout the meat, resulting in a more succulent and flavorful bird.
But that’s not all – letting your turkey rest is also crucial for safety. If you attempt to carve your turkey too soon, you run the risk of hot juices splashing out and potentially burning yourself or others. So, by allowing your turkey to cool down slightly, you are not only enhancing its flavor but also ensuring everyone’s safety.
To let your turkey rest properly, simply take it out of the oven and tent it with foil to keep it warm. Then, let it sit for at least 20-30 minutes before carving. During this time, you can prepare any remaining side dishes or take a well-deserved break before serving the star of the show.
sQmBbs3ULPw” >
Conclusion
In conclusion, the art of cooking a perfect turkey is not just about its appearance but also about ensuring it’s safe and delicious to eat. To achieve this, every part of the bird must reach an internal temperature of 165 degrees Fahrenheit. This rule applies uniformly to all parts, from the thickest to the thinnest portions. Using a reliable meat thermometer is essential to ensure that each piece reaches this temperature.
Cooking different parts of the turkey can be challenging, as they cook at varying rates. However, there are solutions such as spatchcocking or butterflying the turkey, using a meat thermometer in several places, and allowing it to rest before carving. Various factors can affect cooking time, such as oven type, starting temperature of the turkey, amount of stuffing used, and size of the bird.
Finally, letting your turkey rest before carving is crucial for enhancing its flavor and safety. By cooling down slightly after cooking and tenting with foil, you ensure that its juices redistribute throughout the meat resulting in a more succulent and flavorful bird.