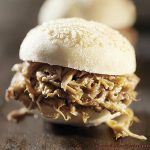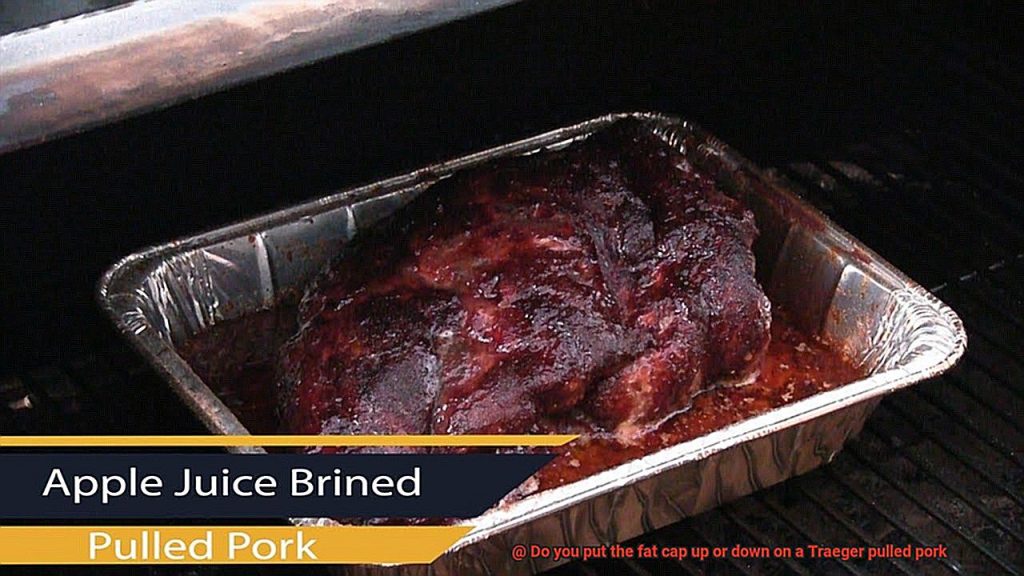
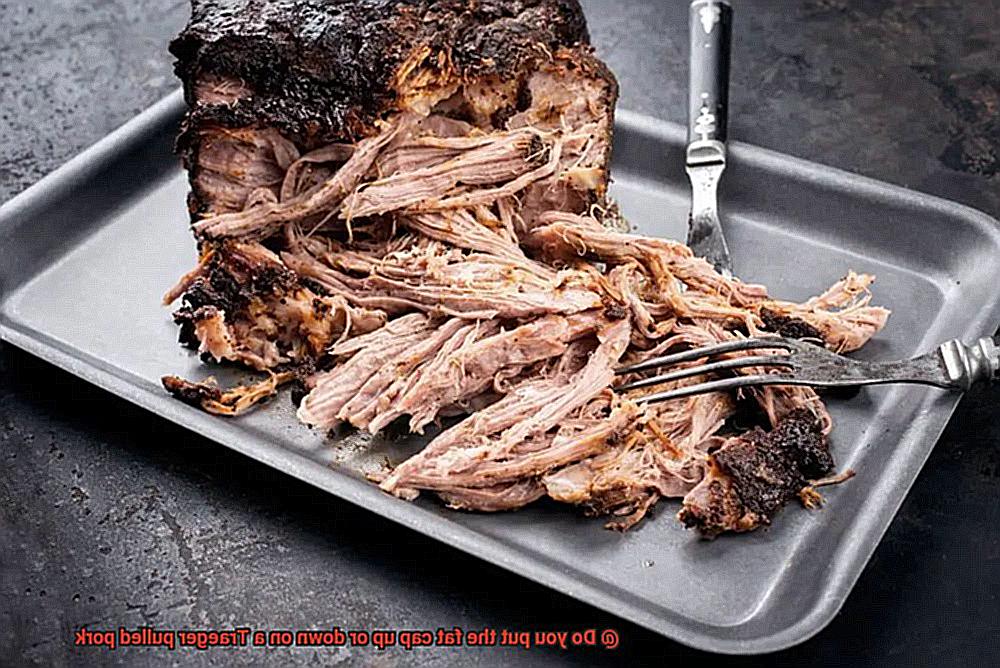
Picture this: you’re sinking your teeth into a plate of tender, juicy Traeger pulled pork. The smoky flavor dances on your tongue, and the meat practically melts in your mouth. It’s BBQ perfection. But here’s the million-dollar question for all you pitmasters and pork enthusiasts out there: do you put the fat cap up or down on a Traeger pulled pork?
In the world of Traeger grilling, fat cap placement is a hotly debated topic that can make or break your pork masterpiece. Understanding this technique is key to taking your smoking game to new heights. So let’s dive right in.
When it comes to fat cap placement, opinions are divided like rival sports teams. And just like any passionate debate, there are valid arguments on both sides. But before we jump into the great fat cap debate, let’s get acquainted with the role of the fat cap itself.
The fat cap is exactly what it sounds like—a layer of fat attached to one side of the pork cut. It acts as a natural shield, protecting the meat from drying out while infusing it with rich, flavorful goodness during cooking. However, how you position that fat cap can have a significant impact on the final result.
Get ready. We’re about to explore the benefits of placing the fat cap up and down, uncovering the secrets behind each method. By the end of this blog series, you’ll have all the knowledge you need to confidently choose your preferred approach and create mouthwatering Traeger pulled pork every single time.
Whether you’re an experienced pitmaster or just starting out on your grilling journey, this blog series will demystify proper fat cap placement for Traeger pulled pork. Get ready to elevate your culinary skills as we embark on this smoky adventure together.
Contents
What is a Fat Cap?
In the world of BBQ and grilling, a perfectly cooked, flavorful piece of meat is the ultimate goal. Achieving this mouthwatering result often involves understanding the crucial role of the fat cap. This article delves deeper into the concept of the fat cap and its significance in the world of BBQ.
The Basics: What is a Fat Cap?
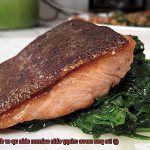
The fat cap is a natural layer of fat found on certain cuts of meat, such as pork shoulder or brisket. This layer is typically located on the side of the meat closest to the animal’s skin. Acting as a protective barrier, it adds flavor during the cooking process.
Protection and Moisture:
The fat cap serves as a shield for the meat, insulating it from direct heat and preventing it from drying out. As heat penetrates the meat, the fat cap acts as a buffer, keeping it moist and succulent. This is particularly important for larger cuts that require longer cooking times.
Flavor Infusion:
As the fat cap slowly renders and melts during cooking, it bastes the meat with its rich and savory juices. These flavorful drippings permeate the meat, enhancing its taste and resulting in a more delicious end product. The fat also contributes to a tender texture, making each bite an indulgent experience.
Choosing Your Technique:
The eternal debate among BBQ enthusiasts revolves around whether to place the fat cap up or down when cooking. Placing it up allows for better protection and moisture retention, while placing it down promotes better rendering and a flavorful bark on top. Ultimately, it boils down to personal preference and experimentation.
Tips for Success:
- Score the fat cap with a sharp knife before cooking to promote even rendering.
- Consider using a drip pan or aluminum foil to catch excess drippings if placing the fat cap down.
- Properly season your meat before cooking to enhance the flavor.
- Monitor the internal temperature of your meat to ensure perfect doneness.
- Allow your meat to rest before shredding or pulling, allowing the juices to redistribute for maximum flavor.
Placing the Fat Cap Up: Pros and Cons
Today, we’ll delve into the sizzling world of fat caps and explore the pros and cons of each method. Get ready to uncover the tantalizing secrets that will elevate your BBQ game to new heights.
Let’s start with the pros of placing the fat cap up. This method allows the fat to render and baste the meat as it cooks, resulting in a mouthwatering, juicy finished product. Imagine tender, melt-in-your-mouth pulled pork that practically falls off the bone. Plus, the fat acts as a cozy little blanket, keeping your meat moist and preventing it from drying out during longer cooking times.
But hold on, there are a few potential drawbacks to consider. Placing the fat cap up can lead to a greasier end result, which may not be everyone’s cup of tea. While some enjoy the added richness and flavor that comes from rendering fat, others may find it too heavy or overwhelming. It’s all about personal taste preferences.
That’s not all – placing the fat cap up might also hinder that coveted crispy crust on your pulled pork. No one wants a soggy exterior. When the fat cap is exposed to direct heat, it can prevent the surface of the meat from browning and developing that irresistible texture. So, if you’re all about that crispy goodness, consider placing the fat cap down.
Uneven cooking is another concern when placing the fat cap up. The fat acts as a barrier, potentially preventing heat from reaching certain areas of the meat and causing uneven doneness. To avoid any surprises, use a meat thermometer to monitor the internal temperature of your pork. We want every bite to be perfection.
In the end, it’s all about personal preference and desired outcomes. If you crave juicy, flavorful goodness with a little extra richness and moisture, go ahead and place that fat cap up. But if you’re a fan of a crispy crust and want to avoid a greasy finish, consider placing the fat cap down.
Now armed with the knowledge of fat cap placement, it’s time to fire up that Traeger grill and let your taste buds be the judge. Experiment with both methods and find what tickles your fancy and brings joy to your palate.
Placing the Fat Cap Down: Pros and Cons
Placing the fat cap down on a Traeger pulled pork has its own set of advantages and disadvantages. Let’s dive into the sizzling debate and explore the pros and cons of this mouthwatering technique.
First, let’s savor the pros. Placing the fat cap down provides a protective shield for your meat, ensuring it stays moist and succulent throughout the cooking process. Who wants dry and tough pulled pork? Not you. By keeping that fat cap down, you’re guaranteeing a juicy and tender masterpiece.
But wait, there’s more deliciousness to uncover. When the fat cap is placed down, it bathes the meat in its flavorful juices as it renders during cooking. The result? An explosion of richness and taste in every bite. It’s like a culinary symphony that dances on your taste buds. And let’s not forget about that golden brown and crunchy exterior that forms on top of your pulled pork. Placing the fat cap down encourages the creation of a crispy bark that adds texture and elevates the overall eating experience.
Now, let’s sizzle up the cons. Placing the fat cap down can potentially limit smoke penetration. We all know that smoky flavor is an essential element of BBQ, and by placing the fat cap down, you may be sacrificing some of that smoky goodness. So, if you crave that smoky kiss, consider flipping that fat cap up.
Next on the grill is uneven cooking. The fat cap acts as an insulator, causing temperature variations across different parts of the meat when placed directly on top of the heat source. You don’t want a game of culinary roulette where some areas are overcooked while others remain undercooked, do you?
Lastly, be prepared for a longer cooking time if you choose to place the fat cap down. The slow melting and rendering of the fat require patience to achieve that desired result. So, if you’re in a hurry or prefer a quicker cooking process, placing the fat cap down might not be your best bet.
Scoring the Fat Cap
Sink your teeth into a succulent, juicy piece of pulled pork, and you’ll understand why it’s a grilling favorite. Achieving that perfect balance of tenderness and flavor is an art, and one crucial step that often goes unrecognized is scoring the fat cap. In this guide, we’ll delve into the process of scoring the fat cap on pulled pork and explore why it is essential for grilling enthusiasts like yourself.
The Purpose of Scoring:
Scoring the fat cap involves making shallow cuts or scores on the surface of the fat before cooking. This technique serves two primary purposes that elevate your culinary experience. Firstly, scoring allows seasonings and flavors to permeate the meat more effectively during the cooking process.
Imagine a symphony of spices swirling through every bite of your melt-in-your-mouth pulled pork – that’s what scoring can achieve. Secondly, it helps render the fat, resulting in a delectable, crispy crust on the pork that adds texture and depth to each mouthful.
Scoring Techniques:
To score the fat cap like a pro, arm yourself with a sharp knife and exhibit a steady hand. Make shallow cuts in a crosshatch pattern across the fat’s surface, about 1/4 inch deep and spaced approximately 1 inch apart.
Be cautious not to slice too deeply into the meat, as this can lead to dry and overcooked pork. If you plan to cook with the fat cap facing up, score both sides of the pork.
However, if you prefer cooking with the fat cap down, scoring is only necessary on the top side. Some experts suggest scoring only one side regardless of cooking method for optimal seasoning penetration while still achieving that coveted crispy crust.
Seasoning and Resting:
After skillfully scoring your pork, it’s time to unleash a burst of flavor. Generously season your meat with your favorite rub or seasoning blend. The cuts created during scoring act as channels, ensuring an even distribution of these flavors throughout the meat. Once seasoned, let the pork rest for a minimum of 30 minutes before cooking. This resting period allows the flavors to infiltrate further, resulting in a truly tantalizing end product.
While scoring the fat cap is not obligatory, it is highly recommended for grilling aficionados seeking optimal flavor and texture when preparing pulled pork. It adds an extra step to your preparation process, but the results are well worth the effort. Remember to employ a sharp knife, execute clean cuts, and experiment with different scoring patterns to suit your personal preference.
So, ignite that Traeger grill, score that fat cap with confidence, and prepare to savor the mouthwatering masterpiece you’re about to create.
Using a Drip Pan or Aluminum Foil
When it comes to achieving perfectly cooked pulled pork on your Traeger grill, there’s more to consider than just the position of the fat cap. In this article, we’ll delve into the benefits and techniques of using a drip pan or aluminum foil, two popular methods that can elevate your pulled pork to new levels of succulence and flavor.
Using a Drip Pan: Capturing Juicy Goodness
- Benefits: A drip pan is a game-changer when it comes to collecting the delectable juices and drippings from your pork. Not only does it prevent flare-ups, but it also safeguards your grill from potential damage.
- Placement: Simply position the drip pan underneath the grates where the pork will be cooked. Ensure it doesn’t obstruct the crucial airflow within your grill.
- Size Matters: Opt for a drip pan that is spacious enough to catch all the mouthwatering drippings without overflowing.
- Easy Clean-up: Keep an eye on the liquid levels and discard them as needed. For an extra burst of flavor, consider adding water, apple juice, or barbecue sauce to the drip pan.
Creating a Foil Tray: Versatility at its Finest
- Embrace Aluminum Foil: Tear off a sheet of aluminum foil and use it to create a shallow tray-like shape that covers the bottom of your grill. The folded edges will hold in all the glorious juices.
- Placement: Position the foil tray directly on top of the heat deflector plates or grill grates for optimal cooking.
- Control and Convenience: Adjust or remove the foil tray as necessary to fine-tune the cooking process. Once you’re done, simply discard the foil for effortless clean-up.
Tips for Success:
- Monitor Liquid Levels: Regularly check the drip pan or foil tray to ensure it doesn’t overflow with liquid. Remove and discard excess liquid to maintain a balanced cooking environment.
- Infuse with Flavor: Enhance the taste of your pork by adding water, apple juice, or barbecue sauce to the drip pan or foil tray. As the liquid evaporates during cooking, it will infuse the meat with tantalizing flavors.
- Preheating is Key: Always preheat your Traeger grill prior to placing the pork and the drip pan or foil tray inside. This guarantees even cooking and optimal results.
Properly Seasoning Your Pork Shoulder Before Cooking
Prepare yourself for a tantalizing journey into grilling perfection. In this guide, we will unveil the essential steps to properly season your pork shoulder before cooking it on a Traeger grill. Brace yourself for a culinary adventure that will leave your taste buds begging for more.
Step 1: Selecting the Perfect Cut
Begin with a bone-in pork shoulder, also known as a pork butt. This cut is renowned for its tender and juicy flavor when slow-cooked. Before seasoning, trim any excess fat from the surface, leaving about ¼ inch intact to infuse the meat with flavor and moisture during the grilling process.
Step 2: Creating the Flavorsome Dry Rub
Now, let’s dive into the creation of a tantalizing dry rub that will enhance the taste of your pork shoulder. Start with the basics: salt, pepper, paprika, garlic powder, onion powder, and brown sugar. Feel free to experiment with additional spices or herbs to customize the rub to your liking. Generously coat the entire surface of the pork shoulder, gently massaging the rub into the meat for even distribution.
Step 3: Letting It Marinate
Allow your seasoned pork shoulder to rest in the refrigerator for at least 4 hours or overnight. This marinating period allows the flavors to penetrate deep into the meat while dehydrating the surface slightly. The result? A more flavorful end product with a delectable crust that will make your taste buds sing with joy.
Step 4: Preheating Your Traeger Grill
Get ready to fire up your Traeger grill. Preheat it according to the manufacturer’s instructions for even heat distribution. The consistent temperature provided by the Traeger grill is perfect for slow cooking meats like pulled pork. Set the temperature to around 225°F (107°C) and get ready to achieve low and slow cooking perfection.
Step 5: Placing the Pork Shoulder on the Grill
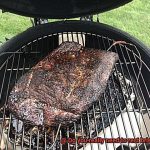
Time to showcase your perfectly seasoned pork shoulder on the grill. Place it directly on the grill grates with the fat cap facing up. This positioning allows the fat layer to render slowly, basting the meat and ensuring mouthwatering tenderness. The fat cap acts as a protective barrier, keeping the meat moist while allowing the flavors from the dry rub to infuse into every succulent bite.
Step 6: Monitoring the Internal Temperature
Keep a watchful eye on the internal temperature of your pork shoulder throughout the cooking process using a meat thermometer. The ideal temperature for succulent pulled pork is around 195°F (90°C). This ensures that the collagen in the meat breaks down, resulting in tender and easily shredded perfection that will melt in your mouth.
Monitoring Internal Temperature for Perfectly Cooked Pulled Pork
Well, get ready because we’re about to dive into the importance of monitoring the internal temperature when cooking Traeger pulled pork. Trust me, this is a game-changer.
Perfectly Cooked Pulled Pork:
Monitoring the internal temperature is essential to achieving that perfectly cooked pulled pork. It ensures that the meat is not only safe to eat but also cooked to the ideal level of tenderness. No one wants dry or undercooked pork, right? So let’s get it right every time.
Ideal Temperatures:
The recommended internal temperature for perfectly cooked pulled pork is around 195-205°F (90-96°C). At this temperature range, the collagen in the pork breaks down, resulting in tender and juicy meat that practically melts in your mouth. But remember, personal preferences may vary, so adjust accordingly.
Checking for Doneness:
To check for doneness, you’ll need a trusty meat thermometer. Insert it into the thickest part of the pork without touching any bones. This will give you an accurate reading of the internal temperature. No guesswork here. We want precise results.
Recommended Techniques:
Here are a few techniques to ensure accurate monitoring of the internal temperature throughout the cooking process:
- Use an instant-read thermometer for quick readings or a leave-in thermometer for continuous monitoring.
- Insert the thermometer probe into various parts of the meat to check for even cooking.
- Keep track of the temperature at regular intervals, especially towards the end of cooking when you’re approaching that perfect range.
Resting Period:
Once your Traeger pulled pork reaches that desired internal temperature, it’s time for a well-deserved rest. Remove it from the heat source and let it rest for about 15-30 minutes. During this time, the temperature will continue to rise slightly, and the juices will redistribute, resulting in a more flavorful and juicy pulled pork. Patience is key here.
Resting After Cooking
After hours of meticulous cooking, where you carefully monitored the temperature and added the perfect blend of flavors, there’s one crucial step that can elevate your dish to new heights of deliciousness: resting. In this article, we will delve into the significance of resting after cooking and how it can transform your culinary creations.
Resting with the fat cap up or down?
Among pitmasters, a heated debate ensues regarding whether to rest meat with the fat cap up or down. Both methods have their merits. Resting with the fat cap up acts as a protective shield, preserving the precious juices within the meat and enhancing its succulence. Conversely, resting with the fat cap down allows excess fat to melt and baste the meat, infusing it with rich flavors and tenderizing it further.
The science behind resting:
When heat is applied to meat, the proteins in its muscle fibers contract, causing moisture to be squeezed out. Resting allows these proteins to relax and reabsorb some of the lost moisture. Furthermore, during this period, carryover cooking occurs, where the internal temperature of the meat continues to rise slightly. This ensures that your desired level of doneness is achieved without risking overcooking.
Proper resting techniques:
To rest your dish properly, remove it from the heat source and place it on a cutting board or platter. Tent it loosely with aluminum foil to retain some heat while allowing for proper air circulation. Allow your creation to rest for approximately 15-30 minutes before slicing or serving.
The magic of resting:
During this resting phase, the meat continues to cook slightly as its internal temperature stabilizes. The juices redistribute throughout the meat, resulting in a moist and tender final product. Additionally, resting allows flavors to meld and develop, intensifying the overall taste experience.
DFpJKwz3McE” >
Conclusion
When it comes to cooking pulled pork on a Traeger, the debate over whether to put the fat cap up or down is a hot topic. But fear not, because I’m here to settle this sizzling dispute once and for all.
Picture this: you’ve got a beautiful piece of pork shoulder, marinated to perfection, ready to be transformed into succulent pulled pork. Now, what do you do with that fatty layer on top? Some say you should place it facing up, allowing the fat to baste the meat as it cooks. Others argue that flipping it over ensures a more tender and flavorful result.
Let’s break it down. Placing the fat cap up can indeed help keep the meat moist during the cooking process. As it renders down, the fat will slowly melt and drip onto the meat, adding an extra layer of juiciness. Plus, some people enjoy the crispy texture that forms on top when cooked this way.
On the flip side (pun intended), putting the fat cap down has its merits too. By doing so, you allow the heat from your Traeger grill to penetrate directly into the meat fibers, resulting in a more even cook throughout. This method can also help prevent any excessive charring or burning on top.
So which approach should you take? Ultimately, it boils down to personal preference. If you’re looking for that extra dose of moisture and don’t mind sacrificing a bit of crispiness, go ahead and leave that fat cap up. But if you prioritize tenderness and an evenly cooked piece of pulled pork, then flipping it over might be your best bet.
In conclusion, there’s no right or wrong answer when it comes to placing the fat cap up or down on your Traeger pulled pork. It all depends on your desired outcome and taste preferences.