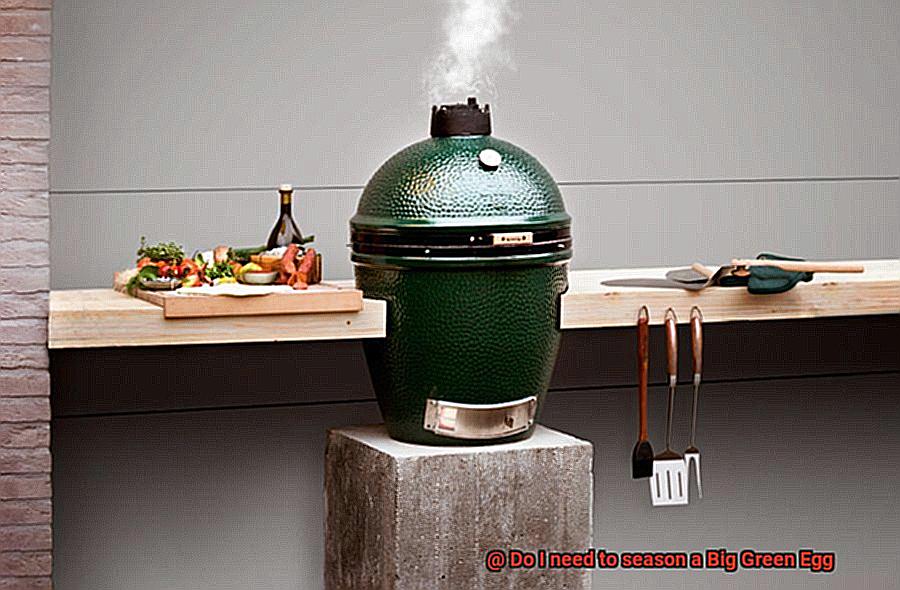
This bad boy is like the Swiss Army knife of outdoor cookers, promising deliciousness and versatility in every bite. But as you unbox this grilling gem, a burning question sizzles in your mind: “Do I really need to season my Big Green Egg?”
Ah, seasoning – that magical process that turns your cooking equipment into a non-stick wonderland. It’s like giving your grill a spa day, pampering it with oils and heat until it’s ready to rock those ribs and char those burgers. But here’s the thing: when it comes to seasoning a Big Green Egg, people can’t seem to agree.
Well, fear not. In this no-nonsense guide, we’re diving headfirst into the age-old debate surrounding Big Green Egg seasoning. We’ll dish out all the juicy details about its benefits and potential drawbacks, so you can make an informed decision without breaking a sweat.
So, grab your favorite spatula and let’s embark on this flavorful journey through the world of Big Green Egg seasoning together.
Contents
Benefits of Seasoning a Big Green Egg
While the Egg is known for its exceptional performance, there is one step that can take your grilling experience to the next level: seasoning. In this article, we will explore the benefits of seasoning a Big Green Egg and why it’s worth the effort.
Enhanced Flavor:
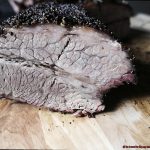
Seasoning your Big Green Egg can help you savor mouthwatering grilled dishes infused with a rich, smoky flavor. Similar to cast iron cookware, the ceramic surface of the Egg develops a natural non-stick coating over time as it absorbs oils and fats from cooking. This seasoning process not only prevents food from sticking but also imparts that irresistible smoky taste to your grilled creations.
Improved Heat Distribution:
Consistency is key when it comes to grilling, and seasoning plays a crucial role in achieving even heat distribution. The layers of carbonized oil created during seasoning act as a barrier between the ceramic surface and the food being cooked, ensuring that heat is evenly distributed throughout the cooking process. Say goodbye to hot spots or cold areas that may compromise the quality of your meals.
Rust and Corrosion Prevention:
Preventing rust and corrosion is essential for maintaining your Big Green Egg’s longevity. By seasoning your grill, you create a protective layer with the oil acting as a shield against moisture. This becomes particularly important if you live in a humid climate or frequently expose your Egg to moisture.
Increased Durability:
Investing in a Big Green Egg means investing in a grill that is built to last. By regularly seasoning your Egg, you are taking proactive steps to extend its lifespan. The oil used during the seasoning process helps seal and protect the ceramic shell, reducing the risk of cracking or deterioration over time. Proper care and maintenance through seasoning ensure that you’ll enjoy the exceptional grilling capabilities of your Egg for years to come.
Easy Cleanup:
Grilling should be a joy from start to finish, and seasoning your Big Green Egg can make cleanup a breeze. The seasoned surface becomes naturally non-stick, allowing food residue to release easily with minimal scrubbing or scraping. Leftover oils and fats from previous cooks also contribute to this protective layer, making your cleanup routine quicker and more efficient.
The Process of Seasoning a Big Green Egg
Before you start grilling up a storm, it’s essential to season your cooker. Seasoning is a crucial step in preparing the ceramic cooking surface, ensuring optimal flavor and hassle-free cooking. In this comprehensive guide, we’ll walk you through the process of seasoning, providing step-by-step instructions to unlock the full potential of your Big Green Egg.
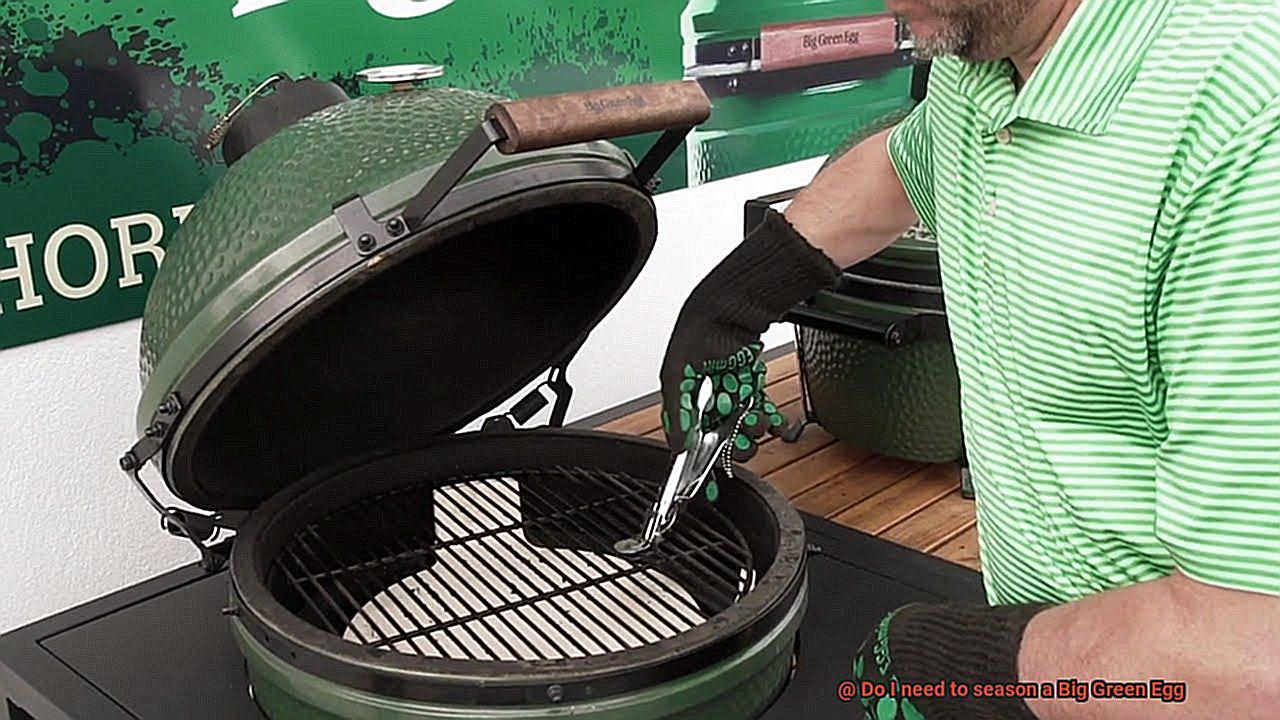
Step 1: Clean the Cooking Surface
Begin by giving your Big Green Egg some TLC. Use a brush or sponge to gently remove any dust or debris from both the inside and outside of the cooker. This step ensures optimal heat retention and prevents unwanted particles from sticking to your food.
Step 2: Apply a Thin Layer of Oil
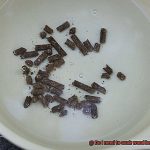
Now it’s time to create that protective layer on the ceramic surface. Grab your favorite cooking oil or cooking spray and apply a thin, even coat to the entire surface of the Big Green Egg, inside and out. This layer will prevent food from sticking and make cleaning a breeze.
Step 3: Spread and Remove Excess Oil
Using a paper towel or cloth, spread the oil evenly across the cooking surface. Be sure to remove any excess oil as well, as too much can cause unwanted smoke and an unpleasant taste. We want the perfect balance here.
Step 4: Light Up and Heat It Up
Once your Big Green Egg is seasoned with oil, it’s time to fire things up. Light up the charcoal in your cooker and let it burn for about 20 minutes until it reaches a temperature of around 400°F (200°C). Keep the lid closed during this time to allow even heat distribution throughout the cooker.
Step 5: Cool Down and Repeat
After 20 minutes, open the lid and let the cooker cool down completely. Once it’s cooled, repeat the seasoning process – cleaning, oiling, spreading, and heating – three to four times. Each repetition builds up layers of protection on the ceramic surface, enhancing flavor and ensuring a non-stick grilling experience.
Step 6: Regular Maintenance
Seasoning your Big Green Egg is not a one-time deal. To maintain its optimal condition, regular cleaning and re-seasoning are necessary. After each use, clean the cooking surface with a brush or sponge, and if needed, reapply a thin layer of oil before your next grilling session. This simple maintenance routine will prolong the lifespan of your Big Green Egg and guarantee consistently delicious results.
Heating the Grill to Complete the Seasoning Process
To take your grilling game to the next level, it is crucial to properly season your grill. Seasoning not only protects your grill from rust but also enhances the flavors of your food and ensures optimal cooking results. In this comprehensive guide, we will walk you through the steps of heating your Big Green Egg to complete the seasoning process, unlocking its full flavor potential.
Step 1: Prepare for Heating
To begin, ensure that all vents on your Big Green Egg are open and the lid is slightly ajar. This allows for proper airflow and prevents excessive heat buildup during the seasoning process.
Step 2: Ignite the Charcoal Using a Chimney Starter
For even and quick heating, it is best to use a chimney starter. Fill the chimney starter with charcoal and place crumpled newspaper or fire starters underneath. Light the newspaper or fire starters and let the charcoal burn for approximately 15-20 minutes until it turns gray and ashy.
Step 3: Distribute Charcoal and Close the Lid
Carefully pour the hot charcoal into the firebox of your Big Green Egg, ensuring even distribution. Close the lid of the grill and let it heat up for at least 20-30 minutes. During this time, the temperature inside will gradually increase and stabilize.
Step 4: Reach Optimal Temperature
Aim for a temperature of around 400-500 degrees Fahrenheit while seasoning your Big Green Egg. This high heat opens up the pores of the ceramic material, allowing better absorption of oils during the seasoning process. Adjust the vents as needed to regulate airflow, keeping an eye on the temperature gauge.
Step 5: Maintain Heat for 1-2 Hours
Once your grill reaches the desired temperature, maintain it for 1-2 hours. This extended period allows the ceramic material to fully absorb the oils and develop a seasoned coating. Remember to keep the lid closed as much as possible to retain heat and prevent sudden temperature fluctuations.
Step 6: Cool Down Naturally
After the recommended seasoning time has passed, carefully open the lid of your Big Green Egg and allow it to cool down naturally. Avoid using water or any cooling methods that may cause thermal shock to the ceramic material.
Is Re-seasoning Necessary?
One of the hottest debates in the world of grilling revolves around the question of whether re-seasoning a Big Green Egg is necessary or not. Grill enthusiasts have divided opinions on this matter, with some vehemently arguing that if the Egg has been properly seasoned during its initial use, re-seasoning is unnecessary. On the other hand, proponents of re-seasoning firmly believe that over time, the seasoning may wear off or become less effective, leading to food sticking to the surface. So, let’s delve into the pros and cons of re-seasoning to help you make an informed decision.
Pros of Re-seasoning:
- Restoring the Non-Stick Surface: Re-seasoning can work wonders in restoring the non-stick surface of your Big Green Egg. Over time, constant use and cleaning can cause the seasoning to wear off or become less effective. By re-seasoning, you can rejuvenate the cooking surface and prevent food from sticking, ensuring a smooth grilling experience.
- Removing Build-up and Residue: If you’ve noticed a significant build-up of residue or a dry, flaky surface on your cooking grate, re-seasoning can be a game-changer. The process involves thorough cleaning of the surface and applying a fresh layer of oil or fat. This not only enhances the flavor of your grilled delicacies but also improves the overall cooking experience by eliminating any unwanted texture caused by residue.
Cons of Re-seasoning:
- Time-Consuming Process: Re-seasoning can be quite time-consuming. It entails cleaning the cooking surface meticulously, applying a new layer of oil or fat, and heating the Egg to allow the seasoning to bond with the surface. For those who are frequent grillers and value their precious time, this additional step may not be worth the investment.
- Proper Maintenance Can Suffice: Opponents of re-seasoning argue that as long as you follow proper cleaning and maintenance practices after each use, re-seasoning is unnecessary. Regular cleaning and brushing of the cooking surface can effectively remove any food particles or residue that may affect the seasoning. With diligent upkeep, they believe that re-seasoning may not offer significant benefits.
Ultimately, the necessity of re-seasoning depends on personal preference and the condition of your Big Green Egg. If you notice significant wear or build-up, re-seasoning may prove to be beneficial in reviving the non-stick properties. However, if you already have a well-maintained Egg that undergoes regular cleaning, re-seasoning may not offer significant advantages.
Tips for Re-seasoning a Big Green Egg
If you want to be a true grill master and cook up mouthwatering dishes on your Big Green Egg, it’s important to know how to properly re-season it. Re-seasoning is like giving your grill a luxurious spa day, rejuvenating it and ensuring it’s ready to deliver the tastiest treats.
Step 1: Thoroughly Clean Your Big Green Egg
Before you can begin re-seasoning, it’s essential to give your Big Green Egg a deep clean. Remove any leftover charcoal, ash, or lingering remnants from your previous cookout. To tackle those stubborn bits stuck on the grates, arm yourself with a specialized grill brush or scraper and scrub away until the surfaces are gleaming and free of debris.
Step 2: Rinse Away the Residue
Once you’ve completed the cleaning process, it’s time to give your Big Green Egg a refreshing rinse with water. However, remember to avoid using any soap or chemicals during this step. You want your food to taste delightfully delicious, not soapy.
Step 3: Dry Thoroughly
Now that you’ve rinsed away the dirt and grime, make sure to dry your Big Green Egg meticulously. You can either let it air dry naturally or grab a cloth or some paper towels to absorb any remaining moisture. Ensuring your grill is completely dry will prevent any potential rust from forming.
Step 4: Apply a Protective Layer of Oil
It’s time for the fun part – oiling up your grill. Select a cooking oil with a high smoke point, such as vegetable or canola oil, and apply a thin layer all over the grates and other surfaces of your Big Green Egg. This not only helps protect against rust but also aids in creating that sought-after non-stick goodness.
Step 5: Heat Things Up for Optimal Re-Seasoning
Now it’s time to ignite the fire and let your Big Green Egg work its magic. Start by lighting a small amount of charcoal and allow it to burn until it reaches a scorching temperature. Close the lid and let the grill heat up for approximately 30 minutes to an hour. This allows the oil or spray to burn off, creating a beautifully seasoned layer on the grates.
Step 6: Cool Down and Get Ready to Grill
After heating up, it’s crucial to let your Big Green Egg cool down completely before you start grilling. This ensures that the seasoning layer sets properly, providing optimal performance for your cooking endeavors. Once your grill has cooled down, you’re all set to unleash your culinary creativity and savor the delectable dishes that await you.
How to Clean and Maintain Your Big Green Egg
The Big Green Egg is a versatile and high-quality grill that can help you create mouthwatering meals. To keep your Big Green Egg in top shape and ensure it continues to deliver amazing flavors, regular cleaning and maintenance are key. In this comprehensive guide, we’ll walk you through the necessary steps to clean and maintain your Big Green Egg like a pro.
Cleaning the Exterior:
Begin by cleaning the exterior of your Big Green Egg to keep it looking its best. Mix mild soap with warm water and use a soft cloth or sponge to gently wipe down the surface of the grill, removing any dirt or grime. Avoid abrasive cleaners or scrub brushes that may damage the ceramic coating. Rinse off any soap residue with water for a sparkling clean exterior.
Cleaning the Interior:
After each grilling session, it’s important to clean the interior of your Big Green Egg to remove leftover food particles and grease. Allow the grill to cool completely before starting. Use a grill brush or scraper to remove any stuck-on residue from the grates. You can also use a damp cloth or paper towel to wipe down the interior surfaces, ensuring a clean cooking environment for your next meal.
Removing Ash:
Regularly removing ash from your Big Green Egg is essential for proper airflow and heat distribution. Once the grill has cooled down, use an ash tool or a vacuum with an ash removal attachment to carefully scoop out the ash from the bottom of the grill. Remember to empty the ash into a designated container for easy disposal.
Preventing Rust:
To prevent rust on the metal components of your Big Green Egg, it’s crucial to keep them dry and protected from moisture. After cleaning, ensure all parts are thoroughly dry before reassembling the grill. If you notice any signs of rust, use steel wool or a wire brush to gently remove it, and then apply a high-temperature paint or spray-on rust protector for added protection.
Maintaining the Gasket:
The gasket on your Big Green Egg plays a crucial role in maintaining airflow and temperature control. To keep it in tip-top shape, avoid using excessive force when closing the lid and regularly inspect it for signs of wear or damage. If needed, you can easily replace the gasket with a new one to ensure optimal performance and lock in those delicious flavors.
IeShI-XDREM” >
Conclusion
In conclusion, seasoning your Big Green Egg is a game-changer. It’s not just about slapping some oil on the surface – it’s a process that brings out the best in your grill. By taking the time to season, you’ll be rewarded with mouthwatering flavors, even heat distribution, and a grill that stands the test of time.
Why should you bother seasoning? Well, for starters, it amps up the taste of your grilled dishes to a whole new level. Imagine sinking your teeth into perfectly seasoned meats and veggies bursting with flavor. That’s what seasoning can do for you.
But it doesn’t stop there. Seasoning also helps prevent rust and corrosion, ensuring that your Big Green Egg remains in pristine condition for years to come. Plus, it makes cleanup a breeze – no more scrubbing away stubborn grime after every cookout.
So how do you go about seasoning this beast of a grill? It’s simple. Start by giving it a thorough cleaning – get rid of any gunk or debris that might be lurking on the cooking surface. Then, apply a thin layer of oil to protect against rust and create that non-stick goodness.
Spread and remove any excess oil – we want just enough to work its magic without turning our grill into an oily mess. Now comes the fun part: crank up the temperature and let your Big Green Egg reach its full potential. The heat will help seal in the flavors and create that perfect non-stick surface we all crave.
Once you’ve achieved grilling greatness, let your grill cool down before repeating the process multiple times. This ensures that every nook and cranny is properly seasoned, leaving no stone unturned when it comes to flavor perfection.
Now here’s where things get interesting – re-seasoning. Some say it’s unnecessary, but trust us when we say it can bring new life to your grill. Re-seasoning helps restore that non-stick surface and gets rid of any build-up or residue that might have accumulated over time.
But we get it, time is precious. So whether you decide to re-season or not ultimately depends on your personal preference and the condition of your Big Green Egg. Just remember, a little extra effort goes a long way in keeping your grill in top shape.
And let’s not forget about regular cleaning and maintenance. It’s like giving your grill a spa day – pampering it so it can perform at its best.