It’s that time of year again, and the holiday season is just around the corner. If you’re planning on cooking up a turkey feast for your loved ones, you might be wondering whether to cook your bird breast side up or breast side down.
This question has been asked by countless home cooks, and it’s an important one too. A poorly cooked turkey can ruin your entire meal, leaving your guests feeling disappointed and hungry. That’s why we’re here to help settle the debate once and for all.
In this article, we’ll explore the pros and cons of each cooking method and how they affect the flavor and texture of your turkey. Whether you prefer a juicy breast or crispy skin, we’ve got you covered with tips and tricks to ensure your turkey is cooked to perfection.
So whether you’re a seasoned pro or a newbie in the kitchen, keep reading to discover everything you need to know about cooking a turkey breast side up or breast side down. Get ready to impress your guests with a deliciously cooked bird this holiday season.
Contents
What is the Difference Between Breast Side Up and Breast Side Down?
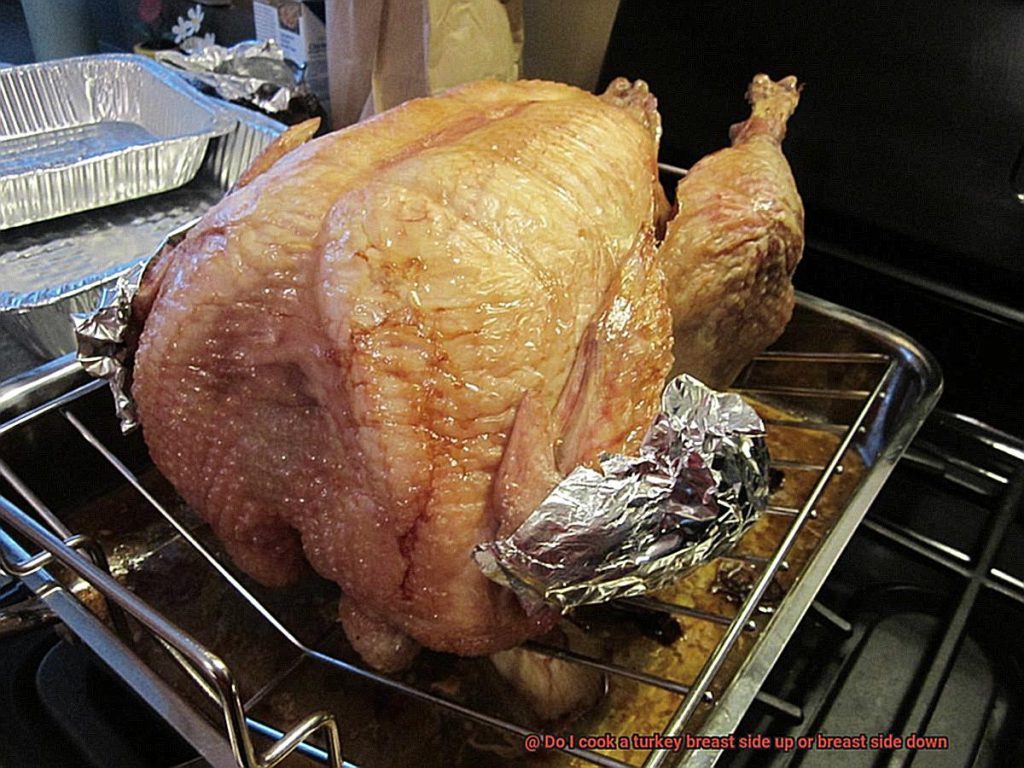
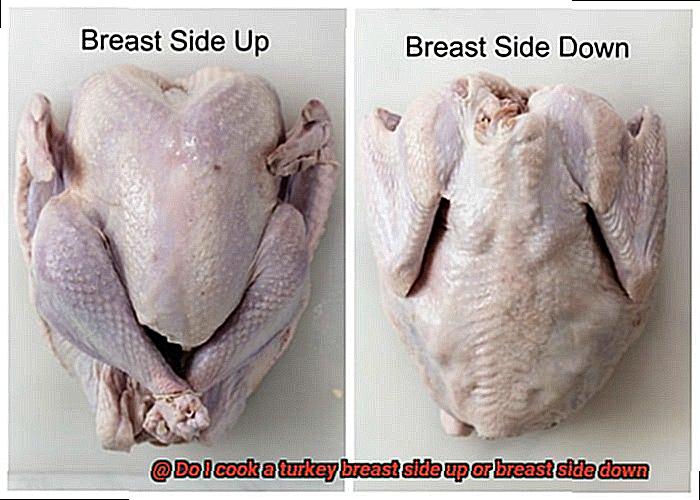
When it comes to cooking a turkey, the age-old question of whether to cook it breast side up or breast side down has sparked many debates. The differences between these two methods are significant and lie in the way heat is distributed throughout the bird.
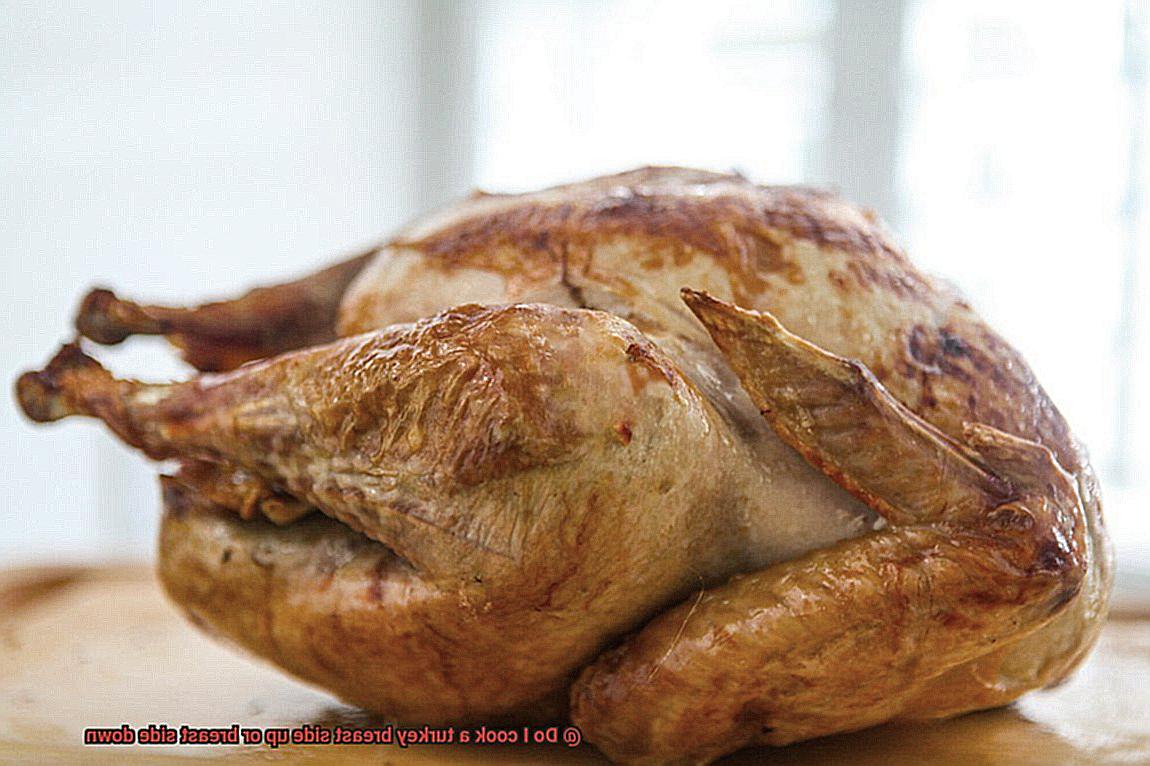
Cooking a turkey breast side up exposes the breasts to more heat, which can cause them to dry out faster than the legs and thighs. However, this method results in evenly browned breasts with crispy skin that are easy to carve.
On the other hand, cooking a turkey breast side down allows the dark meat juices to drip down into the breasts, making them more moist, tender, and flavorful. This method also helps protect the white meat from drying out.
Although some people argue that cooking a turkey breast side down can result in soggy skin, this can be quickly remedied by flipping the turkey over for the last 30 minutes of cooking to crisp up the skin.
Ultimately, the decision of whether to cook a turkey breast side up or breast side down depends on personal preference and cooking style. If you prefer juicy, flavorful meat, then cooking breast side down may be your preferred method. However, if you want crispy skin and don’t mind sacrificing some moisture in the breasts, then cooking breast side up may be your go-to.
To ensure your turkey cooks evenly and stays moist, follow these general tips: First, season your bird generously with salt and pepper before roasting. You can also add flavor by brushing it with melted butter or oil. Additionally, basting your turkey regularly throughout the cooking process will help keep it moist and juicy. Lastly, let your turkey rest for at least 15-20 minutes before carving so that the juices can redistribute throughout the meat.
Pros and Cons of Cooking a Turkey Breast Side Up
As the holiday season approaches, the age-old debate about whether to cook a turkey breast side up or down has resurfaced. As an expert in the field, let’s delve into the pros and cons of cooking a turkey breast side up.
Starting with the positive, cooking your turkey breast side up can result in beautifully browned skin, moist meat, and easy carving. The even browning of the skin is a major appeal for many people, providing an attractive golden hue that looks appetizing. Furthermore, the natural juices flow towards the breast when cooked this way, keeping it juicy and flavorful. This is a surefire way to impress your guests with a deliciously moist bird.
In addition to its visual appeal, cooking your turkey breast side up allows for easy carving. With the meat already facing upward, it’s easier to see where to make your cuts and serve up those perfect slices. This is especially helpful for those who may be new to carving a turkey.
However, there are some downsides to cooking your turkey breast side up as well. One of the main concerns is uneven cooking, with the legs and thighs taking longer to cook than the breast. This can lead to dry, overcooked breast meat and undercooked thighs, which can be disappointing for those who prefer their turkey cooked evenly. Additionally, because the thighs are not facing upwards, they may become drier than the rest of the bird.
Ultimately, it comes down to personal preference when deciding whether to cook your turkey breast side up or down. If you value beautifully browned skin and moist meat over perfectly cooked thighs, then cooking your turkey breast side up may be a great option for you. However, if you prioritize evenly cooked meat and don’t want to risk overcooking any part of your bird, then cooking it breast side down may be more suitable.
Pros and Cons of Cooking a Turkey Breast Side Down
As Thanksgiving approaches, the question on how to cook a turkey is a topic of discussion once again. One of the most debated methods is whether to cook it breast side up or down. As an expert in the field, I’m here to break down the pros and cons of cooking a turkey breast side down.
Let’s start with the advantages. Cooking a turkey breast side down allows the juices from the back and dark meat to flow down into the breast meat, which results in moist and flavorful meat. This also ensures that the dark meat, which takes longer to cook, will be fully cooked while keeping the white meat juicy. Additionally, cooking breast side down can result in a beautifully browned skin on the back of the turkey which adds to its presentation.
On the other hand, there are some drawbacks to consider as well. One issue is that the breast meat may not brown as evenly as it would if it were cooked breast side up. But fear not. You can easily remedy this by flipping the turkey over during the last 30 minutes of cooking to crisp up the skin on the breast. Another thing to keep in mind is that because the breast meat isn’t directly exposed to the heat source, it may take longer to cook. However, with a little patience and proper care, your turkey will cook perfectly.
It’s important to remember that no matter how you choose to cook your turkey, proper food safety practices must always be followed. The internal temperature of the turkey should reach at least 165°F (74°C) in the thickest part of the meat, and any stuffing should also reach this temperature before being consumed.
So, what are some subtopics worth considering? First, it’s essential to know your recipe and cooking method so you can decide what works best for you. Second, flipping a turkey over during cooking can help with even browning and result in crispy skin on both sides. Third, while cooking a turkey breast side down may take longer, it’s important to remember that patience is key and the end result will be worth it.
Tips for Cooking a Turkey Breast Side Up
Cooking a turkey breast side up can be a daunting task, but with the right tips, it’s easy to achieve a juicy and flavorful turkey that will impress your guests. Here are five sub-sections with tips to help you cook a perfect turkey breast side up.
Properly Prepare the Turkey
Before cooking the turkey, it’s essential to properly prepare it. This includes removing any giblets or organs from the cavity, rinsing it under cold water, and patting it dry with paper towels. By doing this, you’ll remove any excess moisture and ensure the skin crisps up nicely.
Season the Turkey
Seasoning is key when it comes to making a delicious turkey. Popular options include garlic, rosemary, thyme, and sage. Rub the seasonings on the outside of the turkey and inside the cavity to infuse maximum flavor. You can also add butter or olive oil under the skin for added moisture and flavor.
Use a Roasting Pan with a Rack
Using a roasting pan with a rack ensures even cooking and prevents sticking. It’s also recommended to add some liquid to the bottom of the pan for added moisture and flavor. Water, chicken broth, or wine are all great options.
Check Internal Temperature
Checking the internal temperature of the turkey is crucial for ensuring it’s cooked thoroughly and safely. Use a meat thermometer to check the temperature in the thickest part of the turkey breast. The temperature should reach 165°F (75°C) for safe consumption.
Allow Rest Time
Once your turkey is fully cooked, allow it to rest for at least 15-20 minutes before carving. This gives time for the juices to redistribute throughout the meat, resulting in a more tender and flavorful turkey.
Tips for Cooking a Turkey Breast Side Down
This method has several benefits, including keeping the meat from drying out and helping the skin stay crispy. Here are some tips to help you cook your turkey breast side down successfully.
First, make sure your turkey is clean and dry before cooking. This will help ensure that the seasonings stick to the skin and that the turkey cooks evenly. After removing any giblets or organs from the cavity, pat the turkey dry with paper towels.
Next, season your turkey generously with salt, pepper, or any other desired seasonings. If you choose to stuff your turkey, wait until after seasoning it to do so.
Then, place the turkey in a roasting pan breast side down. This allows the juices from the bird to run down into the breast meat, keeping it moist and flavorful. Be sure to position the legs towards the back of the oven.
Cook the turkey in a preheated oven at 325°F (160°C) for about 15 minutes per pound or until a meat thermometer inserted into the thickest part of the breast reads 165°F (74°C). Check on it periodically to ensure that it’s not overcooking.
Once the turkey is cooked, remove it from the oven and carefully flip it over so that the breast side is facing up. Let it rest for at least 15 minutes before carving. This allows time for the juices to redistribute throughout the meat, resulting in tender and flavorful slices.
Best Practices for Roasting a Turkey
Roasting a turkey can be a daunting task, but with the right techniques, you can achieve a mouth-watering turkey that will leave your guests impressed. The first thing to consider is whether to cook the turkey breast side up or down. While both methods have their advantages and disadvantages, it ultimately comes down to personal preference.
Cooking the turkey breast side up allows for even browning and a quicker cooking time for the breast meat. However, there is a risk that the breast meat may dry out due to direct heat exposure. On the other hand, cooking breast side down allows for the juices from the dark meat to drip down into the breast meat, resulting in a moist and flavorful bird. However, the downside is that the skin on the breast may not brown as well.
Regardless of which method you choose, there are some crucial best practices to keep in mind when roasting a turkey. Firstly, ensure that your turkey is fully thawed before cooking. This can take several days in the refrigerator, so plan accordingly. Once your turkey is thawed, remove any packaging or giblets from inside the bird and pat dry with paper towels.
Next, season your turkey inside and out with salt and pepper, along with any other herbs or spices you prefer. For extra flavor, stuff the cavity with aromatics like onions, garlic or herbs.
When it’s time to cook your turkey, preheat your oven to 325°F and place it in a roasting pan. If you’re cooking your turkey breast side up, tuck the wings under the body and tie the legs together with kitchen twine. If you’re cooking breast side down, place it on a rack so that it doesn’t sit in its own juices.
It’s crucial to monitor the temperature of your turkey throughout the cooking process. Use a meat thermometer and insert it into the thickest part of the thigh without touching the bone – when it reaches 165°F, your turkey is done. The cooking time can vary from 2-4 hours depending on the size of your bird.
Once your turkey is cooked, let it rest for at least 15 minutes before carving. This allows the juices to redistribute throughout the meat, resulting in a moist and flavorful turkey.
How to Baste a Turkey Properly
Basting is the secret to achieving a moist and flavorful bird. The process involves brushing or spooning melted butter or pan juices over the turkey while it cooks. This step adds flavor, moisture, and helps the bird brown evenly. In this article, we will guide you through the proper way of basting a turkey with five sub-sections.
Preparation
Start by preheating your oven to the desired temperature. Melt some butter in a small saucepan or microwave-safe bowl.
Positioning
Remove the turkey from the oven and carefully tilt it so that the juices in the cavity run out into the roasting pan.
Basting
Brush or spoon the melted butter over the turkey, making sure to cover all surfaces. Be careful not to disturb any crispy skin that has formed.
Frequency
Return the turkey to the oven and repeat this process every 30 minutes or so until it’s fully cooked. It is important not to overdo it with basting as opening the oven door too frequently can cause the temperature to drop and affect cooking times. Aim for no more than 3-4 basting sessions during cooking.
Variations
In addition to butter, you can also baste your turkey with other liquids such as wine, broth, or fruit juice for added flavor. You can also add herbs and spices to your basting mixture for extra flavor.
Aside from proper basting techniques, choosing how to position your turkey can also affect basting frequency. If you cook your turkey breast side up, you’ll need to baste it more often than if you cook it breast side down. This is because juices tend to pool in the bottom of the pan when it’s breast side up, making it harder for them to reach the breast meat. Basting every 30 minutes can help prevent the breast meat from drying out.
On the other hand, cooking your turkey breast side down can result in a moister bird without the need for constant basting. When cooked breast side down, the juices from the dark meat seep into the breast meat, keeping it moist and flavorful. Regardless of which method you choose, be sure to season your bird generously with salt and pepper before roasting.
How to Let Your Turkey Rest Before Carving
Cooking a turkey is an art, and letting it rest properly before carving is just as important as cooking it properly. Resting allows the juices to redistribute throughout the meat, resulting in a more flavorful and tender bird. Here’s how you can let your turkey rest before carving:
Time Matters
After your turkey has reached the desired internal temperature, remove it from the oven and let it rest for at least 20-30 minutes before carving. This gives the meat time to relax and allows the juices to settle, making it easier to carve and ensuring that each slice is moist and delicious. Tent the turkey with foil to keep it warm during this time.
Remove Stuffing
Before carving your turkey, make sure to remove any stuffing from the bird. Leaving the stuffing in can cause bacteria to grow, which can be harmful if consumed. Instead, scoop the stuffing out into a separate dish and serve it alongside the turkey.
Carve in a Separate Location
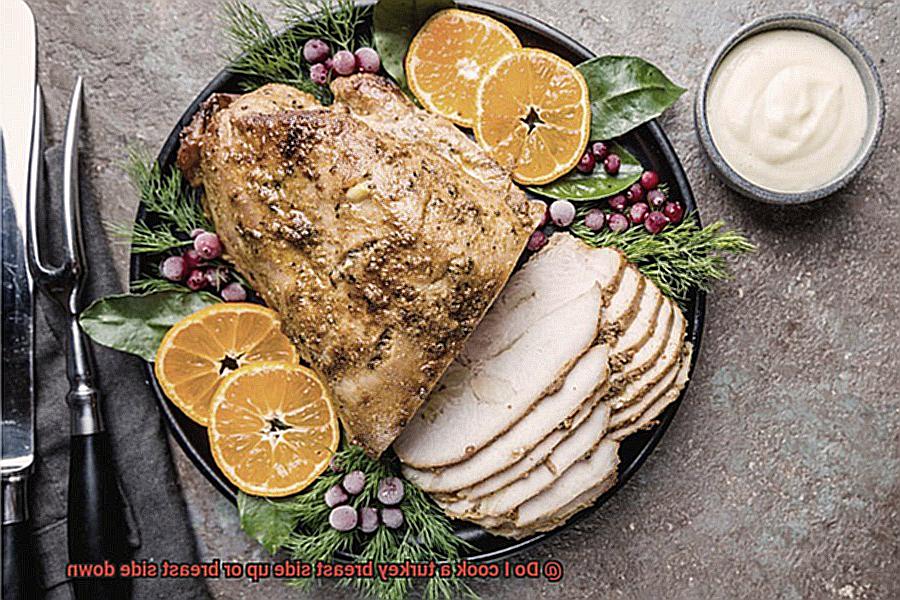
When it’s time to carve your turkey, start by removing the legs and wings using a sharp knife to make clean cuts and avoid tearing the meat. Then, slice across the breast meat, making sure to cut against the grain to ensure tenderness. It’s best to carve the turkey in a separate location than where it was cooked, as this will prevent any residual heat from affecting its texture or flavor.
Finish Sides and Gravy
While your turkey is resting, take advantage of this opportunity to finish up any last-minute side dishes or gravy. You can use a meat thermometer to check the internal temperature of the turkey again just before carving to ensure that it has remained within a safe temperature range.
Tent with Foil
To let your turkey rest properly, place it on a cutting board or serving platter, and tent it with foil to keep it warm. However, make sure not to wrap the foil too tightly, as this can cause the skin to become soft and soggy.
Personal Preference
The method of cooking a turkey breast up or down, and how long you let it rest before carving comes down to personal preference. Some people swear by one method or the other, while others have had success with both. If you’re unsure which way to go, consider trying both methods and seeing which one produces a turkey that’s more to your liking.
6PoZeaL1_c0″ >
Conclusion
When it comes to cooking a turkey, the age-old question of whether to cook it breast side up or down is a common concern. While there are valid arguments for both methods, ultimately, it comes down to personal preference and the desired outcome.
Cooking the turkey breast side up allows for a crispy golden brown skin on top, while cooking it breast side down results in a moist and juicy bird. Whichever method you choose, be sure to properly prepare your turkey by seasoning it well and using a meat thermometer to ensure it reaches the appropriate internal temperature.
In the end, the decision of how to cook your turkey will depend on your taste preferences and desired outcome. So go ahead and experiment with both methods until you find what works best for you.