There’s something about the slow rotation of a spit, the sizzling sound of meat juices hitting hot coals, and the heavenly aroma of perfectly roasted meat that makes rotisserie cooking an irresistible outdoor cooking technique. But can you achieve this on a Weber BBQ? Absolutely. The iconic grilling brand offers several models of charcoal and gas grills that can accommodate rotisserie attachments.
Adding a Weber rotisserie attachment to your grill opens up a whole new world of flavors and textures. You can infuse meats with rich flavors, achieve perfect browning and crispy skins, and evenly distribute heat for succulent and juicy results. Whether you’re grilling a whole chicken, leg of lamb, or prime rib, a Weber rotisserie attachment can help you achieve mouth-watering perfection with minimal effort.
In this blog post, we’ll explore the various Weber BBQ models that are compatible with rotisserie attachments, the types of attachments available, and some tips on how to get the most out of your Weber rotisserie experience. So grab your apron and tongs because we’re about to dive into the delicious world of Weber rotisserie cooking.
Contents
How to Set Up Your Weber BBQ for Rotisserie Cooking
Rotisserie cooking is a delicious way to cook meat that results in a crispy outer layer and juicy, tender interior. With the right tools and preparation, you can easily set up your Weber BBQ for rotisserie cooking and impress your friends and family with mouth-watering meals.
Get a Rotisserie Attachment
The first step in setting up your Weber BBQ for rotisserie cooking is to get a compatible rotisserie attachment. This attachment usually comes with a motor, spit rod, and forks to hold the food in place. Make sure to purchase an attachment that fits your specific Weber BBQ model.
Remove Cooking Grates and Set Up Attachment
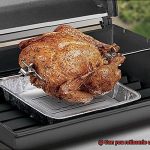
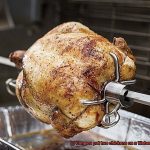
Once you have the rotisserie attachment, remove the cooking grates from your grill and place the attachment in the center of the grill. Attach the spit rod to the motor and insert it into the center of the meat. Ensure that the meat is balanced on the spit rod so that it rotates evenly during cooking. Adjust the forks on either side of the meat until it is secure.
Prepare for Indirect Cooking
Rotisserie cooking requires indirect heat, so you’ll need to set up your grill accordingly. Turn on all burners and let the grill preheat for about 10-15 minutes. Then, turn off one side of the burners and place a drip pan on that side to catch any juices that fall from the meat.
Start Rotisserie Cooking
Once your grill is set up for indirect cooking, attach the rotisserie spit with the meat securely placed on it. Center it so that it rotates evenly and insert it into the motor. Turn on the rotisserie and let it do its magic.
Monitor Temperature and Check for Doneness
During cooking, monitor the temperature of your grill to maintain a consistent temperature of around 350-400°F for even cooking. Use a meat thermometer to check the internal temperature of the meat periodically and remove it from the grill once it reaches the desired level of doneness. Let it rest for a few minutes before carving and serving.
In conclusion, setting up your Weber BBQ for rotisserie cooking is a simple process that requires a few essential tools and preparation. By following these steps, you’ll be able to achieve restaurant-quality results in your own backyard.
Preparing the Meat for Rotisserie Cooking
Look no further than preparing your meat for rotisserie cooking on a Weber BBQ. With these expert tips and tricks, you’ll be serving up perfectly cooked and juicy meals that will have your guests begging for seconds.
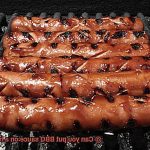
First things first, it’s important to choose the right type of meat. Luckily, anything that can be roasted on a spit can be cooked on a Weber BBQ rotisserie. So whether you’re in the mood for chicken, turkey, beef, pork, lamb, or even fish, the possibilities are endless.
Once you’ve chosen your protein, it’s time to trim any excess fat or skin. This not only helps reduce the risk of flare-ups but also ensures that your meat cooks evenly. Be sure to remove any bones or cartilage that may hinder the rotation of the meat on the spit.
Now, it’s time to add some flavor. Whether you prefer a dry rub or marinade, seasoning your meat is crucial for achieving maximum taste and tenderness. A dry rub is typically a mixture of herbs and spices while a marinade is a liquid mixture that can be left on the meat for several hours or even overnight. The longer you let your meat marinate, the more flavorful it will be.
Once your meat has been seasoned to perfection, it’s time to skewer it onto the rotisserie spit. Make sure to secure it tightly so that it doesn’t wobble or shift during cooking. Butcher’s twine can be used to tie any loose sections of the meat to prevent them from flapping around.
Before placing your meat onto the Weber BBQ rotisserie, preheat your grill on high heat for at least 10-15 minutes. This ensures that your grill is hot enough to properly cook your meat. Once you’re ready, place your spit onto the grill and turn on the rotisserie motor. Close the lid and let your meat cook until it reaches its desired internal temperature.
Benefits of Using a Weber Rotisserie Attachment
It’s time to take your grilling game to the next level with a Weber rotisserie attachment. This tool is not only impressive but also offers several benefits that will enhance your grilling experience.
Firstly, a Weber rotisserie attachment ensures even cooking, eliminating the risk of undercooked or overcooked meat. The meat rotates on the spit, ensuring it cooks evenly on all sides. Secondly, the rotating motion of the spit bastes the meat in its own juices, resulting in a more flavorful and juicy end result. This is especially true for larger cuts of meat like roasts and whole chickens, making them incredibly succulent.
Moreover, a Weber rotisserie attachment is versatile and can be used for different meats such as chicken, beef, pork, and lamb. It can also be used for vegetables like potatoes and peppers. Not only is it versatile, but it’s also easy to use and can be attached to your barbecue quickly and effortlessly. Once attached, simply place the meat on the spit, turn on your barbecue, and let the rotisserie do its job.
Lastly, using a rotisserie attachment adds a unique element to your BBQ setup. Impress your guests with perfectly cooked rotisserie meals that are both tasty and visually appealing. They will be amazed by the presentation of a whole chicken or roast rotating on a spit.
Tips for Perfectly Balanced Rotisserie Cooking
Look no further than these tips for achieving perfectly balanced rotisserie cooking:
- Choose the right cut of meat: A key factor in achieving balanced cooking is selecting a uniform cut of meat. This ensures that the meat cooks evenly and doesn’t cause the skewer to become unbalanced. Avoid cuts with uneven shapes or thicknesses, as they can be difficult to secure and balance.
- Secure the meat tightly: To prevent any slipping or movement during cooking, make sure to secure the meat tightly on the rotisserie skewer using forks or prongs. This step is crucial in achieving perfectly balanced cooking.
- Use counterweights: If you’re cooking a large cut of meat that is heavier on one end, using counterweights can help balance it out. Vegetables or another piece of meat can serve as effective counterweights. This step ensures that the skewer remains balanced throughout the cooking process.
- Check for balance regularly: Keeping an eye on the rotisserie skewer throughout the cooking process is essential to ensure balanced cooking. If you notice any wobbling or uneven cooking, stop the rotisserie and adjust the meat accordingly. Regular monitoring will help you catch any imbalances before they become major problems.
- Use a drip pan: A drip pan placed underneath the meat catches any excess juices that may cause an imbalance on the skewer. Not only does this prevent flare-ups and uneven cooking, but it also makes cleanup easier.
Best Cuts of Meat for Rotisserie Grilling
Before you start spinning that spit, it’s crucial to choose the right cut of meat for optimal tenderness and taste.
Let’s start with poultry. A whole chicken is an excellent choice for rotisserie grilling, thanks to its even shape and succulent meat. But don’t stop there. Turkey, duck, and Cornish hens are also fantastic options to experiment with on your rotisserie. Just be sure to keep an eye on the cooking time as poultry can dry out quickly if overcooked.
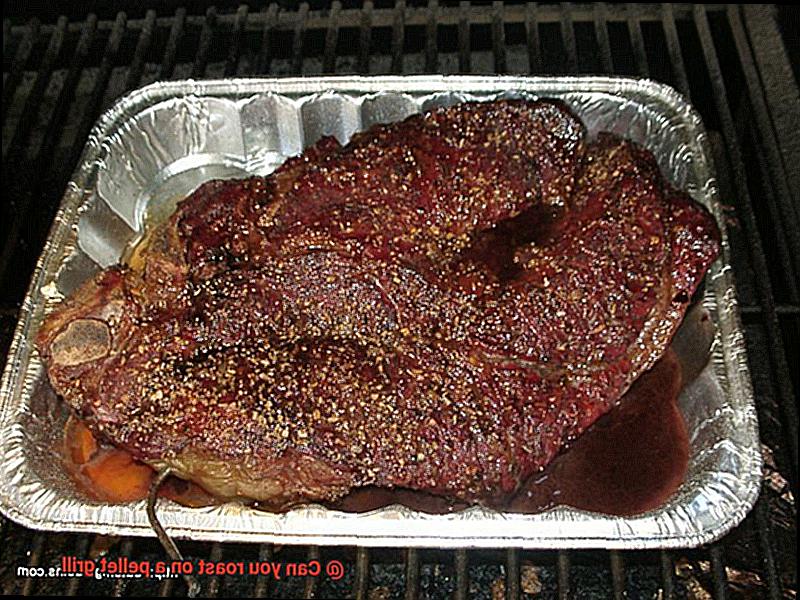
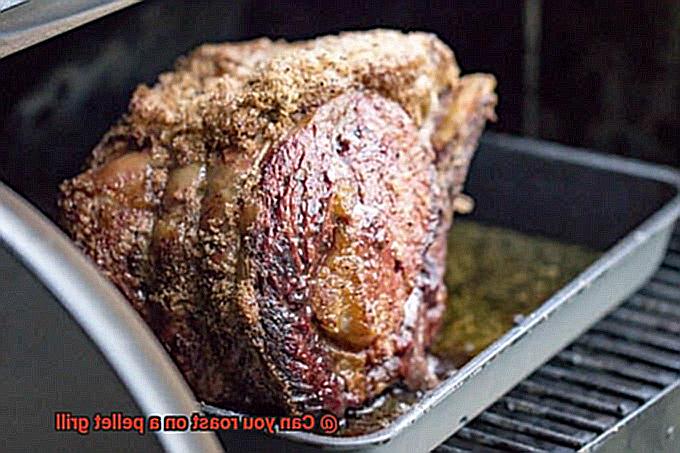
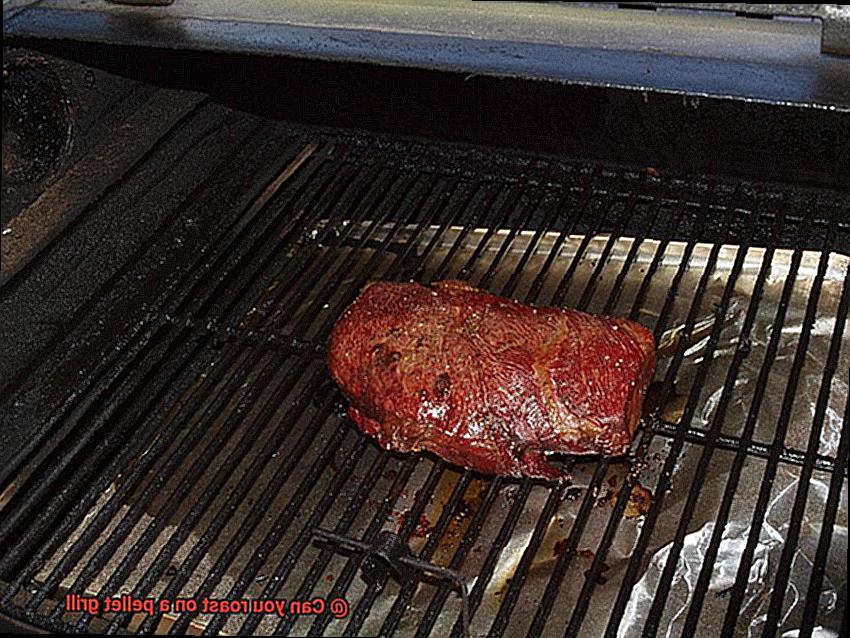
If beef is more your style, then you’re in luck. Prime rib, tri-tip, sirloin, and flank steak are all cuts that work wonders on a rotisserie. These cuts are known for their marbling, which adds extra flavor and helps keep the meat moist during cooking.
For pork lovers, look no further than pork loin, pork shoulder, and pork tenderloin. The slow rotation of the spit allows the pork to cook evenly and retain its moisture, resulting in juicy and delicious meat.
And let’s not forget about lamb. A leg of lamb or lamb shoulder can be seasoned with herbs and spices before being placed on the spit for a tender and flavorful result.
It’s important to remember that the size of the cut will affect how long it needs to cook on the rotisserie. Always use a meat thermometer to ensure that your meat reaches the proper internal temperature: 165°F for poultry, 145°F for beef and pork.
How Long Does it Take to Cook on a Weber BBQ?
Whether you’re a seasoned pitmaster or a beginner, knowing how long it takes to cook different types of food on your grill is essential for achieving that perfect taste and tenderness that will impress your guests.
When it comes to direct grilling, where food is placed directly over the heat source, cooking times will depend on the thickness of your food and how well-done you like it. For example, a 1-inch thick steak cooked on high heat will take around 4-6 minutes per side for a juicy, medium-rare perfection. That’s just enough time to grab a cold drink and enjoy the summer breeze while your Weber works its magic.
If you prefer indirect grilling, where food is not placed directly over the heat source, you’ll need patience as cooking times can range from 30 minutes to several hours depending on the type of food and your desired level of doneness. For example, a mouthwatering whole chicken cooked on indirect heat at 350°F will take around 1.5-2 hours to reach the recommended internal temperature of 165°F. But trust us, it’s worth the wait for that crispy skin and tender meat.
But wait, there’s more. Have you tried rotisserie grilling yet? This method involves slow rotation of meat on a spit over indirect heat, resulting in succulent and flavorful meat. As a general rule, it’s recommended to cook for around 15-20 minutes per pound of meat. For example, a 4-pound chicken would take around 1-1.5 hours to cook on a rotisserie. Just imagine the heavenly aroma wafting through your backyard.
Remember, cooking times will be affected by factors such as grill temperature and food thickness. To ensure your food is cooked to perfection every time, always use a meat thermometer to check the internal temperature. The USDA recommends cooking beef, pork, lamb, and veal to an internal temperature of 145°F, poultry to 165°F, and ground meat to 160°F.
Before you start grilling, make sure to preheat your grill for 10-15 minutes to ensure it reaches the desired temperature. And don’t forget to clean your grill grates before and after cooking for optimal performance.
Temperature Control and Doneness Checks
Mastering the art of rotisserie cooking on a Weber BBQ requires attention to detail and an understanding of temperature control and doneness checks. These two components are essential for achieving perfectly cooked meat that is both tender and flavorful.
To ensure even cooking, it’s important to control the temperature of your grill. This begins with preheating your grill to the desired temperature before placing your meat on the rotisserie. Doing so helps prevent hot spots that could cause uneven cooking. During cooking, use the bottom and top vents on your grill to adjust the airflow and maintain a consistent temperature. Keeping both vents partially open during cooking prevents smothering the fire and ensures that your meat is cooked to perfection.
In addition to temperature control, checking for doneness is crucial for perfect rotisserie cooking. The best way to check is by using a meat thermometer to check the internal temperature of the meat. Different types of meat have different recommended internal temperatures, so consult a cooking chart or recipe for specific guidelines. Checking the temperature ensures that your meat is cooked through without overcooking it.
Finally, allowing your meat to rest for a few minutes after taking it off the rotisserie is essential for achieving tender and flavorful meat. Resting allows the juices to redistribute throughout the meat, resulting in a more delicious final product.
Other Equipment You May Need for Rotisserie Grilling
Here are some essential pieces of equipment that will help you achieve perfectly cooked, juicy, and mouth-watering meats.
First up is the rotisserie attachment. This handy gadget is essential for even cooking and perfect browning. It includes a spit rod, motor, and forks that will secure your food in place as it rotates over the heat source. So, before you start your rotisserie adventure, make sure to check if your Weber BBQ model is compatible with a rotisserie attachment.
In addition to the rotisserie attachment, there are a few accessories that can make your rotisserie grilling experience even better. A drip pan is a must-have for any rotisserie session to catch any juices or marinades that may drip from your food while it’s cooking. This not only prevents flare-ups but also keeps your BBQ clean and mess-free. Additionally, using a meat thermometer will ensure that your food is cooked to perfection, avoiding overcooking or undercooking.
But let’s not forget about safety. A pair of heat-resistant gloves will protect your hands while you handle hot items such as the spit rod or forks. These gloves are a small investment that can go a long way in keeping you safe and comfortable while you cook.
Now, let’s talk about ingredients and seasonings. Using fresh and flavorful ingredients can take your rotisserie cooking to the next level. Whether you’re cooking a whole chicken, pork roast, or veggies – quality ingredients can make all the difference in the taste and texture of your food.
To sum it up, here’s your ultimate list of equipment for rotisserie grilling on a Weber BBQ:
- Rotisserie attachment (compatible with your Weber BBQ model)
- Drip pan (to catch excess juices and marinades)
- Meat thermometer (for perfectly cooked meats)
- Heat-resistant gloves (to keep your hands safe)
- Quality ingredients and seasonings (for mouth-watering flavor)
Conclusion
In conclusion, the answer to the question “Can you rotisserie on a Weber BBQ?” is a resounding yes. Weber offers a wide range of charcoal and gas grills that are compatible with rotisserie attachments. Rotisserie cooking is an irresistible outdoor cooking technique that elevates meats to new levels of deliciousness, delivering rich flavors and textures while achieving perfect browning and crispy skins. By following some simple steps, you can set up your Weber BBQ for rotisserie cooking and impress your guests with mouth-watering meals.
To achieve perfectly balanced rotisserie cooking, choosing the right cut of meat, securing it tightly on the spit, using counterweights, checking for balance regularly, and using a drip pan are essential tips. Whether you’re grilling poultry, beef, pork, lamb or even fish on your Weber rotisserie attachment, you’ll enjoy even cooking and added flavor through self-basting. Plus, it’s versatile and easy to use.
Temperature control and doneness checks are crucial for perfect rotisserie cooking. With the right equipment such as a rotisserie attachment compatible with your Weber BBQ model, drip pan, meat thermometer, heat-resistant gloves and quality ingredients at hand – you’re all set.