Curious if your Kamado grill can whip up some lip-smacking jerky? Wonder no more. This article is your ultimate guide to creating tender, flavor-packed jerky on your trusty ceramic cooker.
For the uninitiated, a Kamado grill hails from Japan and boasts incredible heat retention. It’s perfect for slow-cooking and smoking all kinds of grub. But did you know it’s also a pro at drying and preserving meat? That’s right – it’s a jerky-making machine.
In this post, we’ll spill the beans on making jerky with your Kamado grill. We’ll cover everything from picking primo cuts of meat to whipping up marinades that’ll make your taste buds dance. By the time we’re done, you’ll be a bonafide backyard jerky master. So grab that apron, get that Kamado fired up, and let’s dive into the delicious world of homemade jerky.
Contents
Choosing the Right Meat for Jerky
In this comprehensive guide, we will delve into the art of selecting the right meat for your jerky. By understanding the significance of meat choice, you will unlock the secrets to tantalizing taste, captivating texture, and unparalleled quality. Get ready to elevate your jerky game and impress even the most discerning taste buds.
The Power of Lean Cuts:
When it comes to crafting delectable jerky, lean cuts of meat reign supreme. It is essential to choose meat with low fat content to prevent rancidity during the drying process. Opt for lean beef cuts like flank steak, sirloin, or eye of round as they offer a harmonious blend of rich flavors and firm texture. These cuts are perfect canvases for absorbing marinades, resulting in a sublime flavor profile that will leave you craving more.
Exploring a World of Flavor:
While beef is the traditional choice for jerky enthusiasts, there is a vast world of flavor waiting to be discovered. Poultry, such as chicken or turkey, adds a lighter and milder taste to your jerky experience. Pork offers a subtly sweet profile that complements a variety of seasonings.
For those seeking an adventurous palate, game meats like venison or elk bring a unique and robust flavor to the table. Keep in mind that these alternative meats may require additional steps due to their higher fat content.
Quality is Key:
To achieve remarkable results with your jerky, always prioritize high-quality meat from reputable sources. Look for freshness and well-marbled cuts without visible fat or signs of spoilage. Choosing top-notch meat not only enhances the taste but also minimizes the risk of foodborne illnesses. Remember, your jerky is only as good as the meat you use, so invest in quality ingredients for an exceptional end product.
Unleash Your Creativity:
One of the joys of making jerky is the ability to experiment with different meats to find your perfect combination. Each cut and type of meat offers distinct flavors and textures, catering to diverse palates. Don’t be afraid to step out of your comfort zone and try something new. Unleash your creativity and create a jerky masterpiece that reflects your unique taste preferences.
Mastering Thickness:
The thickness of your meat slices plays a pivotal role in the texture of your jerky. Thin slices dry faster, resulting in a crispy, snackable texture. On the other hand, thicker slices offer a satisfyingly chewy consistency. Consistency is key, so ensure uniform slicing for even drying time and an enjoyable eating experience.
Marinating the Meat
Prepare to take your jerky game to new heights as we unlock the secret sauce of marinating meat. Not only does marination enhance the flavor and tenderness of your jerky, but it also plays a vital role in preserving the meat during the drying process. So grab your apron, fire up the Kamado grill, and dive into the world of marinated meat that will leave you craving more.
The Flavor Explosion:
Marinating your meat is like giving it a rejuvenating spa day. The combination of soy sauce, Worcestershire sauce, liquid smoke, brown sugar, garlic powder, onion powder, and black pepper creates an irresistible marinade that infuses your jerky with mouthwatering savory notes. However, don’t be afraid to ignite your creativity by experimenting with different spices and flavors to find the perfect marinade that tantalizes your taste buds.
Tenderize Like a Pro:
Marination isn’t just about flavor; it’s about achieving that melt-in-your-mouth tenderness. By allowing the meat to luxuriate in the marinade for at least 4 hours (or even overnight), the acids and enzymes in the marinade delicately break down the proteins and connective tissues in the meat. This transformative process results in a tender jerky that is easy to chew and enjoy.
Preserving Perfection:
Preserving your jerky is essential if you want to savor its deliciousness for an extended period. The combination of salt and other ingredients in the marinade acts as a natural preservative, inhibiting bacterial growth and extending the shelf life of your jerky. So not only does marination make your jerky taste incredible, but it also ensures that it stays fresh and safe to eat.
Marination Tips and Tricks:
- Cut the meat into thin strips against the grain to maximize tenderness.
- Ensure all pieces are thoroughly coated in the marinade by using a shallow dish or resealable plastic bag.
- Allow the flavors to weave their magic by marinating for at least 4 hours, or overnight for a more intense flavor.
- Pat the meat dry before placing it on the Kamado grill to remove excess moisture.
- Let the meat reach room temperature before grilling to ensure even cooking.
Setting up the Kamado Grill for Jerky
With a Kamado grill and the right techniques, you can create mouthwatering jerky that will leave your friends and family begging for more. In this step-by-step guide, we’ll walk you through the process of setting up your Kamado grill for jerky, from cleaning the grill to enjoying the final product.
Step 1: A Clean Canvas
Before embarking on your jerky journey, ensure that your Kamado grill is clean and free from any residue or debris. Give the grates a thorough scrub with a wire brush, eliminating any lingering ash or charcoal. This will provide a fresh and clean surface for your jerky masterpiece.
Step 2: Infuse Flavor with Wood Chips
Enhance the taste of your jerky by selecting suitable wood chips or chunks to create that perfect smoky flavor. Hickory, mesquite, and applewood are popular options that work wonders. Remember to soak them in water for about 30 minutes prior to use to prevent them from burning too quickly.
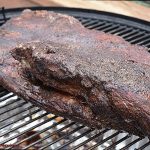
Step 3: Indirect Heat Cooking
To achieve even cooking without any unwanted charring, it’s crucial to set up your Kamado grill for indirect heat. Place a heat deflector or plate setter on the grill grate, creating a barrier between the fire and the meat. This method ensures that your jerky cooks to perfection.
Step 4: The Perfect Temperature
Preheat your Kamado grill to an ideal temperature of around 225°F to 250°F. This low and slow approach allows for thorough dehydration without overcooking. Use a thermometer to monitor the grill’s internal temperature, maintaining a consistent heat throughout the entire process.
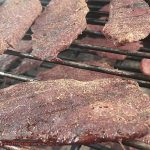
Step 5: Ready, Set, Jerky
Once your grill reaches the desired temperature, it’s time to place your marinated meat strips on the grates. Leave ample space between each strip to ensure proper airflow and even cooking. Close the lid and let the magic unfold.
Step 6: Rotate and Monitor
During the cooking process, periodically rotate the grates to ensure even dehydration and prevent any hot spots. Keep a close eye on the temperature, adjusting the vents if necessary, to maintain a steady heat. This will guarantee consistent results.
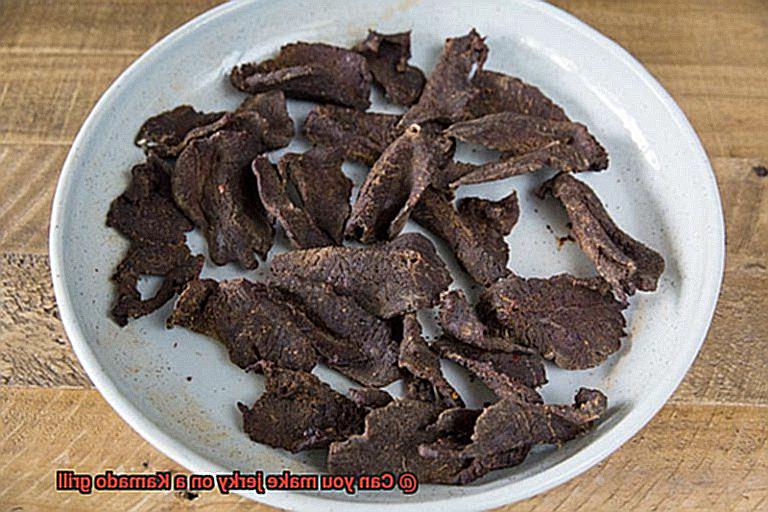
Step 7: Cook and Cool
Allow your jerky to cook for several hours, depending on its thickness. When it reaches your preferred level of dryness, remove it from the grill and let it cool for a few minutes before indulging in its deliciousness or storing it for later enjoyment.
Maintaining a Proper Cooking Temperature
Now, we’re delving into the intricate details of maintaining the proper cooking temperature when making jerky on a Kamado grill. Get ready for a tantalizing journey of flavor.
Why is maintaining the correct cooking temperature important?
Let’s start with the basics. The right cooking temperature is absolutely crucial when crafting jerky on a Kamado grill. It guarantees that your meat emerges flavorful, tender, and perfectly dried. By cooking at low and slow temperatures between 145°F and 160°F (63°C and 71°C), you preserve the natural flavors, textures, and nutritional value of the meat.
Preheating your Kamado grill:
Before embarking on your jerky-making adventure, it’s essential to preheat your Kamado grill to approximately 150°F (65°C) for about 20 minutes. This step ensures that your grill attains a stable temperature before the precious meat slices are added.
Regulating airflow with vents:
Now let’s talk about airflow control. Your Kamado grill comes equipped with top and bottom vents that play a pivotal role in maintaining the cooking temperature. For crafting jerky, it’s best to keep both vents slightly open. This guarantees proper airflow, preventing the fire from smoldering and ensuring an even distribution of heat.
Monitoring the temperature:
During this process, an accurate thermometer becomes your best friend. Place the thermometer probe at grate level to obtain an exact reading of the heat where your meat sits. Remember to check the temperature every 30 minutes or so, making necessary adjustments to keep it within your desired range.
Adjusting temperature fluctuations:
Despite our best efforts, temperatures may fluctuate at times. If you notice the temperature rising above 160°F (71°C), simply close the vents slightly to reduce airflow and lower the heat. Conversely, if the temperature drops below 145°F (63°C), open the vents slightly to increase airflow and raise the heat. Achieving the perfect balance may take practice, but trust us, you’ll get there.
Cooking time and thickness:
The cooking time will vary depending on the thickness of your meat slices and your personal preference for dryness. Thinner slices dry more swiftly, while thicker ones require more time. As a general guideline, plan for a cooking time of 4 to 6 hours, adjusting as needed.
Cooking Time and Techniques
If you’ve ever experienced the irresistible smoky taste of homemade jerky, you know just how addictive it can be. Prepare to take your jerky-making skills to new heights as we explore the ideal temperature range and cooking techniques that will elevate your jerky game.
When it comes to cooking jerky, the Kamado grill is a true champion. With its exceptional heat retention capabilities, it’s the perfect tool for slow and low cooking. To achieve that perfect balance of drying the meat while infusing it with mouthwatering flavors, we need to find that sweet spot in terms of temperature.
For jerky on a Kamado grill, aim for a temperature range of 160 to 175 degrees Fahrenheit (70 to 80 degrees Celsius). This allows for thorough drying without overcooking or burning the meat. But how do we achieve this temperature? Fear not, my grilling comrades, for I have a solution.
Set up your Kamado grill for indirect grilling. Place the heat source to one side of the grill while positioning the meat on the opposite side. This technique creates a controlled cooking environment and prevents direct exposure of the meat to high heat. The result? Even cooking and that ideal temperature range throughout the process.
Now let’s dive into two techniques that will take your jerky game to the next level: smoking and marinating. First up, smoking. Enhance your jerky with a delightful smoky aroma and taste by using wood chips or chunks. Soak them in water for about 30 minutes before placing them directly onto the charcoal or in a smoker box. The result? Jerky with an irresistible smoky flavor that will have your taste buds dancing with joy.
Next, let’s talk about marinating. Infuse your jerky with flavors and tenderize the meat at the same time. Countless marinade recipes are available, from simple combinations of soy sauce and Worcestershire sauce to more complex mixtures involving spices, herbs, and liquid smoke. Marinate your meat for at least 4 hours (or overnight if you’re feeling patient) to allow those flavors to work their magic.
Now, let’s address the all-important question of cooking time. Remember, jerky is a dehydrated product, requiring longer cooking compared to other grilled meats. On average, it takes about 4 to 6 hours to fully cook jerky on a Kamado grill. Factors like the thickness of the meat slices, humidity levels, and desired level of dryness can influence cooking time. Be sure to periodically rotate and flip the meat during the grilling process for even cooking and drying.
Checking Doneness and Texture
When it comes to creating mouthwatering jerky on a sizzling Kamado grill, checking for doneness and texture is the secret ingredient to achieving unbeatable results. So, let’s dive into the tantalizing details of how you can ensure your jerky turns out perfectly every single time.
First and foremost, one of the most reliable methods to check for doneness is by using a trusty meat thermometer. Picture this: the internal temperature of your jerky should reach a mouthwatering 160°F (71°C) to guarantee that any potential bacteria or pathogens are eliminated. This vital step is not to be overlooked if you want to savor your jerky without any food safety concerns. Safety first, flavor second.
But wait, there’s more. Assessing the tantalizing texture of your jerky is just as crucial as nailing the temperature. Properly cooked jerky should have a firm and dry bite, with a lusciously leathery consistency. Imagine sinking your teeth into a slice of jerky that exudes tenderness and flavor. However, if your jerky feels disappointingly soft or has a chewy texture, it may not be fully cooked and needs a little more love on the grill.
Now, let’s talk technique. To achieve that drool-worthy texture, it’s essential to slice your meat thinly and evenly. Think precision and finesse. Thicker slices will take longer to dry and might result in uneven cooking. So, grab yourself a sharp knife or go all out with a meat slicer to ensure that each piece of meat boasts consistent thickness, allowing for an even cooking experience that will leave your taste buds dancing with joy.
And here’s where things get exciting – monitoring the temperature of your Kamado grill during the cooking process is key. Aim to maintain a temperature range between 165°F (74°C) and 175°F (79°C). This sweet spot allows for a gentle drying process that will leave your jerky perfectly balanced between tender and dry. That’s what we call culinary harmony.
Ah, the tantalizing countdown to perfection. Cooking time can vary depending on factors such as the thickness of your meat slices, humidity levels, and personal preference for dryness. As you embark on your jerky-making journey, start checking for doneness after approximately 3-4 hours of cooking. But don’t stop there. Keep checking until you achieve that divine texture that makes your taste buds sing with delight.
Oh, and don’t forget to give your jerky some love on the grill. Rotate or flip it periodically during the cooking process to ensure a symphony of flavors and even drying. This simple step prevents any spots from becoming too dry or, heaven forbid, burnt to a crisp.
Cooling and Storing Jerky
Before you can sink your teeth into that mouthwatering goodness, there’s a crucial step you can’t overlook – cooling and storing your jerky. In this comprehensive guide, we will delve into the secrets of proper cooling and storage techniques to ensure your jerky remains fresh and full of flavor.
The Importance of Cooling:
After achieving grilling perfection, it’s essential to cool your jerky properly. This critical step allows any residual heat and moisture to dissipate, preventing the growth of bacteria and extending its shelf life. To cool your jerky effectively, spread it out on a wire rack or a clean surface, allowing each piece ample space to breathe. Avoid stacking the jerky, as this traps heat and moisture, spoiling all your hard work.
Room Temperature Is Key:
Resist the temptation to rush the cooling process by tossing hot jerky directly into the fridge or freezer. This sudden temperature change can lead to condensation, resulting in unwanted moisture buildup that could ruin your carefully crafted jerky. Instead, let the jerky cool naturally at room temperature for approximately one to two hours. Patience is key here.
Airtight Containers for Storage:
Once your jerky has cooled to perfection, it’s time to store it properly. Airtight containers become your best friends in this endeavor, preventing air and moisture from reaching your precious cargo. Opt for ziplock bags or vacuum-sealed bags as excellent options for storing jerky. Before sealing the bag, squeeze out as much air as possible to maintain optimal freshness.
Freezing for Long-Term Storage:
For those seeking to store jerky for an extended period, freezing is a game-changer. Freezing not only prolongs the shelf life of your jerky but also preserves its texture and flavor. Divide your jerky into conveniently sized portions and place them in separate freezer bags or vacuum-sealed bags. This strategic approach allows you to thaw only what you need, preserving the rest in its frozen glory.
Thawing the Right Way:
When it’s time to savor your frozen jerky, ensure a proper thawing process by utilizing the refrigerator. Slowly thawing the jerky in this controlled environment maintains its quality while preventing any bacterial growth. Once thawed, your jerky can be enjoyed for up to six months if stored correctly.
Flavor Variations and Customizations
Are you ready to elevate your jerky game to new heights? Look no further, because today we’re delving into the exhilarating world of flavor variations and customizations for crafting delectable jerky on a Kamado grill. Prepare to tantalize your taste buds and dazzle your loved ones with these awe-inspiring flavor ideas.
The Timeless Classic: Smoky Masterpiece
Immerse yourself in the timeless allure of the classic smoky flavor that only a Kamado grill can deliver. Harness the power of different wood chips such as hickory, mesquite, or applewood to infuse your meat with an irresistible depth of rich smokiness. The combination of charcoal heat and natural wood creates a symphony of flavors that will leave you craving more.
Ignite Your Senses: A Fiery Kick
If you’re a thrill-seeker who craves the heat, why not ignite your senses with a spicy twist? Embark on an adventure by experimenting with spices like cayenne pepper, chili powder, or crushed red pepper flakes in your marinade. The Kamado grill’s superior heat capabilities ensure that the spices are evenly distributed throughout the meat, providing a fiery kick with each savory bite.
Unleash Sweet and Savory Delights
Indulge your sweet tooth without sacrificing savory satisfaction. Delve into a world of endless possibilities by incorporating ingredients like brown sugar, honey, or maple syrup into your marinade. The precise temperature control of the Kamado grill ensures that these sweet elements caramelize perfectly, creating a harmonious balance of flavors that will keep you coming back for more.
Tailor-Made Jerky: Unleash Your Creativity
The beauty of making jerky on a Kamado grill lies in its ability to cater to your wildest culinary dreams. Unleash your creativity by adding your favorite herbs, spices, or even a splash of your preferred marinade. The Kamado grill’s exceptional temperature control guarantees that your customizations will be flawlessly integrated into the jerky, resulting in a one-of-a-kind masterpiece.
wPuVHclv6v8″ >
Conclusion
In conclusion, the answer is a resounding yes – you can absolutely make jerky on a Kamado grill. The versatility and superior heat retention of these grills make them ideal for this delicious snack. Whether you prefer beef, turkey, or even venison jerky, the Kamado grill will deliver mouthwatering results every time.
With its ability to maintain low and steady temperatures for extended periods, the Kamado grill provides the perfect environment for drying out meat without overcooking it. The smoky flavor that permeates the jerky adds an extra layer of deliciousness that is sure to impress your taste buds.
One of the key advantages of using a Kamado grill for making jerky is its efficient airflow control. This allows you to easily adjust the temperature and smoke levels to achieve the desired texture and flavor. Plus, with its durable ceramic construction, the Kamado grill ensures even heat distribution, preventing any hot spots that could ruin your batch of jerky.
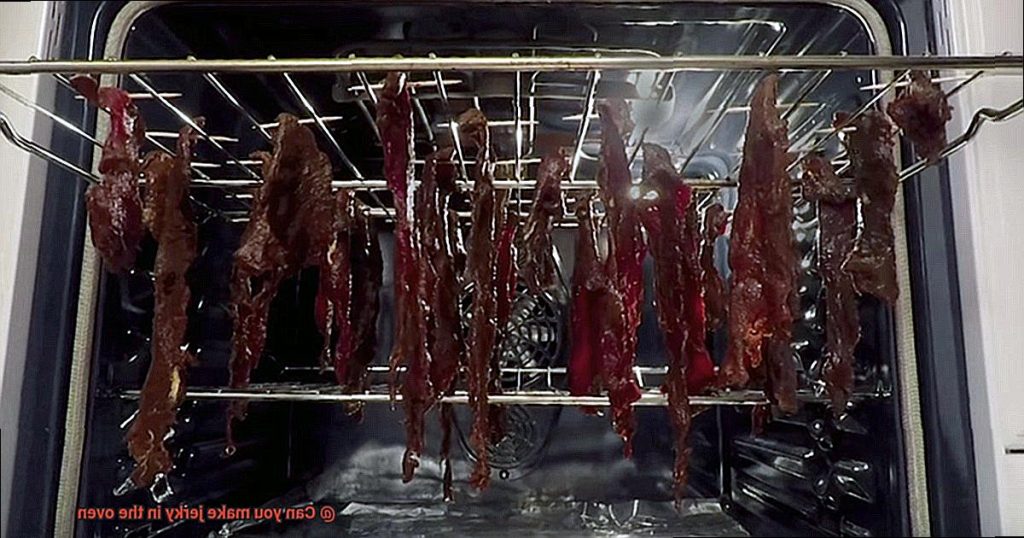
When it comes to making jerky on a Kamado grill, preparation is key. Properly marinating your meat beforehand will infuse it with incredible flavors and help tenderize it for a more enjoyable chew. Once marinated, simply lay out your strips of meat on wire racks or skewers and let the Kamado grill work its magic.
The slow cooking process on a Kamado grill allows the moisture in the meat to evaporate gradually while preserving all those savory flavors. You’ll be left with perfectly dried jerky that’s packed with protein and ready to satisfy your cravings anytime, anywhere.
So why settle for store-bought jerky when you can create your own delectable version right in your backyard? With a Kamado grill as your trusty companion, you’ll have full control over every aspect of the process – from choosing high-quality cuts of meat to experimenting with different marinades and seasonings.
In conclusion, making jerky on a Kamado grill is not only possible but also highly rewarding. So fire up your grill, get creative with flavors, and indulge in the mouthwatering goodness of homemade jerky.