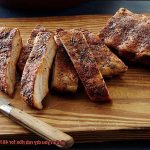
Get ready to embark on a mouthwatering adventure as we uncover the secrets behind the legendary 3-2-1 ribs. Imagine sinking your teeth into juicy, fall-off-the-bone goodness that’s infused with smoky perfection. And guess what? We’re about to take this flavor expedition to a whole new level with one secret weapon – butcher paper.
Now, you might be wondering, can you really achieve finger-licking 3-2-1 ribs with butcher paper? The answer is a resounding yes. This tried-and-true technique has pitmasters everywhere drooling over tender, flavorful ribs that are simply out of this world. The magic lies in three crucial phases – smoking, wrapping, and finishing – each playing a vital role in creating barbecue bliss.
Traditionally, aluminum foil has been the go-to choice for wrapping ribs during phase two. But here’s the exciting twist: many seasoned pros have discovered that using butcher paper can yield equally incredible results, if not better. Not only does it let those ribs breathe and keep their beautiful bark intact, but it also imparts a tantalizing flavor that foil just can’t replicate.
In this blog post, we’ll dive deep into the art of the 3-2-1 method and explore why butcher paper is stealing the show from foil. We’ll unravel the science behind it all, understand how butcher paper helps retain moisture like a boss, and learn how this game-changing technique will skyrocket your BBQ skills. So grab your apron, roll up those sleeves, and get ready to savor every delectable bite of 3-2-1 ribs wrapped in the magic of butcher paper.
Contents
Benefits of the 3 2 1 Ribs Method
Look no further than the 3 2 1 ribs method. This popular technique used by barbecue enthusiasts promises perfectly cooked and tender ribs that will have your friends and family begging for more. In this article, we’ll explore the benefits of the 3 2 1 ribs method, with a particular focus on the advantages of using butcher paper during the cooking process.
Lock in Flavors and Juices:
One of the main benefits of the 3 2 1 ribs method is the ability to lock in the flavors and juices of the meat. During the three-hour smoking stage, the ribs absorb delicious smoky flavors from the wood chips or pellets used in the smoker. This infusion of flavor sets the foundation for mouthwatering ribs.
Tenderize to Perfection:
The second stage of the method involves wrapping the ribs in either foil or butcher paper for two hours. This step is crucial for achieving that fall-off-the-bone tenderness. Butcher paper, with its ability to allow just enough airflow, offers a superior option for tenderizing without sacrificing texture. The steam created inside the wrap helps break down connective tissues, resulting in ribs that are melt-in-your-mouth tender.
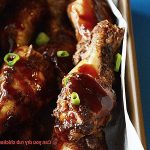
Enhanced Texture and Mahogany Bark:
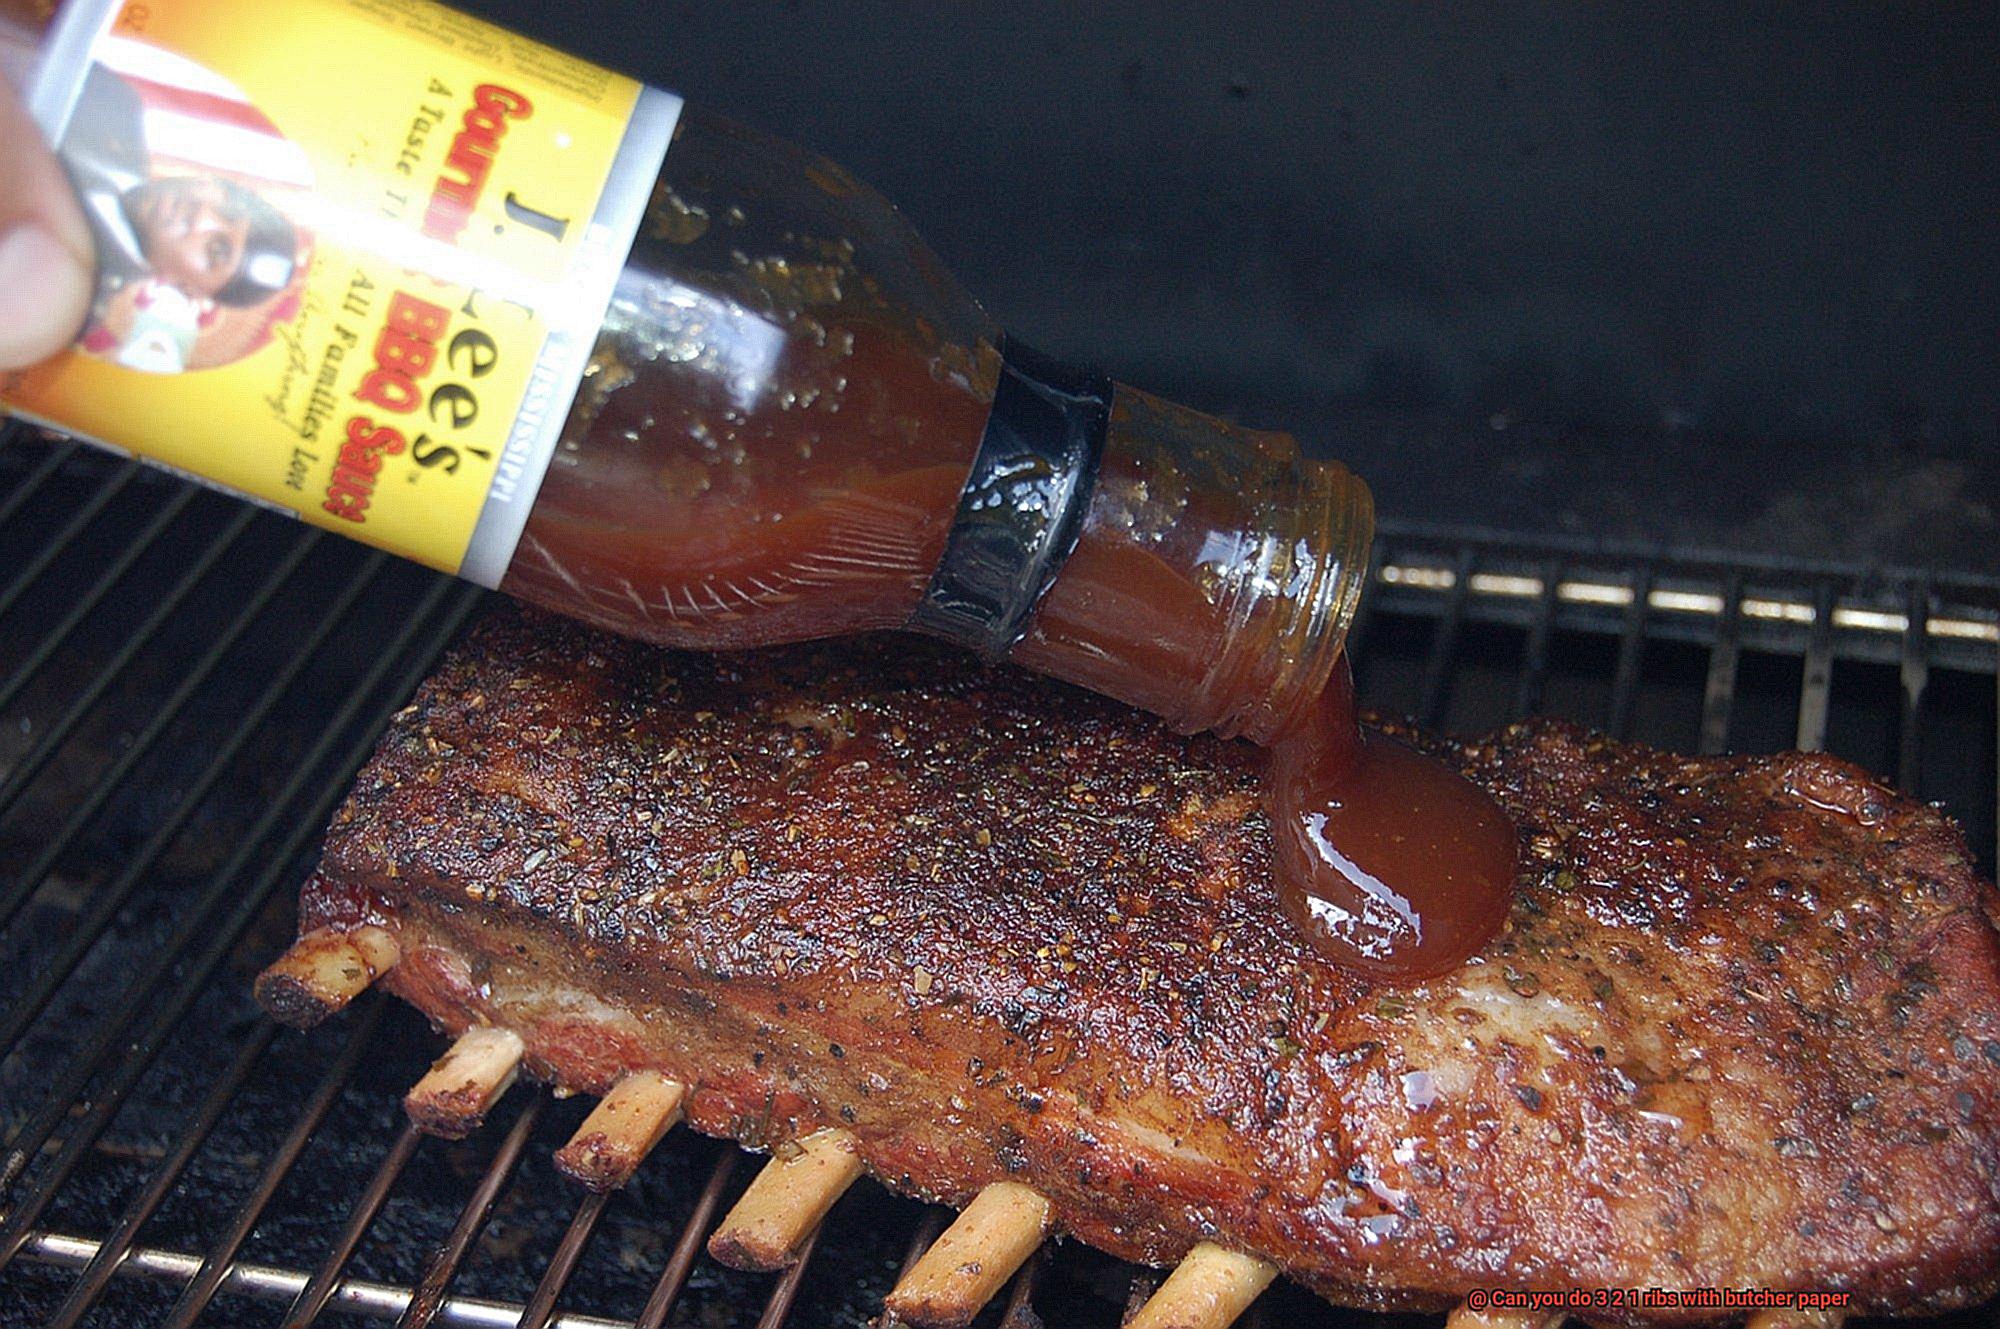
Butcher paper not only helps tenderize the meat but also contributes to an improved texture and appearance. Unlike foil, which can make ribs too soft and mushy, butcher paper strikes a perfect balance between tenderness and bite. It allows moisture to escape gradually, allowing the surface of the meat to caramelize and develop a beautiful mahogany-colored bark. This bark adds depth of flavor and visual appeal to your ribs.
Reduced Cooking Time:
Using butcher paper can help reduce cooking time compared to foil. The paper’s efficient heat transfer properties allow for faster cooking while retaining moisture. This advantage means you can spend less time tending to the grill and more time enjoying your perfectly cooked ribs with family and friends.
Customization and Experimentation:
The 3 2 1 ribs method offers plenty of room for customization and experimentation. You can adjust each stage’s duration based on your preferences and desired tenderness level. Whether you prefer ribs that are fall-off-the-bone or have a slight bite, this method allows you to tailor the cooking process to your taste.
Environmental Friendliness:
Choosing butcher paper over foil not only benefits your ribs but also the environment. Foil is often discarded after use, contributing to waste. In contrast, butcher paper can be composted or recycled, making it a more sustainable choice.
Traditional Use of Foil for Wrapping Ribs
Today, we delve into the age-old debate of foil versus butcher paper for wrapping ribs. Get ready to uncover the secrets behind achieving mouthwatering, tender, and succulent ribs that will leave everyone craving for more.
The Texas Crutch: Foil-Wrapped Ribs
- Harness the benefits of foil: Swift cooking time, moisture retention, and protection from direct heat.
- Lock in moisture: Entrap the tantalizing juiciness inside the foil, resulting in ribs that are nothing short of succulent.
- Quick and uniform cooking: Foil acts as an oven, ensuring that your ribs cook evenly throughout.
Potential drawbacks of using foil:
- Softer bark: The bark may lack the desired level of crispiness preferred by purists.
- Authenticity concerns: Traditionalists argue that foil detracts from the slow and low cooking experience.
Enter Butcher Paper:
- The ascent of butcher paper as an alternative: It retains moisture and shields the ribs without compromising the bark’s texture.
- Preserving a crispy bark: Butcher paper strikes a perfect balance, endowing your ribs with a flavorful crust while keeping the meat tender and juicy.
- Texture and flavor profile: Numerous pitmasters swear by the unique texture and flavor imparted by butcher paper.
Advantages of Butcher Paper for Wrapping Ribs
Today, we’re diving into the world of butcher paper and its incredible advantages for wrapping ribs. Prepare to unlock the secrets behind achieving juicy, tender, and flavor-packed ribs that will have your friends and family begging for more.
First on our list of advantages is moisture retention. Butcher paper acts as a barrier, sealing in the natural juices of the ribs while still allowing them to breathe. Say goodbye to dry ribs and hello to succulent, mouthwatering perfection.
Butcher paper also helps develop a beautiful bark on your ribs. Unlike foil, which can create a steamed texture, butcher paper allows for evaporation. This results in a slightly crispy exterior that will leave you craving seconds.
Safety is another advantage of using butcher paper. Foil has been known to leach aluminum into food when exposed to high heat, which can be harmful. Butcher paper, made from pure cellulose, is completely food-safe. Grill up your favorite ribs with peace of mind.
Not only is butcher paper safe for your food, but it’s also environmentally friendly. Foil contributes to landfill waste as it is non-recyclable. Butcher paper, on the other hand, is biodegradable and can be easily disposed of without harming the environment. Indulge in your delicious ribs guilt-free.
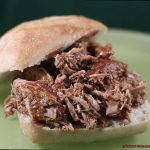
Butcher paper isn’t limited to just wrapping ribs; it’s a versatile tool. Use it to wrap brisket or pork shoulder for similar benefits, or even as a liner for baking sheets or a surface for rolling out dough. The possibilities are endless and make cooking a breeze.
Lastly, using butcher paper adds a rustic and authentic touch to your cooking process. It harkens back to traditional barbecue techniques and enhances the overall dining experience. Unveiling those beautifully wrapped ribs, with their juices sealed inside, will leave your guests eagerly anticipating the feast ahead.
How to Wrap Ribs with Butcher Paper
Wrapping your ribs in butcher paper can be a game-changer, resulting in tender and flavorful results. In this guide, we will walk you through the step-by-step process of wrapping ribs with butcher paper using the popular 3-2-1 method. Get your grills ready and prepare for mouthwatering ribs.
Step 1: Prepare the Butcher Paper
To begin, cut a piece of food-grade butcher paper large enough to fully enclose the ribs. Butcher paper is breathable, allowing for better smoke penetration and imparting a delicious smoky flavor to the meat.
Step 2: Lay the Ribs on the Paper
Place the ribs bone side down on top of the butcher paper. This positioning protects the meat during cooking and ensures even heat distribution.
Step 3: Fold and Seal
Fold the sides of the butcher paper over the top of the ribs, completely covering them. Tightly tuck the paper underneath the ribs to create a tight seal, trapping in all those mouthwatering flavors.
Step 4: Roll and Secure
Starting from one end, roll the butcher paper tightly around the ribs, ensuring they are fully enclosed. Use butcher’s twine or kitchen string to secure the paper in place, tying it around the rolled-up ribs. This keeps everything snug and prevents any juices from leaking out during cooking.
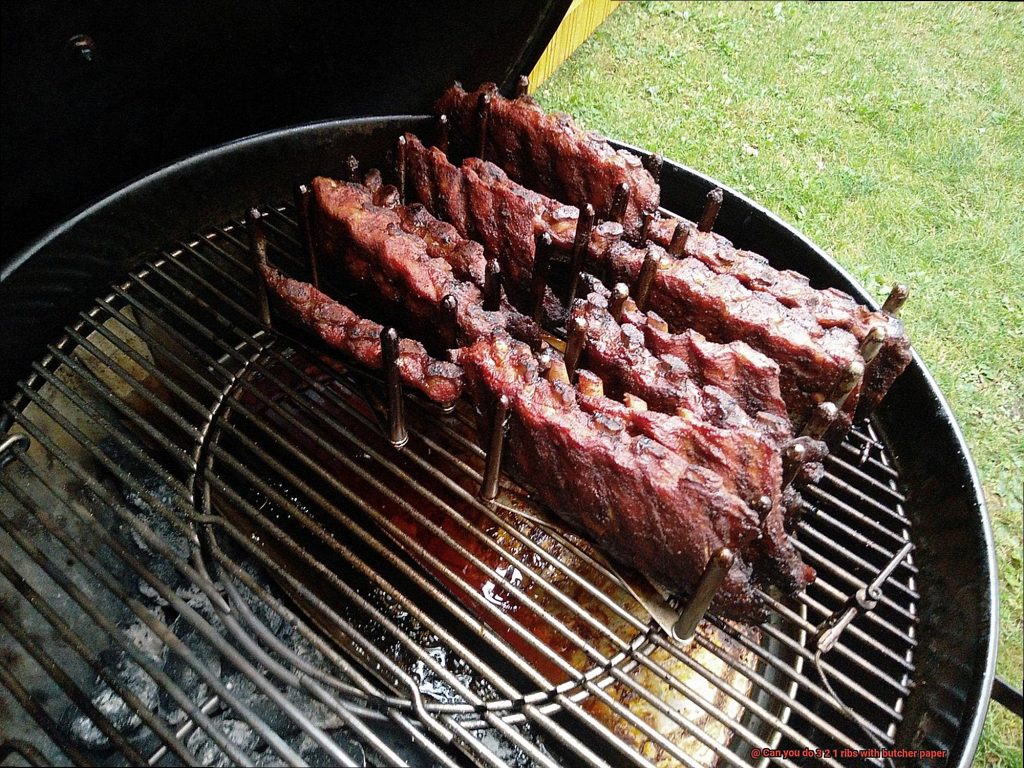
Step 5: Let It Smoke
With your ribs securely wrapped in butcher paper, return them to your grill or smoker. Continue cooking at a low temperature for the remaining 2 hours. The breathable nature of the butcher paper helps retain moisture while allowing some smoke to penetrate, resulting in tender and succulent ribs.
Step 6: Unwrap and Finish Strong
After the 2-hour mark, carefully unwrap the butcher paper from the ribs and return them to the grill or smoker for an additional hour. This allows the exterior to crisp up, developing a beautiful bark that will make your taste buds dance with delight.
Tips for Using Butcher Paper During the 3 2 1 Method
The 3 2 1 method is renowned for producing tender, fall-off-the-bone ribs. But did you know that you can take this technique to new heights by using butcher paper instead of foil during the wrapping stage? In this guide, we will delve into the essential tips and tricks for using butcher paper during the 3 2 1 method, elevating your grilling game to a whole new level.
Choose High-Quality Butcher Paper:
To make the most of using butcher paper for wrapping your ribs, quality is key. Opt for a high-quality, food-grade butcher paper that is unbleached and unwaxed. This ensures that no harmful chemicals or residues transfer onto your delectable ribs while cooking. Additionally, select a sturdy and durable paper that can withstand high temperatures without tearing or breaking.
Extend the Initial Smoking Time:
Traditionally, after three hours of smoking, it’s time to wrap your ribs. However, when using butcher paper, consider extending the initial smoking time by an hour. This extra hour allows for enhanced smoke absorption, resulting in a more pronounced flavor profile in your final masterpiece. Maximize that smoky goodness.
Wrap Tightly to Retain Moisture:
To fully harness the benefits of butcher paper, it’s crucial to wrap your ribs tightly. Place the ribs meat side down on a generous sheet of butcher paper and fold it over tightly, ensuring there are no gaps or openings. This tight seal creates a steamy environment inside the paper, effectively locking in moisture and keeping your ribs tender and juicy.
Monitor Internal Temperature:
While butcher paper helps retain moisture, it’s still important to monitor the internal temperature of your ribs to avoid overcooking. Invest in a reliable meat thermometer to accurately measure the temperature throughout the cooking process. The USDA recommends a minimum internal temperature of 145°F for pork ribs, but many pitmasters prefer to cook them to a slightly higher temperature for extra tenderness.
Rest and Unwrap with Care:
Once your wrapped ribs have finished cooking, let them rest for at least 15-20 minutes before unwrapping. This resting period allows the juices to redistribute within the meat, resulting in a tender and flavorful end result. When unwrapping the butcher paper, exercise caution to avoid tearing or losing any precious juices that have accumulated inside. Slowly unfold the paper and transfer the ribs to a cutting board or serving platter.
Comparison Between Foil and Butcher Paper
When it comes to grilling ribs, the choice of wrapping material can greatly impact the final result. Foil and butcher paper are two popular options, each with their own advantages and disadvantages. Let’s dive into the details and compare these two wrapping materials to help you make an informed decision for your next grilling adventure.
Advantages of Foil:
- Moisture Retention: Foil provides a tight seal, trapping moisture and creating a succulent, tender texture in the ribs. It’s like a cozy blanket for your meat.
- Easy Cleanup: Foil is disposable, making clean up a breeze. No scrubbing or soaking required – just crumple it up and toss it away.
- Soft Texture: If you prefer a softer bark on the outside of your ribs, foil is the way to go. Its steam-trapping abilities prevent the bark from becoming crispy, resulting in a melt-in-your-mouth experience.
Disadvantages of Foil:
- Limited Smoke Flavor: Foil creates a barrier that restricts smoke circulation, leaving you with less of that delicious smoky goodness infused into your meat. It’s like missing out on a secret ingredient.
- Longer Cooking Time: The tight seal of foil slows down the cooking process, meaning it may take longer to achieve that perfect tenderness. Patience is key.
Advantages of Butcher Paper:
- Balanced Texture: Butcher paper is porous, allowing some moisture to escape while still retaining enough to keep the meat moist. This results in a more balanced texture with a tender interior and a crispy bark – the best of both worlds.
- Enhanced Smoke Flavor: The porous nature of butcher paper allows the smoke to dance around your ribs, infusing them with a rich, smoky flavor that will tantalize your taste buds.
- Reduced Cooking Time: The heat can penetrate through the porous paper more quickly, reducing cooking time compared to using foil. You’ll be sinking your teeth into those ribs sooner than you thought.
Disadvantages of Butcher Paper:
- Skill and Technique Required: Wrapping ribs tightly in butcher paper is crucial to retain moisture. It requires finesse and careful attention to detail. Don’t let those precious juices escape.
- Availability and Cost: Foil is more widely accessible and typically cheaper than butcher paper. You may need to do some hunting or spend a little extra cash to get your hands on the paper.
Disadvantages of Using Butcher Paper
Imagine the enticing aroma of smoked ribs permeating the air, the sizzle of succulent meat on the grill, and the anticipation of sinking your teeth into tender, flavorful goodness. But before you embark on your grilling journey, it’s crucial to understand the potential disadvantages of using butcher paper for the popular 3-2-1 ribs method. While butcher paper has its merits, it’s essential to weigh them against its drawbacks to ensure a finger-licking success.
Cost Considerations:
Butcher paper can be pricier compared to alternatives like aluminum foil or parchment paper. For cost-conscious grillers or those seeking budget-friendly options, this could be a disadvantage worth considering.
Moisture Retention Challenges:
Unlike aluminum foil, butcher paper doesn’t provide a complete seal, compromising moisture retention during cooking. This may result in drier ribs or loss of desired flavors, leaving you with a less succulent end product.
Heat Sensitivity:
Butcher paper is not as heat-resistant as foil, making it less suitable for longer cooking times or higher temperatures. Prolonged exposure to direct heat can lead to tearing or burning, impeding your grilling progress.
Color Transfer:
During cooking, the color of butcher paper may transfer onto the meat. While this doesn’t affect taste, it detracts from the appetizing visual appearance when serving your beautifully smoked ribs.
Limited Availability:
Butcher paper may not be as widely available as other wrapping materials. This inconvenience poses a challenge for those without easy access to stores that stock butcher paper, requiring additional effort and planning ahead of your grilling session.
Air and Light Exposure:
Unlike foil, butcher paper is not as effective at blocking out air and light. This hastens the spoilage of cooked ribs if not stored properly after wrapping, jeopardizing all your delicious efforts.
KYC9FDQhbM4″ >
Conclusion
Yes, you can absolutely do 3-2-1 ribs with butcher paper. The technique of using butcher paper to wrap the ribs during the cooking process has gained popularity among barbecue enthusiasts. It helps to create tender and flavorful ribs by allowing them to retain moisture while still getting that desirable smoky flavor.
By following the 3-2-1 method, you start by seasoning your ribs and smoking them uncovered for three hours. This allows the meat to absorb all those delicious smoky flavors. Then, you wrap the ribs tightly in butcher paper and continue cooking for another two hours. The butcher paper acts as a barrier, trapping in heat and moisture to further tenderize the meat.
Finally, in the last hour of cooking, you unwrap the ribs from the butcher paper and return them to the smoker or grill. This step is crucial as it allows the exterior of the ribs to develop a beautiful caramelized bark while still remaining moist and tender on the inside.
The use of butcher paper in this 3-2-1 rib method provides numerous benefits. It helps regulate temperature, prevents excessive browning or burning, and enhances flavor retention. Additionally, it allows some smoke penetration while still protecting the meat from drying out.
So if you’re looking to take your rib game up a notch, give 3-2-1 ribs with butcher paper a try.